Menu Close

Tag: paper (page 6 of 17)

5 MORE STARS

stars

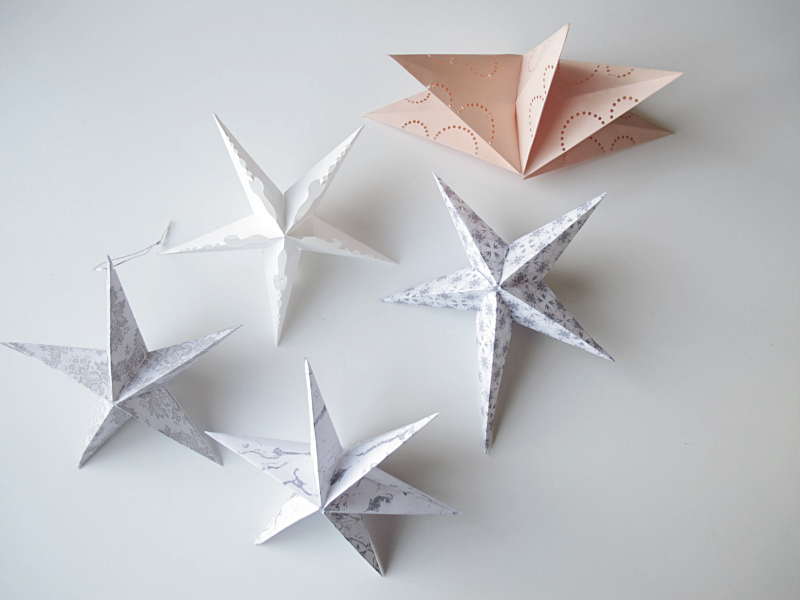
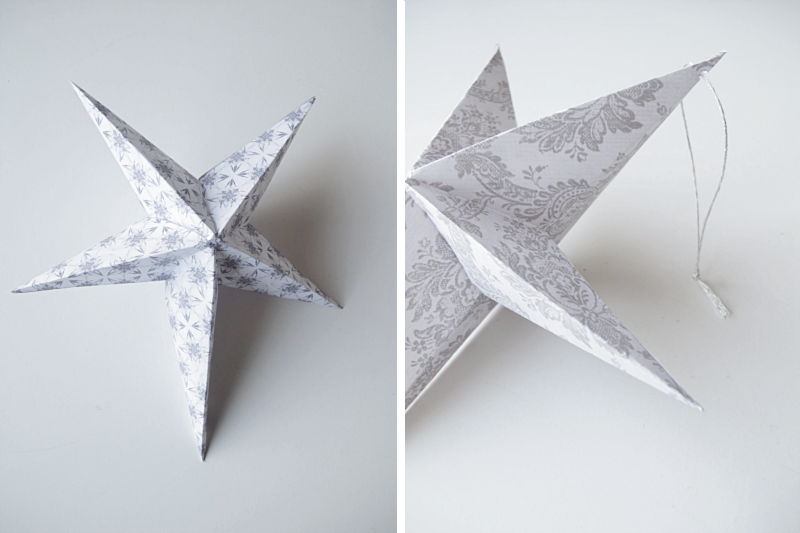
I’m so happy you like the star diy I did a couple of days ago. Thumbs up for you! Today I’ll show you some more variants on that star. On the first one I made the bottom point longer than the others. On the second star I made a hole on the top off the star so that I can hang it. The pattern on the paper I printed out from sxc.

/// Vad roligt att ni gillade mitt stjärn diy som jag visade för några dagar sedan. Tummen upp för er och era glada tillrop! Idag tänkte jag visa er fler varianter på den stjärnan. På första stjärnan har jag gjort nedersta spetsen längre än de andra. På andra stjärnan har jag gjort ett litet hål på toppen av en spets, för att kunna hänga upp stjärnan. Mönstret till den har jag skrivit ut på sxc.

stars

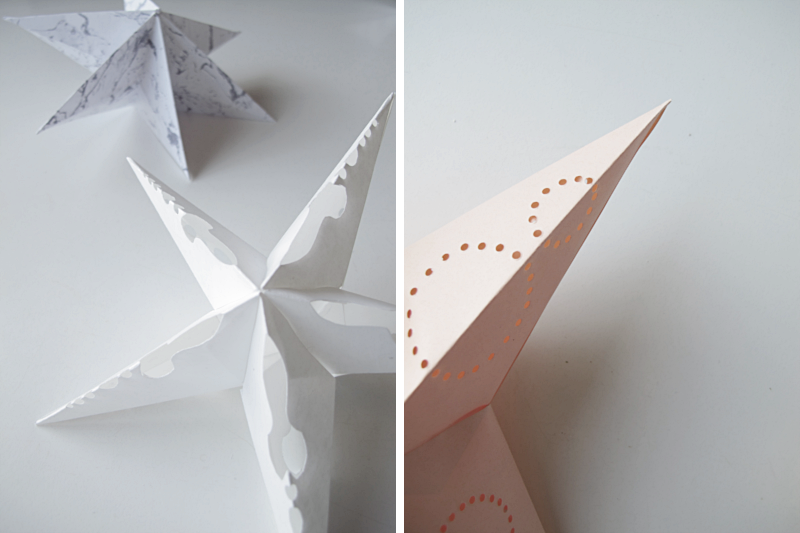
In the picture with two stars the star in the back has six points instead of five. And on the one in the front I cut a pattern on every point using a pair of scissors. On the last star I made a pattern with tiny holes. Put a led light inside the star and it becomes a beautiful christmas star.

/// På bilden med två stjärnor har den bakre sex stycken spetsar istället för fem. På den främre stjärnan har jag klippt ett mönster på varje spets. Och på sista stjärnan har jag gjort ett hålmönster. Blir jättefint att sätta fast en liten ledlampa inuti.

stars

Do have any more variants on the star so please share them!

/// Kommer ni på fler varianter på stjärnan så får ni gärna dela med er!

DIY THREE DIMENSIONAL STAR

stars

Almost to this day one year ago, I showed a star diy, that has become one of the most popular diy’s on my blog. Today it’s time again. But this time it’s a three-dimensional star. You need: A pair of scissors, glue and some carton. I tried to make stars out of copying paper too, but I found it to be much harder.
First you want to cut out the template. You’ll found the pdf in the bottom of the post. Place it on the paper you want to use and make five figures. (An a4 sized will be enough). Then cut them out. And fold along the lines.

/// För ganska precis ett år sedan visade jag ett stjärn-diy som faktiskt har blivit ett av de mest gillade diy:en på bloggen. Nu ett år senare tänkte jag att det var dags igen. Denna gång blir den en tredimensionell stjärna. Du behöver lim, sax, och papper. Jag provade att göra stjärnor av både kopieringspapper och hobbykartong, och hobbykartongen var mycket enklare.
Börja med att klippa ut mallen (pdf finns längst ner i inlägget). Rita sedan av den 5 gånger på papperet du vill använda. Ett a4 ark räcker, och klipp sedan ut delarna. Vik längst med linjerna.

star

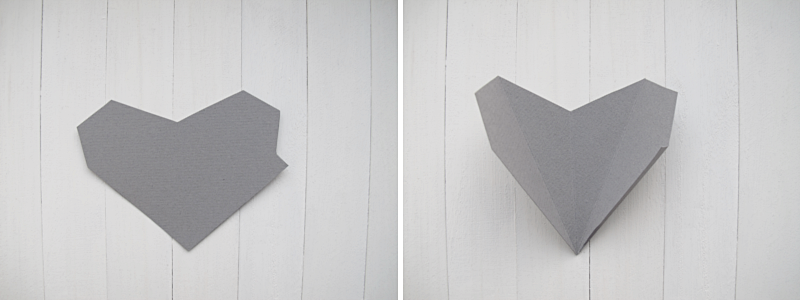
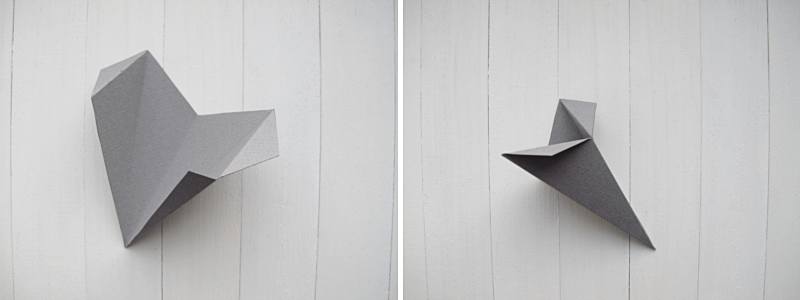
Fold along the slashed lines too, but in the opposite direction. Put glue on the small part and make the figure into a cone.

/// Vik längs med de streckade linjerna men åt andra hållet. Stryk ut lim på den lilla delen och sätt ihop till en spets.

star

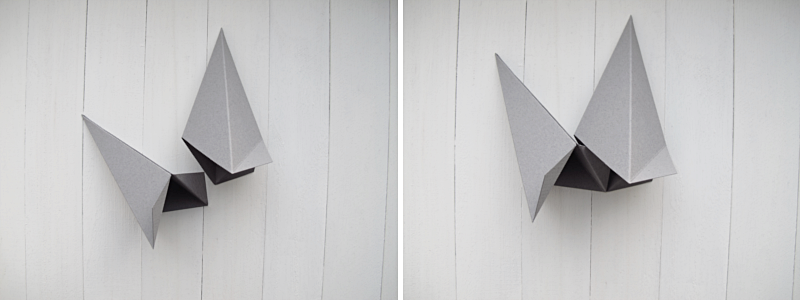
Now its time to assemble the star. Place two cones so that you have the little “wings” in the same direction. Put glue on both “wings”, and attach them on the inside off the other cone. See pictures below.

/// Nu är det dags att sätta ihop stjärnan. Lägg två spetsar så att de har de två “vingarna” åt samma håll, jag la dem till höger. Stryk lim på “vingarna” och fäst båda två på insidan av spetsen till höger. Se bilderna nedan.

star

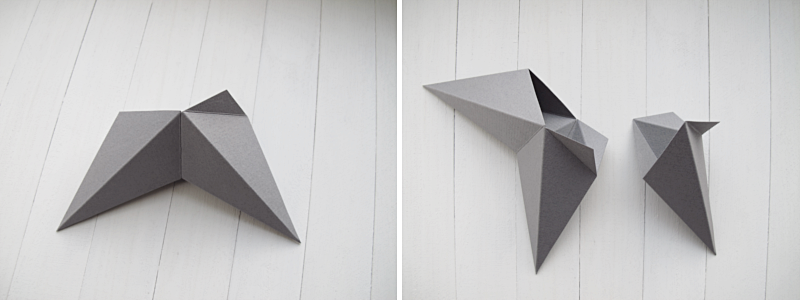
This is how it should look when the glue has dried. Then continue with the next cone. The same way. Glue on the “wings”, then attach them on the inside of the other cone.

/// Så här ser den ut när limmet torkat. Fortsätt med nästa spets. På samma sätt igen. Sätt lim på de små “vingarna” och sätt fast dem på insidan på den andra spetsen.

star

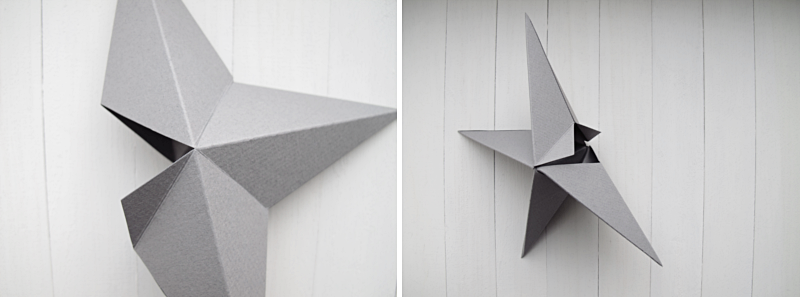
Be sure to check that your cones don’t “wander off”. When you want to attach the fifth and last cone it can be a bit tricky to get it in place. You can push the four other cones together to get a little more space. And the good thing about using carton, you don’t even have to glue the last “wings” in place. The star will hold together anyway. When that is done, you’re done!

/// Var noga med att kolla så att ingen av delarna förskjuts, för då kommer du inte att få ihop stjärnan på slutet. När du kommer till den sista och femte spetsen på stjärnan kan det vara lite mäckigt att få dit den. Då kan du trycka ihop de andra spetsarna mot varandra för att få lite hjälp. Om du gör med hobbykartong så behöver du inte heller fästa de sista “vingarna” med den första spetsen, utan stjärnan håller ihop ändå. När det är färdigt, är du klar!

star

Pdf: star template

DIY FOLDER

mapp

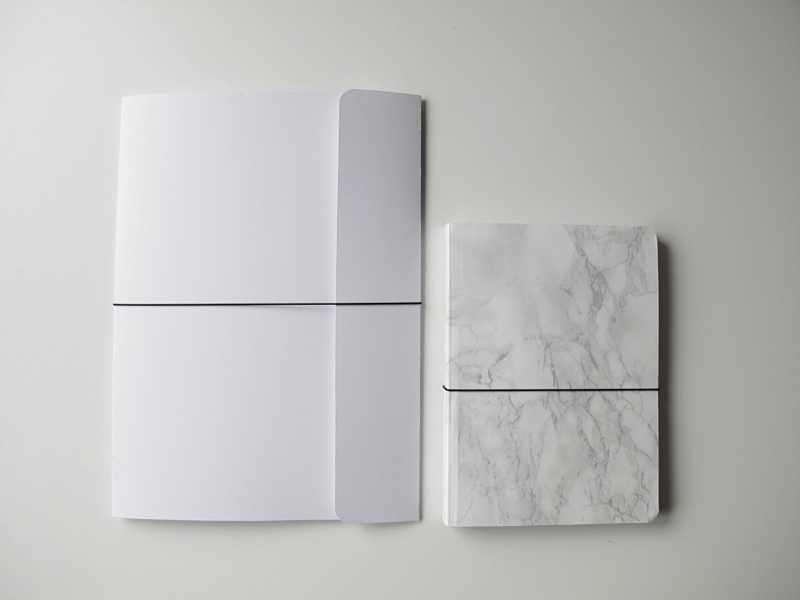
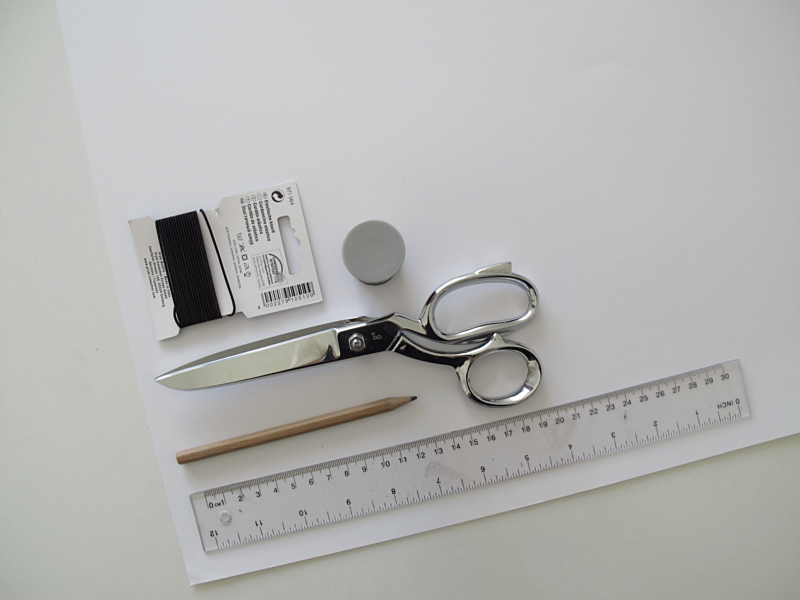
I´ve done a folder for a4 paper in the same style as the note book I did here. For this you need: thick carton, a pair of scissors, a ruler, a pencil, elastic band and something round.

/// Jag har gjort en mapp för a4 papper liknande anteckningsboken i marmor som jag gjorde här. Det som behövs för att göra denna mapp är: tjock kartong, sax, linjal, blyerts, resårband och något runt.

mapp

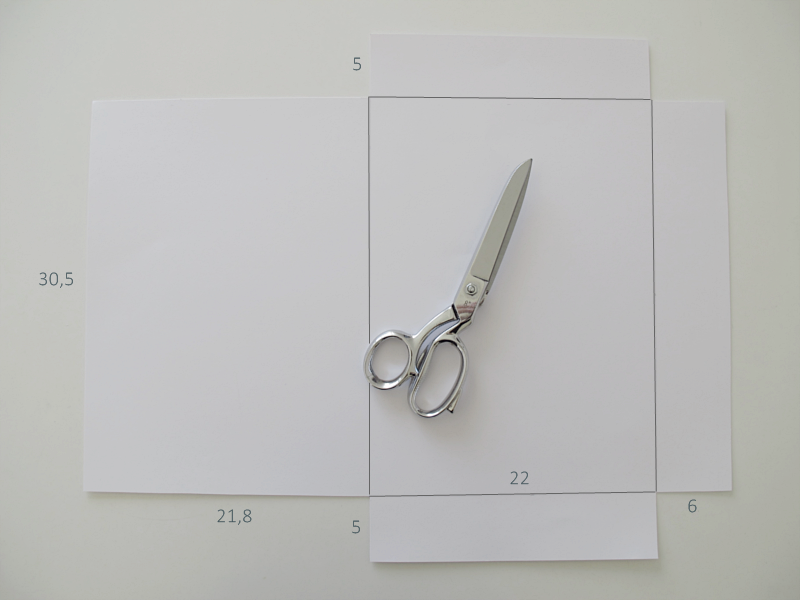
Start by making a figure with these measurements: (in cm)

/// Börja med att göra en figur med dessa mått: (i cm)

mapp

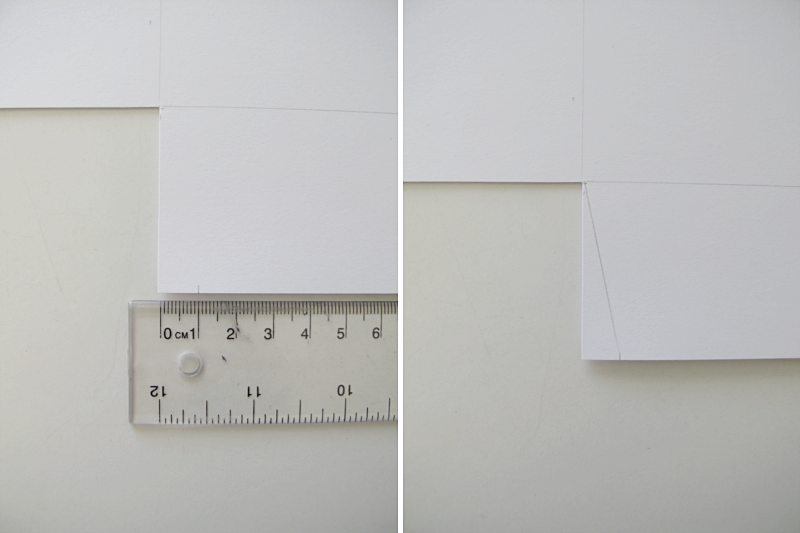
Make a mark 1 cm from the side on the bottom piece of the figure. Then draw a line between the corner and the mark.

/// Gör en markering 1cm in från sidan på den nedersta delen av figuren. Dra sedan ett streck från hörnet och till markeringen.

mapp

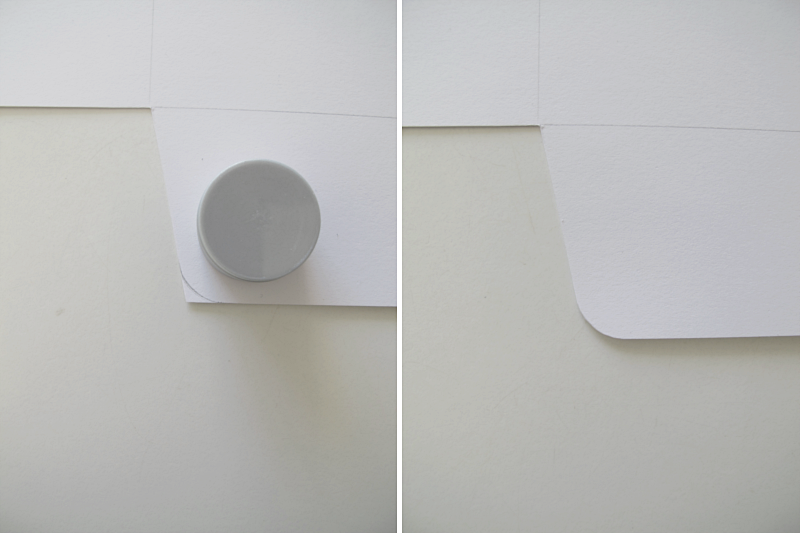
Cut off the triangle. Take the round object and make a line in the corner. Then cut along the line. Now do the same to the other side. When that is done, repeat these steps on the upper piece of the figure.

/// Klipp bort triangeln. Ta det runda föremålet och rita av den i hörnet på papperet. Klipp längst med linjen. Gör nu likadant på andra sidan. När du är klar med den sidan, gör du likadant på den översta delen på figuren.

mapp

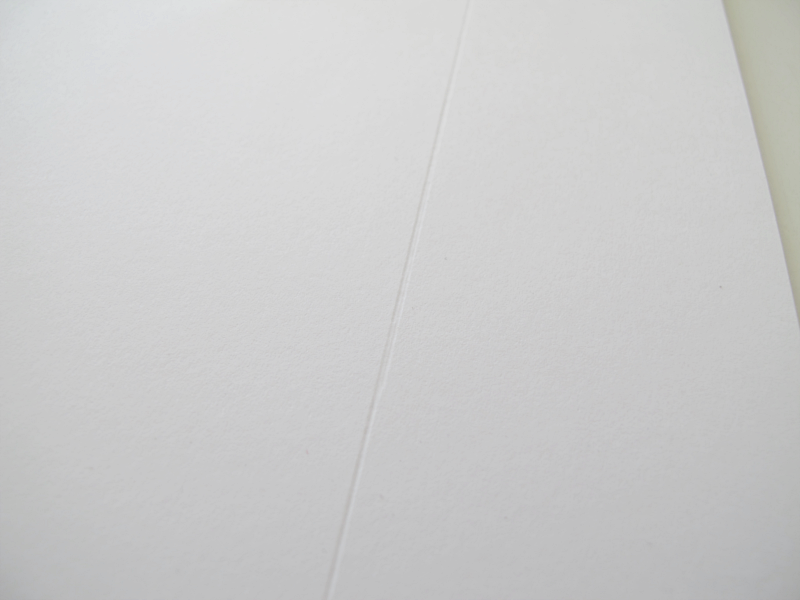
Fold along the lines. And erase the pencil lines.

/// Vik längst med linjerna. Sudda sedan bort blyertsstrecken.

mapp

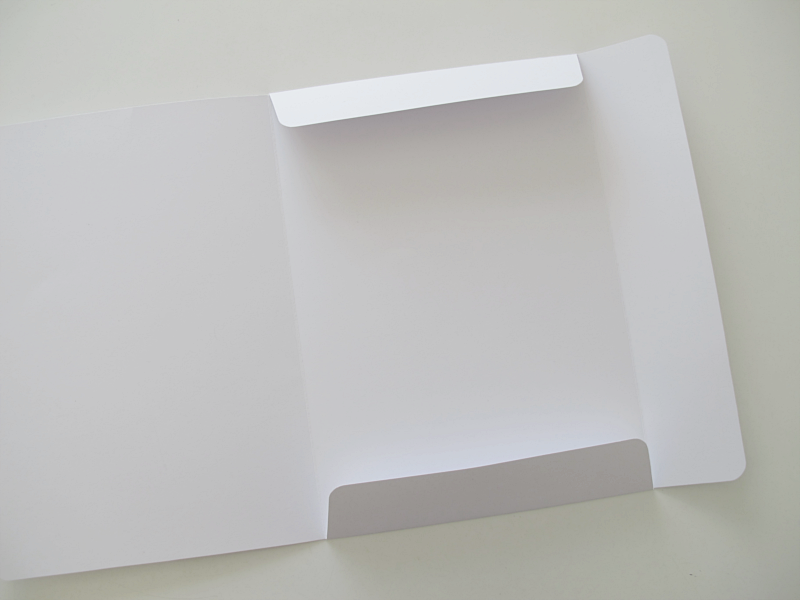
Make all the other corners of the folder round (without making a triangle first).

/// Runda av alla de andra hörnen på mappen (utan att göra en triangel först).

mapp

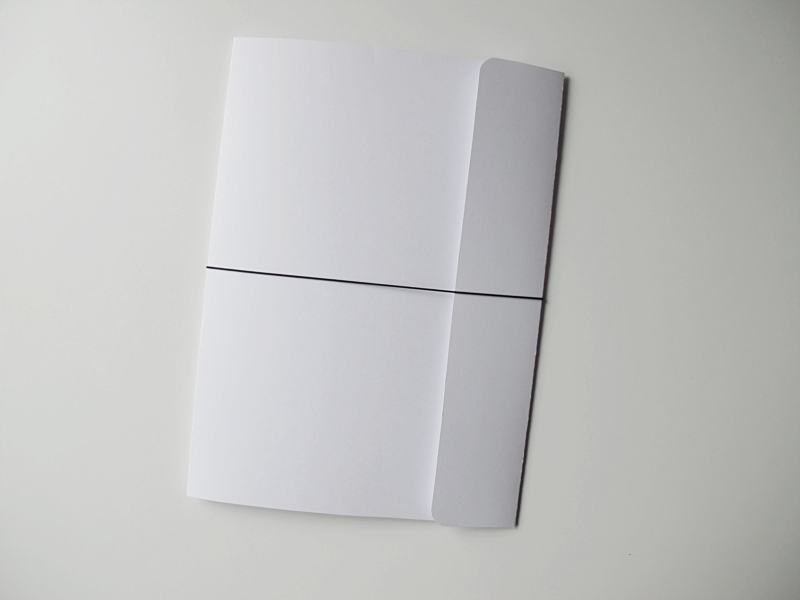
Thread the elastic around the folder and you are done.

/// Trä resårbandet runt mappen och du är klar!

mapp

DIP DYE

boxen

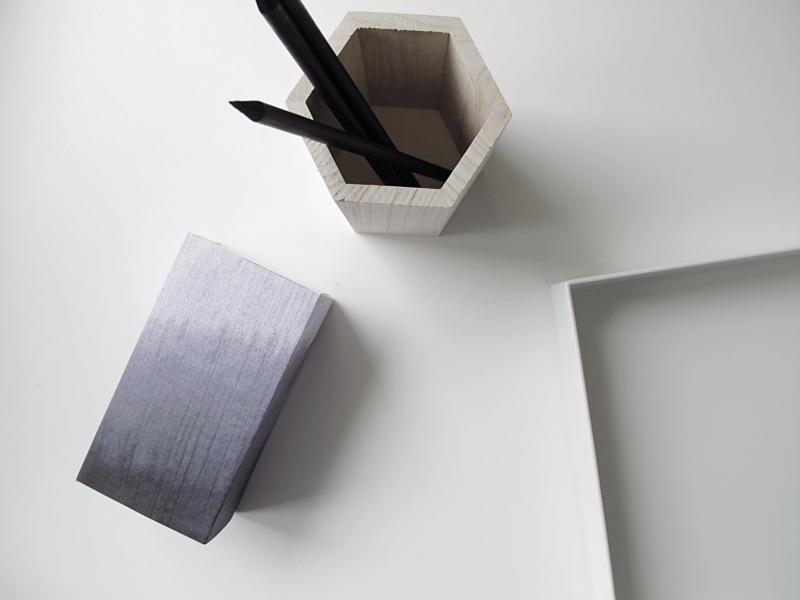
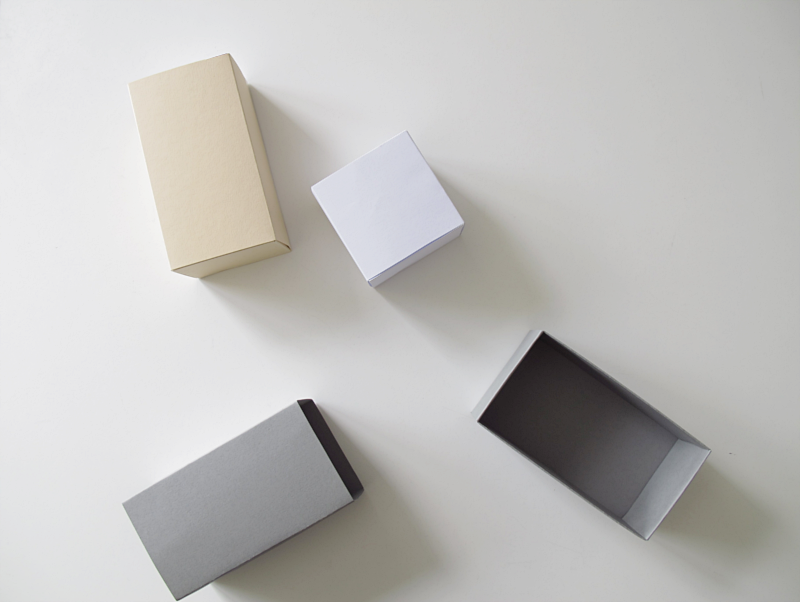
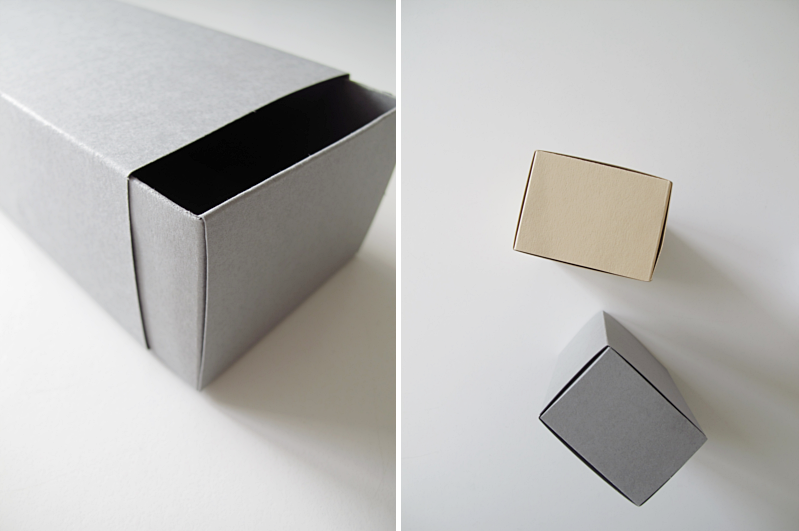
If you follow me on insta you have already seen it, but I´ve made another version of this box. A dip dye looking one.

/// Om du följer mig på insta så har du redan sett denna, men jag har gjort en ny variant på den här asken. En dip dye.

DIY BOX

ask

ask

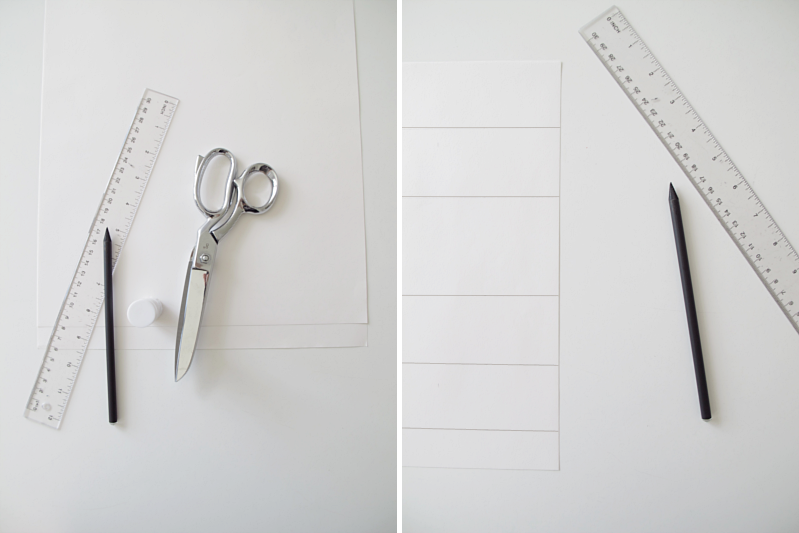
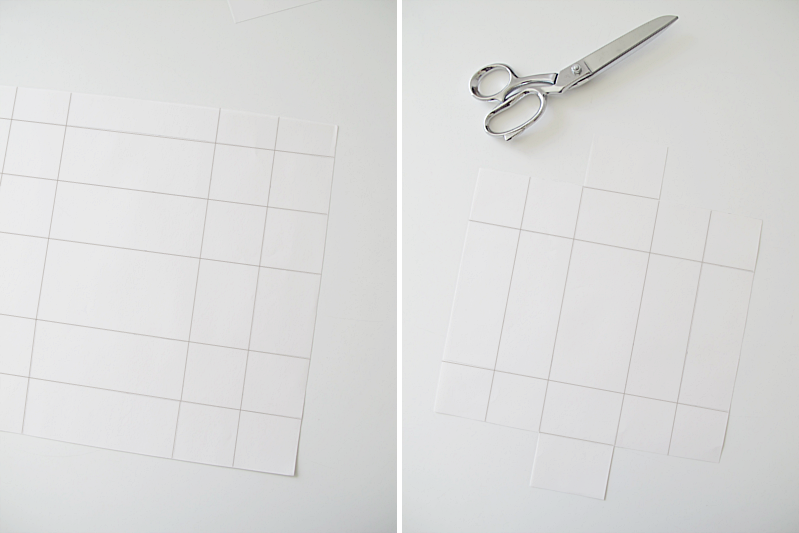
1. For this diy you need a ruler, a pair of scissors, a pencil, glue and 2 sheets of carton. A3 size. 2. Start with one of the sheets. Lay the paper so you have the shorter sides of the paper on your left and right. Draw a line 4.9 cm from the upper edge. And yes, you have to be that accurate :). Then a second line, 5 cm from the first. The third line should be 7 cm from the one you did before. The fourth line should be 5 cm from the one before, and the last line should be 4.9 cm.

/// 1. Till detta diy behöver du en linjal, sax, blyertspenna, lim och två A3 ark i kartong. 2. Börja med ett av arken. Placera papperet så att du har långsidan mot dig, och dra en linje 4.9 cm från den övre kanten. Och ja du behöver vara så noggrann :). Dra sedan en andra linje, 5 cm från den första. Tredje linjen ska vara 7 cm från den du gjorde innan. Fjärde linjen ska vara 5 cm ifrån, och den sista linjen ska vara 4.9 cm ifrån.
ask

3. Now you are going to draw lines in the other direction. Start with one 5.1 cm from the right side. Then make another 5 cm from the first line. Then make one line 13 cm from the one before. And then one line 5 cm, and end with one 5.1 cm from the one before. 4. Cut along the lines, so it looks like this.

/// 3. Nu ska du dra linjer åt andra hållet. Börja med en linje 5.1 cm från kanten. Nästa ska vara 5 cm ifrån den första. Den tredje ska vara 13 cm ifrån. Den fjärde 5 cm ifrån och den sista ska vara 5.1 cm ifrån. 4. Klipp längst med linjerna så att ditt papper ser ut såhär.
ask

5. Draw another line 1cm wide. If you are using a really thick carton you can skip this step and jump right to step 7. 6. And cut off the excess.

/// 5. Rita ännu en linje. 1cm från kanten. Om du använder ett riktigt tjock papper så kan du hoppa över denna del och gå direkt till steg 7. 6. Klipp bort den överblivna biten.

ask

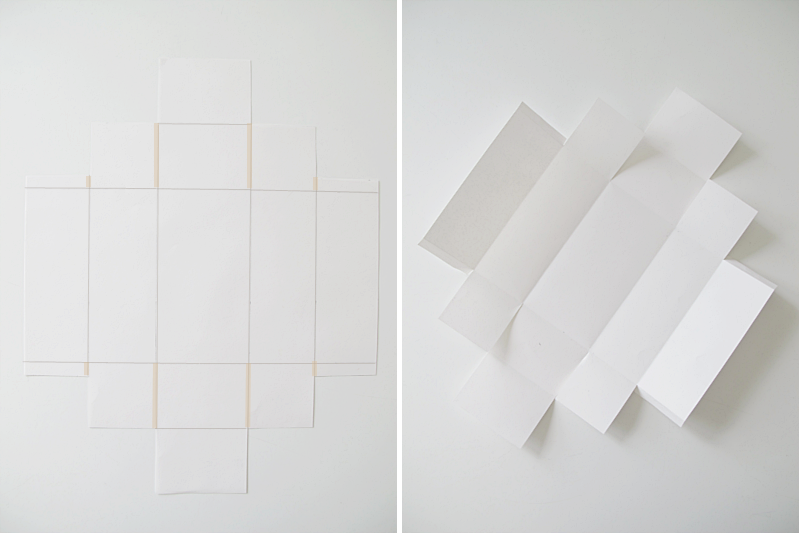
7. Time to cut again. Where the beige lines shows. 8. Fold along all lines, notice that I folded the pieces I did in step 5 in the opposite direction. And erase all pencil marks.

/// 7. Dags att klippa igen. Klipp där de beiga linjerna visar. 8. Vik längs med linjerna, notera att jag vikt bitarna, som jag gjorde i steg 5, åt andra hållet. Sudda sedan bort alla blyertsstreck.
ask

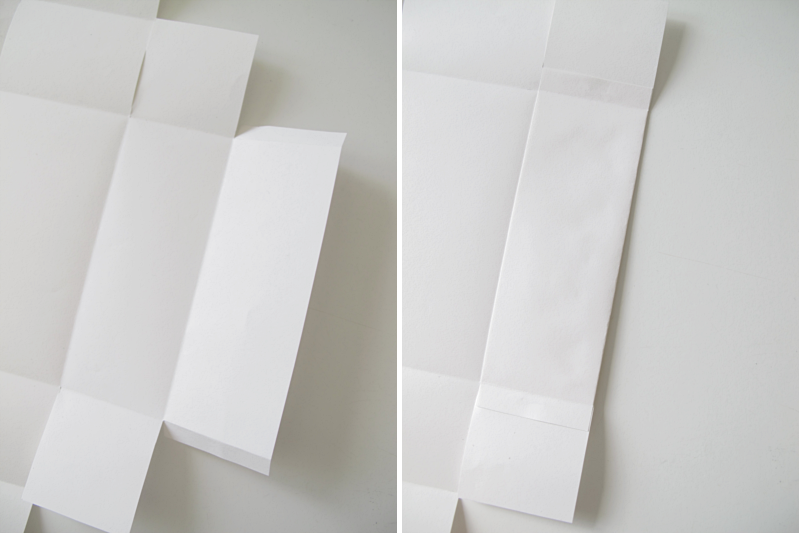
9. Put some glue on the piece of paper that is on the far right. 10. And fold it to the left.

/// 9. Stryk lim på biten som är längst till höger. 10. Och vik den sedan åt vänster.
ask

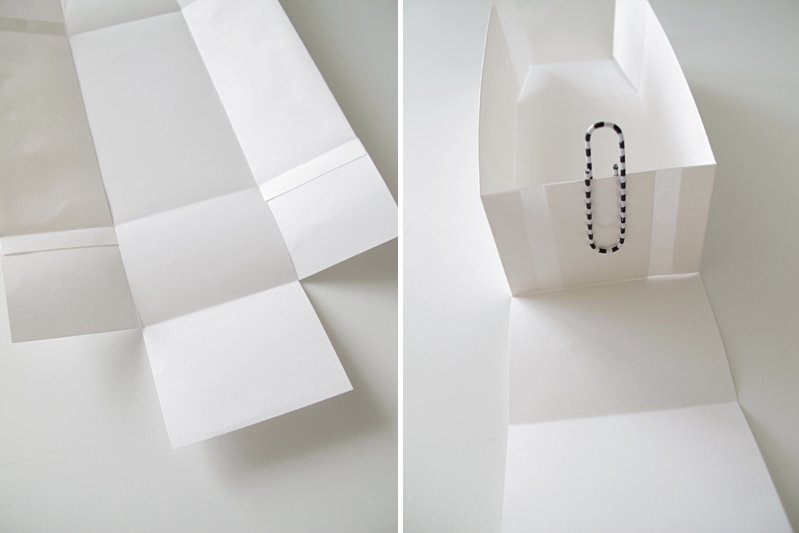
11. Repeat on the other side. Put some glue on one of the side pieces. 12. And put the sides together. Then put another click of glue on the middle piece and..

/// 11. Gör likadant på andra sidan. Stryk lim på en av sidbitarna. 12. Och sätt ihop de båda sidbitarna med varandra. Sedan stryker du lim på mittenbiten..
ask

13. ..fold it over. 14. Repeat on the other side.

/// 13. ..och viker den över. 14. Gör nu likadant på andra sidan.
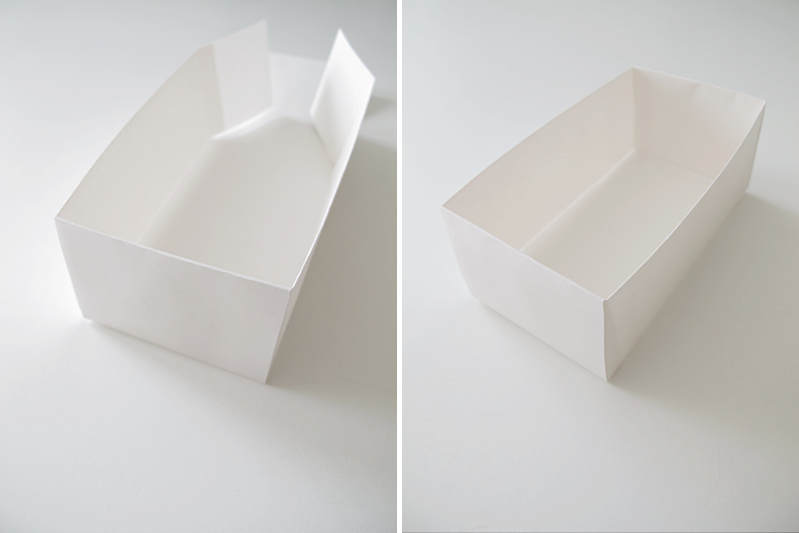
ask

15. And now to the “lid” of the box. Start by cutting a piece of paper 13cm wide. And then it´s time for the lines again. The first one should be 5 cm from the edge. Make another, 7.1 cm from the first, then one 5.1 cm from the one you did before. Make another one at 7.1 cm and end with a line 5.1 cm from the one before. You can also cut off the tiny piece of excess paper, you see in the bottom of the picture. 16. Fold along the lines and erase the pencil lines.

/// 15. Nu är det så dags för “locket” på lådan. Ta ark nr 2 och klipp ut en remsa som är 13 cm bred. Rita sedan en linje 5 cm från toppen. Och en till 7.1 cm från den första. En tredje linje 5.1 cm ifrån. Den fjärde linjen ska vara 7.1 cm ifrån och den sista 5.1 cm ifrån. När du har ritat ut linjerna så har du fått en liten liten remsa papper kvar på slutet, den kan du klippa bort. 16. Vik längst med linjerna och sudda bort blyertsstrecken.
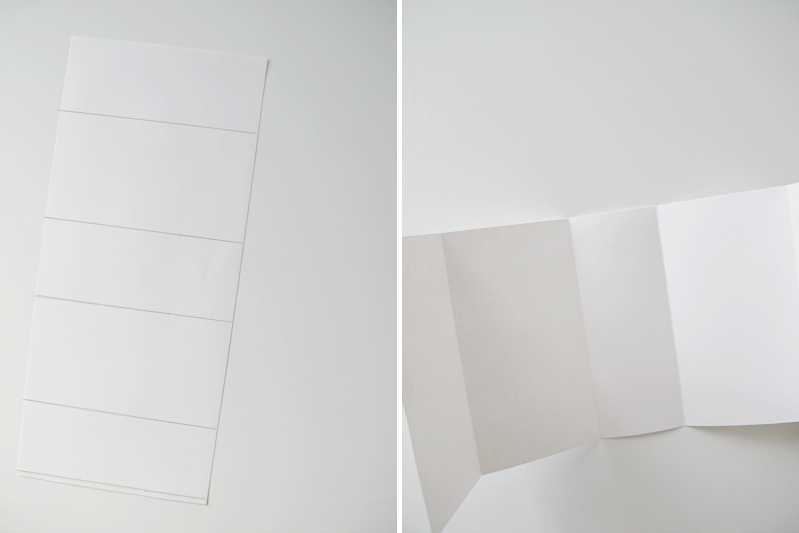
ask

17. Put some glue of the end piece and glue the “lid” together. 18. Let it dry, and you are done!

/// 17. Stryk lim på ena ändbiten och limma ihop “locket”. 18. Låt det torka, och du är klar!
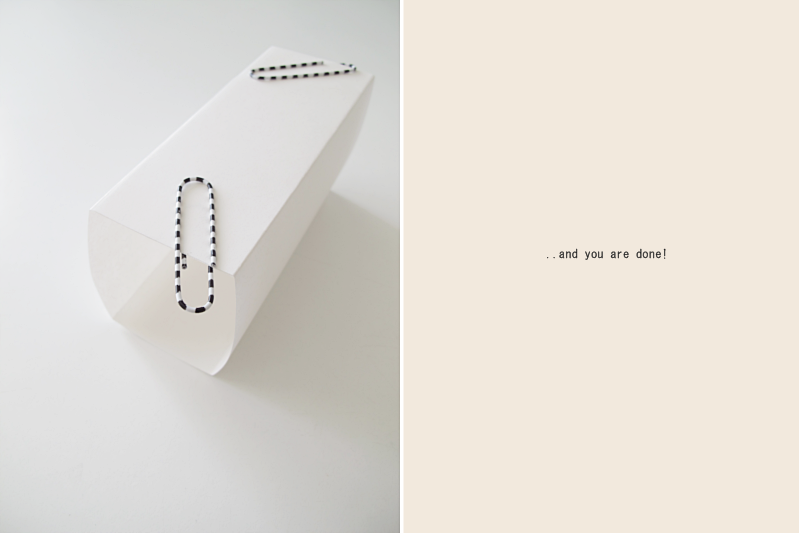
ask

A tip is to pre fold the box before you glue it together, just to make sure that it will be good looking when you are done. You may have to cut off a mm or two. It all depends on what kind of paper you are using. Good luck!

/// Ett litet tips är att förvika din låda innan du limmar ihop något. Bara för att se om du kanske behöver klippa bort nån mm här eller där. Det beror egentligen helt på vilken typ av papper du använder och tjockleken på detta. Lycka till!
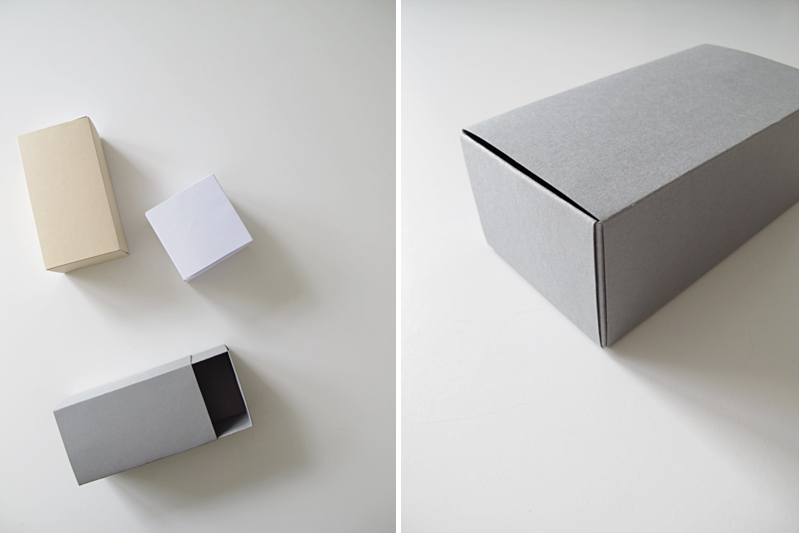
ask