Menu Close

Category: DIY – PARTY & DECORATION (page 1 of 6)

WEEKLY WONDERS – VALENTINE EDITION

DIY inspiration - valentine

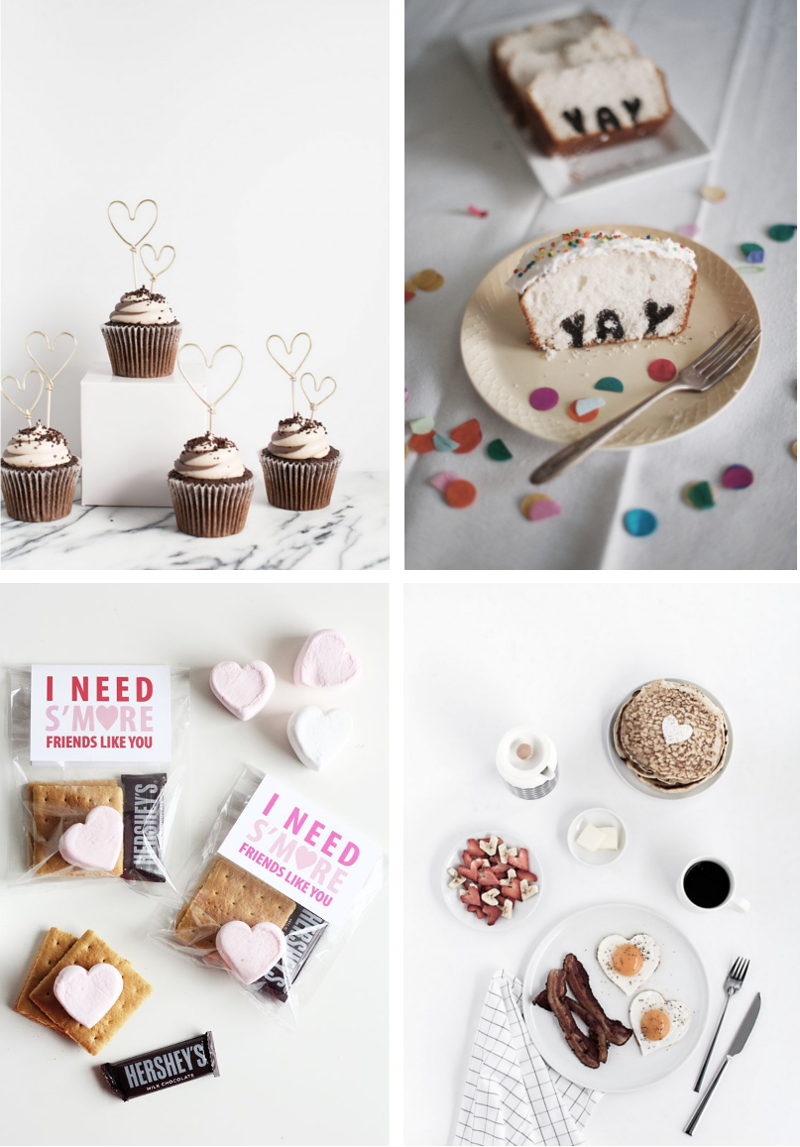
Valentine is just around the corner and today I have four food-related DIY’s for you. First up are the cupcakes with heart shaped toppers. The second one are again cupcakes but this time with words in them, and you can choose whatever word you like. So cute! The third one are for your friends, a real clever one right? And the fourth DIY is more of a breakfast one. All things heartshaped.

And now I wish you a happy weekend!

/// Alla hjärtans dag är i antågande och idag tänkte jag visa er fyra enkla matrelaterade DIY’s som passar för dagen. Först ut är cupcakesen med hjärtformade små dekorationer. Det andra är också det ett cupcake DIY fast med text inuti, där man kan välja vilket ord man vill. Så himla fint! Det tredje är en riktig klurig en till vännerna, och den sista är en idé som kanske passar bättre till frukost, med allting hjärtformat.

Och nu.. önskar jag er en trevlig helg!

Homey oh my 2 A subtle revelryLittle peanut 4 Homey oh my

DIY – SILLY SIMPLE PAPER STAR

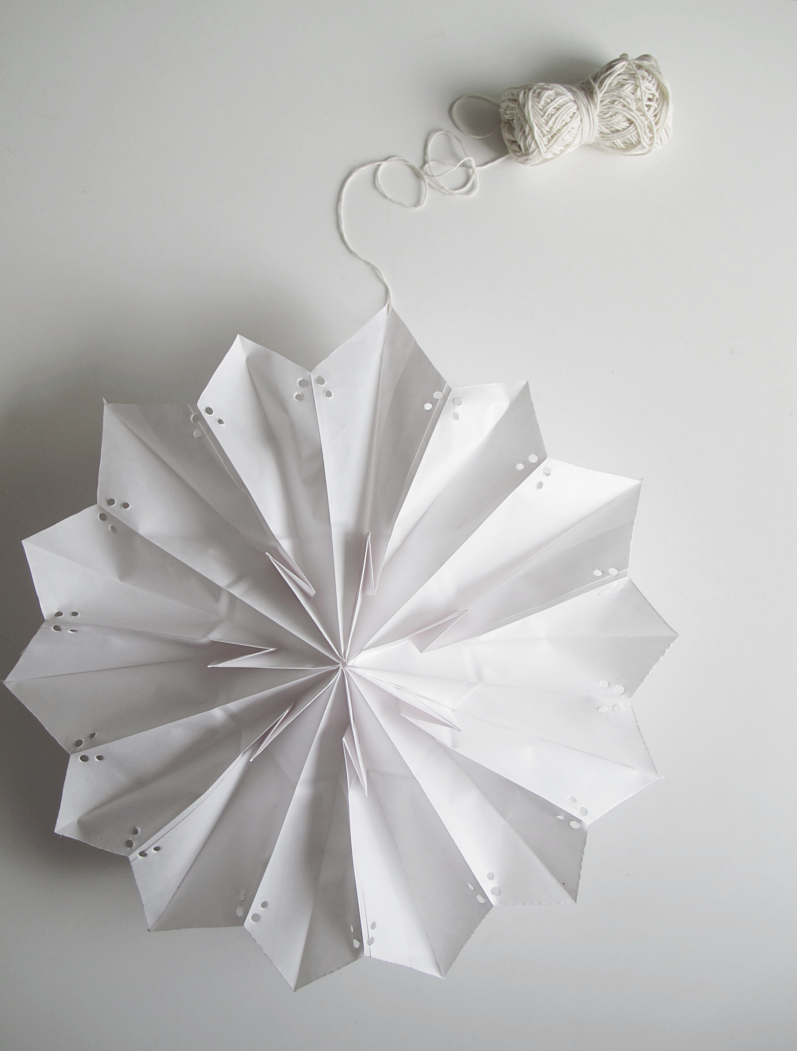
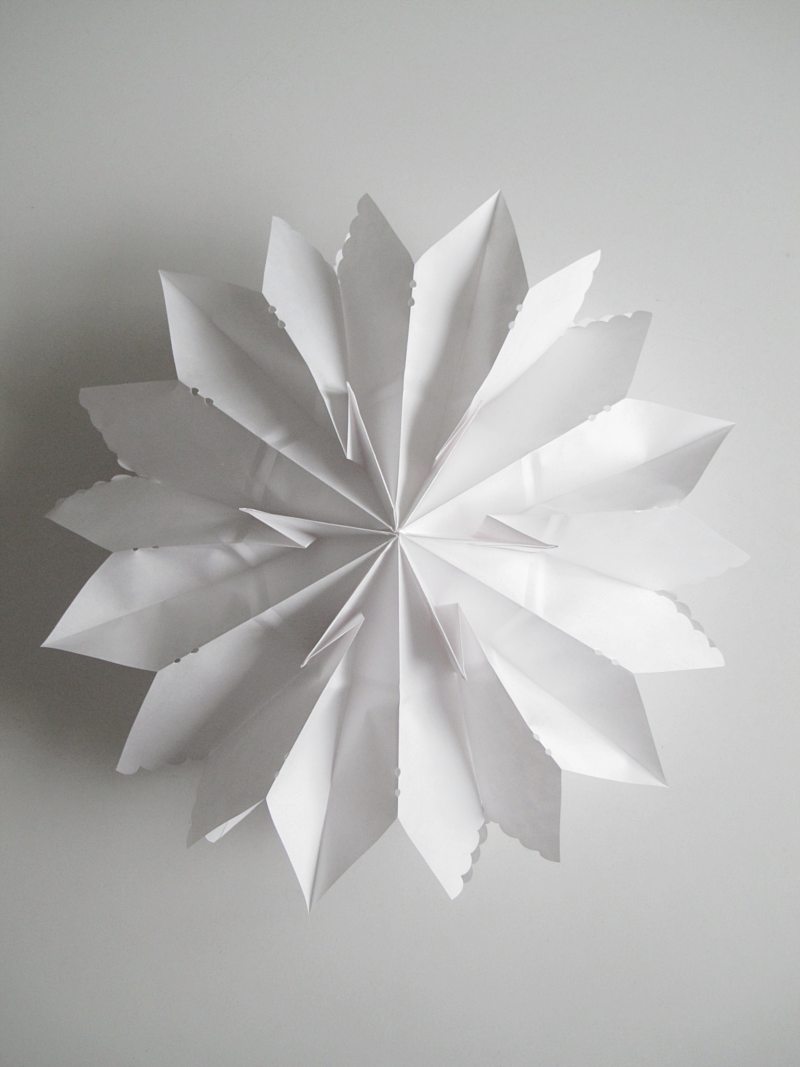
This DIY that I found over at Cchobby is both silly simple and brilliant at the same time. It’s a star made out of small paper bags.

/// Det här DIY:et som jag hittade hos Cchobby är både löjligt enkelt och underbart på en och samma gång. Det är en stjärna gjord av papperspåsar.
diy star | designoform.com

For this you need:

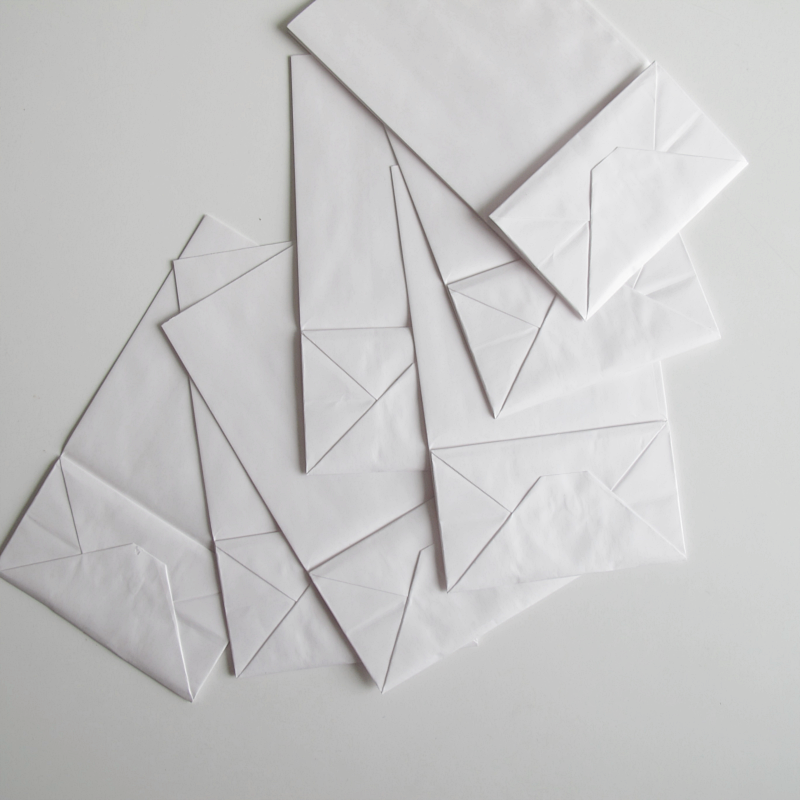
→ 6-7 small bags with block bottom (if you want a “fuller” star you use 7)
→ Glue
→ A pair of scissors

/// Du behöver:

→ 6-7 papperspåsar med kloss botten (om du vill ha en tätare stjärna så använd 7st)
→ Lim
→ Sax
diy star | designoform.com

And this is how you do it:

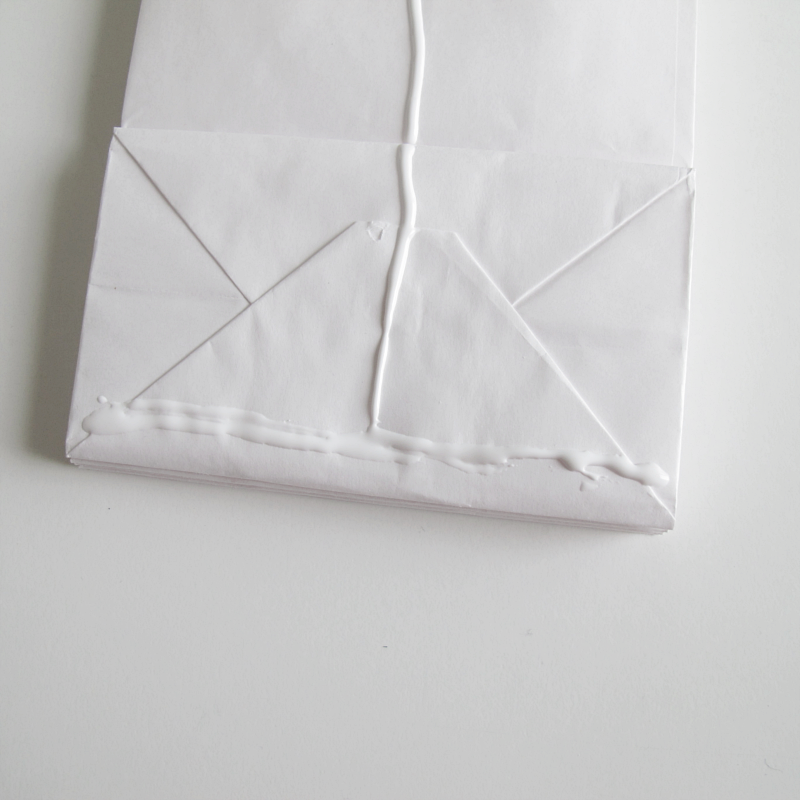
Place one of the bags with the bottom up, and put some glue on it like the picture shows. (Just a heads up: The amount of bags makes the cutting a bit tricky so if you want to make a lot of pattern on your star you might want to cut that out before you glue.)

/// Placera en av påsarna med botten uppåt och limma som bilden visar. (Ett tips på vägen: Om du vill göra ett avancerat mönster på din stjärna så klipp innan du limmar för 7 påsar är ganska svårt att klippa igenom samtidigt.)
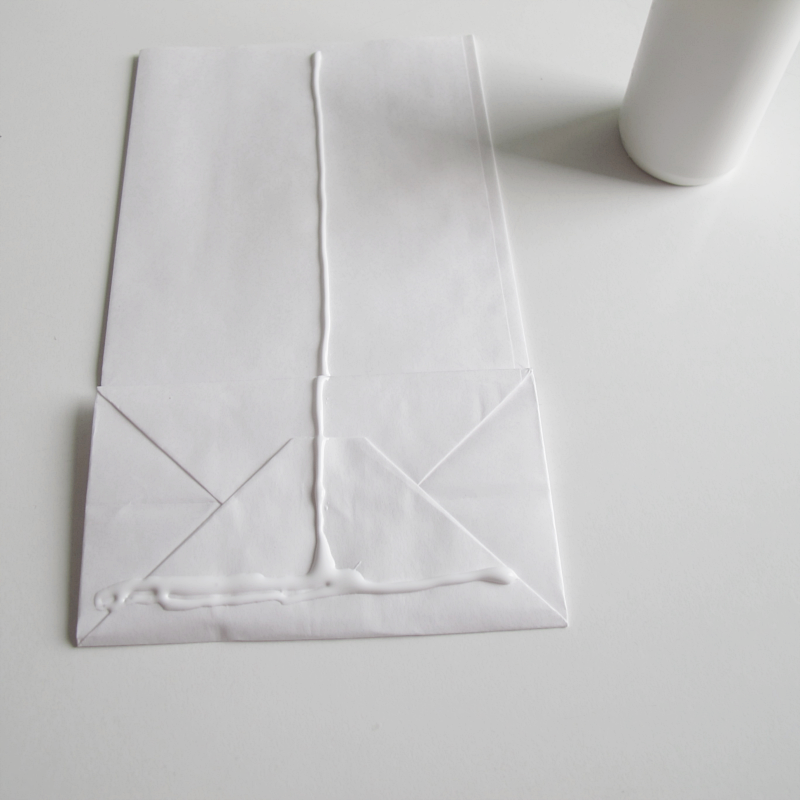
diy star | designoform.com

Place another bag on top of the other and press. Glue the rest of the bags in the same way.

/// Lägg nästa påse på den första och tryck till. Limma sedan fast de andra påsarna på samma sätt.
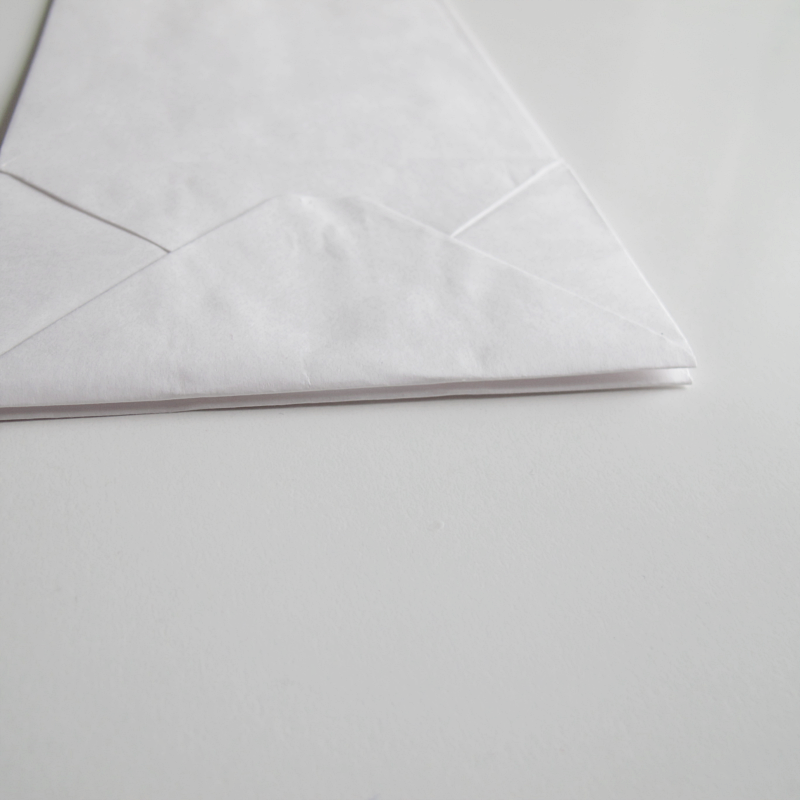
diy star | designoform.com

When the glue is dry it’s time to make the shape and patterns on the star.

/// När limmet torkat är det dags att göra formen och mönstret på stjärnan.

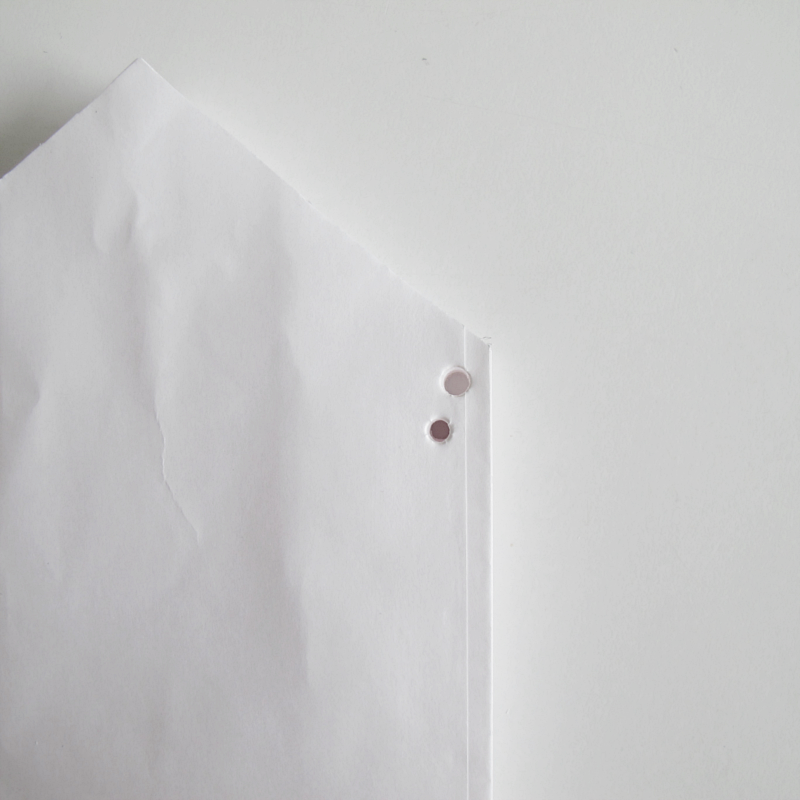
To make this star ↓ you use 7 paper bags, make a V-shaped top and cut out two small holes on the side.

/// För att göra den här stjärnan ↓ så använder du 7 påsar, klipper en V-formad topp och gör små hål på sidan.
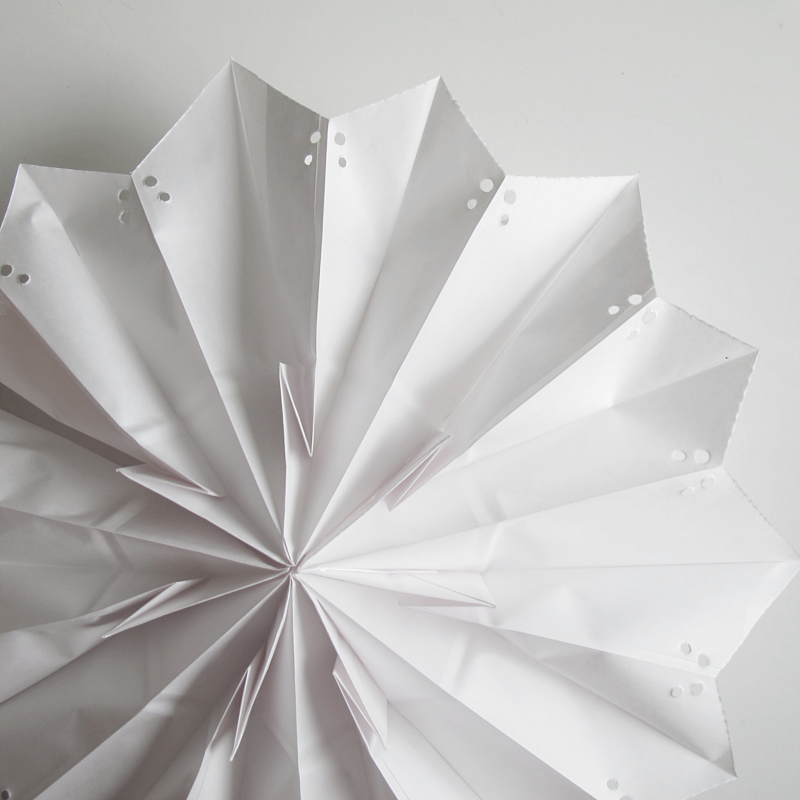
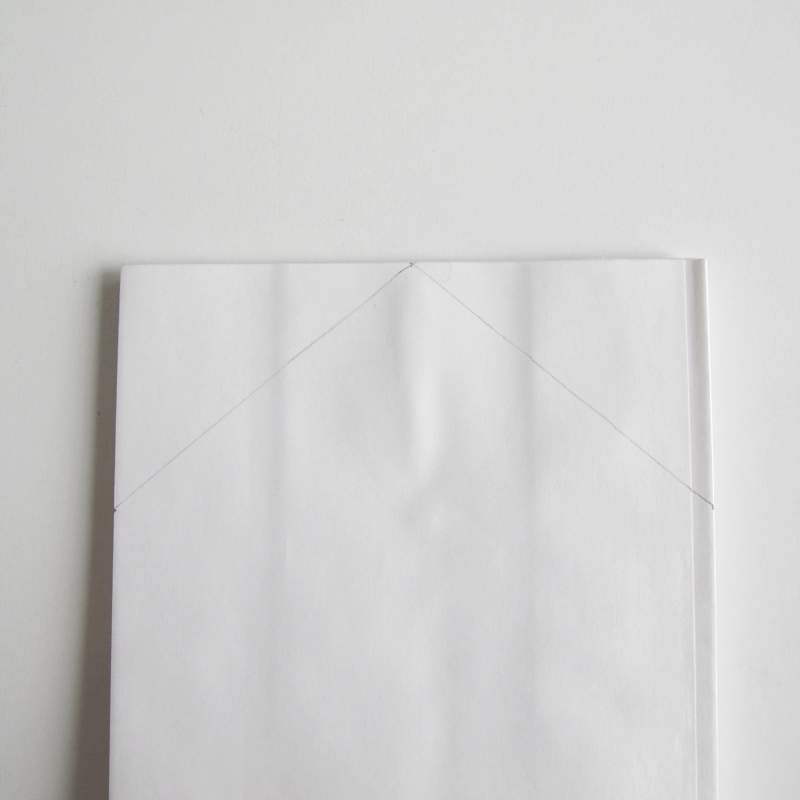
diy star | designoform.com

diy star | designoform.com

diy star | designoform.com

To make the star in the first picture you use 6 paper bags, make a M-shaped top where you make the inside of the M (the V shape of the letter M) “bubbly”, and cut two holes, at the same hight as in the picture above but make them just at the end of the bags.

/// För att  göra stjärnan på första bilden så använder du 6 st påsar, klipper en M-formad topp där insidan på M:et (V-formen på bokstaven M) klipps i ett “bubbel”-mönster. Sedan gör du två små hål. På samma höjd som i stjärnan innan men nu gör du dem precis på kanten av påsarna.

When you are happy with the result just put glue on the top bag like you did with the other ones and glue it to the first bag. And you are done!

/// När du är nöjd med ditt mönster så limmar du den översta/sista påsen på samma sätt som de andra med den första påsen och du är klar!
diy star | designoform.com

diy star | designoform.com

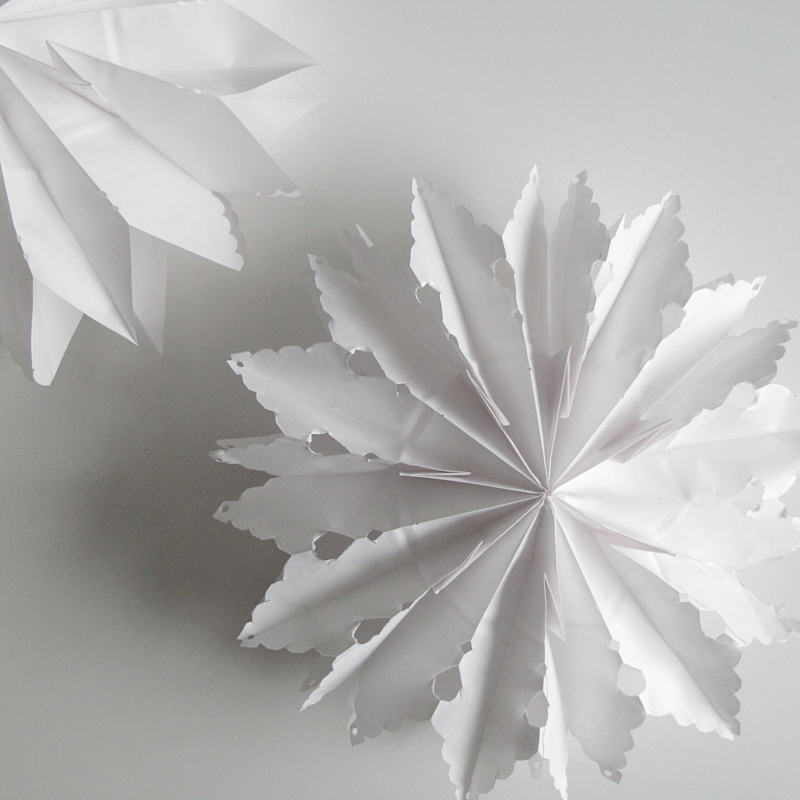
The picture bellow shows the star I did when I was trying to decide what pattern I liked (so I didn’t think about cutting it to look “good”.) But I still wanted to show you that one, so you can see how you can change the look of the star depending on how you cut the pattern. That star is made out of 7 bags, the top is an M-shape with the whole M made “bubbly”. I made a teardrop shape an under that a V-shaped cut. And I made holes on the points of the star.

/// Bilden nedanför visar en stjärna som jag gjorde när jag försökte bestämma mig för vilket mönster jag ville ha, så den är inte så jättefint klippt, men jag ville ändå visa er den för att visa hur man kan förändra utseendet på stjärnan beroende på hur man klipper mönstret. Den är gjord med 7 påsar, har en M-formad topp där hela M:et är klippt “bubbligt”, sedan har jag gjort ett droppformat hål precis på kanten och under den ett V-format jack,  och till sist gjorde jag hål längst ut på stjärnan spetsar.
diy star | designoform.com

Spara
DIY – CARD WITH WASHI TAPE PATTERN

DIY card with washitape | designoform.com

If I don’t remember wrong this is the blogs first DIY using Washi tape. It’s a pretty simple one but you need a bit of patience.

/// Om jag inte är helt fel ute nu så tror jag minsann att detta är bloggens första DIY med Washi tape. Det är väldigt enkelt med kräver lite tålamod.

Other than that you’ll need:

→ Washitape with a striped pattern
→ A pair of scissors
→ A card (If you are using Washi tape that are black and white like I did you get the best result with a white card since the Washitape is a bit transparent)
→ A piece of regular paper

Till detta behöver du:

→ Washi tape med ränder
→ Sax
→ Ett kort (Om du använder svart och vit Washi tape som jag så får du bäst resultat med ett vitt kort då Washi tapen är lite genomskinlig).
→ Ett vanligt papper

And this is how you do it:

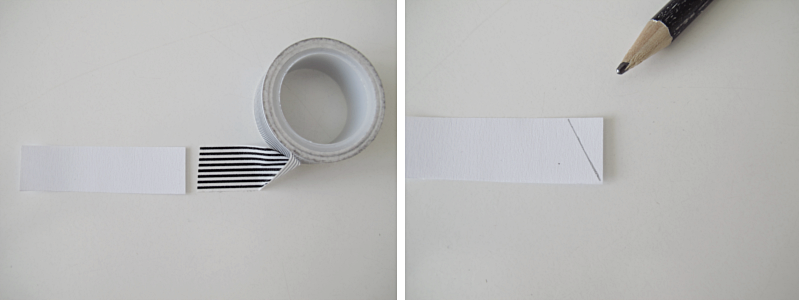
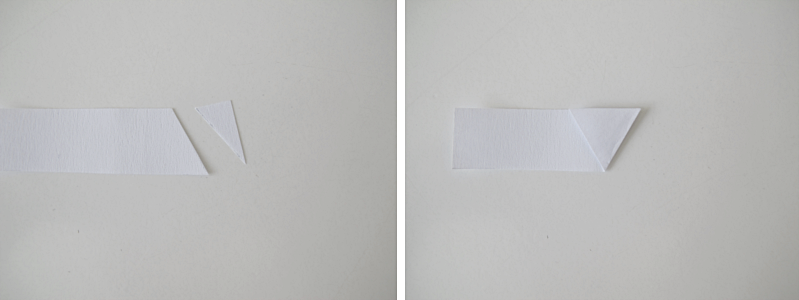
First you cut a stripe from the regular paper as wide as the Washi tape. Then you draw a line in a 60° angle.

/// Börja med att klippa ut en bit ur det vanliga papperet som är lika bred som din Washi tape. Sedan ritar du ett streck som är i 60° vinkel.

DIY card with washitape | designoform.com

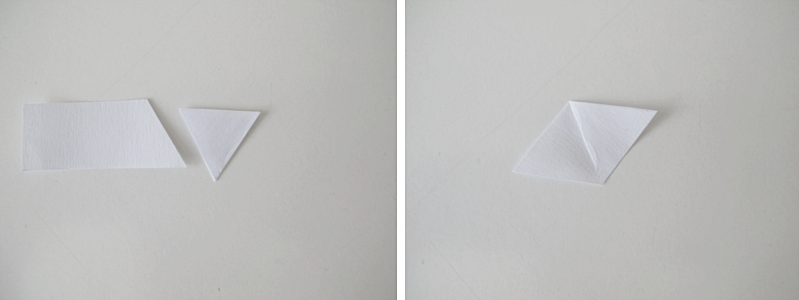
Cut along the line. Then fold like the picture shows.

/// Klipp längst med linjen och vik som bilden visar.

DIY card with washitape | designoform.com

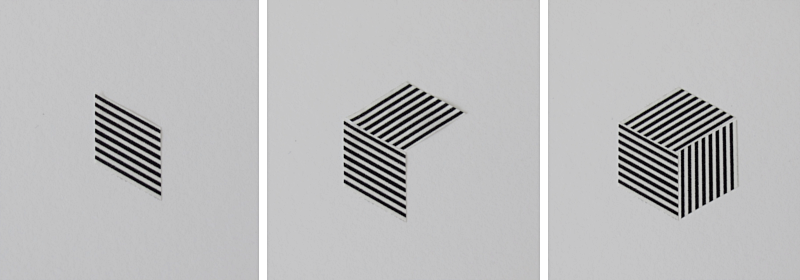
Then you cut again and unfold. Now you have a template for the Washi tape.

/// Klipp sedan igen och vik upp. Nu har du ett mall till Washi tapen.

DIY card with washitape | designoform.com

DIY card with washitape | designoform.com

Now it’s time to start making the pattern. All pieces are the same, you just rotate them.

/// Nu är det dags att börja med mönstret. Alla bitar är likadana, vi bara roterar dem.

DIY card with washitape | designoform.com

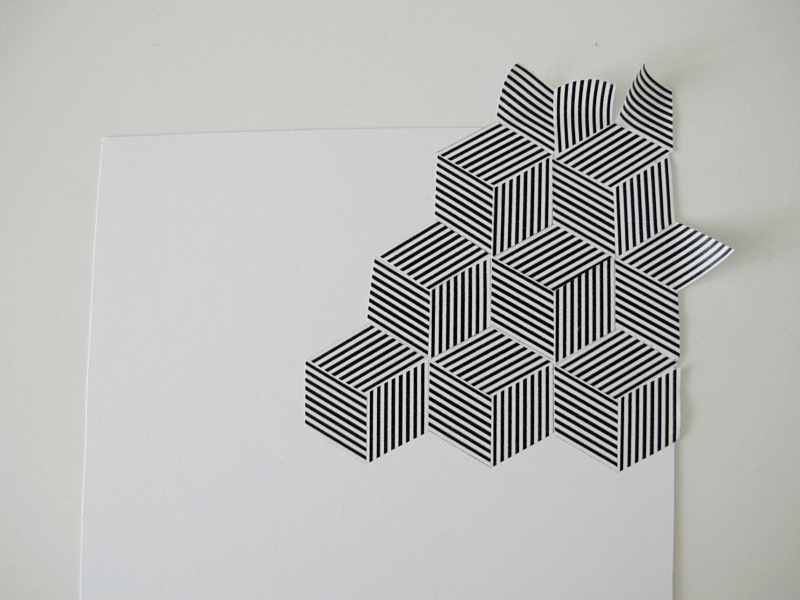
I started in the middle and worked my way out to the sides. Some tips along the way: When you fasten your pieces, do it so that they still are a bit loose, because you may have to go back and move them a bit later. At the same time don’t be too meticulous. A small gap won’t show when the card is finished.

/// Jag började i mitten och arbetade mig utåt. Några tips längst vägen: När du sätter fast dina bitar låt dem vara ganska lösa, för det kan vara så att du behöver gå tillbaka och ändra och flytta om lite. Men var samtidigt inte allt för noga för eventuella småluckor kommer inte att synas i slutändan.

DIY card with washitape | designoform.com

When the pattern is done, you cut along the edges of the card to remove the leftover Washi tape. And you are done!

/// När du är färdig med mönstret klipper du längst efter kanten på kortet för att ta bort all överbliven Washi tape och du är klar!

DIY card with washitape | designoform.com


DIY – DECORATION

boll

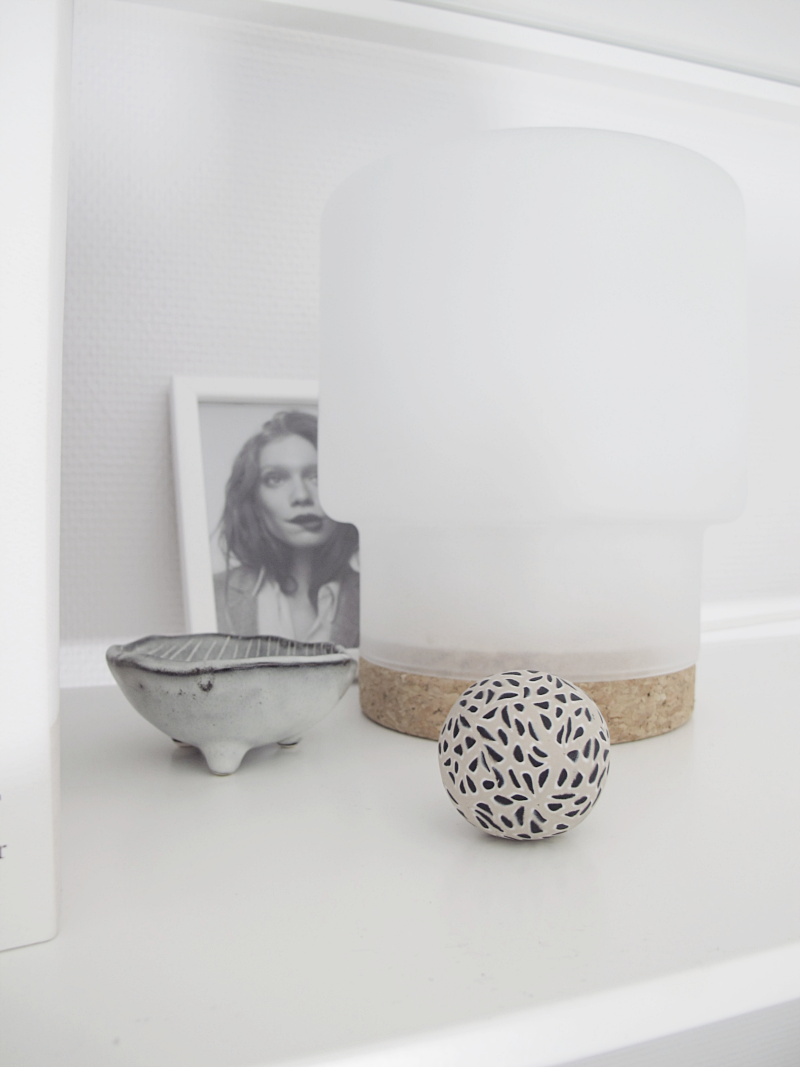
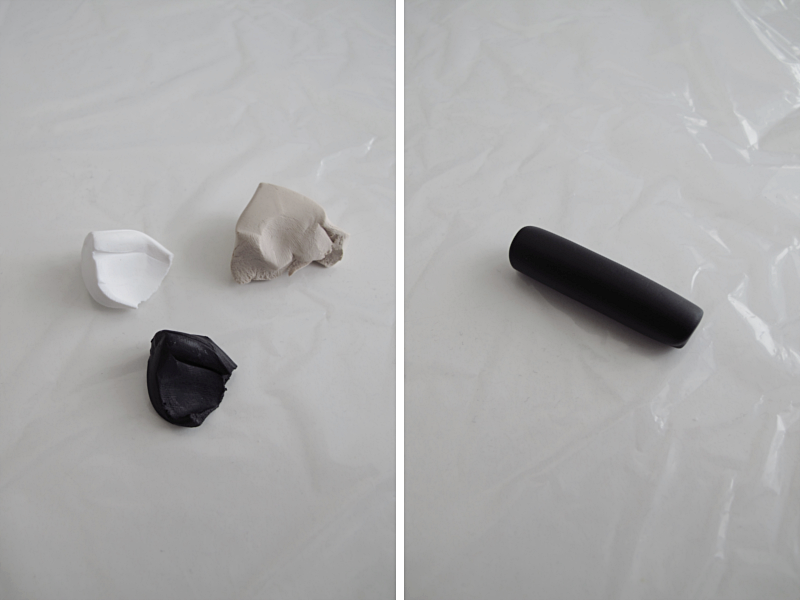
Ok, so first I would just like to say, I don’t really know what to call this diy. A ball diy? A clay diy? I just like the look of it so I’m using it as a decoration on my bookshelf. Anyway.. For this you’ll need: fimo clay. (I used three different colors, but you can use just two if you want to), something to protect your table. (I used a bit of plastic), something to cut with and an oven.

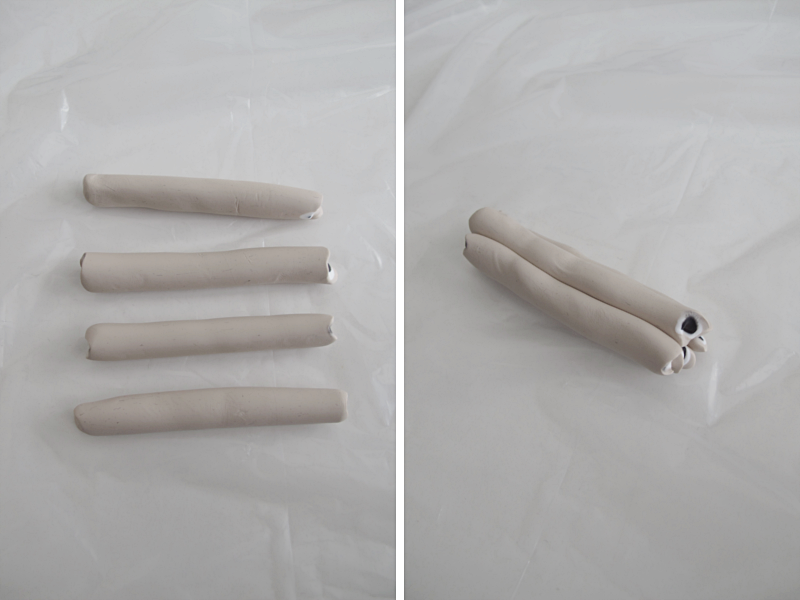
Start by rolling a bit of clay , the color of the clay will be the color of the dots. Make it about the same size as your little finger.

/// Jag vet inte riktigt vad jag ska kalla det här diy:et.. Iallafall så gillar jag den och har den som dekoration i min bokhylla. För att göra en likadan så behöver du fimo lera. (jag använde tre färger men du kan använda två om du hellre vill det), nånting som skyddar bordet ( jag använde en bit plast), nått att skära med och en ugn.

Börja med att rulla ut en bit lera, färgen på leran kommer att bli bollens prickar. Gör den ungefär i samma tjocklek som ditt lillfinger.

boll

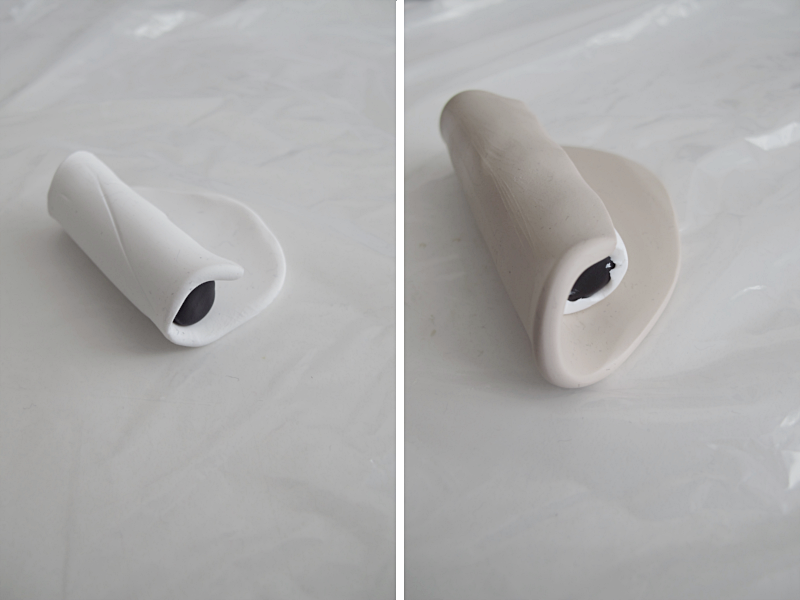
Then you take another piece of clay and roll that on top of  the other. This color will be like a “frame” to the dots. After that you take the third piece of clay and roll that around the other two. This will be the main color of the ball.

/// Ta sedan nästa bit med lera, och rulla den över den första. Färgen på denna kommer att bli små “ramar” på prickarna. Sedan tar du den tredje biten med lera.  Denna färg kommer att bli “huvudfärgen” på bollen.

boll

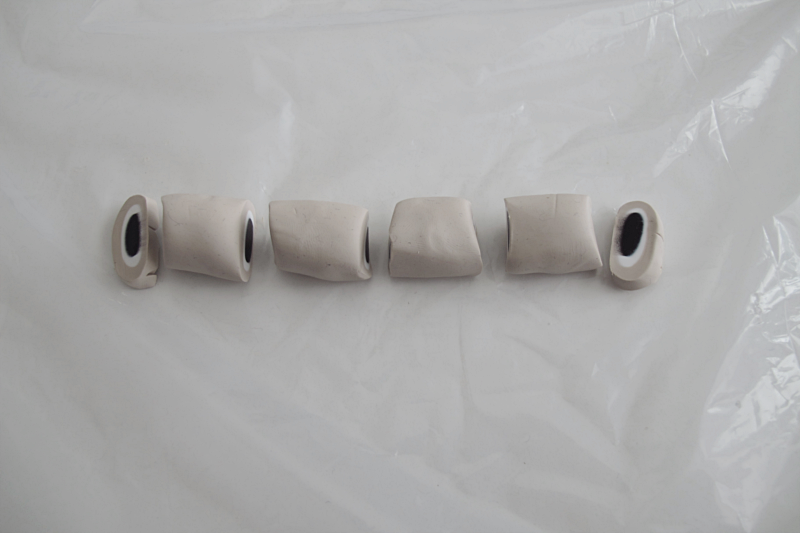
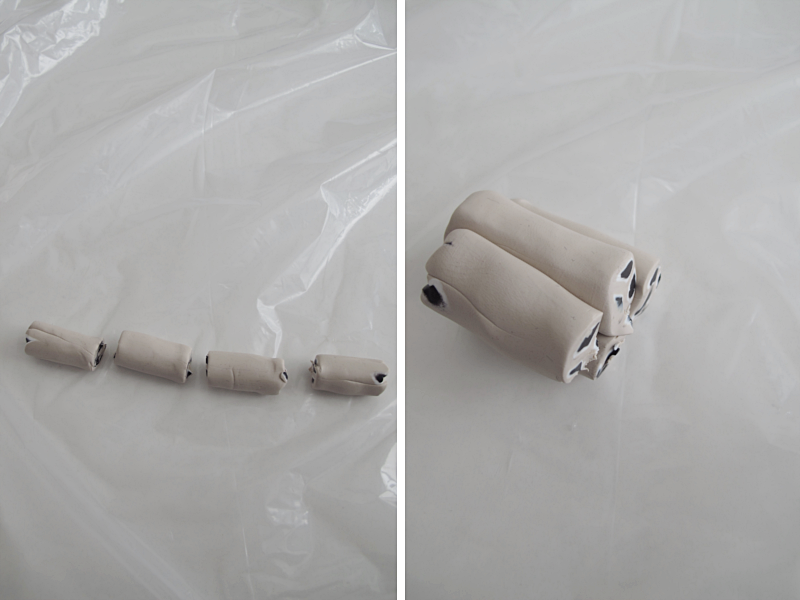
Cut away the excess clay of the ends. Then roll out the clay so that you have a piece about the size of your index finger. Then you cut the clay into smal pieces. As you can see in the image I cut away small pieces at the ends again.

/// Skär bort den överflödiga leran på ändarna. Sedan rullar du ut leran så att den är ungefär samma storlek som ditt pekfinger. Skär sedan leran i bitar. Som ni kan se på bilden så skar jag bort lite av ändarna igen.

boll

Roll each piece and then put them together and roll them again. This might be a bit tricky but just take it slow when you roll.

/// Rulla ut alla bitarna, för att sedan sätta ihop dem och rulla ut dem igen. Det kan vara lite trixigt, men ta det bara försiktigt när du rullar.

boll

And repeat.. End this step by rolling the clay together.

/// Och upprepa. Avsluta detta steg med att rulla ihop bitarna till en jämn rulle.

boll

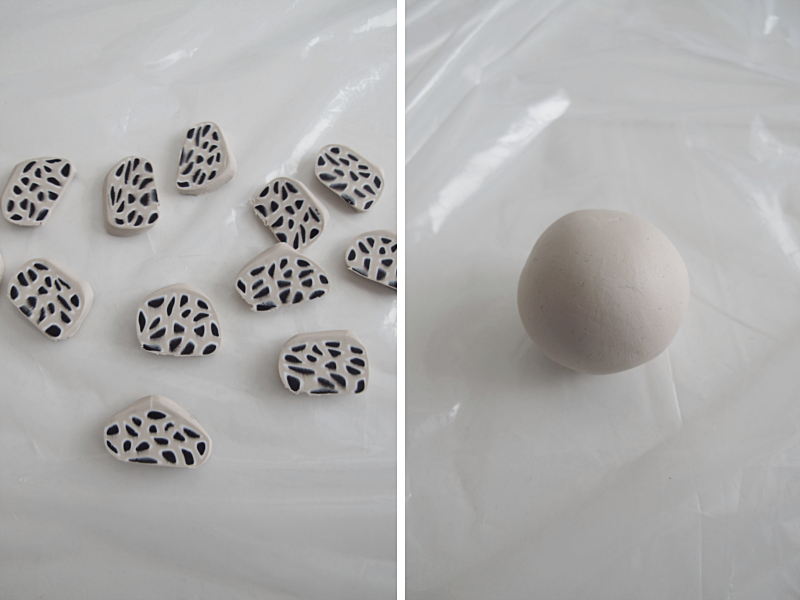
Then you cut the clay in thin slices. Roll a ball the same color as the main color of your ball.

/// Sedan skär du leran i tunna skivor. Rulla en boll med lera i samma färg som “huvudfärgen”.

boll6

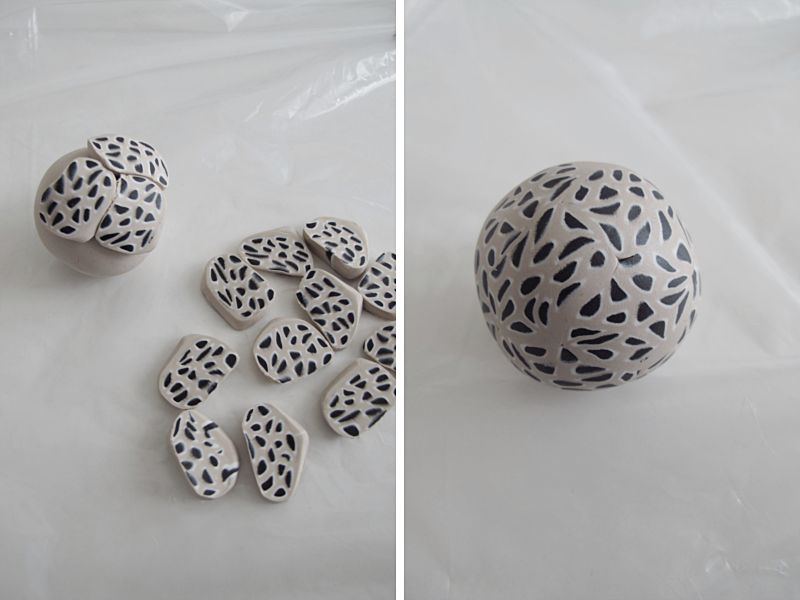
And place the slices around the ball. When that is done, carefully roll the ball so that the slices “melts” with the ball, and each other.

/// Placera skivorna runt bollen. Och rulla sedan försiktigt ihop hela bollen tills skivorna smälter ihop med varandra och bollen.

boll7

Harden it in the oven, following the instructions on the package. And you are done!

/// Följ sedan instruktionerna på leran för att härda bollen . Och du är klar!

DIY – BABY CARD

diycard

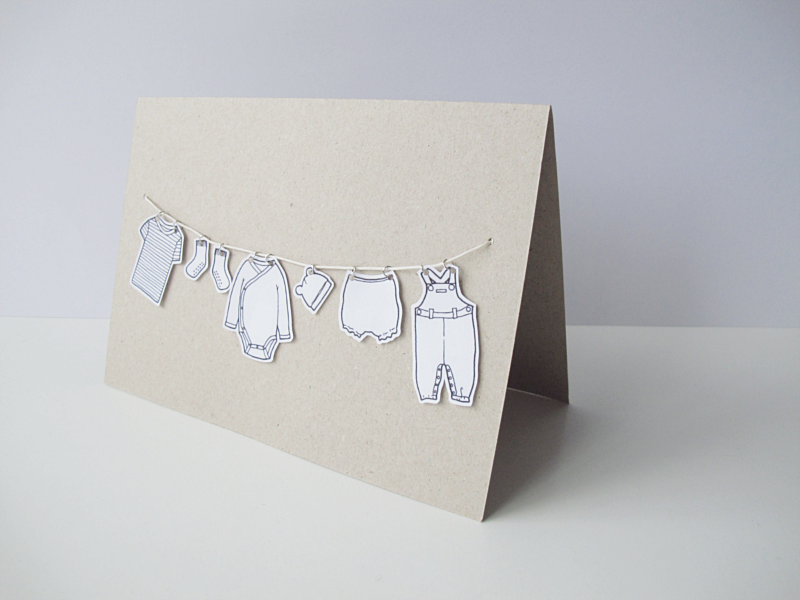
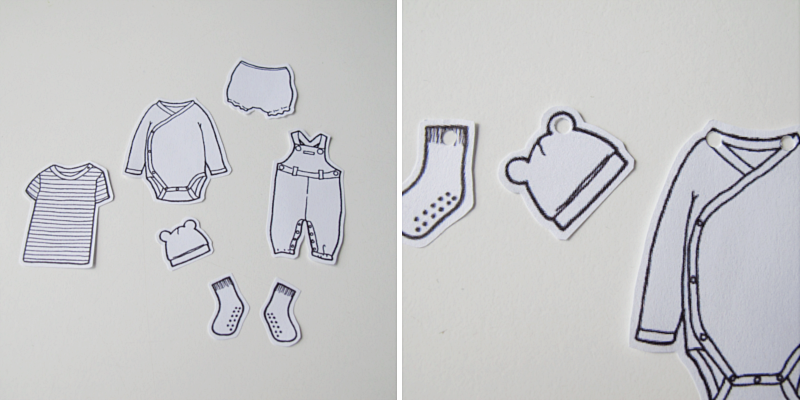
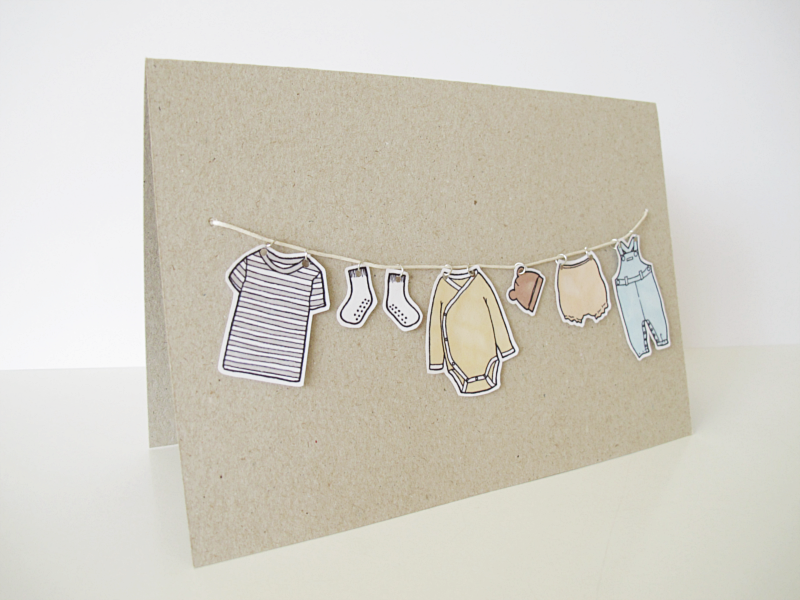
I saw this idea in a book at the library and I just had to share my version of it with you. I made a pdf-file with my drawings of the clothes and you will find that in the bottom of this post. Print it out and cut out the the clothes. Make a small hole on top of the clothes, where you would hang it with a clothespin on a actual drying rack.

/// Jag såg den här idén i en bok på biblioteket och jag ville visa min version av den för er. Jag har gjort en pdf-fil som ni kan skriva ut med bilder på kläderna. Den finns längst ner i inlägget. Skriv ut den och klipp sedan ut varje del för sig. Gör små hål på varje klädesplagg där du, om det skulle ha varit ett riktigt plagg skulle ha använt en klädnypa för att sätta upp den på en torkställning. 

diycard

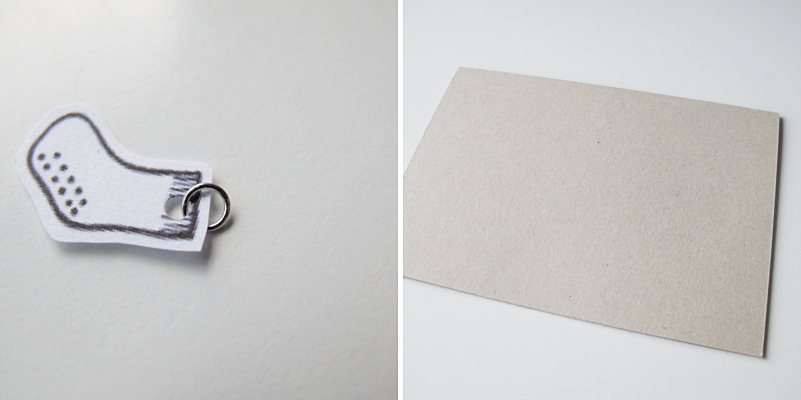
Attach a small ring to the hole (or you can use the same thread that you are using as the drying rack to make small loops). For the card I used a regular piece of carton. A4 size. And I folded it in half.

/// Sätt fast en liten ring i varje hål. Har du inga ringar går det lika bra att knyta små öglor av samma garn som du använder till torklinan. Till själva kortet använde jag ett vanligt a4 hobbykartong papper, som jag vek på mitten.

diycard

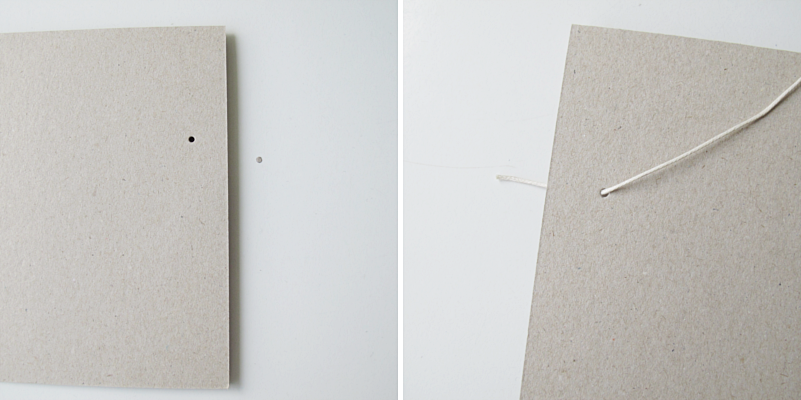
Make a hole on the side. About 1.5cm from the right edge and about 4.5 cm from the top. Then make another on the other side of the paper. Slide a thread thru the hole..

/// Gör ett hål på sidan av papperet. Ungefär 1.5 cm in och ca 4.5 cm från toppen. Gör sedan ett likadant hål på andra sidan av papperet. Trä en tråd igenom hålet..

diycard

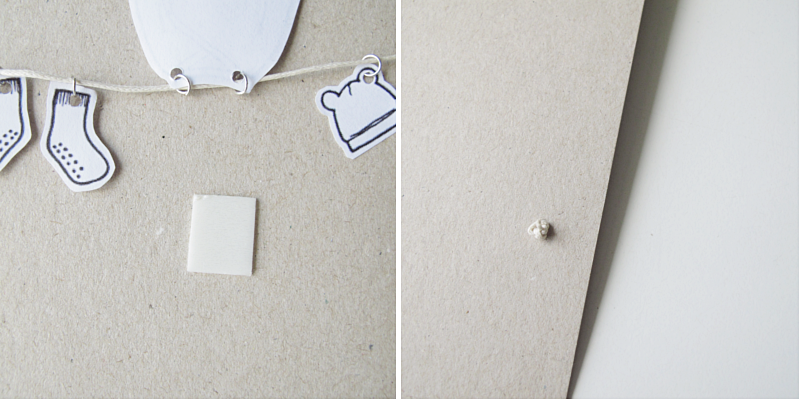
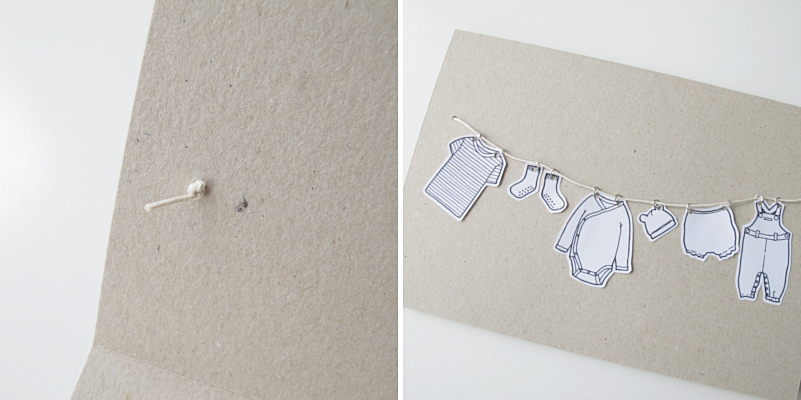
And tie a knot on the backside. Gently attach all the clothes on the thread in the order that you want them.

/// Och knyt en knut på baksidan. Sedan trär du försiktigt på alla kläderna på snöret i den ordning du vill ha dem.

diycard

Attach all the clothes with a small piece of double sided adhesive pads. Thread the other end of the thread through the remaining hole, tie a knot on the other side and you’re done!

/// Sätt fast alla plaggen med en liten bit fästkudde. Trä sedan andra änden av tråden igenom det återstående hålet, knyt en knut på andra sidan och du är klar!

diycard

Here I painted all the clothes with promarkers. /// Här har jag målat plaggen med promarkers.

kort

Pdf:  BABY CARD