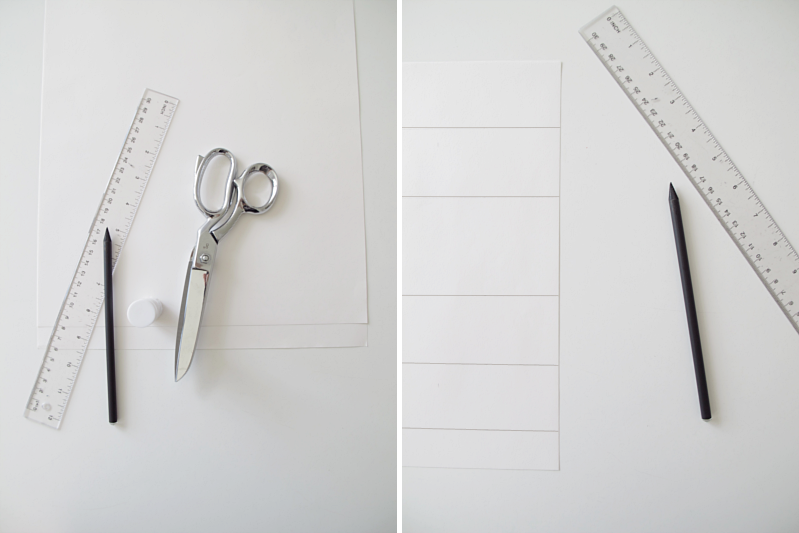
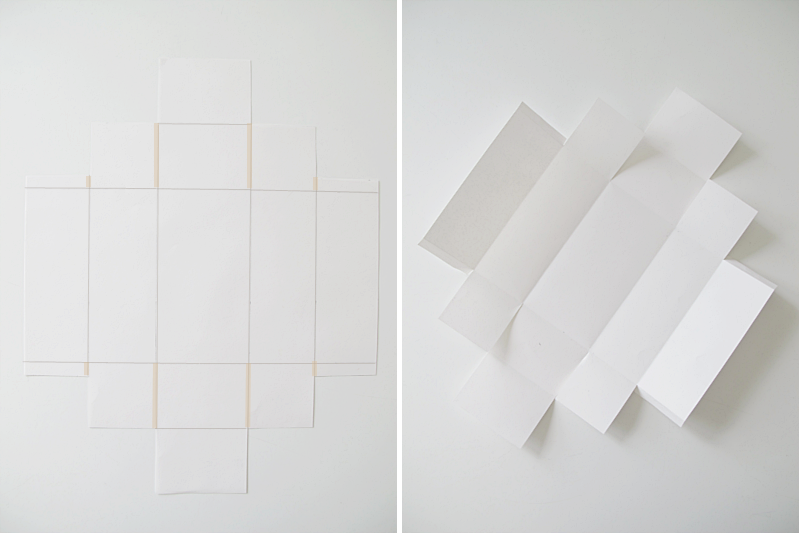
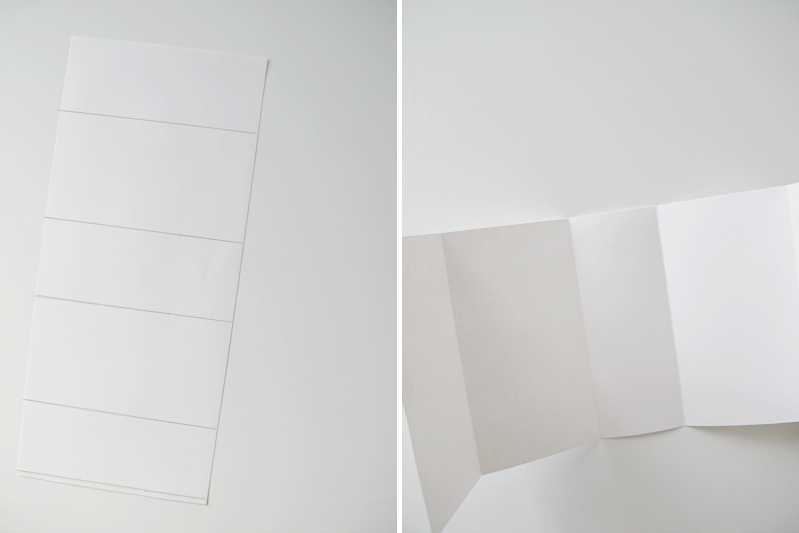
1. For this diy you need a ruler, a pair of scissors, a pencil, glue and 2 sheets of carton. A3 size. 2. Start with one of the sheets. Lay the paper so you have the shorter sides of the paper on your left and right. Draw a line 4.9 cm from the upper edge. And yes, you have to be that accurate :). Then a second line, 5 cm from the first. The third line should be 7 cm from the one you did before. The fourth line should be 5 cm from the one before, and the last line should be 4.9 cm.
/// 1. Till detta diy behöver du en linjal, sax, blyertspenna, lim och två A3 ark i kartong. 2. Börja med ett av arken. Placera papperet så att du har långsidan mot dig, och dra en linje 4.9 cm från den övre kanten. Och ja du behöver vara så noggrann :). Dra sedan en andra linje, 5 cm från den första. Tredje linjen ska vara 7 cm från den du gjorde innan. Fjärde linjen ska vara 5 cm ifrån, och den sista linjen ska vara 4.9 cm ifrån.
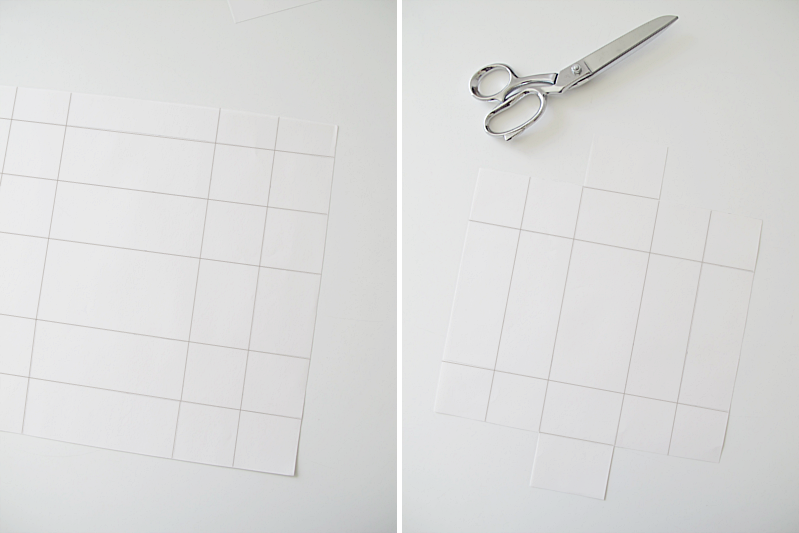
3. Now you are going to draw lines in the other direction. Start with one 5.1 cm from the right side. Then make another 5 cm from the first line. Then make one line 13 cm from the one before. And then one line 5 cm, and end with one 5.1 cm from the one before. 4. Cut along the lines, so it looks like this.
/// 3. Nu ska du dra linjer åt andra hållet. Börja med en linje 5.1 cm från kanten. Nästa ska vara 5 cm ifrån den första. Den tredje ska vara 13 cm ifrån. Den fjärde 5 cm ifrån och den sista ska vara 5.1 cm ifrån. 4. Klipp längst med linjerna så att ditt papper ser ut såhär.
5. Draw another line 1cm wide. If you are using a really thick carton you can skip this step and jump right to step 7. 6. And cut off the excess.
/// 5. Rita ännu en linje. 1cm från kanten. Om du använder ett riktigt tjock papper så kan du hoppa över denna del och gå direkt till steg 7. 6. Klipp bort den överblivna biten.
7. Time to cut again. Where the beige lines shows. 8. Fold along all lines, notice that I folded the pieces I did in step 5 in the opposite direction. And erase all pencil marks.
/// 7. Dags att klippa igen. Klipp där de beiga linjerna visar. 8. Vik längs med linjerna, notera att jag vikt bitarna, som jag gjorde i steg 5, åt andra hållet. Sudda sedan bort alla blyertsstreck.
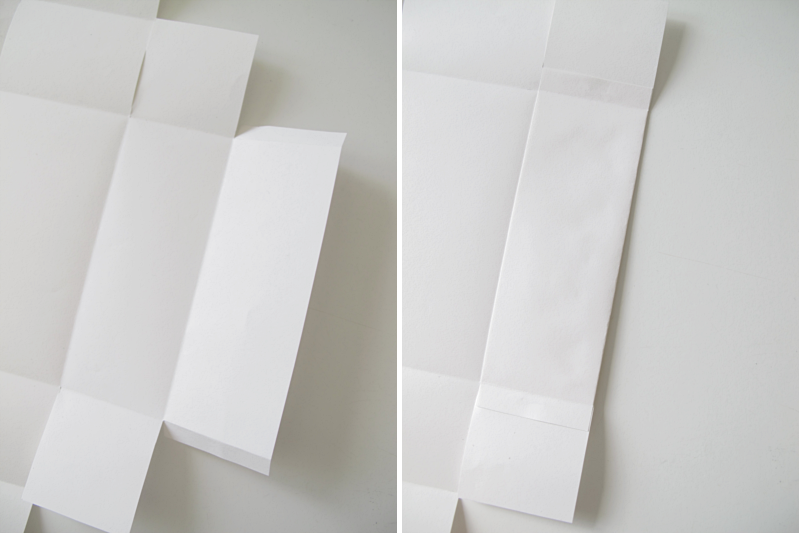
9. Put some glue on the piece of paper that is on the far right. 10. And fold it to the left.
/// 9. Stryk lim på biten som är längst till höger. 10. Och vik den sedan åt vänster.
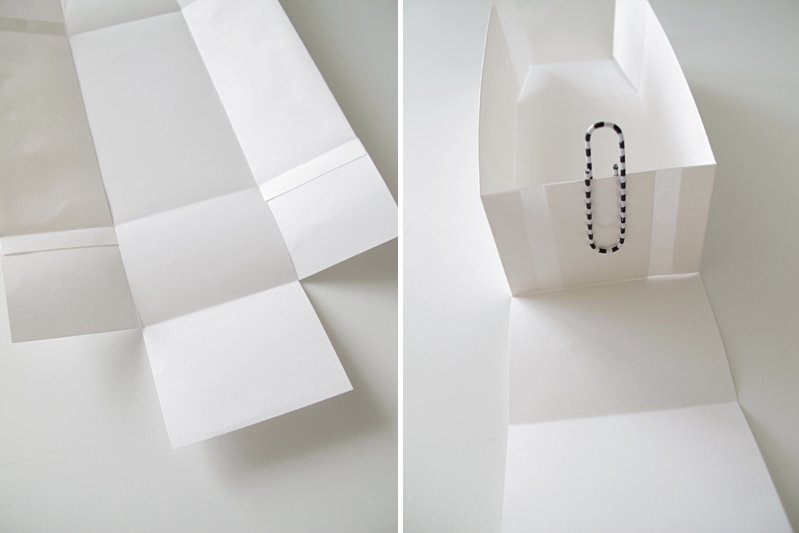
11. Repeat on the other side. Put some glue on one of the side pieces. 12. And put the sides together. Then put another click of glue on the middle piece and..
/// 11. Gör likadant på andra sidan. Stryk lim på en av sidbitarna. 12. Och sätt ihop de båda sidbitarna med varandra. Sedan stryker du lim på mittenbiten..
13. ..fold it over. 14. Repeat on the other side.
/// 13. ..och viker den över. 14. Gör nu likadant på andra sidan.
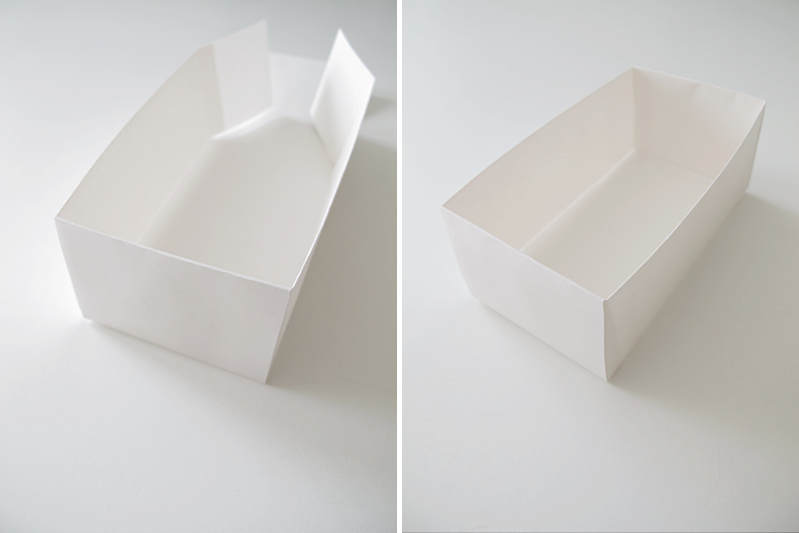
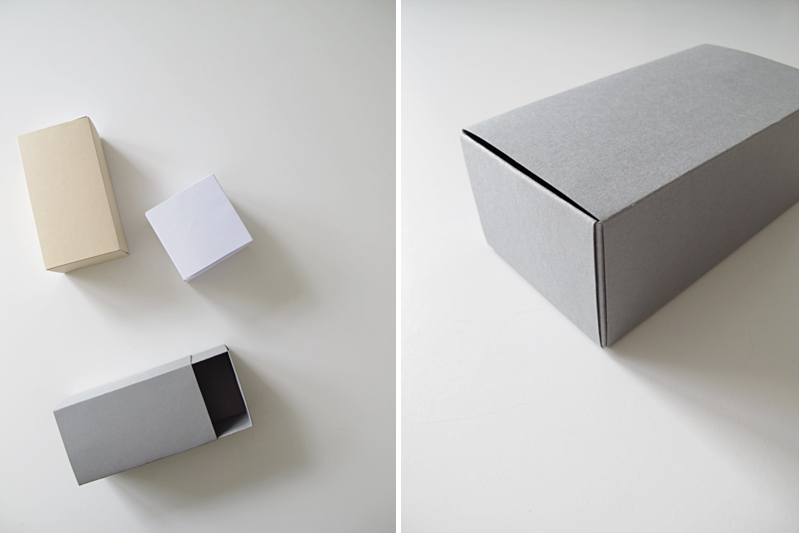
15. And now to the “lid” of the box. Start by cutting a piece of paper 13cm wide. And then it´s time for the lines again. The first one should be 5 cm from the edge. Make another, 7.1 cm from the first, then one 5.1 cm from the one you did before. Make another one at 7.1 cm and end with a line 5.1 cm from the one before. You can also cut off the tiny piece of excess paper, you see in the bottom of the picture. 16. Fold along the lines and erase the pencil lines.
/// 15. Nu är det så dags för “locket” på lådan. Ta ark nr 2 och klipp ut en remsa som är 13 cm bred. Rita sedan en linje 5 cm från toppen. Och en till 7.1 cm från den första. En tredje linje 5.1 cm ifrån. Den fjärde linjen ska vara 7.1 cm ifrån och den sista 5.1 cm ifrån. När du har ritat ut linjerna så har du fått en liten liten remsa papper kvar på slutet, den kan du klippa bort. 16. Vik längst med linjerna och sudda bort blyertsstrecken.
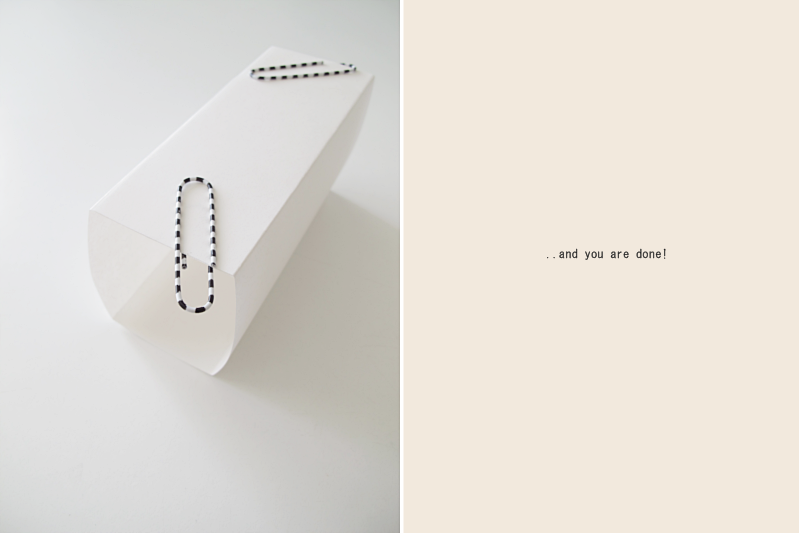
17. Put some glue of the end piece and glue the “lid” together. 18. Let it dry, and you are done!
/// 17. Stryk lim på ena ändbiten och limma ihop “locket”. 18. Låt det torka, och du är klar!
—
A tip is to pre fold the box before you glue it together, just to make sure that it will be good looking when you are done. You may have to cut off a mm or two. It all depends on what kind of paper you are using. Good luck!
/// Ett litet tips är att förvika din låda innan du limmar ihop något. Bara för att se om du kanske behöver klippa bort nån mm här eller där. Det beror egentligen helt på vilken typ av papper du använder och tjockleken på detta. Lycka till!


annanymous says:
Great! Helped me a lot! ~code:uQjYbBM3D2ef
August 23, 2015 — 00:25