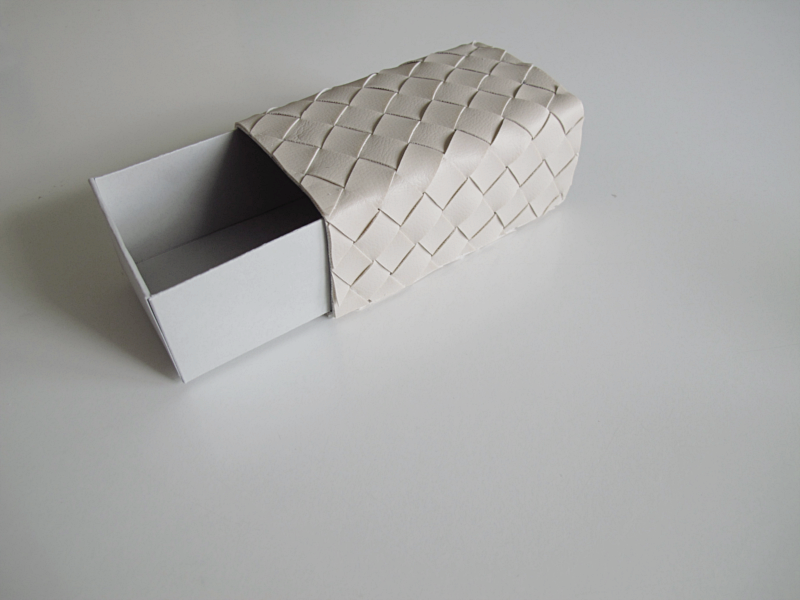
So sometimes I really don’t know where I get my ideas from, but I was thinking that I wanted to make a gift box that somehow looks a bit “more”. And I had this piece of beige fake leather, so I desided to braid a pattern using 1.5 cm wide strips. I’m going to show you how I did it, but it’s not really a tutorial, more like guidence. And just let me warn you before you start. If you don’t have a lot of patience, maybe you should try another diy from the blog. This isn’t hard to make, it’s just that you need a lot of time, and it can feel a bit “messy” keeping all the strips in place.
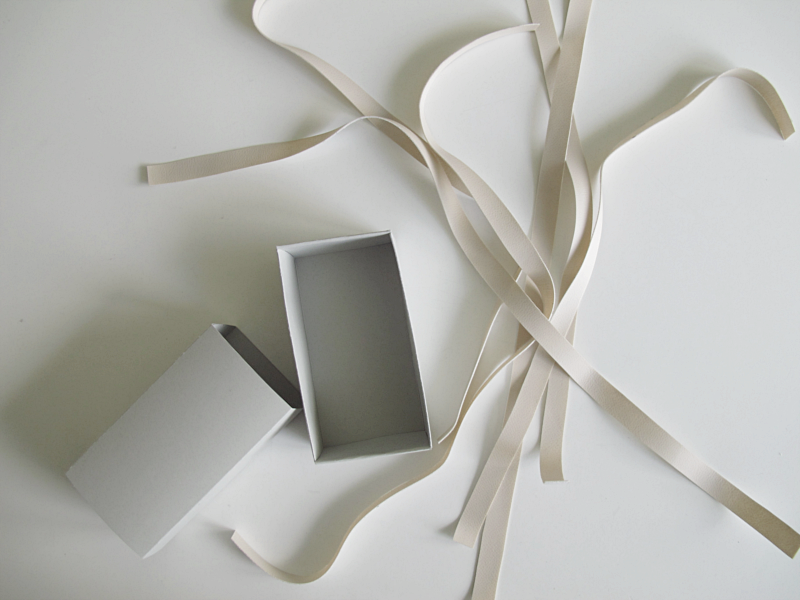
I used:
→ 1.5 cm wide strips of fake leather. And to be honest I lost count on how many I used. I made them really long and then cut them off and reused them. But I think I used more than 2 meters..
→ And a bunch of paperclips
→ A light gray box. The box I used is actually from a tutorial on the blog. Here you can find it. (And yes I know in that tutorial I go on about millimeters but you have to be that accurate)
→ Glue
→ A pair of scissors
/// Ibland vet jag inte vart jag får mina idéer ifrån, men jag ville iallafall göra en presentask som skulle kännas lite “mer”. Jag hade en bit beige fejkläder så jag bestämde mig för att göra ett flätat mönster med 1.5 cm breda bitar. Jag tänkte visa er hur jag gjorde, men det är inte riktigt en tutorial, mer en vägledning. Men jag vill bara säga det innan du börjar, att har du inte väldens bästa tålamod så ska du kanske prova ett annat diy från bloggen. Den här är inte svår att göra, utan den tar bara tid och det kan kännas lite rörigt med alla bitar och vart den ena ska och den andra slutar.
Jag använde:
→ 1.5cm breda bitar av fejkläder. Och om jag ska vara helt ärlig vet jag inte hur mycket läder jag använde. Jag klippte långa bitar som jag sedan klippte av och använde igen. Men jag tror iallafall att jag använde mer än 2 m..
→ En massa gem
→ En ljusgrå låda. Lådan jag använde är faktiskt från ett tidigare diy från bloggen. Här kan du hitta den. (Och jag vet att jag är noga med mm i det diy:et, men det är av en anledning..)
→ Lim
→ Sax
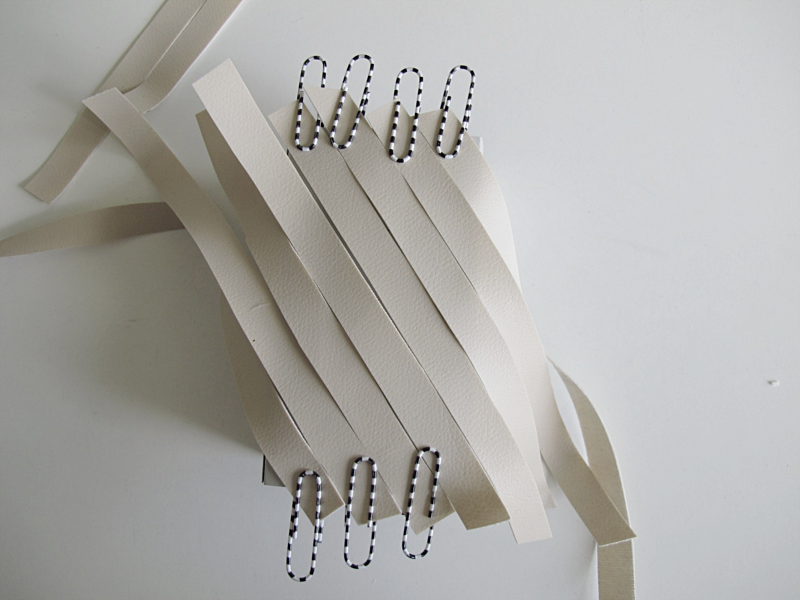
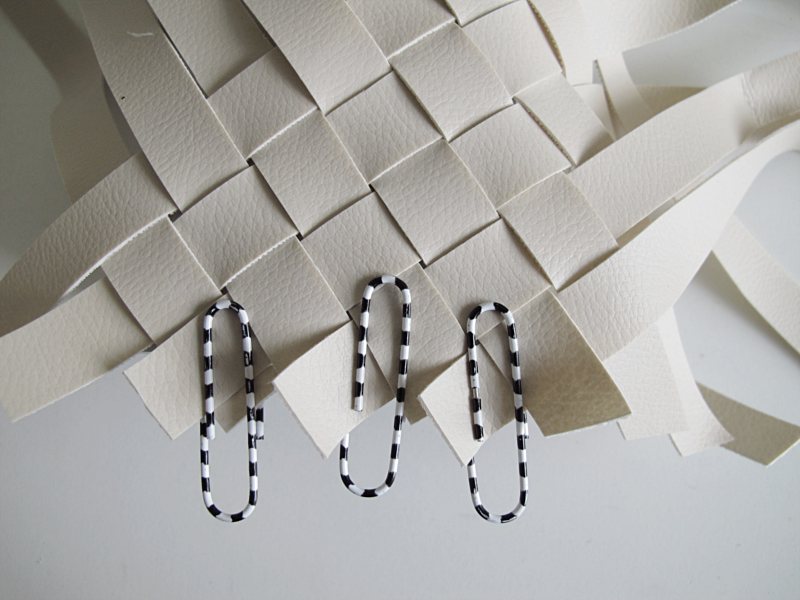
I started placing strips in the top left corner. No glue yet but I fasten them with paper clips. And I let the ends stick out a bit.
/// Jag började i det övre vänstra hörnet. Inget lim än, men jag fäste dem med hjälp av gem. Och lät ändarna på bitarna sticka ut en bit över kanten på lådan.

Then I continued from the bottom right corner, and fasten those too with paperclips. Here you have to check that the strips are so long that they reach around the side / sides.
/// Sedan fortsatte jag från de nedre högra hörnet och fäste dem också med gem. Här måste man också se till att bitarna är så långa att de räcker runt hörnet och den andra sidan/sidorna.
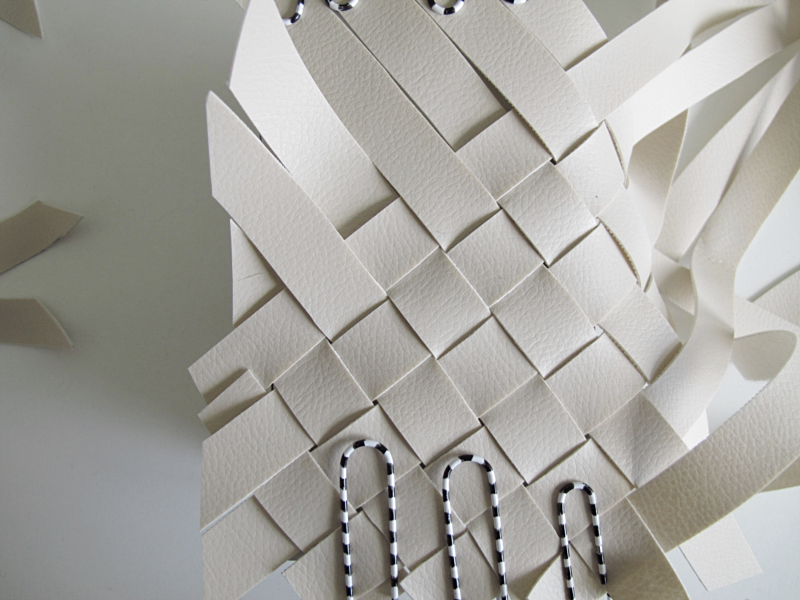
Then you take a new strip and thread it under- over- under- over the ones already in place.
/// Sedan tar du en remsa till och trär den från andra hållet. Under- över- under- över.
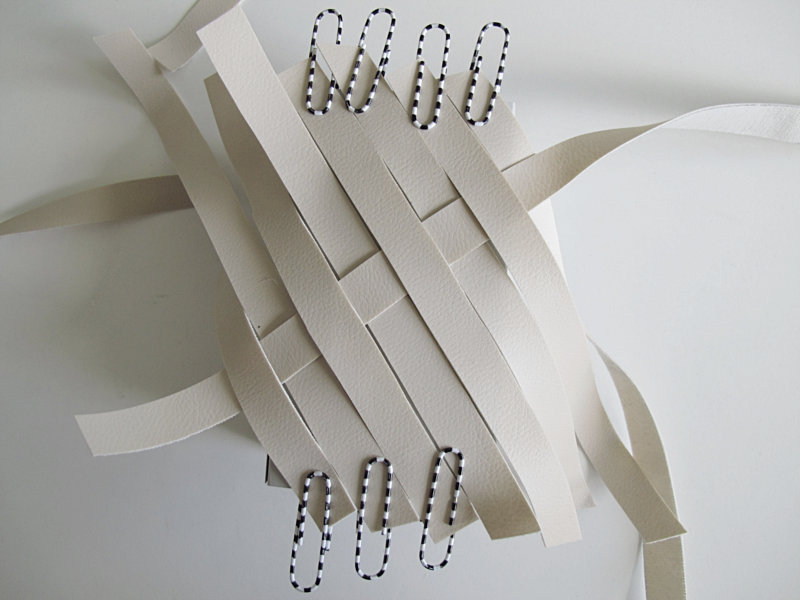
And continue with more strips. When you feel that the strips are nicely fitted together you can take away one of the paper clips, put a bit of glue between the box and the leather and between the pieces of leather. Then secure the paperclip again, and repeat with the others.
/// Och så fortsätter du med fler bitar. När du tycker att bitarna är tighta mot varandra och du är nöjd, kan du försiktigt ta bort ett gem, limma mellan lädret och lådan, och mellan läderbitarna och sedan sätter du tillbaka gemet igen. Och gör samma sak med nästa gem.
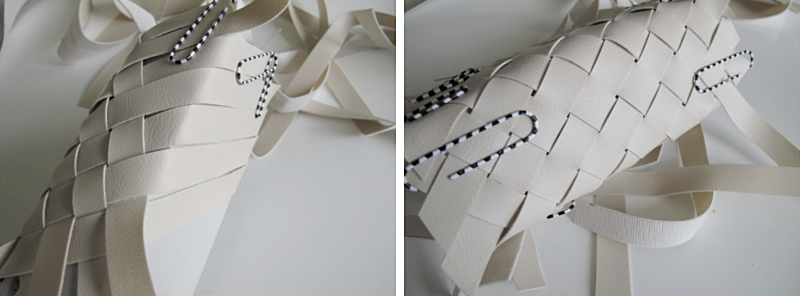
At this point I also cut some of the excess strips off on the left side, a couple of cm from the box just to get less strips in the way.
/// Jag klippte även här av bitarna på vänster sida så att det blev lite mindre bitar att hålla ordning på. Men jag klippte inte jäms med lådans kant, utan några cm ifrån.
Then it’s time to continue around to the other side. This part can fell a bit tricky but use the paper clips to keep the pieces in place, and tighten the strips as you go. You might also have to go back to the sides you’ve already done to tighten once again.
/// Nu är det dags för att fortsätta runt hörnet på nästa sida. Det här kan kännas lite trixigt, men använd gemen för att hålla bitarna på plats, och så sträcker du dem eftersom du flätar. Du kan också få gå tillbaka och sträcka sidorna du redan gjort.
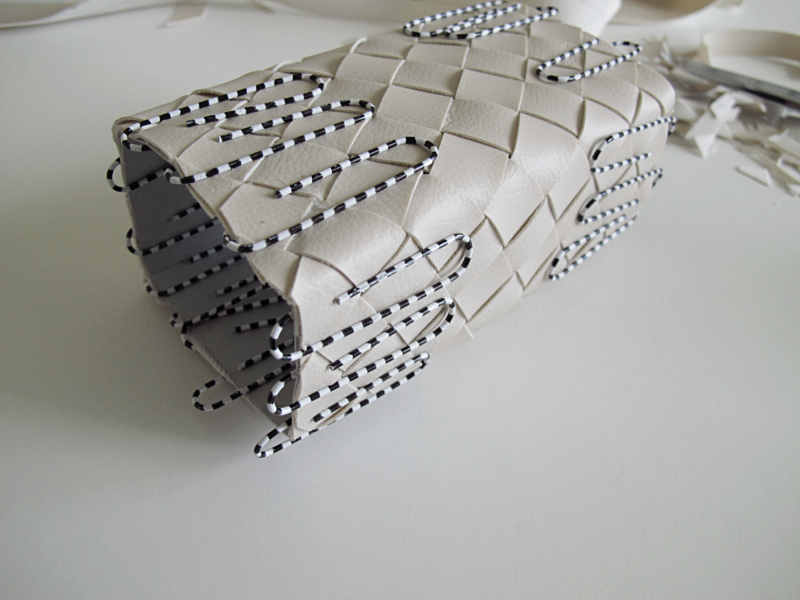
And continue on all sides of the box. Braid, tighten, and then glue. In the pictures below you can see that I cut the ends of the strips even closer to the box, but still not super close.
/// Och sen fortsätter du bara så på alla sidor av lådan. Fläta, sträck och sedan limma. På bilderna nedan kan ni se att jag klippt ännu närmare asken, fast fortfarande inte supernära.
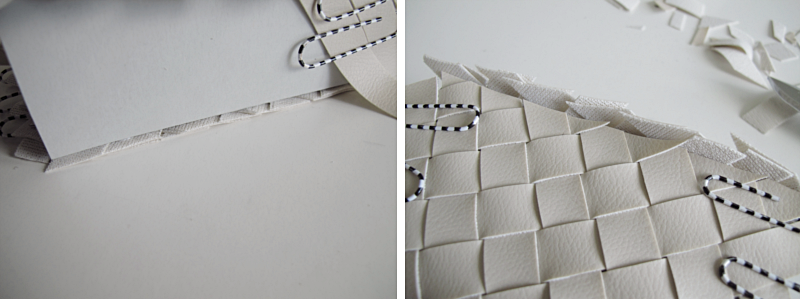
I let the glue dry for a little while, then I carefully removed the paperclips (one side at a time) and cut along the side of the box. And also glued some of the end once again. Then I put the paperclips back and let the glue dry again.
/// Jag lät asken ligga en liten stund för att limmet skulle torka lite, sedan tog jag försiktigt bort gemen (en sida i taget) och klippte längs med kanten. Och limmade eventuella flikar som lossnat. Sedan fick gemen åka på igen och så fick den torka igen.
Once the box was completely dry I cut the ends along the side of the box as close as I could to the box. And done!
/// När asken var torr klippte jag ändarna så nära jag kunde på askens långsida. Och så var det klart!
