
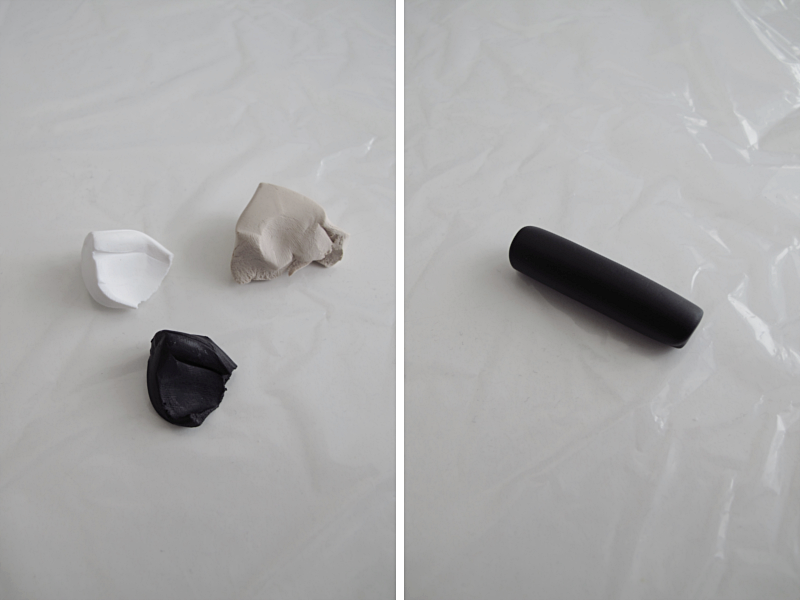
Ok, so first I would just like to say, I don’t really know what to call this diy. A ball diy? A clay diy? I just like the look of it so I’m using it as a decoration on my bookshelf. Anyway.. For this you’ll need: fimo clay. (I used three different colors, but you can use just two if you want to), something to protect your table. (I used a bit of plastic), something to cut with and an oven.
Start by rolling a bit of clay , the color of the clay will be the color of the dots. Make it about the same size as your little finger.
/// Jag vet inte riktigt vad jag ska kalla det här diy:et.. Iallafall så gillar jag den och har den som dekoration i min bokhylla. För att göra en likadan så behöver du fimo lera. (jag använde tre färger men du kan använda två om du hellre vill det), nånting som skyddar bordet ( jag använde en bit plast), nått att skära med och en ugn.
Börja med att rulla ut en bit lera, färgen på leran kommer att bli bollens prickar. Gör den ungefär i samma tjocklek som ditt lillfinger.
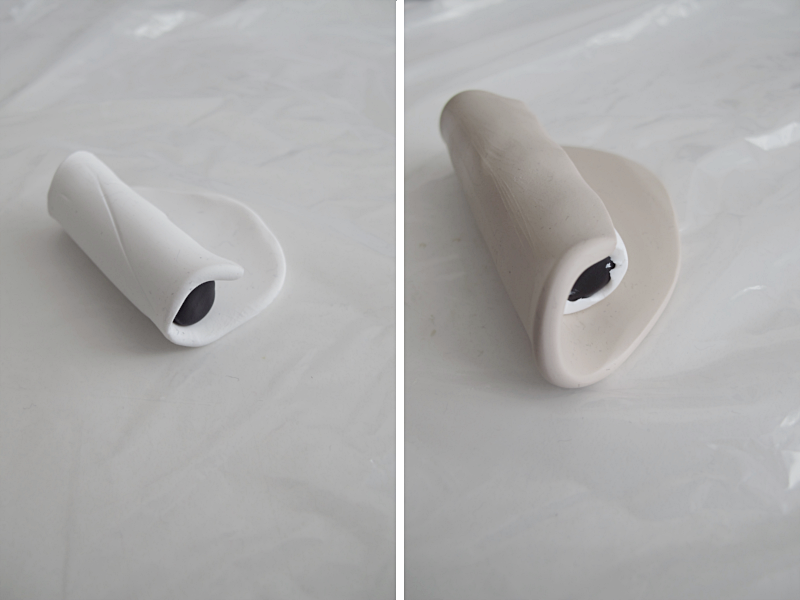
Then you take another piece of clay and roll that on top of the other. This color will be like a “frame” to the dots. After that you take the third piece of clay and roll that around the other two. This will be the main color of the ball.
/// Ta sedan nästa bit med lera, och rulla den över den första. Färgen på denna kommer att bli små “ramar” på prickarna. Sedan tar du den tredje biten med lera. Denna färg kommer att bli “huvudfärgen” på bollen.
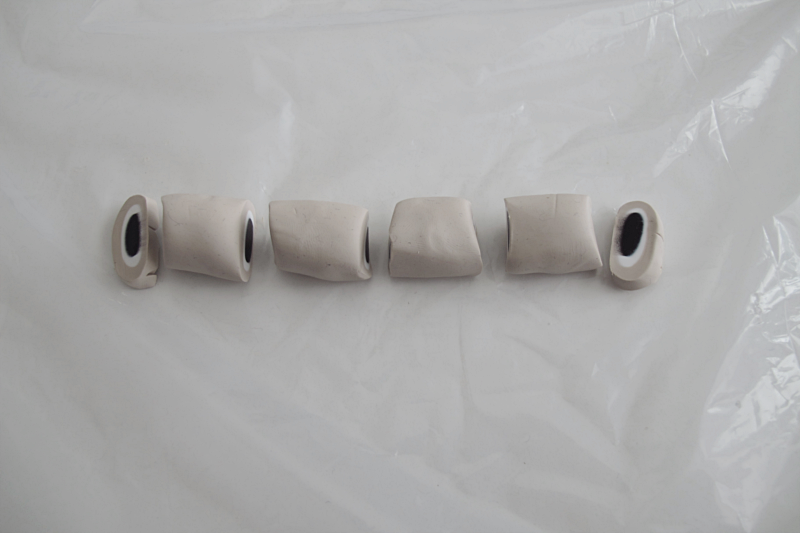
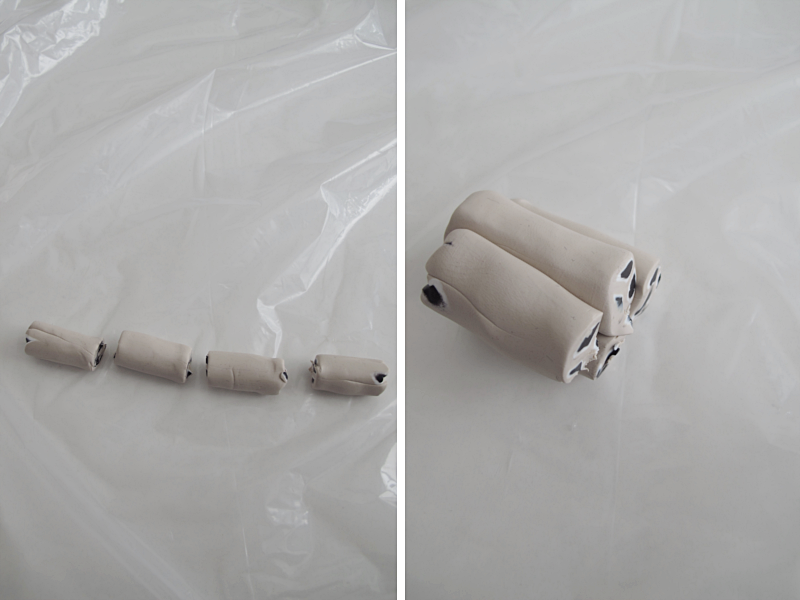
Cut away the excess clay of the ends. Then roll out the clay so that you have a piece about the size of your index finger. Then you cut the clay into smal pieces. As you can see in the image I cut away small pieces at the ends again.
/// Skär bort den överflödiga leran på ändarna. Sedan rullar du ut leran så att den är ungefär samma storlek som ditt pekfinger. Skär sedan leran i bitar. Som ni kan se på bilden så skar jag bort lite av ändarna igen.
Roll each piece and then put them together and roll them again. This might be a bit tricky but just take it slow when you roll.
/// Rulla ut alla bitarna, för att sedan sätta ihop dem och rulla ut dem igen. Det kan vara lite trixigt, men ta det bara försiktigt när du rullar.
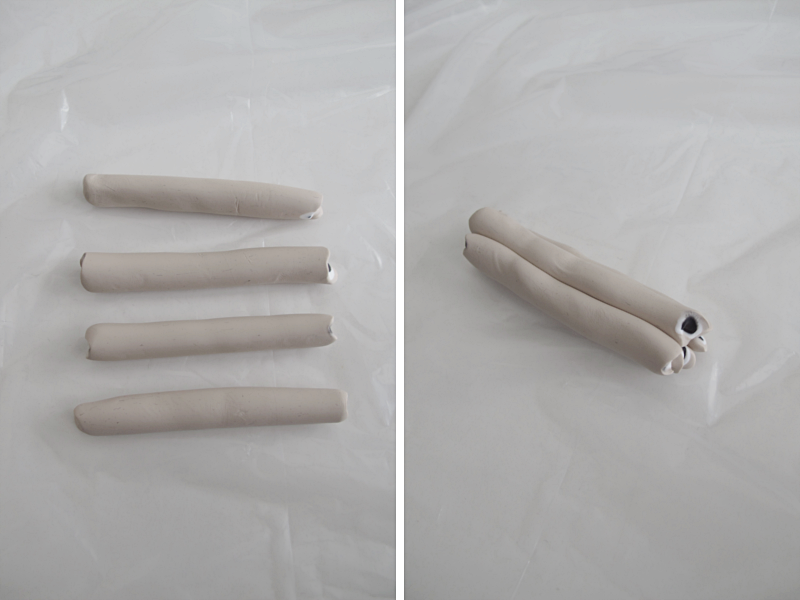
And repeat.. End this step by rolling the clay together.
/// Och upprepa. Avsluta detta steg med att rulla ihop bitarna till en jämn rulle.
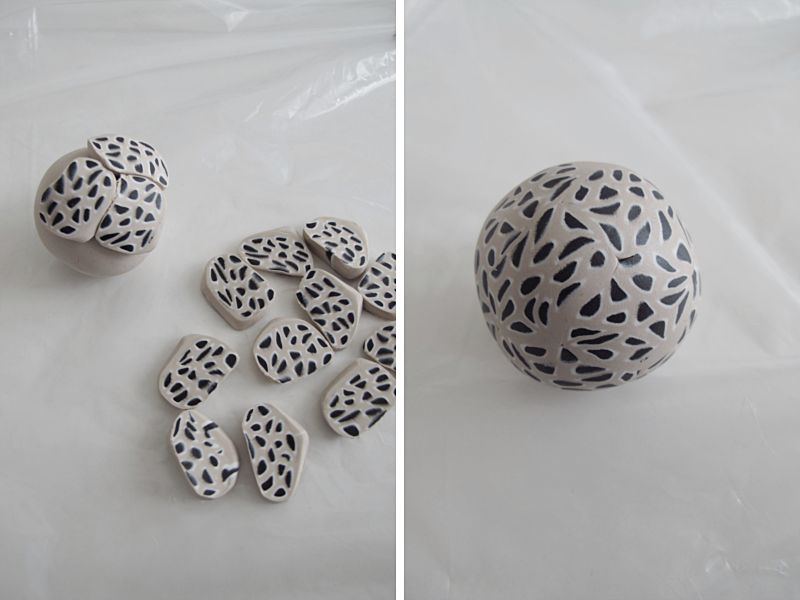
Then you cut the clay in thin slices. Roll a ball the same color as the main color of your ball.
/// Sedan skär du leran i tunna skivor. Rulla en boll med lera i samma färg som “huvudfärgen”.

And place the slices around the ball. When that is done, carefully roll the ball so that the slices “melts” with the ball, and each other.
/// Placera skivorna runt bollen. Och rulla sedan försiktigt ihop hela bollen tills skivorna smälter ihop med varandra och bollen.
Harden it in the oven, following the instructions on the package. And you are done!
/// Följ sedan instruktionerna på leran för att härda bollen . Och du är klar!