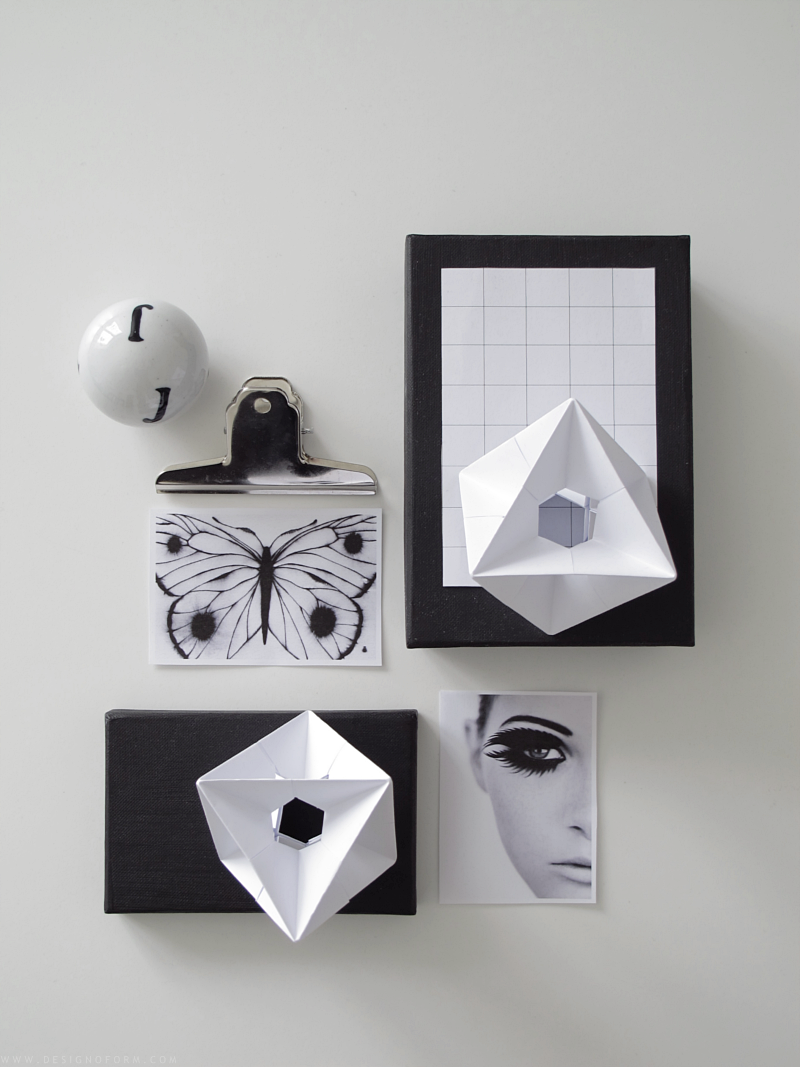
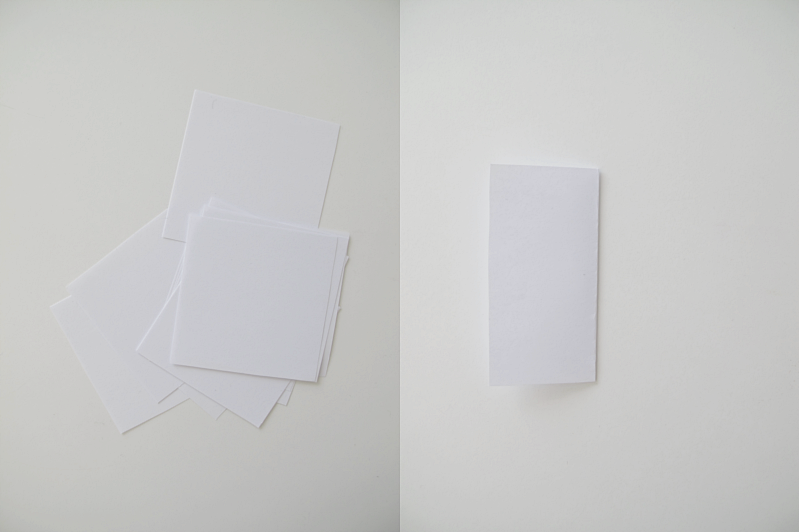
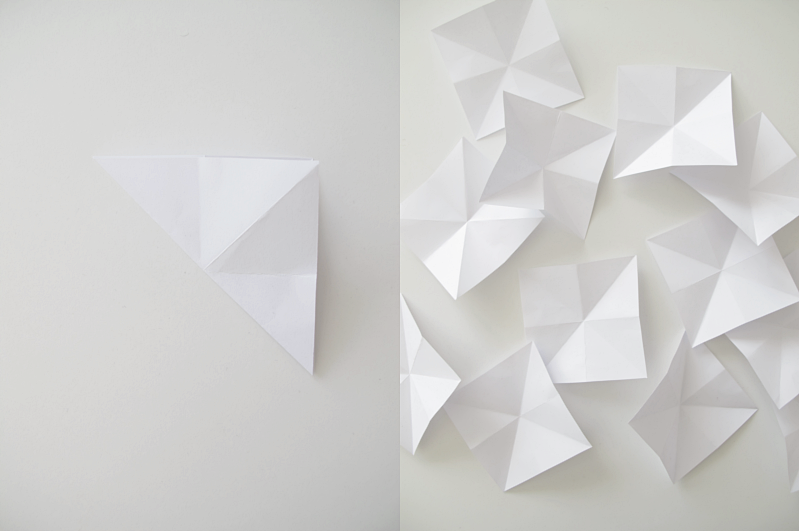
But first I have another diy for you. I posted a picture of my spinner on instagram and so many of you like it so here you have a tutorial. Start with 12 squares. I did mine 8x8cm. You can do all the squares at once, as we go, but I´m only gonna show you one. Fold it sideways.
/// Men först tänkte jag visa er ett annat diy. Det var så många som gillade bilden på spinnern som jag visade på instagram så jag tänkte visa hur jag gjort. Börja med 12 fyrkanter. Jag gjorde mina 8x8cm. Du kan vika alla fyrkanterna på en gång, steg för steg, men jag kommer bara visa en av dem. Börja med att vika den åt sidan.
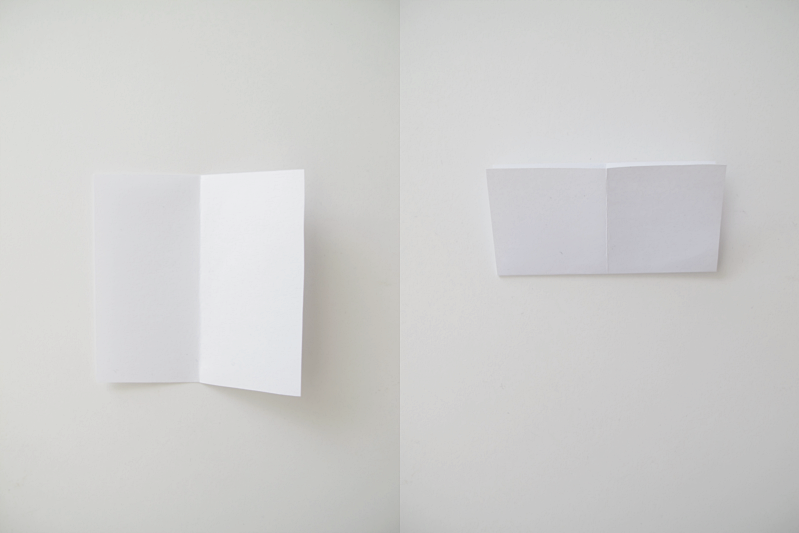
Unfold and fold it upwards. /// Vik upp och vik den uppåt
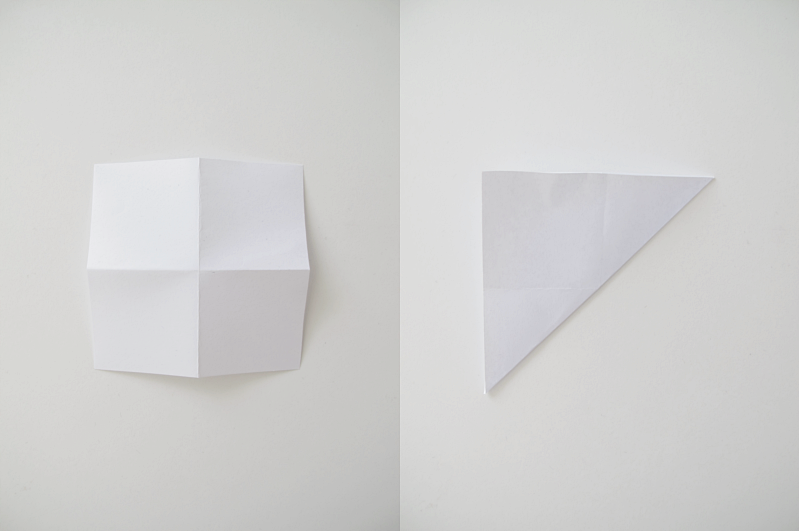
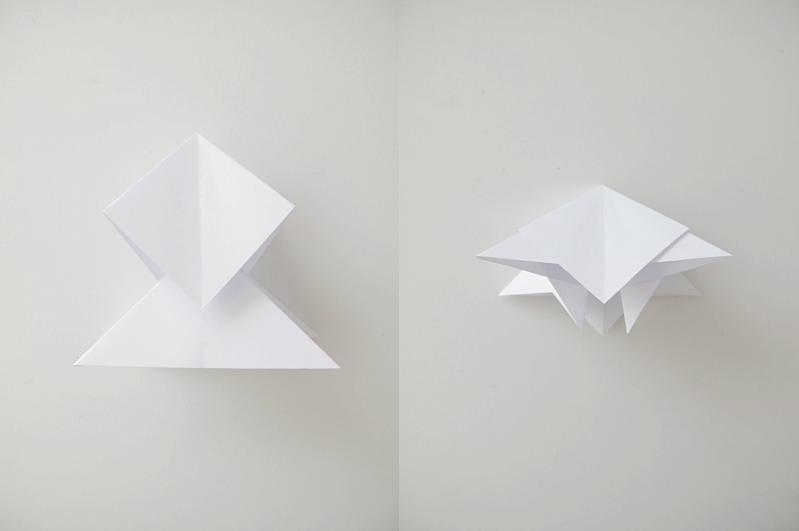
Turn the square upside down and fold it from one corner to another. /// Vänd fyrkanten upp och ner och vik den från ett hörn till det andra.
Unfold and fold it the other way. This is how they should be looking /// Vik upp den igen och vik åt andra sidan. Så här ska de se ut.
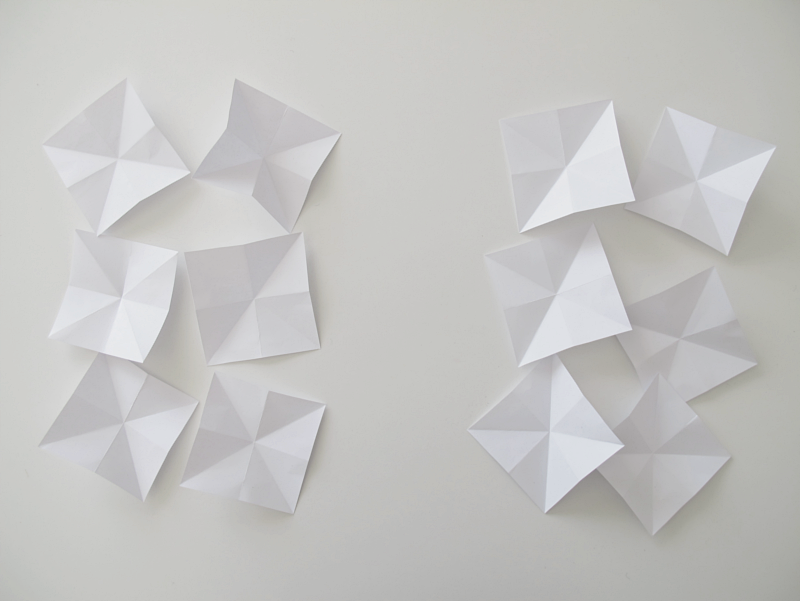
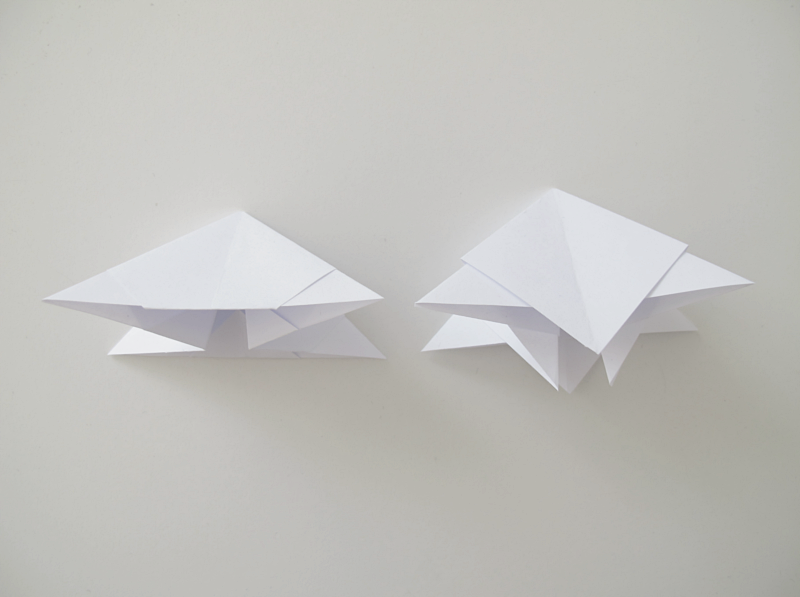
Now you are going to make two piles. Six squares in every pile. The ones to the left you´re going to fold as the left pictures shows, and the squares to the right you´re going to fold as the right pictures shows.
/// Nu ska du dela in dina rutor i två högar. 6 stycken i varje. De rutor som ligger i den vänstra högen ska vikas som bilderna till vänster visar, och de rutorna som finns i den högra högen ska vikas som de bilderna till höger visar.
↓
↓
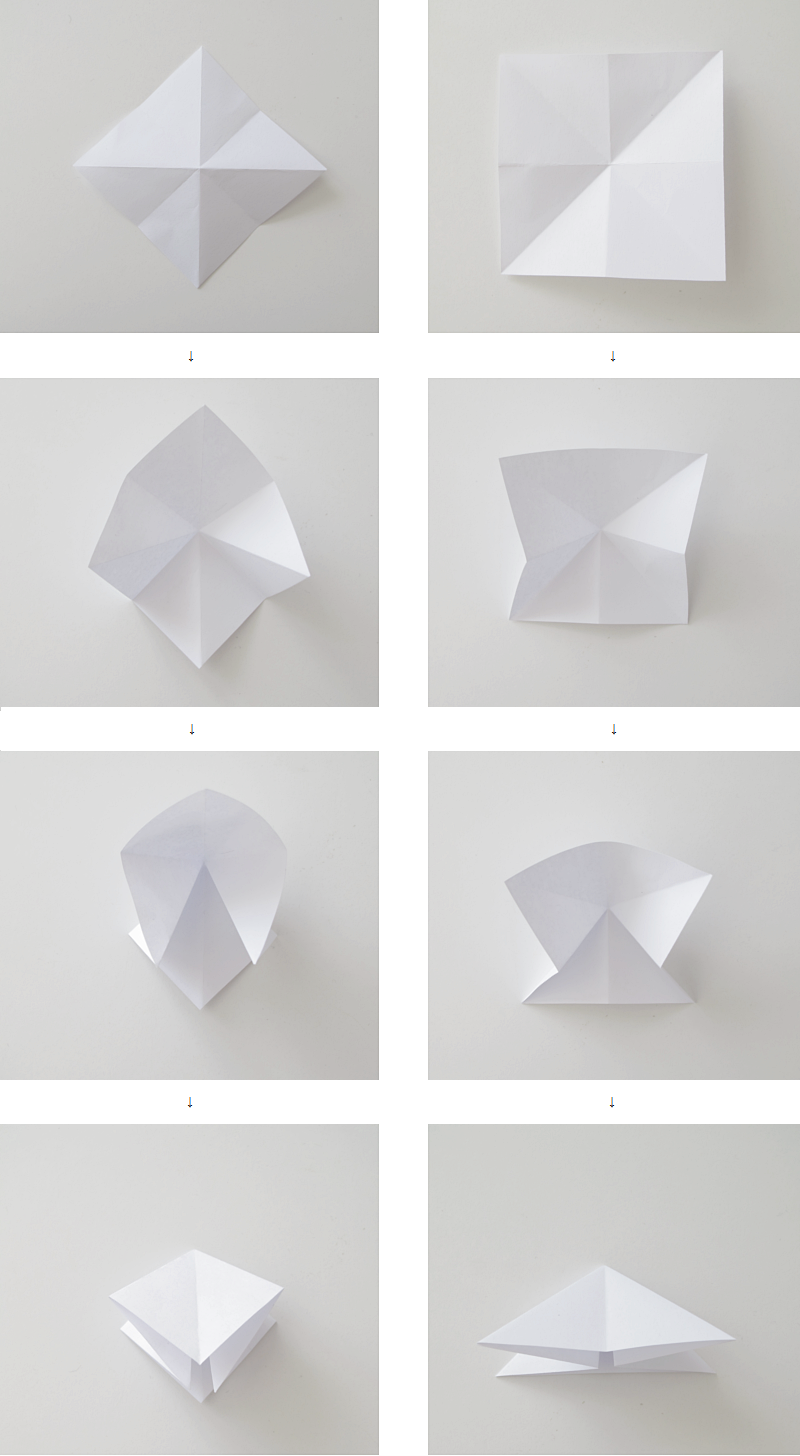
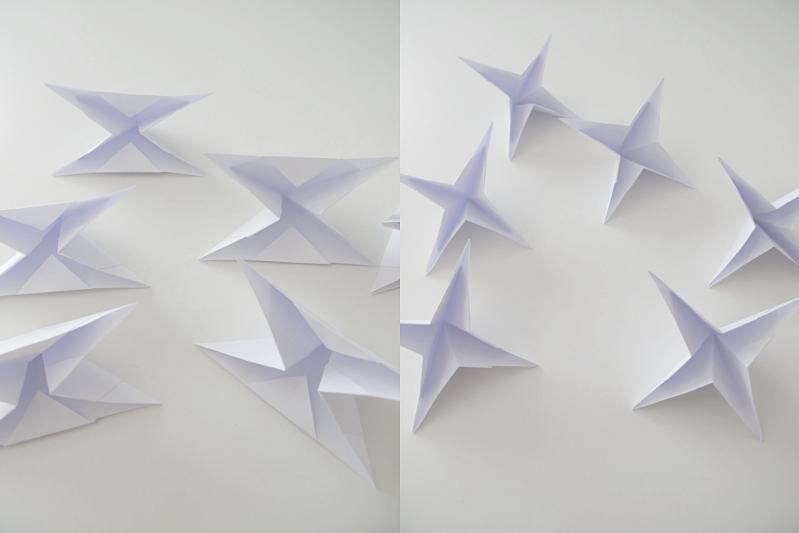
Now you are going to take one from each pile and attach them together. /// Ta en från varje hög och sätt ihop dem med varandra.
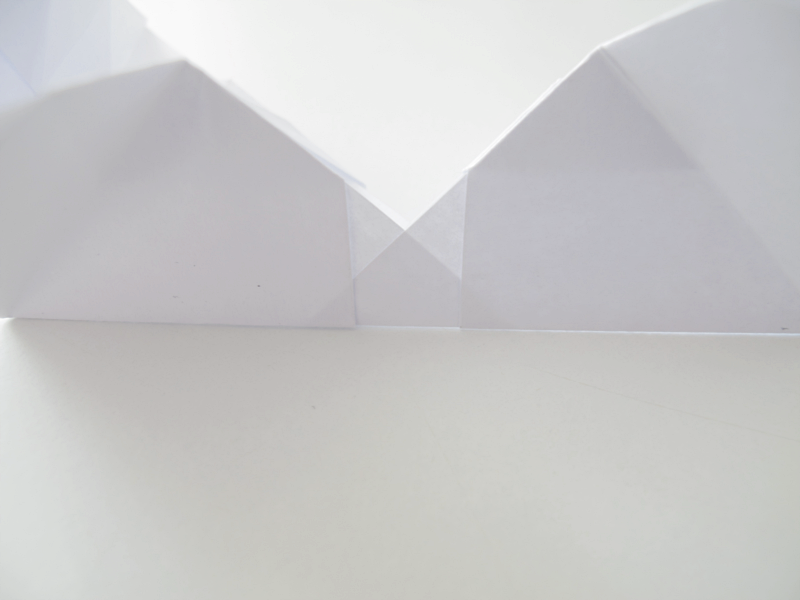
Fold the corners inwards. (Folded and unfolded.) /// Vik in kanterna. (vikt och ovikt)
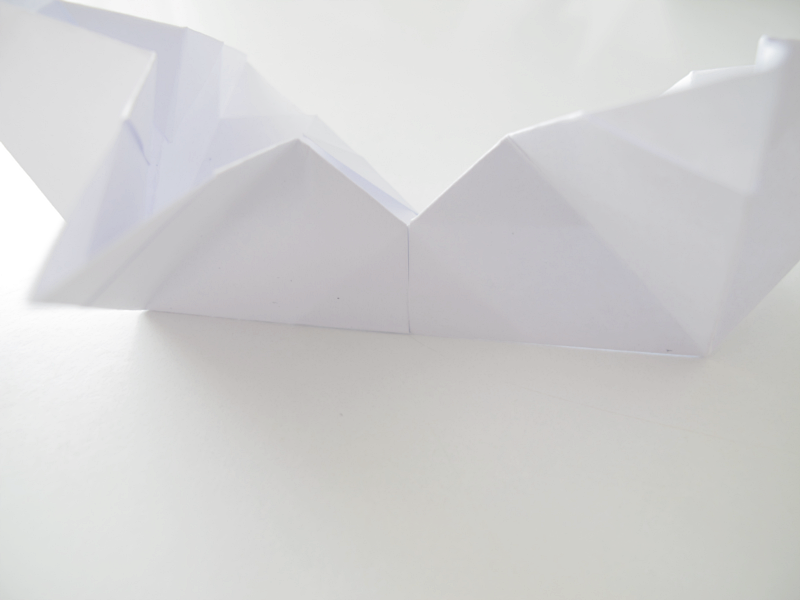
They now look like this if you´re looking from down under. Fold them so they look like the ones on the right. Almost like stars. /// Om du tittar på de ihopsatta rutorna från undersidan så ser de ut så här. Vik nu dem så att de ser ut som bilden till höger. Nästan som stjärnor.
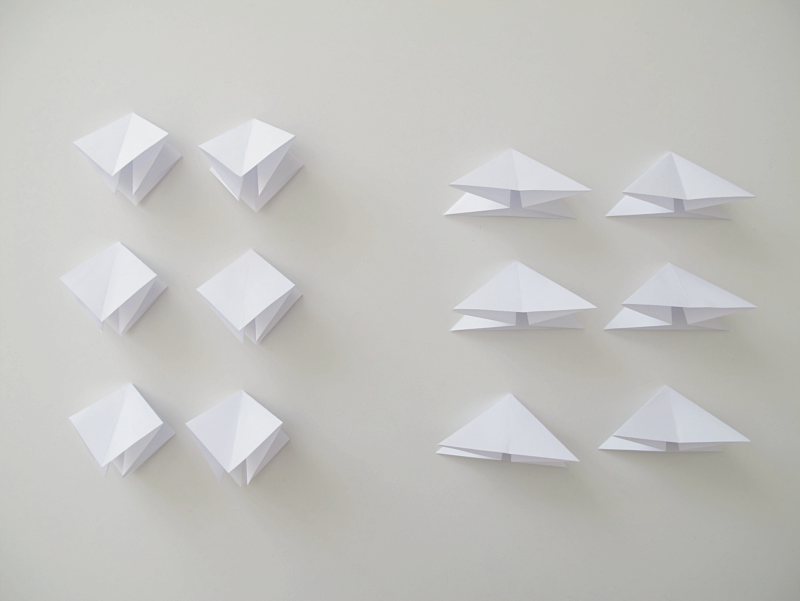
Take two of the “stars” and attach them to each other, by sliding one corner into the other.
/// Ta två “stjärnor” och sätt ihop dem, genom att skjuta ett hörn av en “stjärna” in i hörnet på den andra “stjärnan”

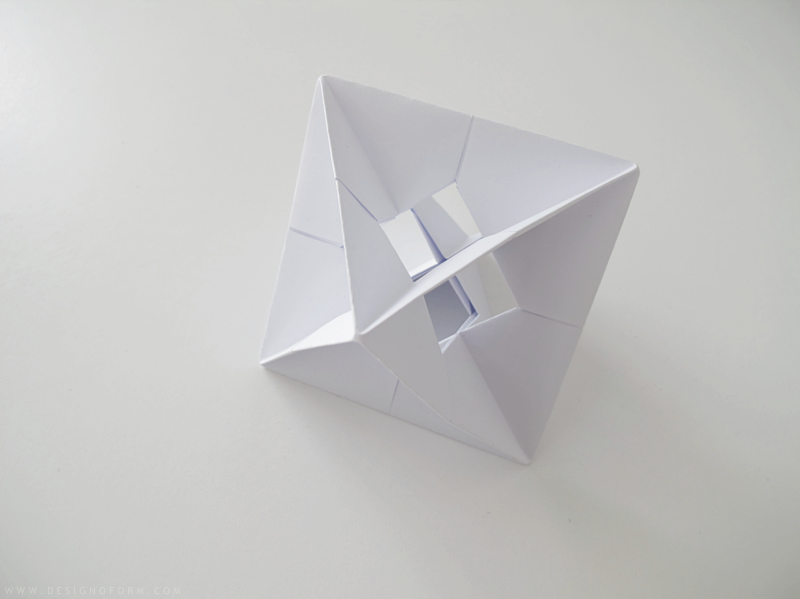
Take the rest of the “stars” and attach them aswell. When you only have two corners left, the last couple, it can be a bit tricky to attach them. But with patience you can make it. And you are done!
/// Ta resten av “stjärnorna” och sätt fast dem också. När du bara har två hörn kvar, de sista paret, kan det vara lite trixit att få ihop dem, men med lite tålamod så går det. Och du är klar!
Marij says:
I have to say: I really, REALLY love your blog!! It’s so beautiful! And your DIY’s are awesome!!
XX Marij
March 10, 2013 — 16:46
designoform says:
Thank you, thank you, thank you!!
March 10, 2013 — 22:10
Tine says:
This model is called Electra and was designed in the 1990s by David Mitchell: http://www.flickr.com/photos/goorigami/5393026757/
April 7, 2013 — 09:42
designoform says:
Thanks for sharing! :)
April 7, 2013 — 17:48