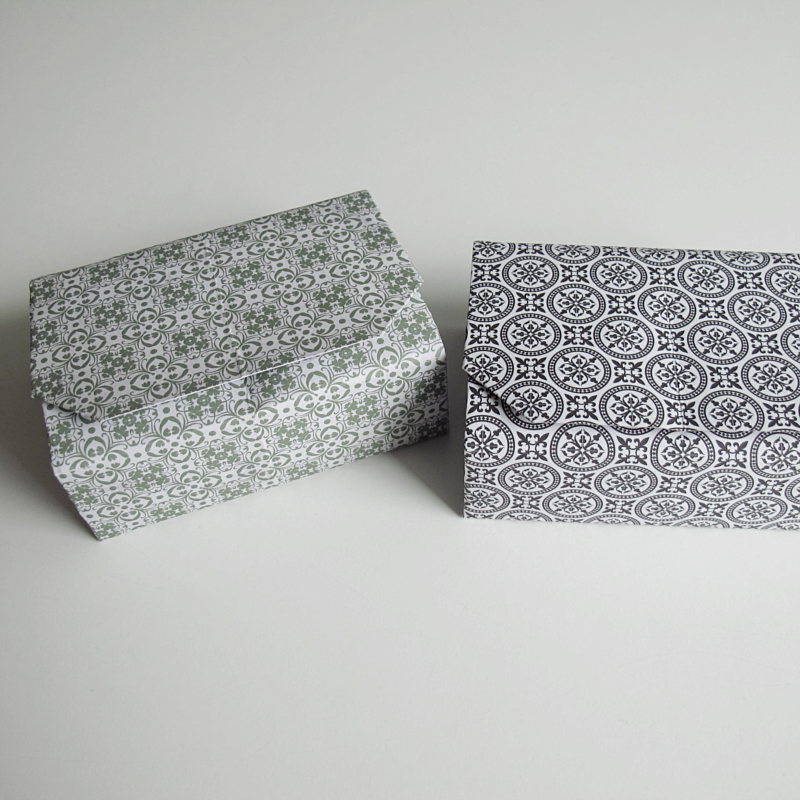
This might be the longest tutorial I have ever posted on the blog. It’s not hard to make, it’s just that I wanted to show you all the steps with pictures. I found another tutorial on how to make this online, but it didn’t have a lot of pictures and I found it pretty confusing. So here you have my tutorial on how to make a box using only one sheet of paper and no glue.
/// Det här kan nog vara den längsta beskrivning jag någonsin gjort på bloggen. Asken är inte svår att göra, men jag vill visa er varje steg med bilder. Jag hittade nämligen en annan beskrivning på nätet, men den hade inte bilder på de olika stegen och jag tyckte det blev en aning krångligt att följa med. Så här har ni min beskrivning på hur du gör en ask med endast ett ark papper och inget lim.
You’ll need:
→ A paper 30 x 30cm
/// Du behöver:
→ Ett papper 30x 30 cm
And this is how you do it:
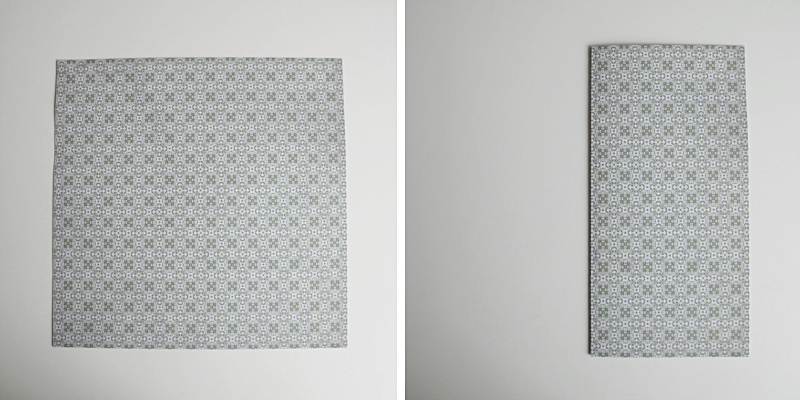
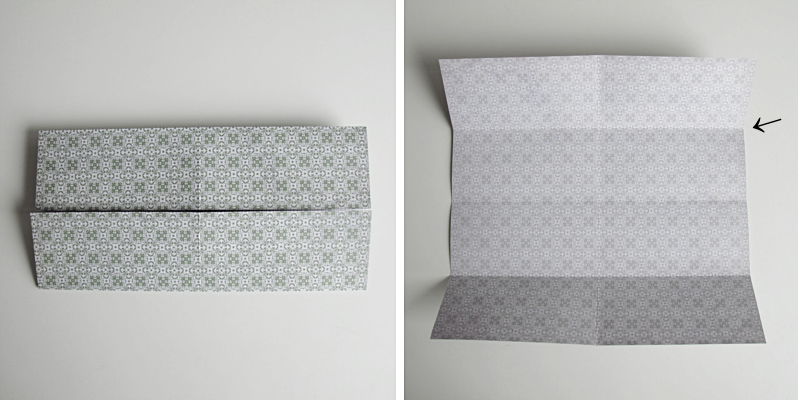
First you have to choose which side of the paper (if you use one with patterns) you want the outside of the finished box to have. Place that side facing down. Then fold the paper in half.
/// Börja med att bestämma vilken sida av pappret (om du använder ett med mönster) du vill ha på utsidan asken. Den sida som du väljer lägger du neråt. Vik sedan papperet på hälften.
Unfold and fold the other way. Unfold again and fold the bottom of the paper towards the middle.
/// Vik upp papperet igen och vik det sedan åt det andra hållet. Efter det viker du nederdelen av papperet mot mitten.
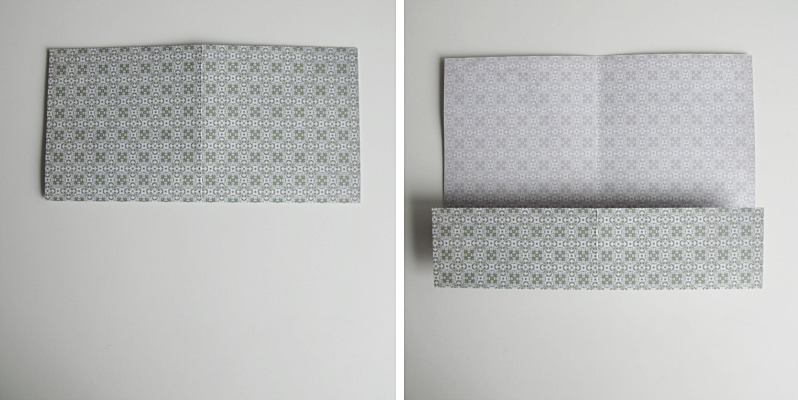
Fold the top of the paper towards the middle. Then unfold. Do you see that little arrow there?..
/// Vik ovandelen av papperet mot mitten. Vik sedan upp papperet. Ser du den där lilla pilen?..
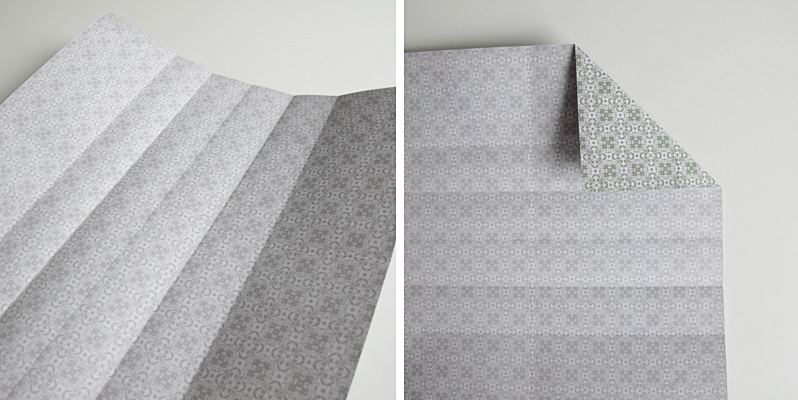
.. fold the bottom of the paper towards the folding where the arrow shows. Unfold. Then do the same with the top of the paper (but to the fold at the bottom)
/// …vik nederdelen av papperet mot viklinjen där pilen visar. Vik upp. Sedan gör du likadant med ovandelen av papperet (fast mot viklinjen längst ner)

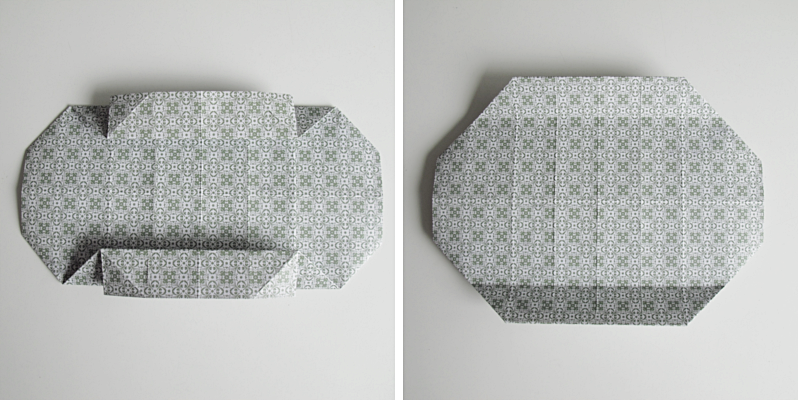
Now your paper should look like this. With five folded lines. Fold the corner to the second line from the top.
/// Nu borde ditt papper se ut så här. Med fem viklinjer. Vik in hörnet så att det möter den andra viklinjen uppifrån.
Repeat on all corners. Then turn your paper upside down.
/// Gör likadant på alla fyra hörnen. Sedan vänder du papperet upp och ner.
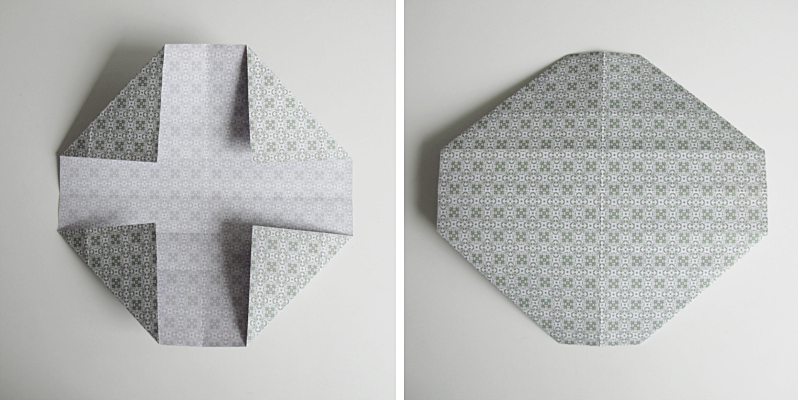
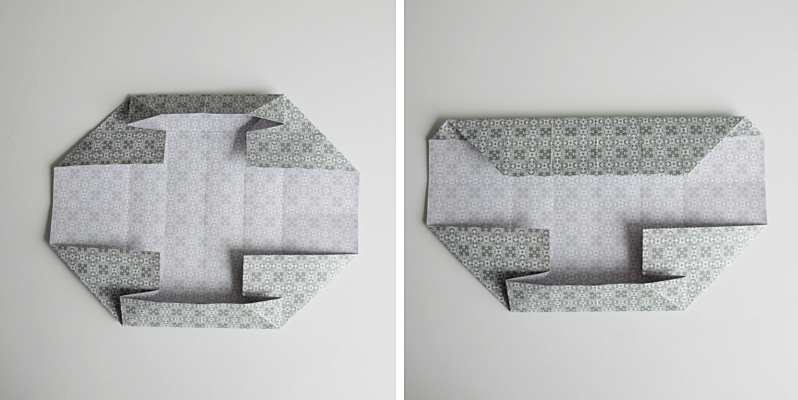
Rotate the paper 90° and fold the bottom of the paper toward the middle.
/// Vänd papperet 90° och vik upp botten mot mitten.
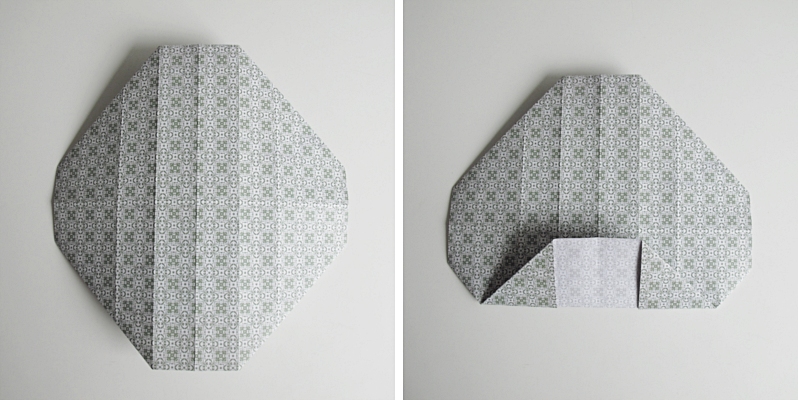
Fold the top to the middle too. Then you fold the bottom piece of paper in half.
/// Vik också ovandelen av papperet mot mitten. Vik sedan bottendelen på mitten.
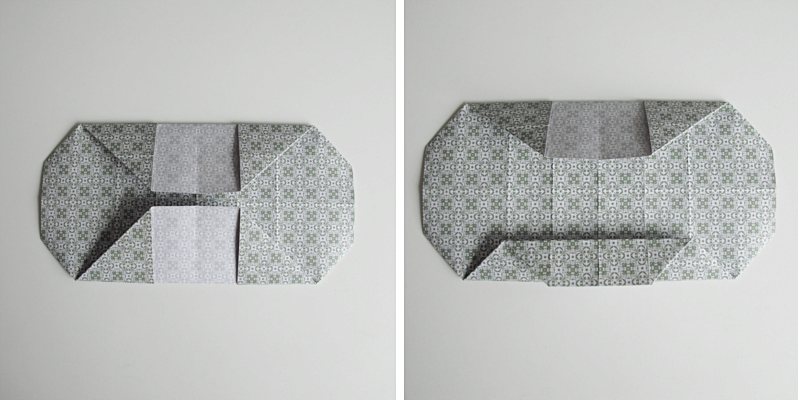
Do the same to the top. Then unfold the bottom.
/// Vik även ovandelen på mitten, och vik efter det upp bottenvikningen igen.
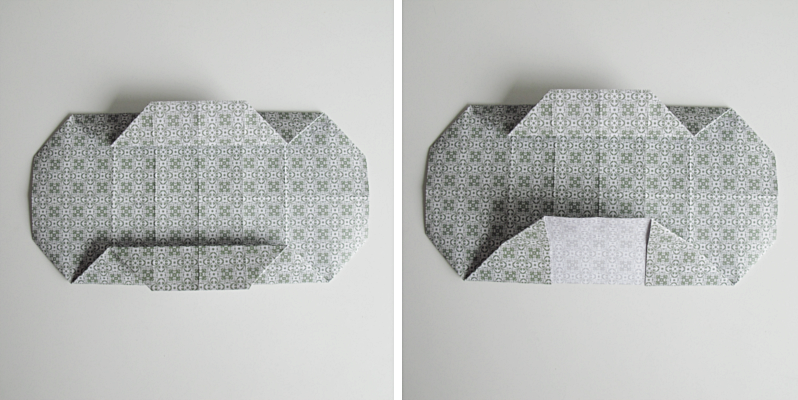
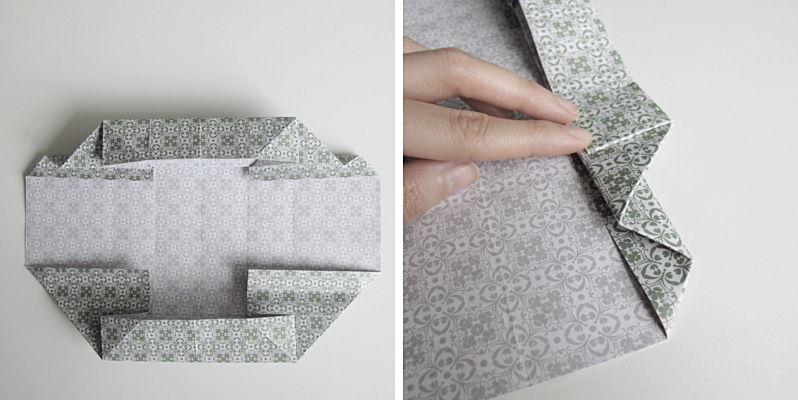
Use your finger to fold the flap to the side ..
/// Använd fingret för att vika ut fliken mot sidan..
..like this.
/// ..såhär.
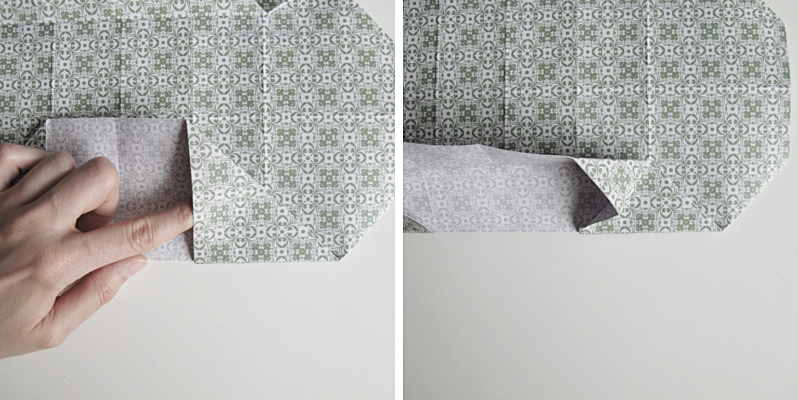
Repeat on all four flaps. Then unfold the bottom and the top like the picture shows.
/// Gör likadant på alla flikar. Sedan viker du upp ovandelen och botten som bilden visar.
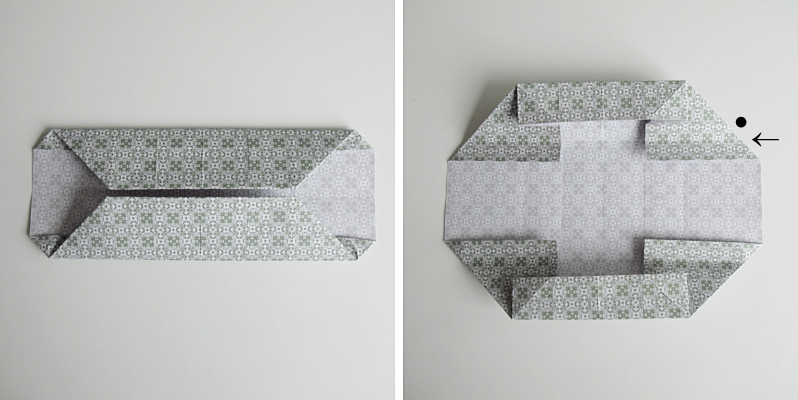
Turn the paper upside down and it should look like this. Then fold the top of the paper towards the middle.
/// Vänd på papperet och det borde se ut såhär. Vik därefter ovandelen av papperet mot mitten.
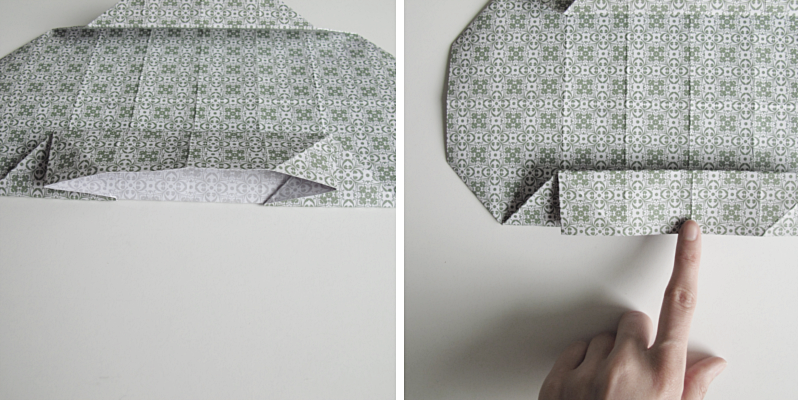
And then the bottom to the middle too. Unfold. Now it’s time to fold the paper again at the fold you just did (the arrow) but at the same time you fold where the dot is…
/// Vik också botten av papperet mot mitten. Vik sedan upp igen. Nu ska du vika igen där du precis vikt (där pilen är) men samtidigt ska du också vika där pricken är..
..like this.
/// .. såhär.
Repeat on the other side too. Then turn the paper 90°.
/// Gör likadant på andra sidan. Vrid sedan papperet 90°.

Fold along the lines, where the arrows shows. (We folded lines here in an earlier step so it shouldn’t be to hard to fold). Repeat on the other side.
/// Vik längst med de viklinjer där pilarna visar. (Vi har redan vikt här i ett tidigare steg så det borde gå ganska lätt). Gör likadant på andra sidan.
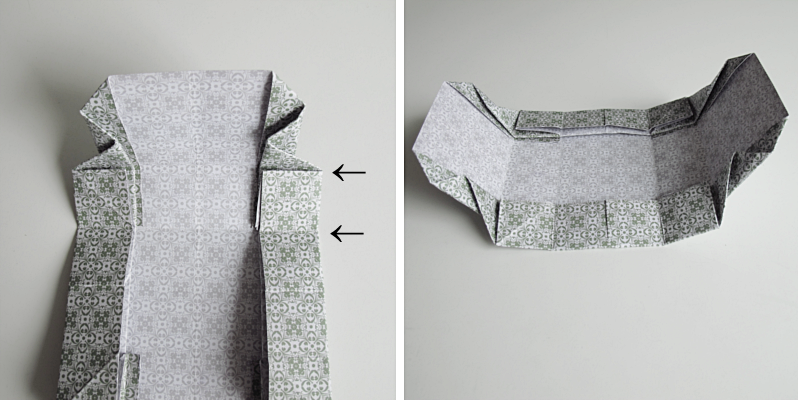
Now you’re going to gently pull the flap towards the middle.
/// Dra försiktigt papperet mot mitten.
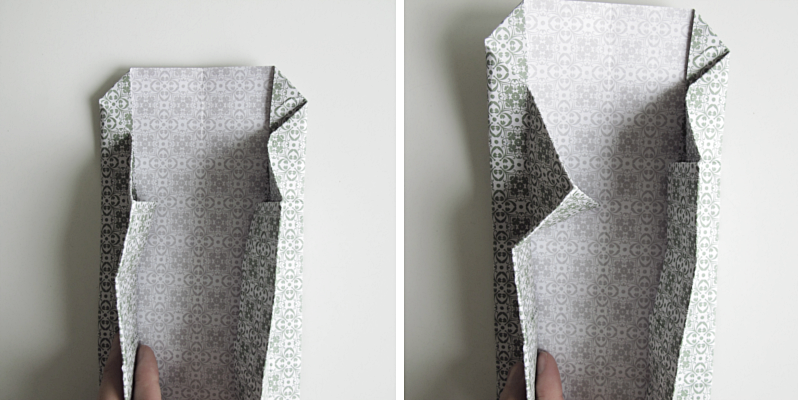
And on the other sides too.
/// Gör likadant på alla fyra sidor.
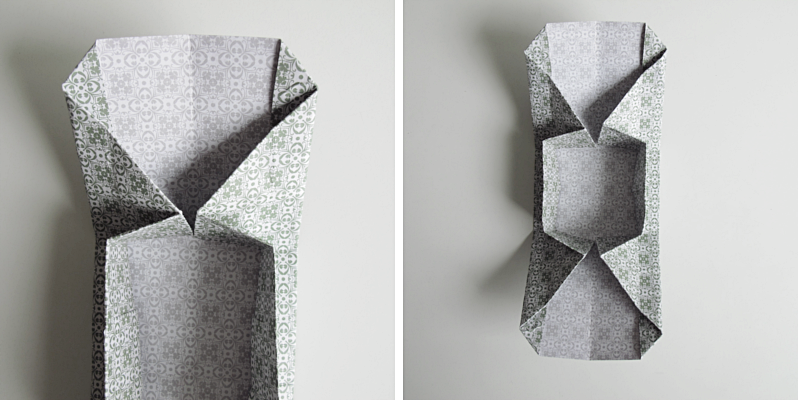
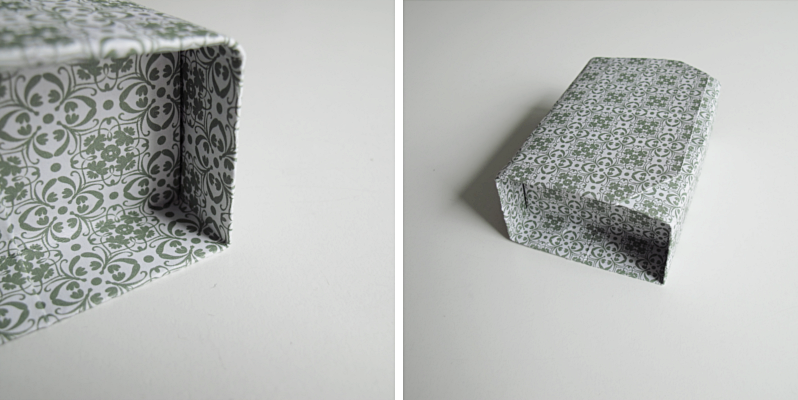
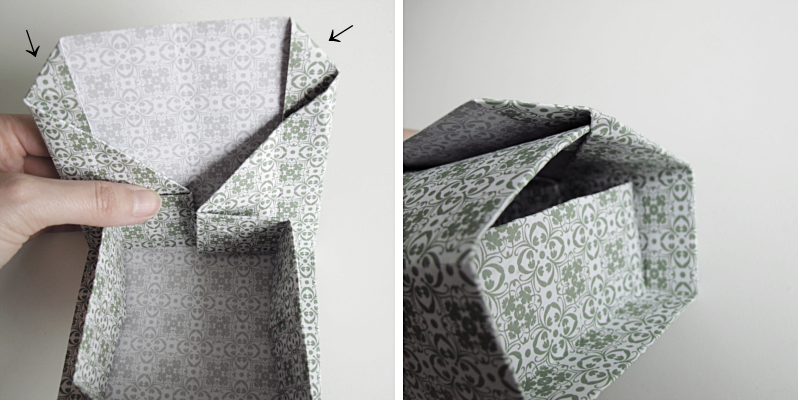
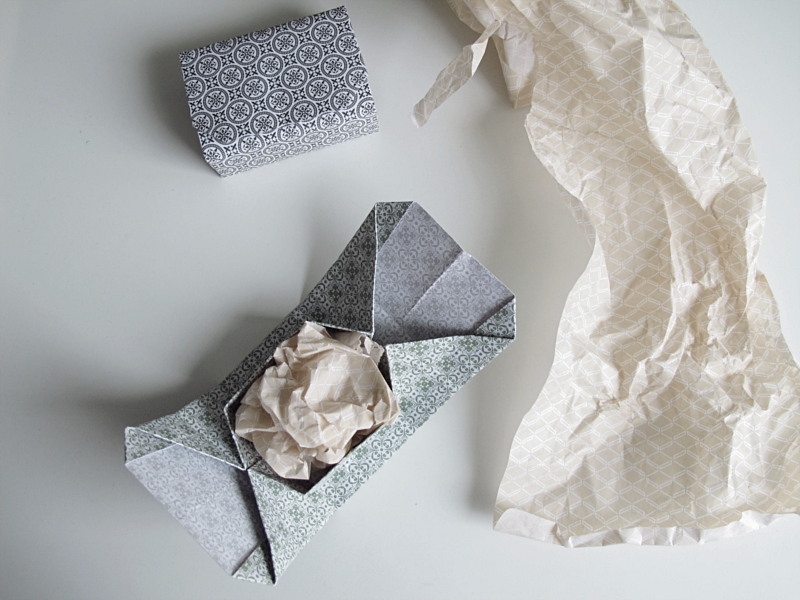
And gently press. And you are done! To close the box you slide the paper (where the arrows are) on one side into the other side.
/// Tryck till lite i vikningarna. Och du är klar! För att stänga asken så skjuter du in ena änden av papperet (där pilarna är) i den andra änden.

This paper diamond
This paper flower
These origami balls