Menu Close

Category: DIY – OTHER (page 7 of 11)

BEADS

beads

beads

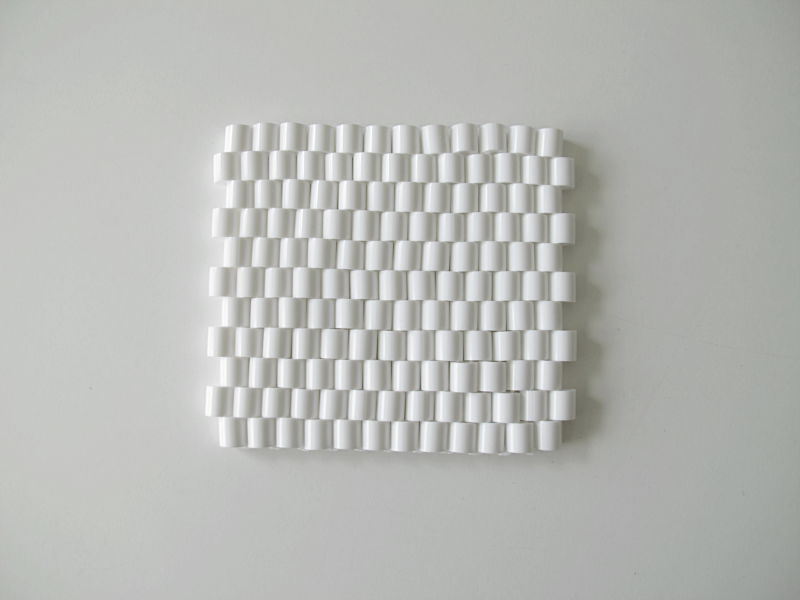
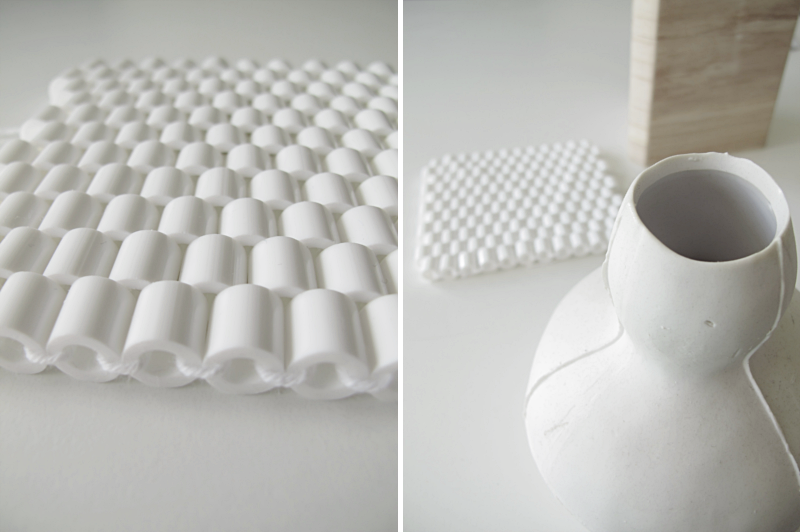
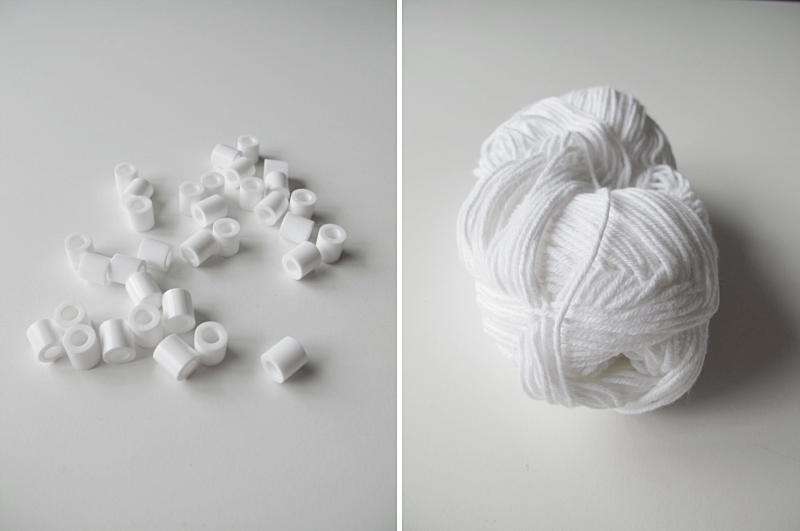
Today I´m going to show you another diy with beads. This is not really a tutorial for something specific, it’s more of a I’m-going-to-show-you-the-technique post. For this you need beads and some thread. I used Hama Maxi beads.

/// Idag tänkte jag visa er ett till diy med pärlor. Det är inte riktigt en tutorial för något specifikt, utan mer för att visa tekniken. Till detta behöver du pärlor och tråd. Jag använde Hama Maxi pärlor.

beads

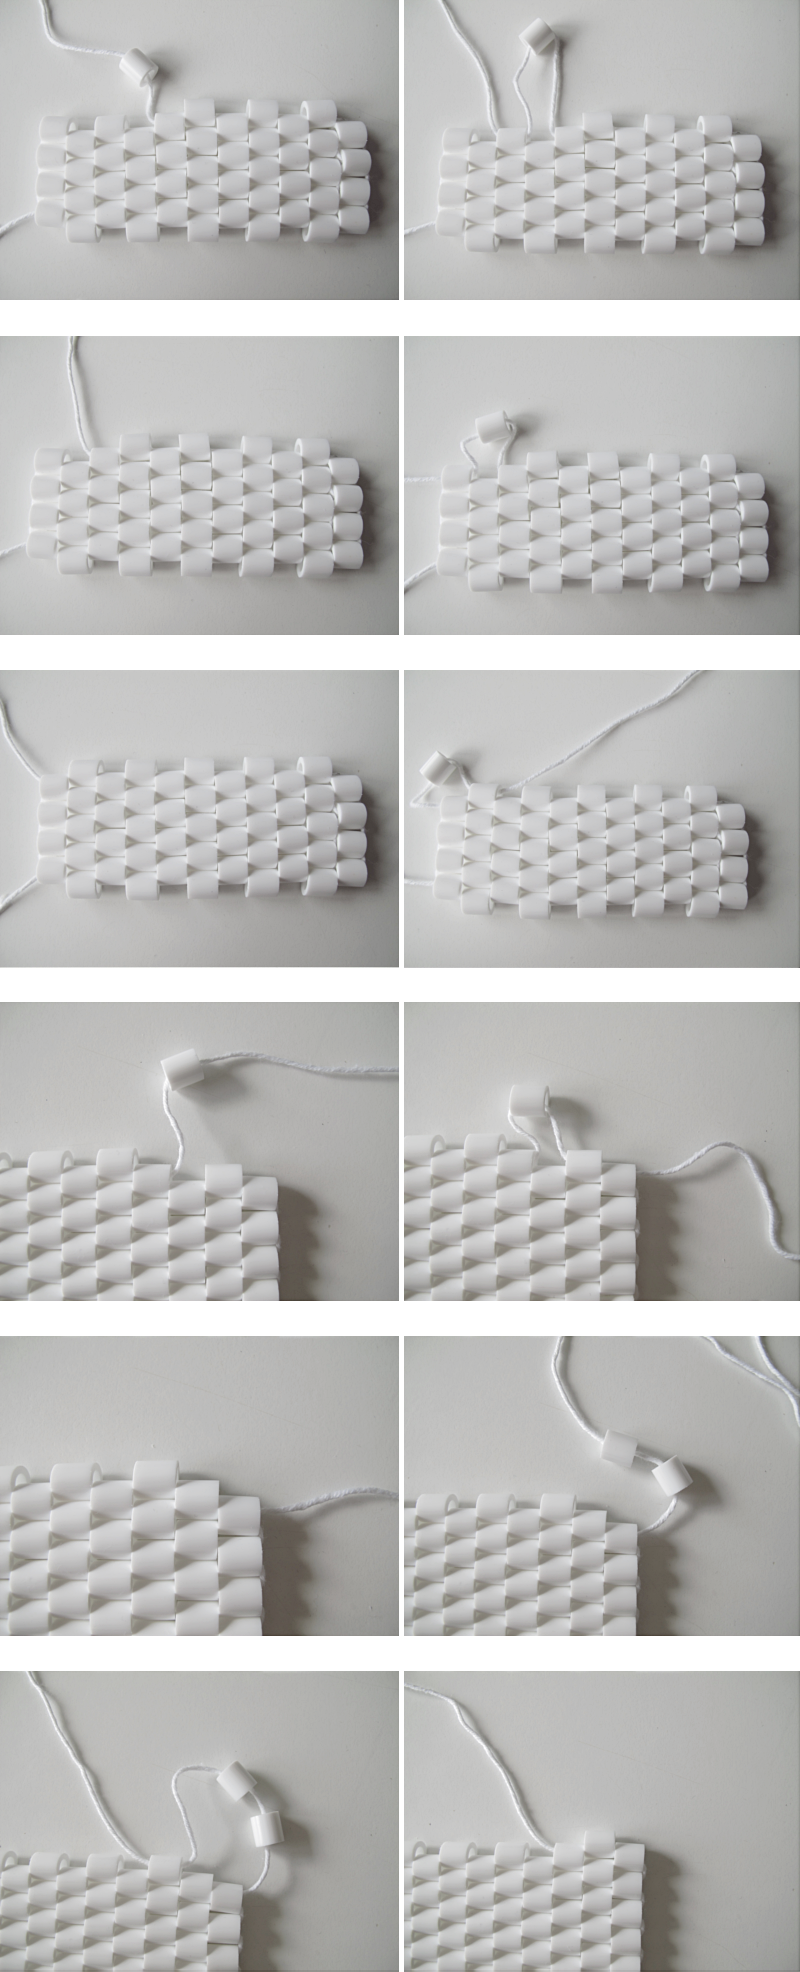
And here is how you do it:

/// Och så här gör du:

beads

BRAID

braid

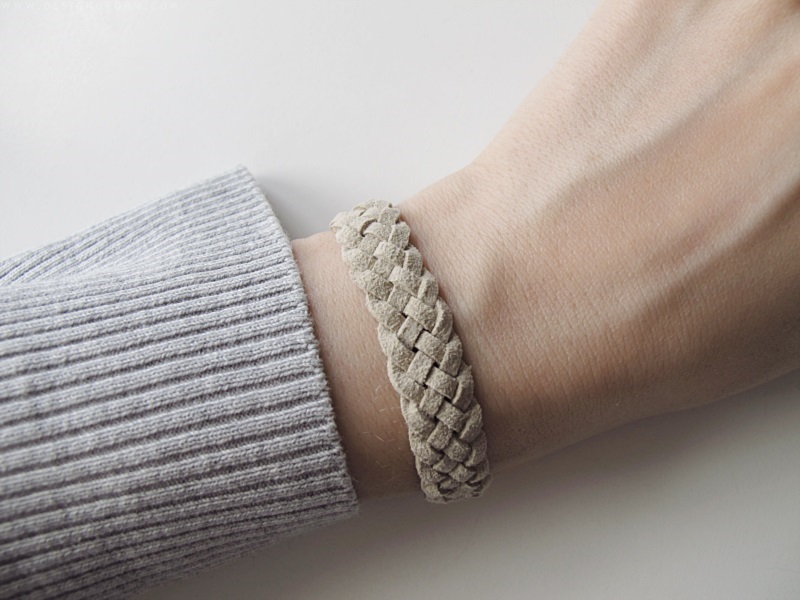
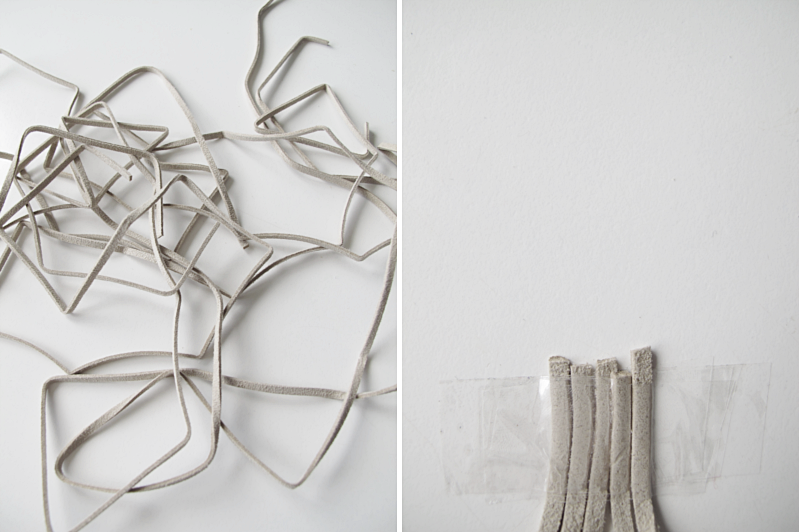
Today I’m going to show you how to make a five-strand-braid. First you want to attach the threads to a plane surface.

/// Idag tänkte jag visa er hur man gör denna fläta med fem snören. Börja med att fästa snörena på en plan yta.
braid

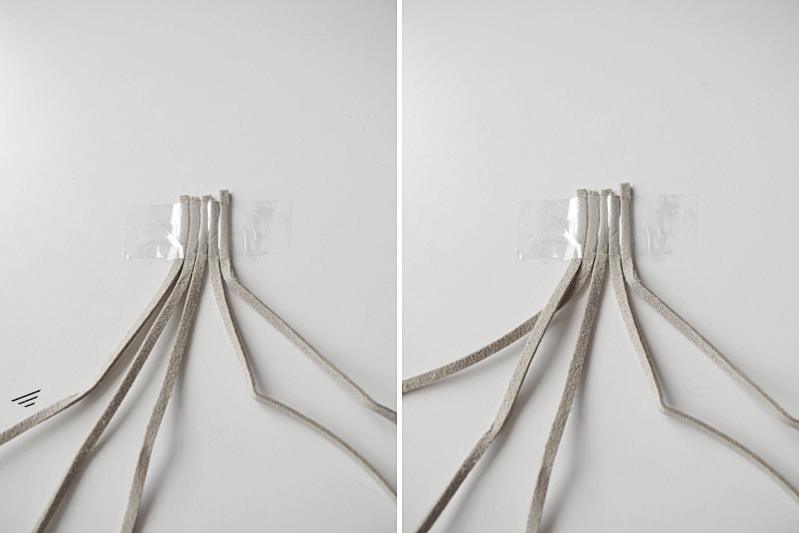
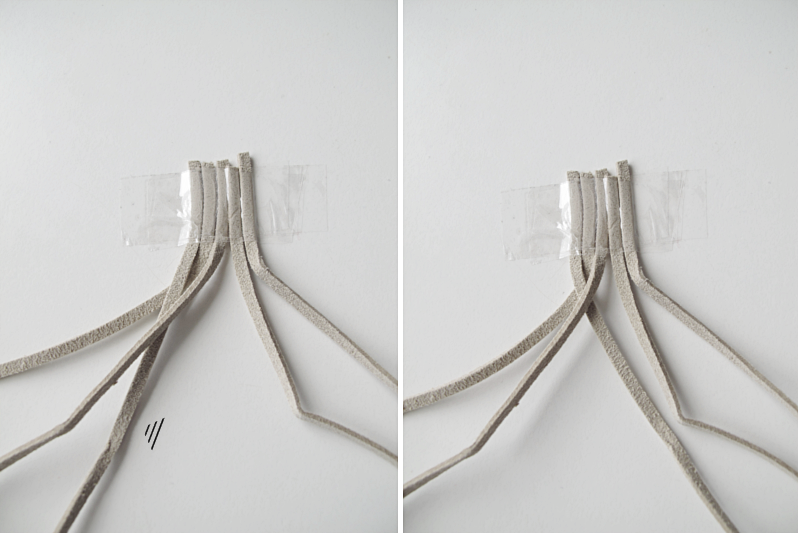
Divide the threads so that you have three on the left side and two on the right. Then start with the left side: Take the thread with the arrow, and place it over the thread next to it.

/// Dela upp snörena så att du har tre på vänstra sidan och två på högra. Så är det dags att börja på vänster sida: Ta snöret med pilen, och lägg den över snöret bredvid.
braid

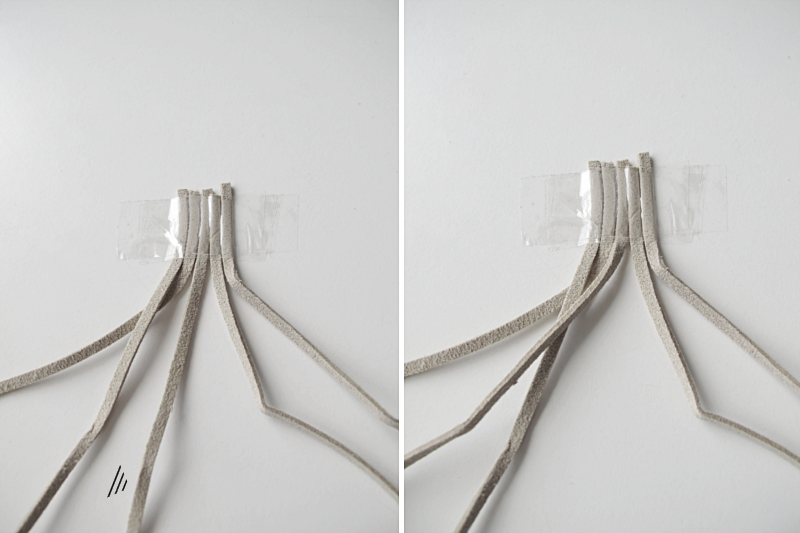
Take the thread with the arrow and place it over the thread to the left.

/// Ta snöret med pilen och lägg den över snöret till vänster.
braid

Take the thread with the arrow and move it over to the right side.

/// Ta snöret med pilen och flytta över den till höger sida.
braid

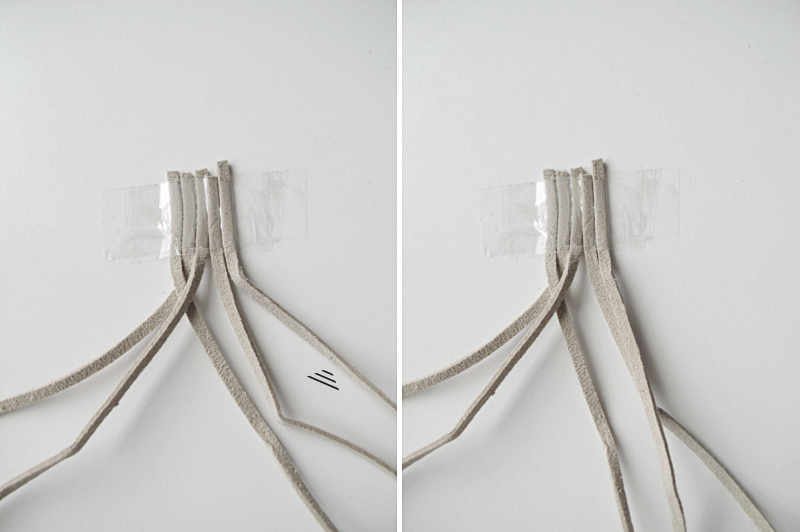
Then continue with the right side. This is actually the same as we did on the left side. Only mirrored. Take the thread with the arrow and place it over the thread next to it.

/// Och nu fortsätter vi på höger sida. Du ska göra precis som vi gjorde på vänster sida. Bara spegelvänt. Ta snöret med pilen och lägg den över snöret bredvid.
braid

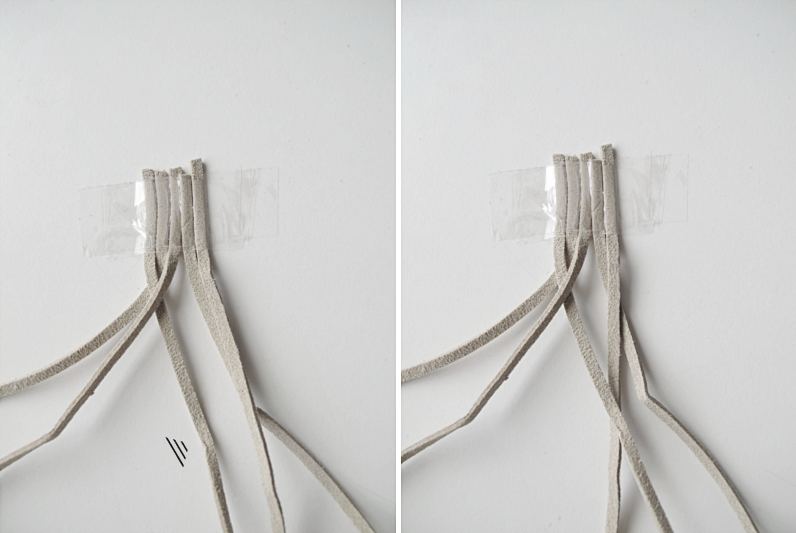
Take the thread with the arrow, and place it over the thread to the right.

/// Ta snöret med pilen, och lägg den över snöret till höger.
braid

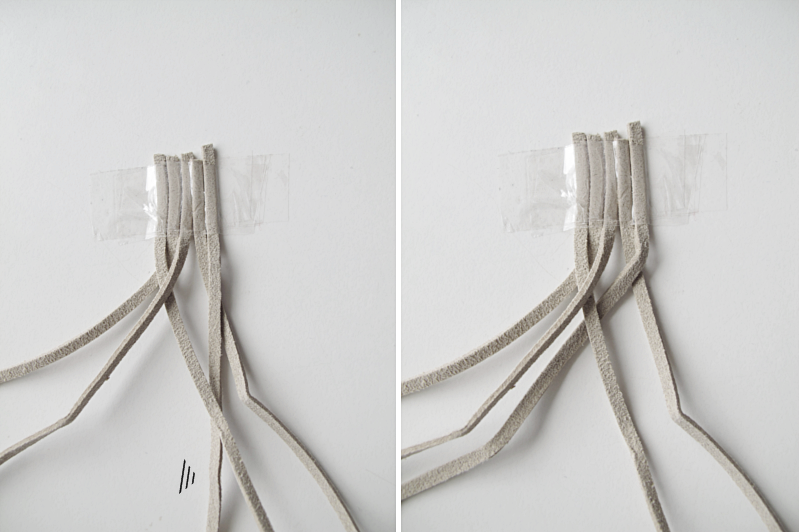
Move the thread with the arrow over to the left side and start from the beginning again. (from: ..start with the left side ). Repeat these steps until you have the length that you want. If you’re making a bracelet you can use one of these as a lock.  Good luck!

/// Flytta över snöret med pilen till vänster sida och starta om från början igen. (från: ..börja på vänster sida.) Så alternerar du dessa sidor tills det att du har den längden du vill på flätan. Om du vill använda flätan som armband kan du använda dessa som lås. Lycka till!
braid

braid

BEFORE AND AFTER

skallens

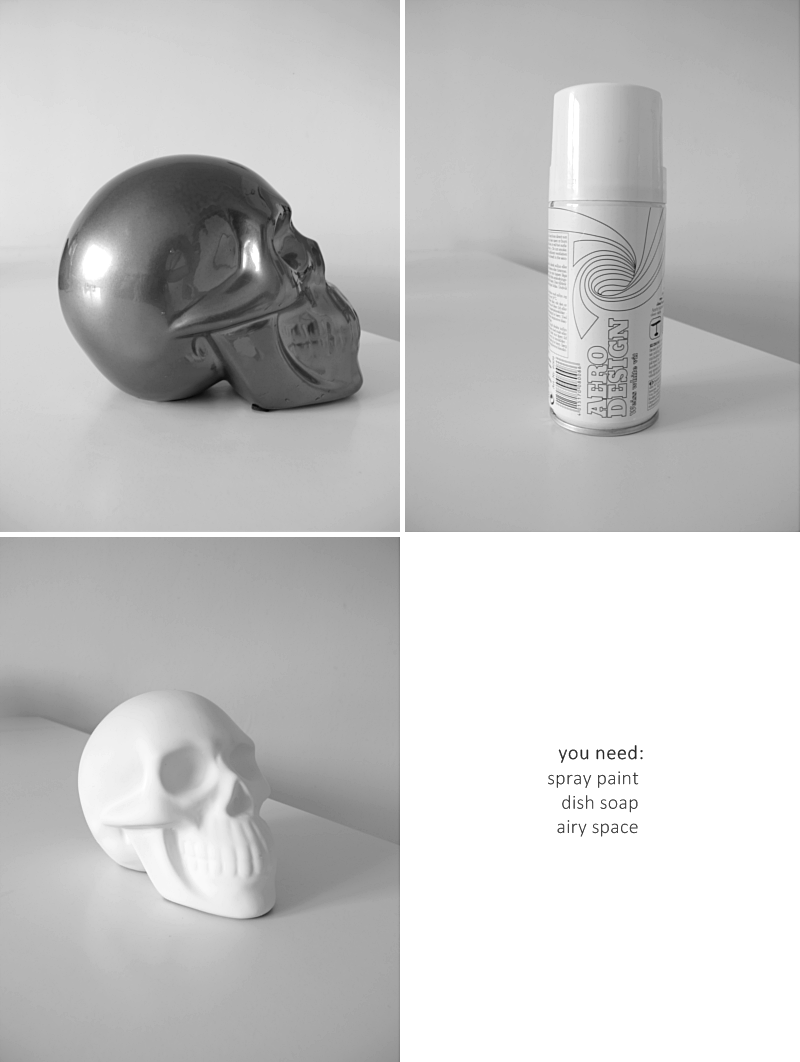
I like skulls, but I haven´t found a single one in my home town. And I don´t want to spend a lot of money on ordering it online. So I decided to “make” one myself. Found this piggy bank at Åhlens for 12 dollars, bought some white spraypaint and just like that, I have a new skull. I cleaned the skull before I sprayed it with regular dish soap.

/// Jag gillar döskallar men jag har inte hittat en enda skalle här där jag bor. Jag vill inte heller betala för mycket för att beställa den på nätet. Så jag bestämde mig för att “göra” en själv. Hittade denna spargris på Åhlens för 79kr, som jag sprejade med vit matt sprayfärg och vips så fick jag mig en döskalle. Rengjorde den innan med vanligt diskmedel.

PATTERNED ENVELOPES

diy

diy

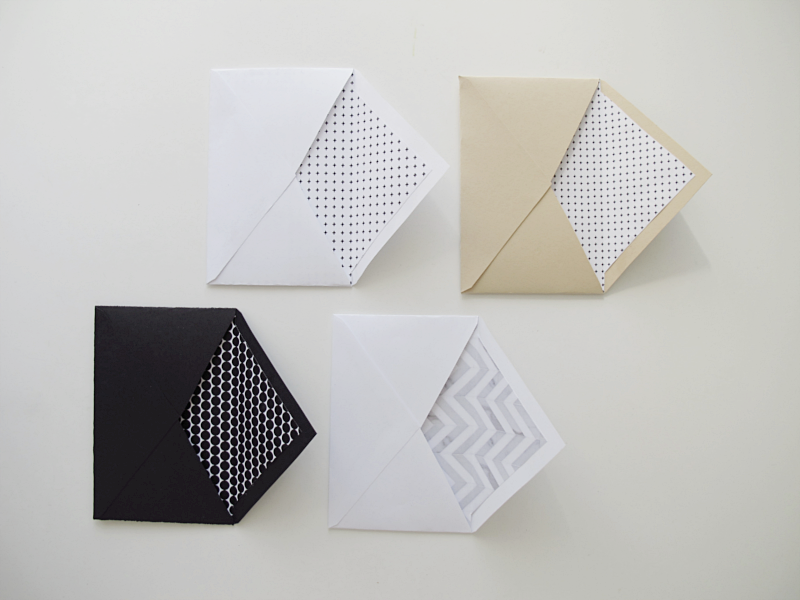
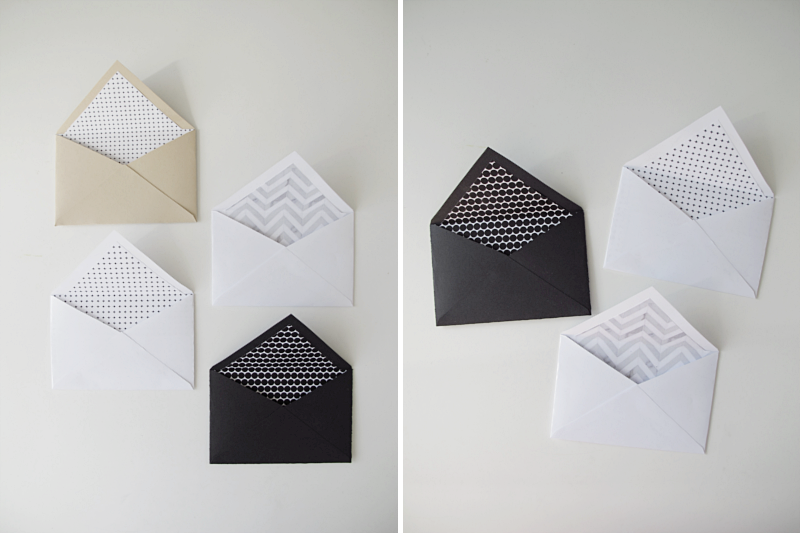
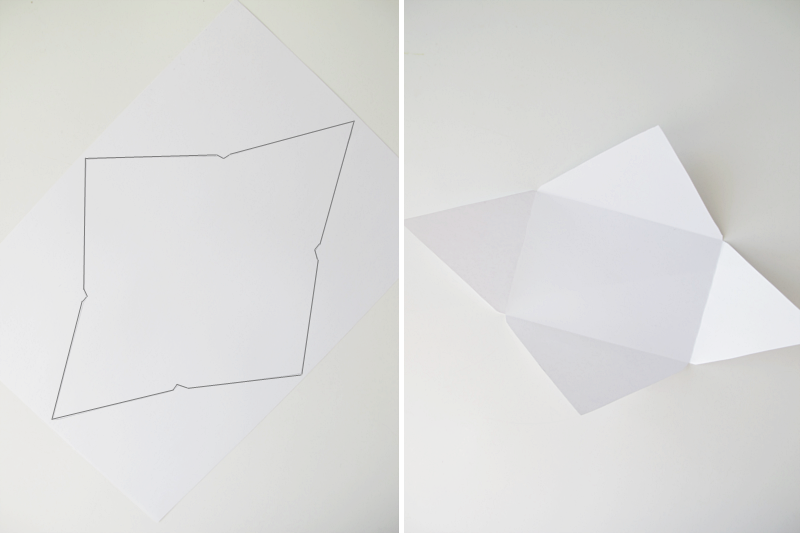
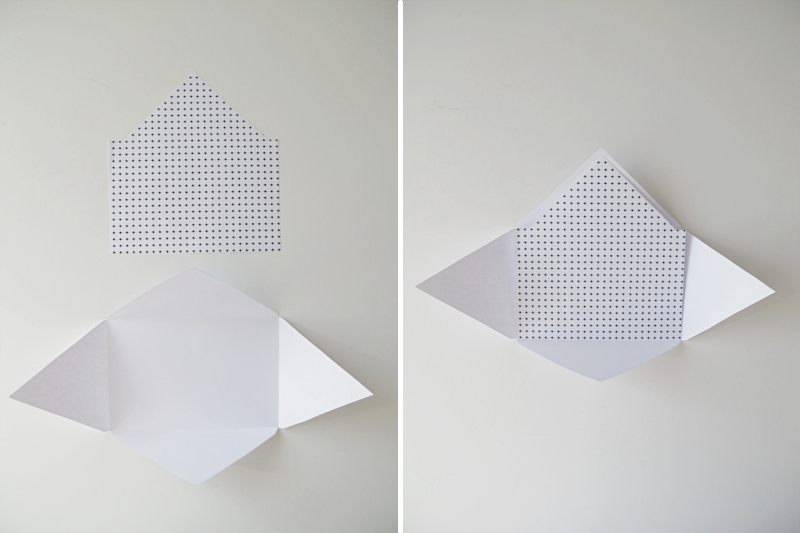
Todays diy shows a really easy way to update your envelopes. To make them more personal. First you take an envelope you already have at home, and use that as a template. Cut it out and fold.

/// Dagens diy är superenkelt. Och visar hur du snabbt uppdaterar dina kuvert, och gör dem mer personliga. Börja med att leta åt ett kuvert som du redan har hemma och använd det som mall. Rita av, klipp ut och vik.

diy

Then you take a paper with a pattern you like and cut it into this shape. As big as the front of the envelope, but with an extra triangle on top. 1cm smaller than the envelope, on two of the sides.

/// Sedan tar du ett papper med ett mönster du gillar, och klipper det i denna form. Lika stor som framsidan på kuvertet, men med en extra triangel uppe på. Två av sidorna ska vara 1cm innanför kanten.

diy

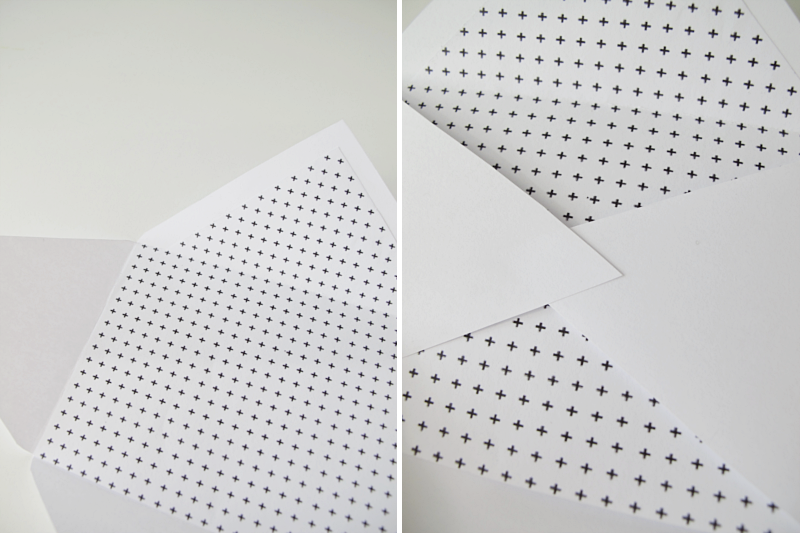
Glue the patterned paper on to the envelope, and then glue the two sides together.

/// Limma fast det mönstrade papperet, och limma sedan ihop de två sidorna.

diy

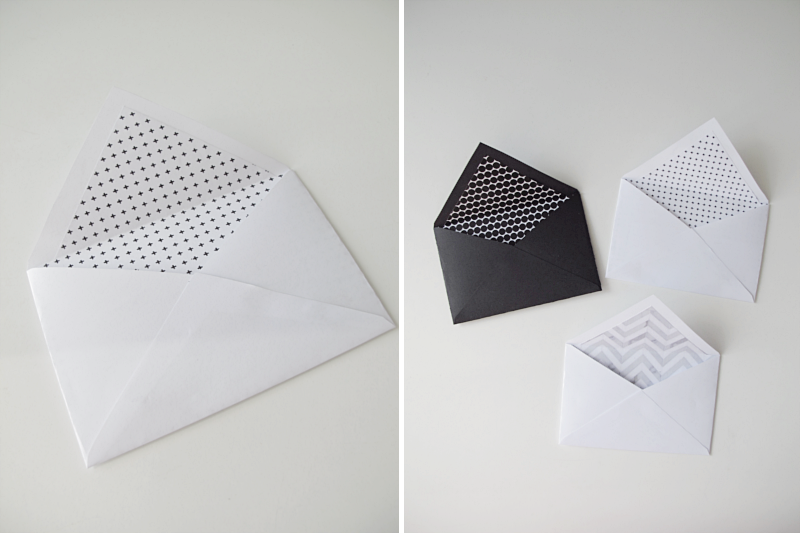
Glue the bottom piece to the sides and you are done! Easy, wasn´t it?

/// Avsluta med att limma fast botten med sidorna och du är klar! Enkelt va?

diy

NINE SMALL FIGURES

tavla

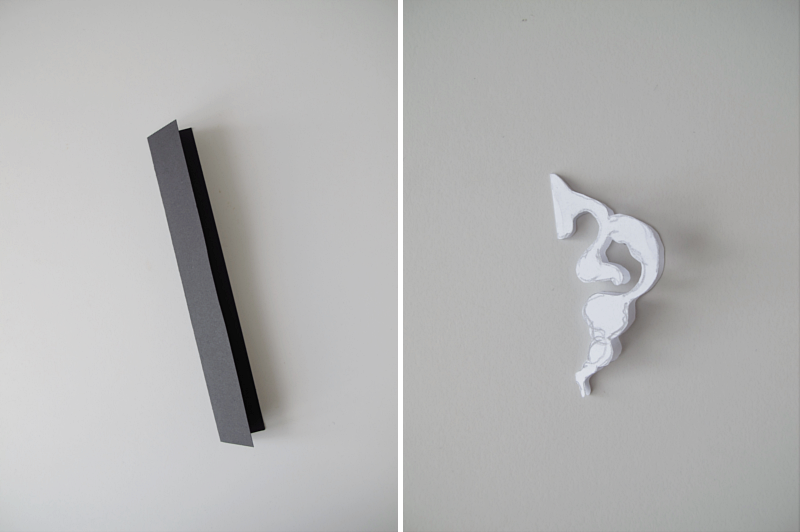
I made a framed poster the other day using some of the figures I did in this post. I think it turned out great so I wanted to show you how I did, if you want one too. First you take one black paper and one white paper and fold them in half. Then you take the white paper and draw one of the figures on it.

/// Jag gjorde en tavla häromdagen med hjälp av de små krumelurerna jag gjort i detta diy. Det var väldigt enkelt, så jag tänkte visa er hur jag gjort, ifall ni vill ha en likadan. Jag började med att vika ett svart papper och ett vitt papper på mitten. Sedan ritade jag av en av krumelurerna på det vita papperet.

tavla

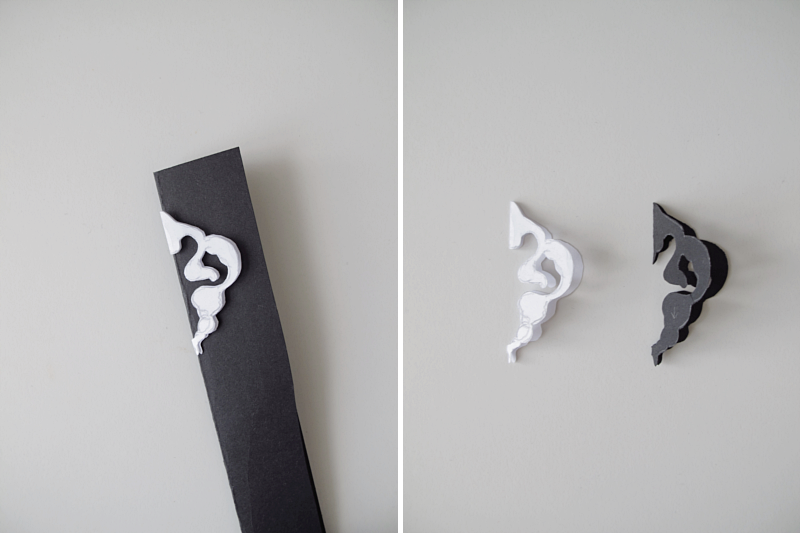
Place the white paper figure on top of the black paper and draw it on. And then cut it out.

/// Sedan lade jag den vita figuren uppe på det svarta papperet och ritade av den. Och så klippte jag ut den.

tavla

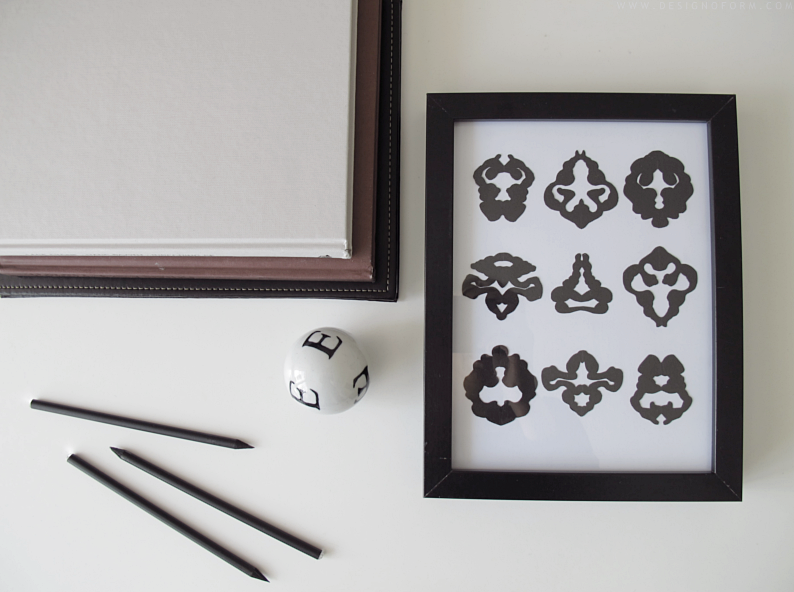
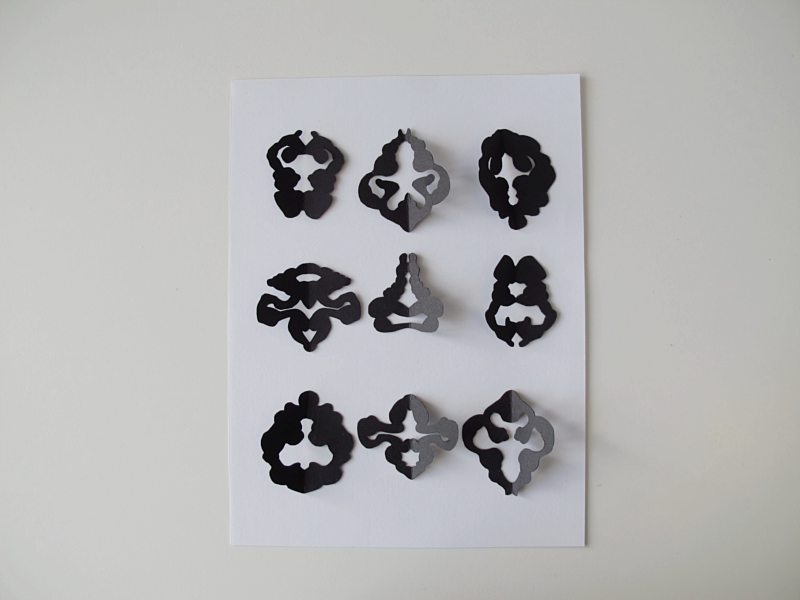
Make 9 different figures. Move them around until you´re happy with the composition and then glue them on the paper.

/// Jag gjorde 9 olika små figurer, och flyttade runt dem tills jag var nöjd. Sedan var det bara att limma fast dem.

tavla

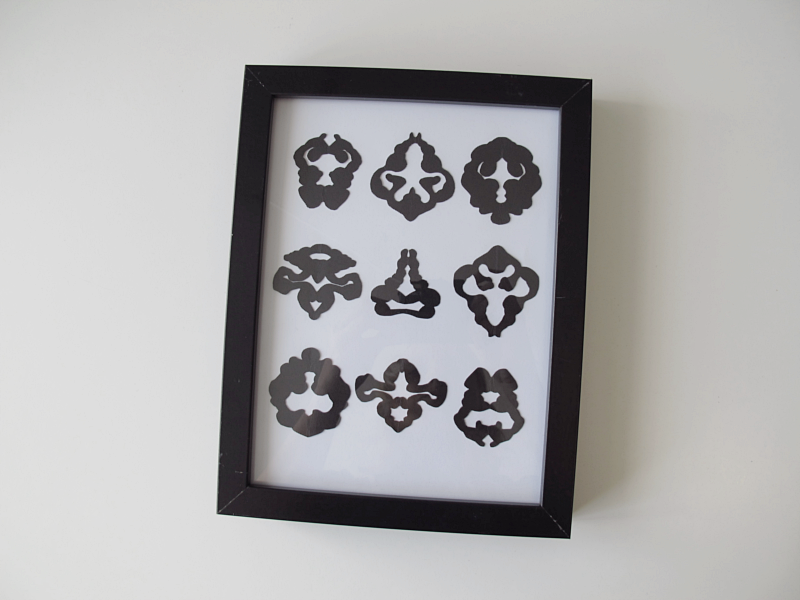
And then frame it. Done! (If you wonder why I folded the black paper in half, it´s just because I found it easier to cut the holes in the middle of the figure with a small pair of scissors. If you don´t fold it you have to use a paper knife to cut the holes. )

/// För att sedan rama in. Klart! (Om du undrar varför jag vek det svart papperet på mitten så beror det bara på att jag tycker det är enklare att klippa ut håligheterna i mitten på krumelurerna med sax istället för med papperskniv som man måste använda om man inte viker)

tavla