Menu Close

Month: February 2013 (page 2 of 2)

INSTA

instagram

@designoform

1. I started on a Kate Moss drawing 2. My favorite pic of Robbie Williams 3. A wooden bead project that never finished 4. Paper diamond 5. A little moodboard 6. More paper diamond 7. Boo.. 8. “Always be yourself. Unless you can be a unicorn” 9. Patterns in the making.

/// 1. En Kate Moss teckning jag börjat på 2. Min favoritbild på Robbie Williams 3. Ett träpärleprojekt som aldrig blev klart 4. Diamanten  5. En liten samling finbilder 6. Mera pappersdiamant 7. Buu.. 8. Monki vet var de talar om: “Always be yourself. Unless you can be a unicorn” 9. Bild från mönstertillverkningen

DIY BOXES

boxes

Make a figure like this using these measurements. You can leave the pencil lines for now. It makes it easier to fold later on

/// Gör en figur med dessa mått. Du kan låta blyertsstrecken vara kvar. De gör det enklare att vika senare.

boxes

Cut where the brown lines are /// Klipp där de bruna strecken finns.

boxes

Fold all the remaining lines (the ones you did with the pencil)

/// Vik vid de andra linjerna. (dom du gjorde med blyertspennan)

boxes

Put some glue on the corner piece and fold it towards you /// Limma hörnbiten och vik in den, mot dig

boxes

Glue the remaining corners /// Limma de andra tre hörnen.

boxes

Make two more pieces. 11cmx4,5cm with a fold allowance of about half a cm. Then fold it.

/// Klipp två nya bitar. Med måtten 11×4,5 cm med en vikmån på ungefär en halv cm på tre av sidorna. Vik sedan in vikmånen.

boxes

Glue the new pieces onto the box. /// Limma fast de nya bitarna på lådan.

boxes

And you are pretty much done. If you want something to keep the box closed, you can use a piece of elastic band. Good luck!

/// Och nu är du färdig. Om du vill ha något som håller lådan stängd kan du använda ett tunt resårband. Lycka till!

boxes

boxes

boxes

( And sorry for the different quality of the pictures in this post. I´m still struggling learning my “new” camera.)

LOTTA

lottaagaton

You know what, I don´t even care if you seen these pictures from stylist Lotta Agatons home a million times before. I love them, so you just have to put up with them a million and one time!

/// Vet ni vad. Jag bryr mig inte om ni redan sett dessa bilder på Lotta Agatons hem en miljon gånger redan. Jag tokgillar dem, därför får ni helt enkelt stå ut med dem en miljon och en gång!

Fo: Pia Ulin | Styling: Lotta Agaton

TOWELS

towels

Just found these kitchen towels at Ilva called Waffel. I like!

/// Hittade just dessa kökshanddukar hos Ilva med namnet Waffel. Finfint!

PAPER DIAMONDS

diamond

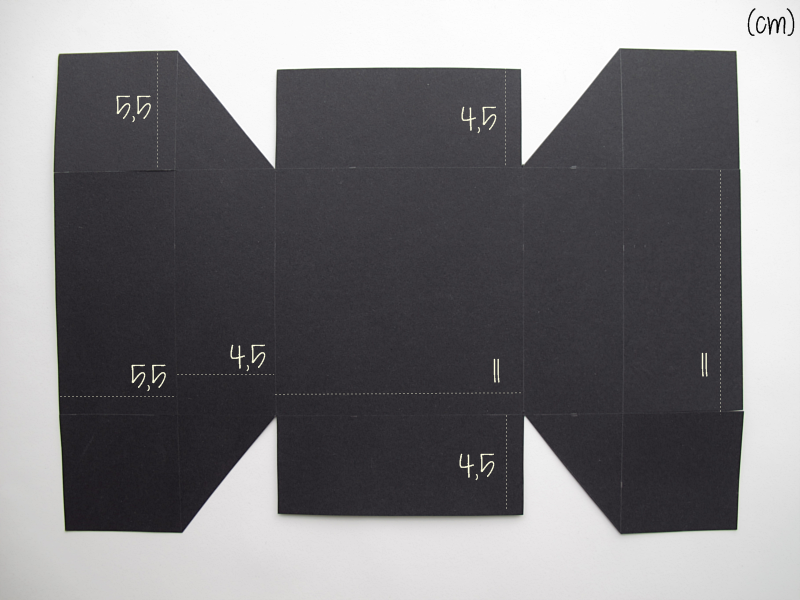
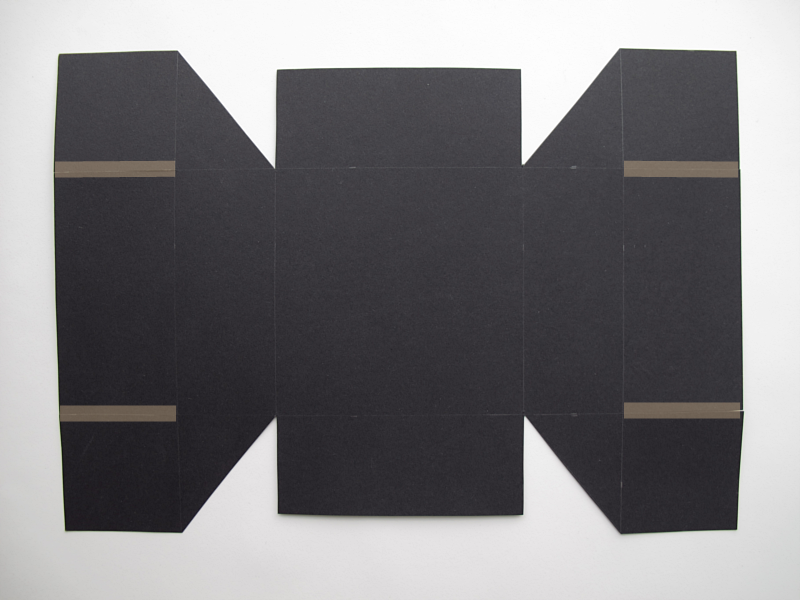
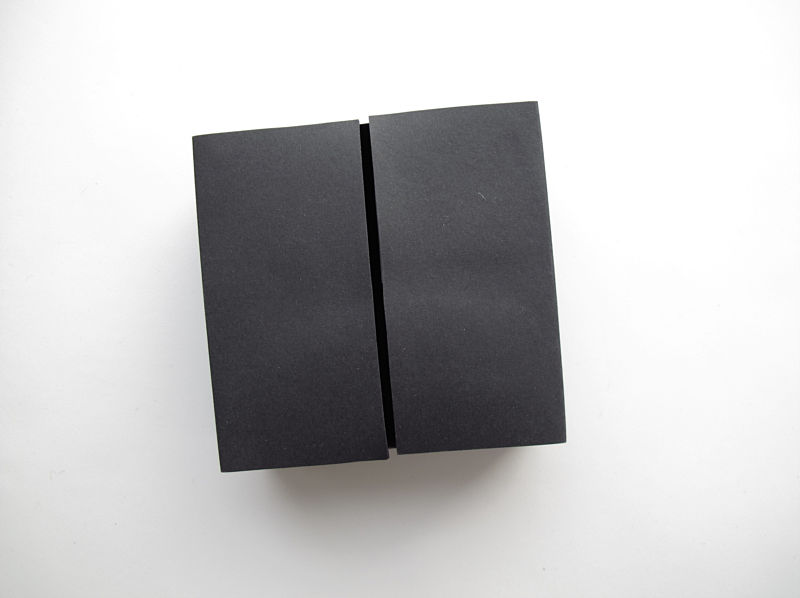
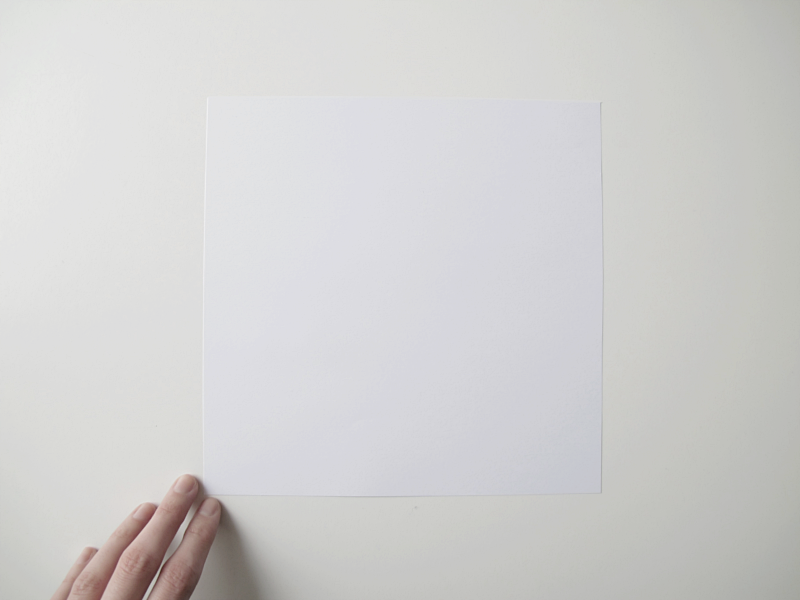
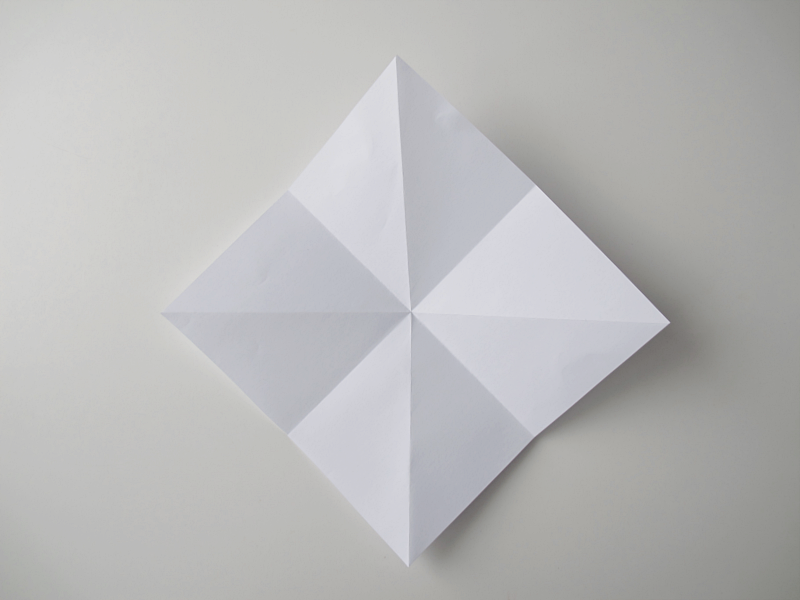
Start with a square of paper /// Börja med en fyrkant

diamond

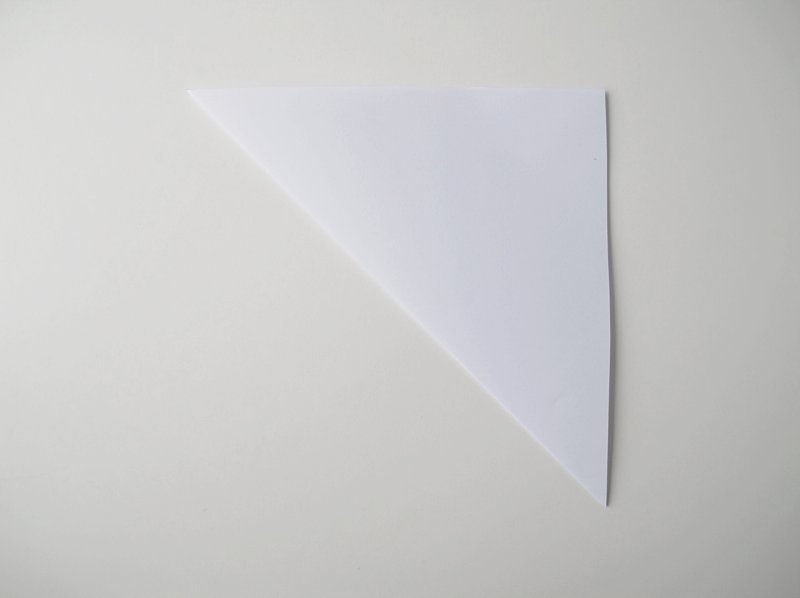
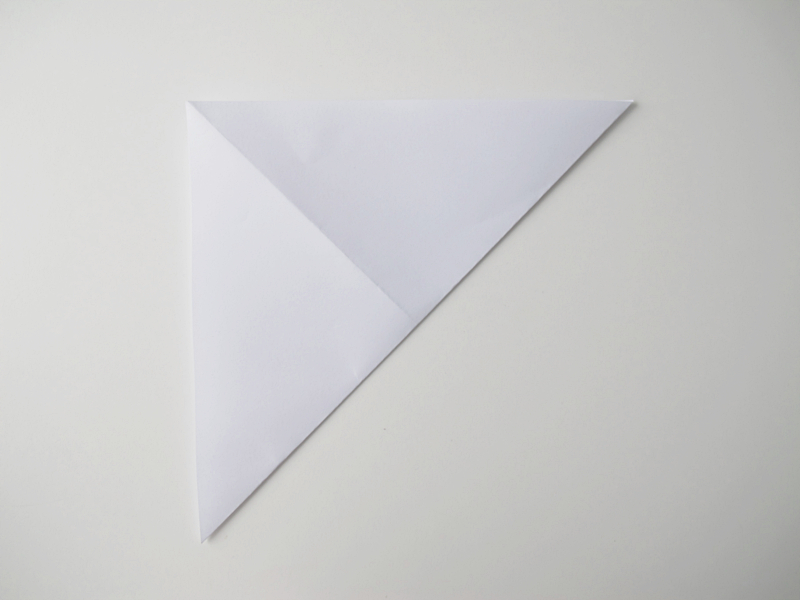
Fold it from one corner to the other /// Vik från ett hörn till det andra

diamond

Unfold and fold it the other way. From corner to corner /// Vik upp den och vik från det andra hållet. Hörn till hörn.

diamond

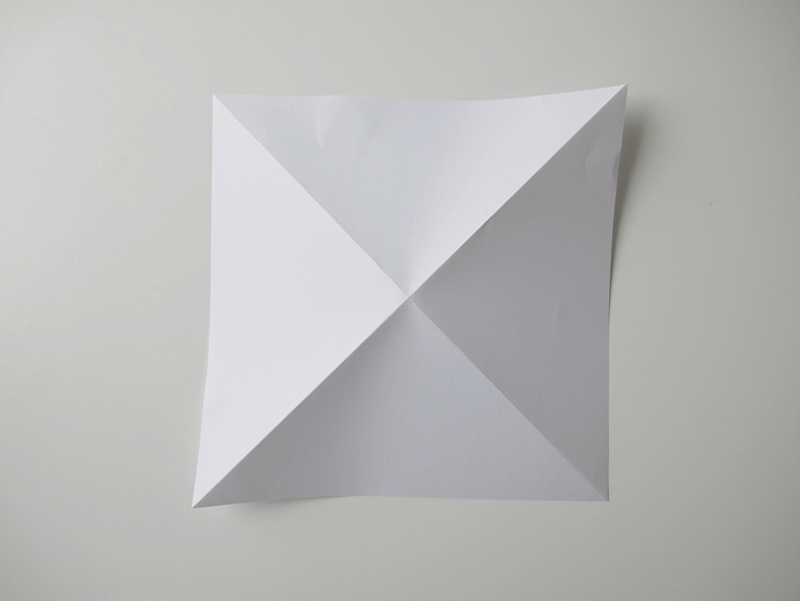
Unfold and turn it over so it looks like this: /// Vik upp och vänd på den så att den ser ut så här:

diamond4

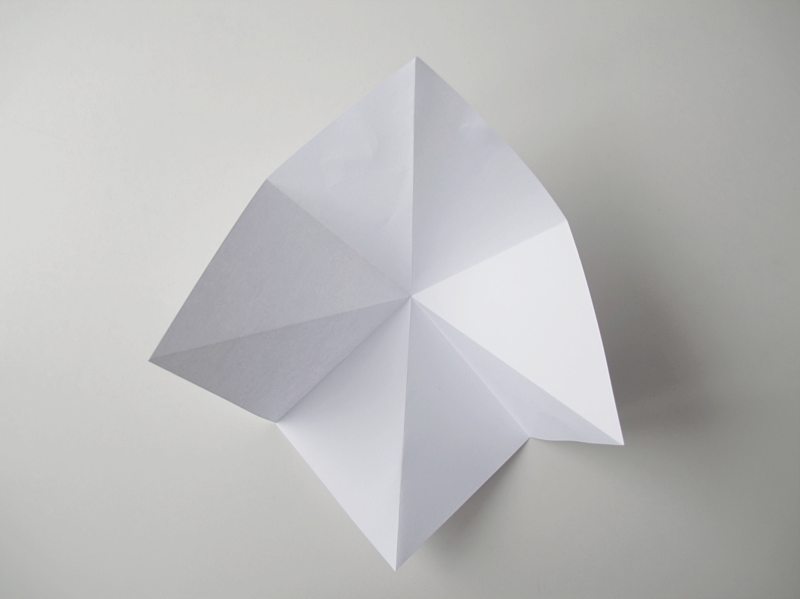
Fold the bottom part to the top /// Vik nedre delen mot den övre

diamond

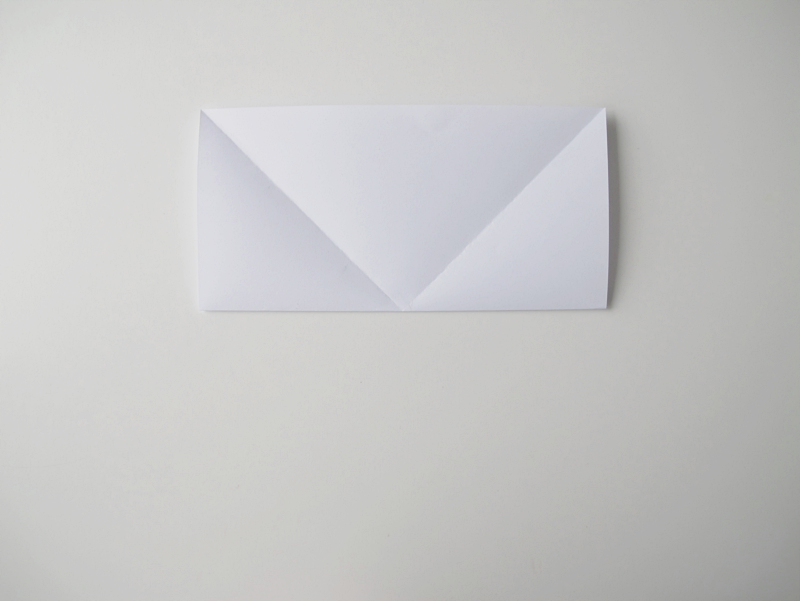
Unfold and fold it the other way /// Vik upp och vik den åt andra hållet.

diamond6

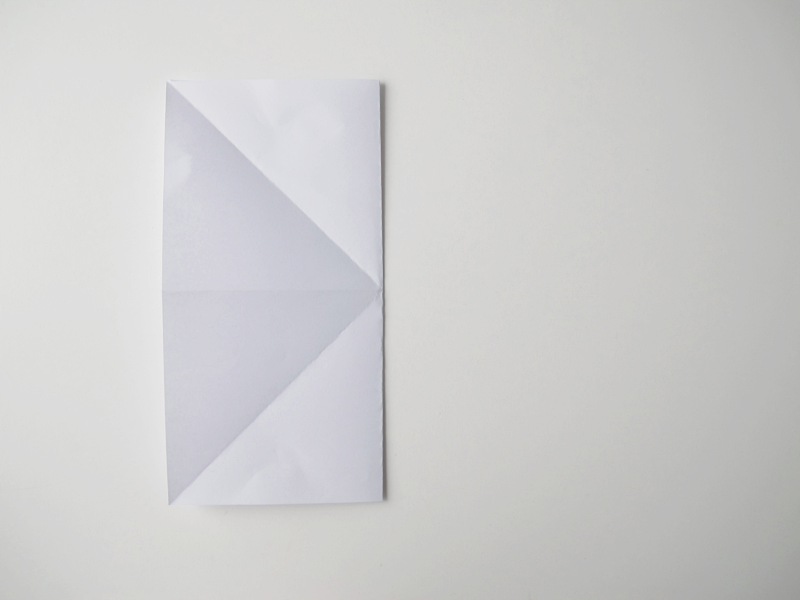
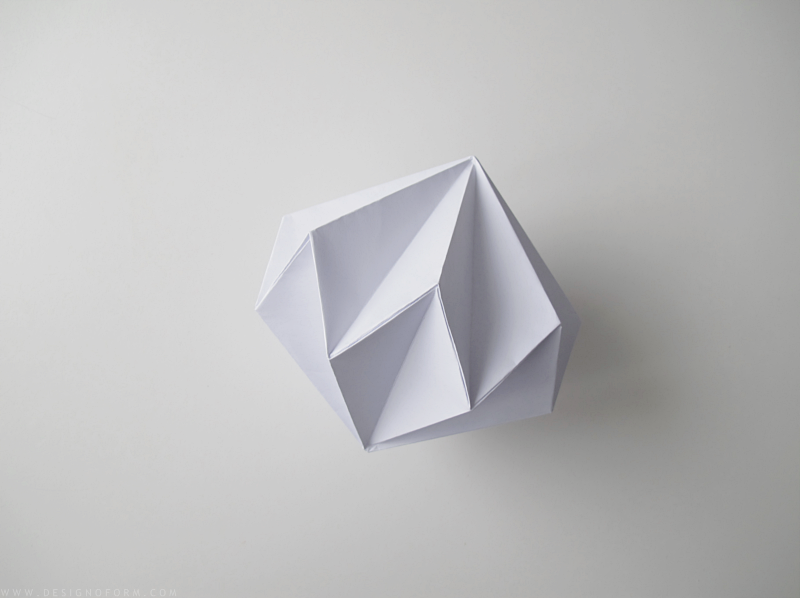
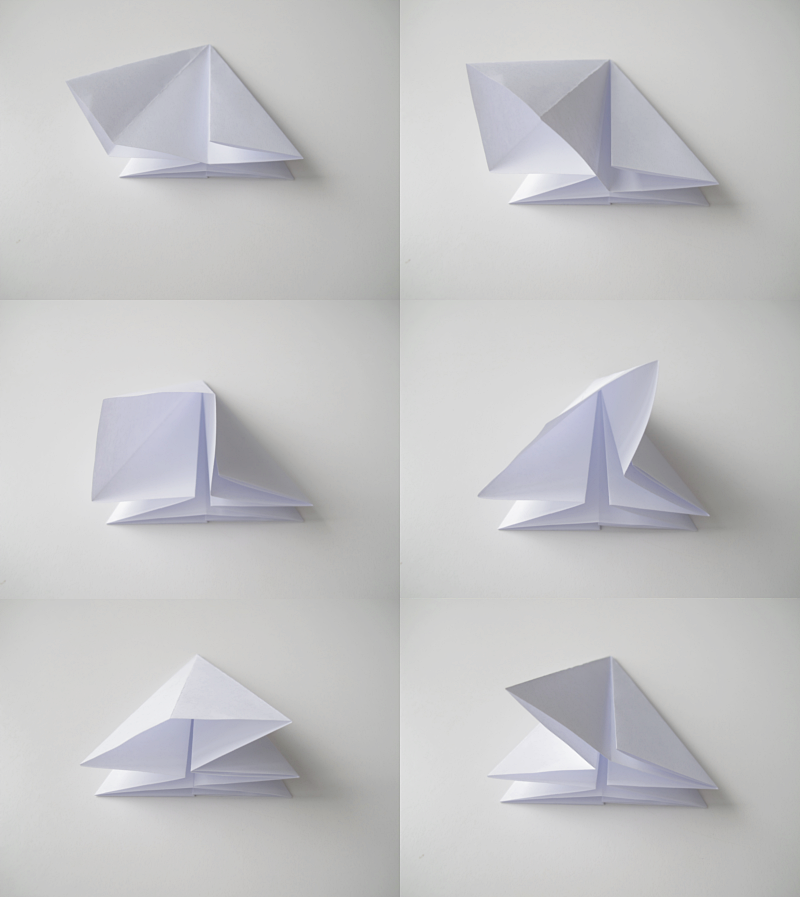
Unfold and turn it over. So it look like the one in the picture. /// Vik upp och vänd på den så att den ser ut som på bilden

diamond

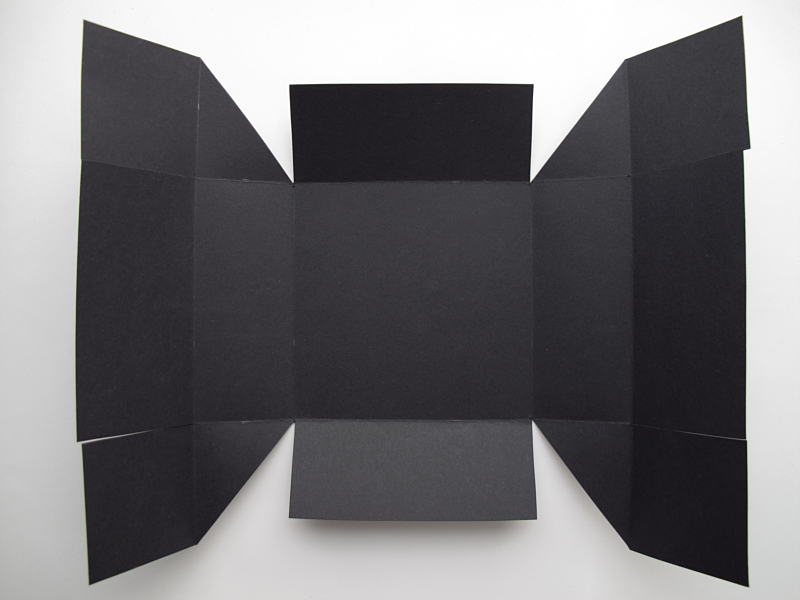
Gently press the sides towards the middle… /// Tryck försiktigt sidorna in mot mitten…

diamond

…and fold the top part towards you /// …och vik ner toppen mot dig

diamond

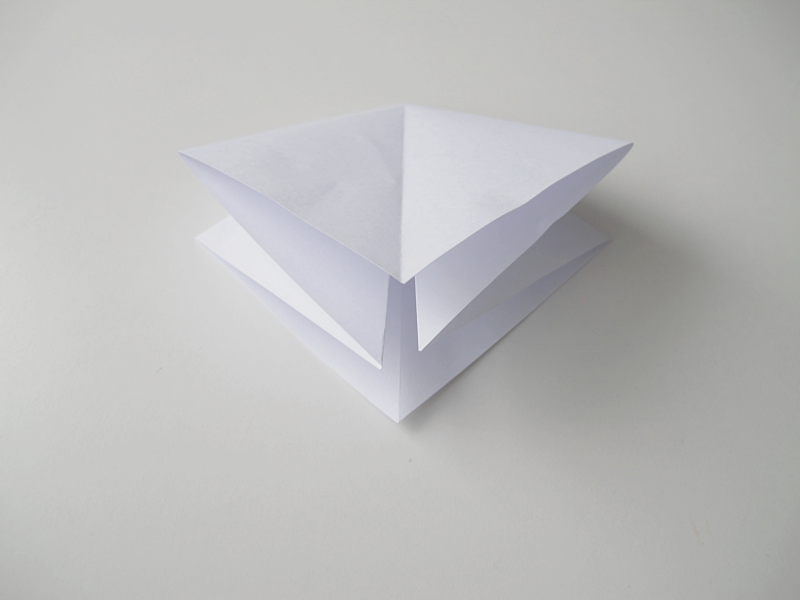
Turn it 180° and fold the sides. When you´re finished folding, cut the top part off.

/// Vänd på den 180° och vik in sidorna. När det är klart så klipp bort toppen.

diamond

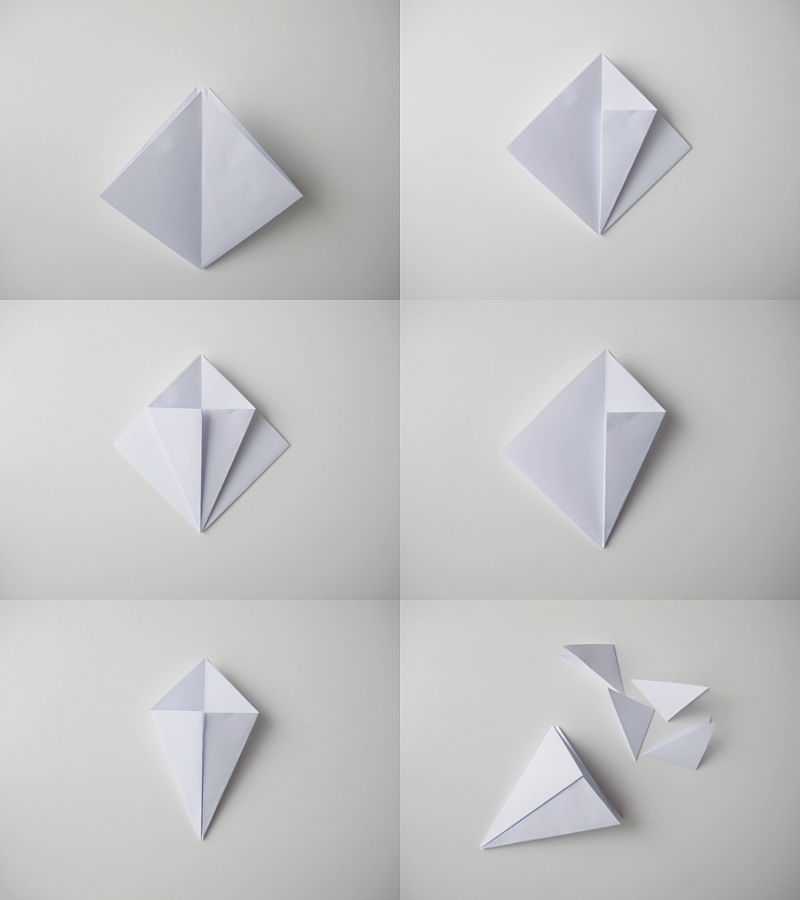
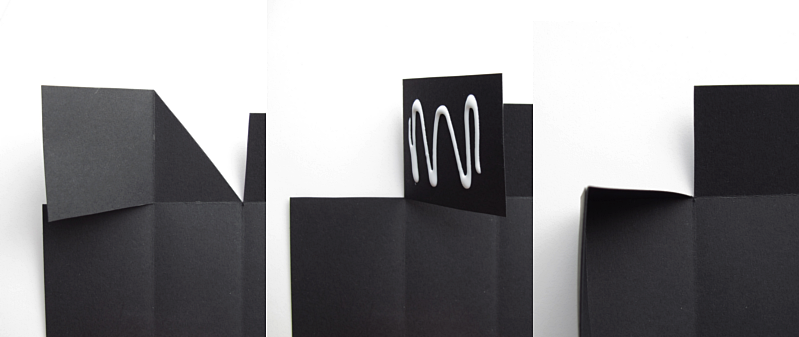
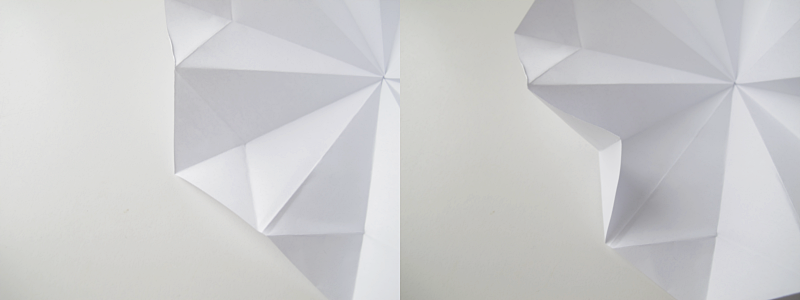
Here comes the tricky part. Place the paper so you have the opening towards you. Take the left side and unfold it. Open it a bit, and fold it over to the right side. (see pictures). Press down the folding on the top, and fold it to the left. (last picture)

/// Nu kommer den lite kluriga biten. Lägg papperet så att du har öppningen mot dig. Vik upp på vänster sida. Öppna upp den lite, och vik den mot den högra sidan. (se bilder). Tryck ner vikningen som är högst upp med fingret och vik sedan till vänster (sista bilden)

diamond

Do the same to the right side  /// Och nu gör vi likadant med den högra sidan

diamond

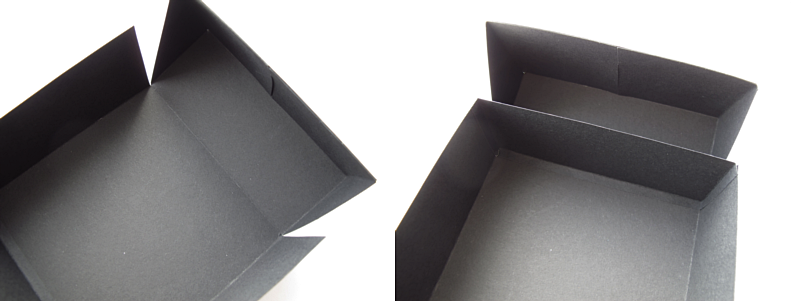
Fold the corners. All off them /// Vik upp alla hörn
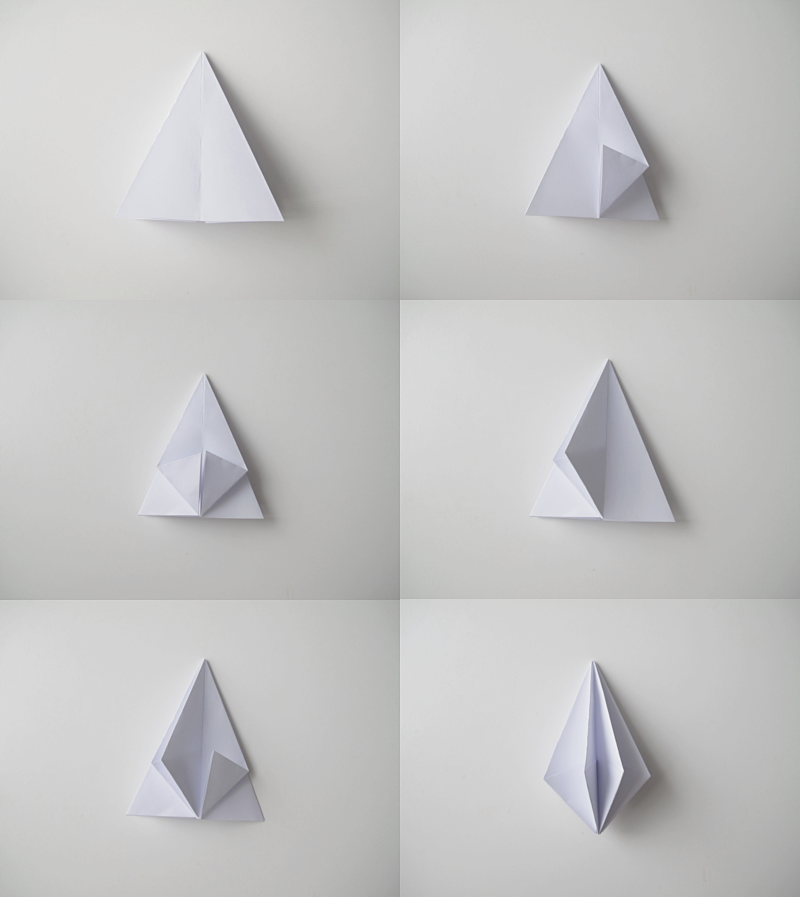
diamond

Unfold /// Vik upp

diamond

Fold the corners inwards /// Vik hörnen inåt

diamond

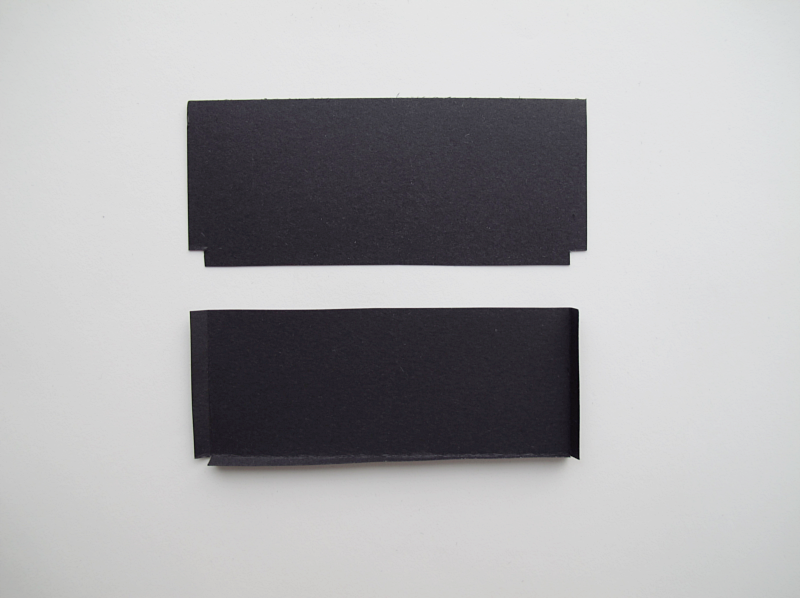
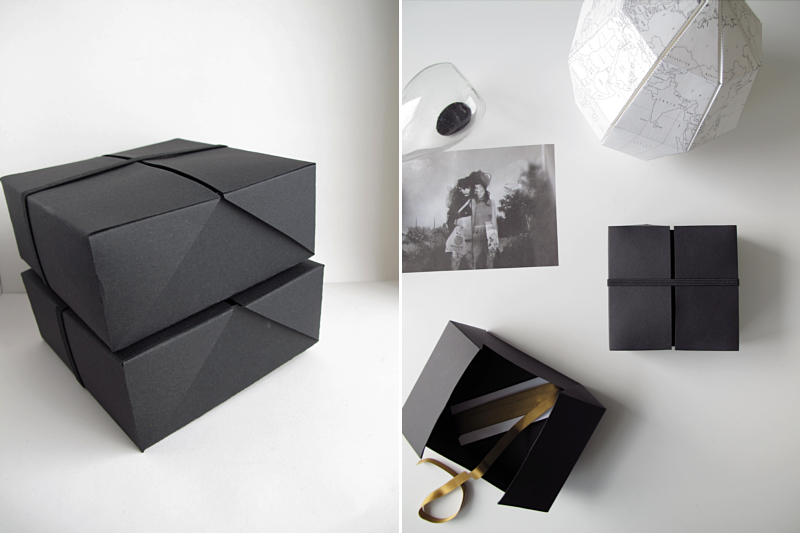
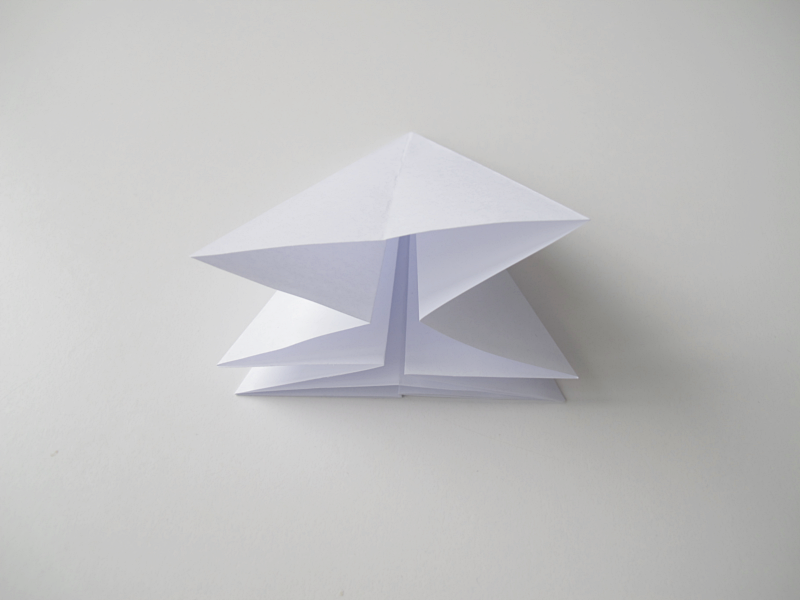
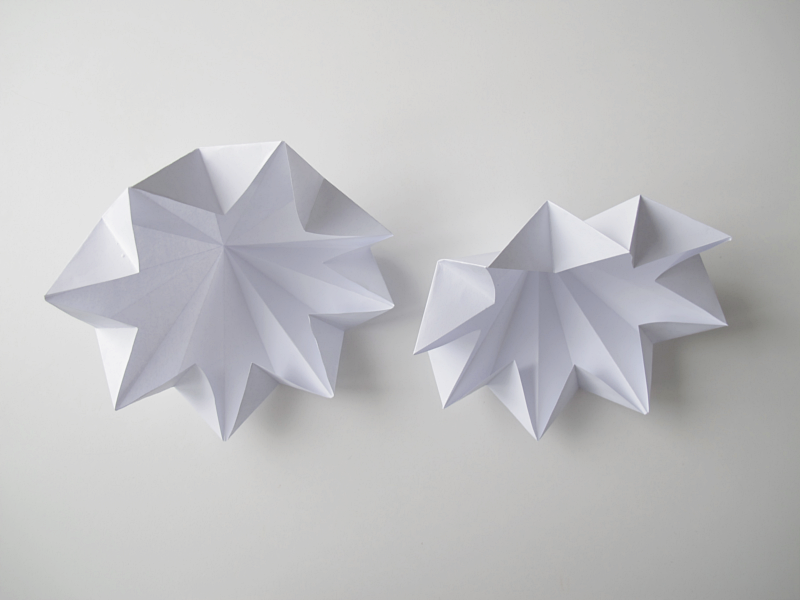
Now you want to make the other half of the diamond, repeat all the previous steps so that you have two pieces that looks like this.

/// Gör nu en precis likadan igen, så att du får den andra halvan av diamanten.

diamond

Put some glue on the corner parts you just folded and gently press half the diamond to the other half. (You want to turn the two parts so you have one “top” facing one “valley”. And not “top” to “top”.)

/// Stryk lite lim på de delar du just vikt in och  tryck försiktigt den ena halvan av diamanten mot den andra. (Tänk på att ha en “topp” mot en “dal” och inte “topp” mot “topp”)

diamond

Done! /// Klart!

diamond

Spara