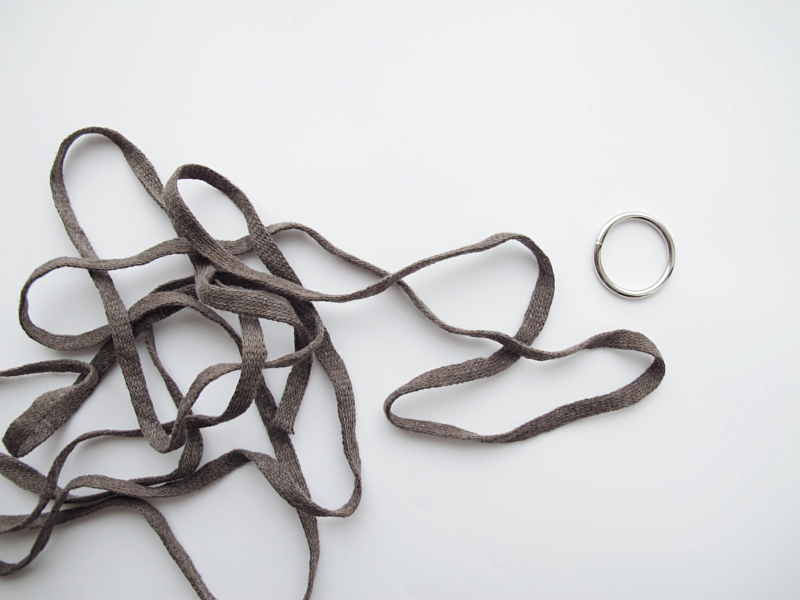
This is what you need. Some yarn and a ring. You can use shoelaces, ribbons, leather cord or pretty much any thread you want. /// Detta är vad du behöver. En ring och lite snöre. Skosnöre, garn, lädersnöre, de flesta snören fungerar.
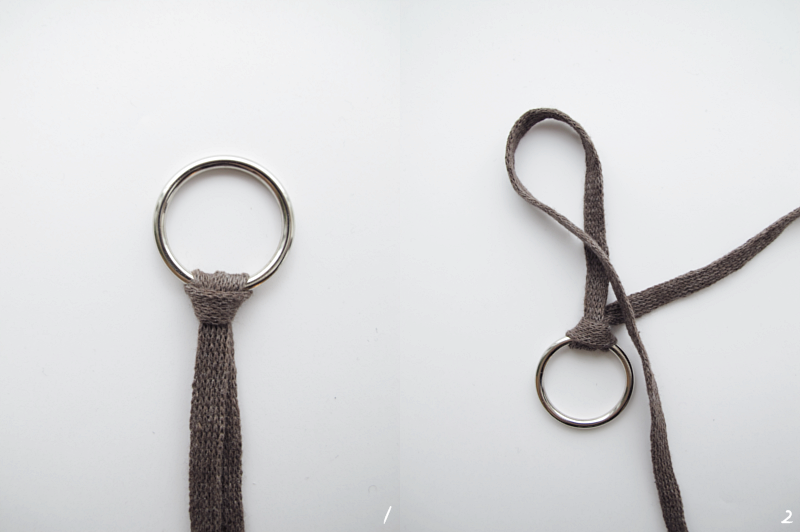
1. Make a knot around the ring in the middle of the yarn. You want the same length on the yarn on both sides of the ring. /// 1. Gör en knut runt ringen i mitten på tråden. Du vill alltså ha lika långa ändar på var sida om ringen.
2. Place the ring facing towards you and make a loop on the left side using the left thread. /// 2. Placera ringen mot dig och gör en ögla på vänster sida med den vänstra tråden.
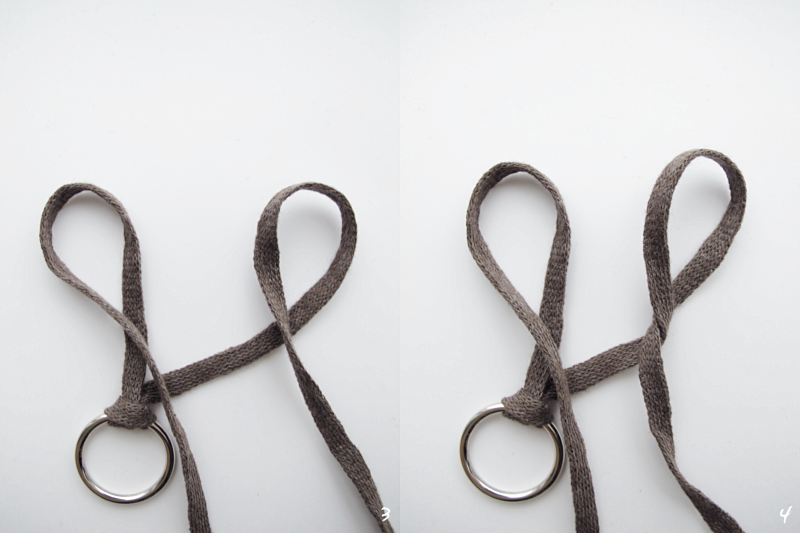
3. Make another loop with the right thread. /// 3. Gör nu en till ögla med den högra tråden.
4. And twist it. /// 4. Och snurra den ett halvt varv.
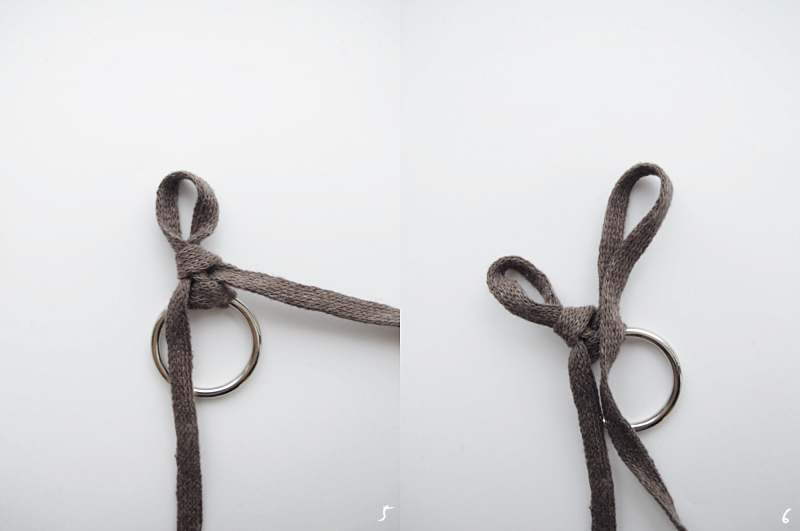
5. Put the right loop over the left one, and pull the right thread to tighten it. This is all you have to do really. Make a loop, slide it through the already existing loop and pull to tighten. But I went to fast didn´t I?. Ok.. I take it slower then. /// 5. Dra nu den högra öglan över den vänstra och dra åt. Det är allt som behövs egentligen för att göra denna fläta. Gör en ögla, dra den igenom den öglan som redan finns, och dra åt. Men det gick lite fort va? Ok, vi tar det lite saktare.
6. Make a loop on the right side by using the right thread. /// 6. Gör en ögla på höger sida.
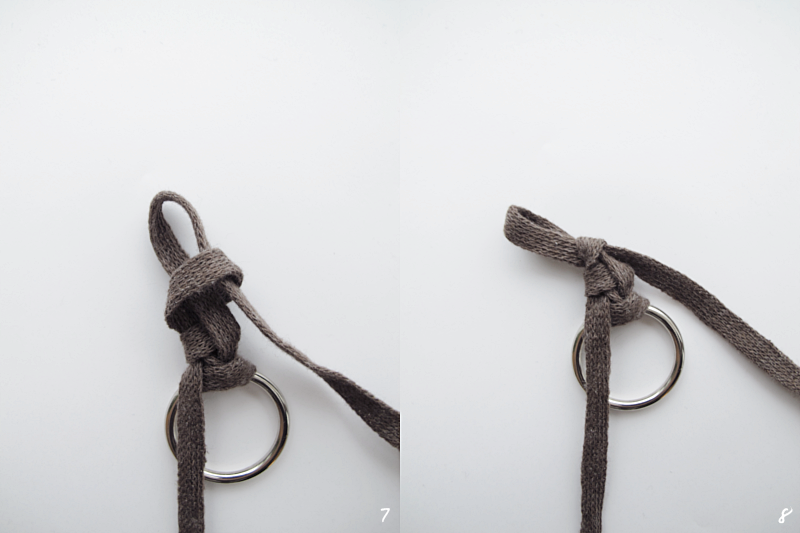
7. Put it through the left loop. /// 7. Trä den högra öglan genom den vänstra.
8. Pull the left thread to tighten it. /// 8. Dra i tråden på vänster sida för att fästa.
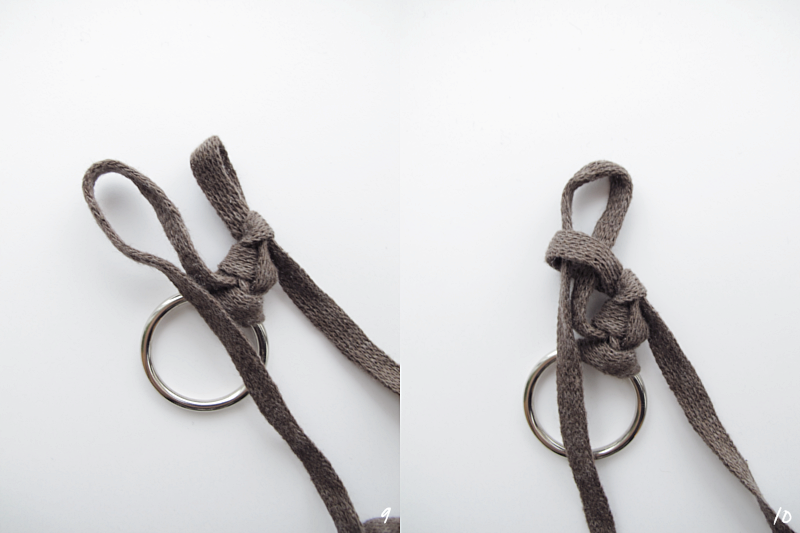
9. Now we are going to do the same on the other side. Make a loop on the left side. /// 9. Nu ska vi göra likdant som tidigare fast spegelvänt. Gör en ögla på vänster sida.
10. Put the loop in to the already existing loop. /// 10. Trä nu öglan genom den ögla du hade sedan förut.
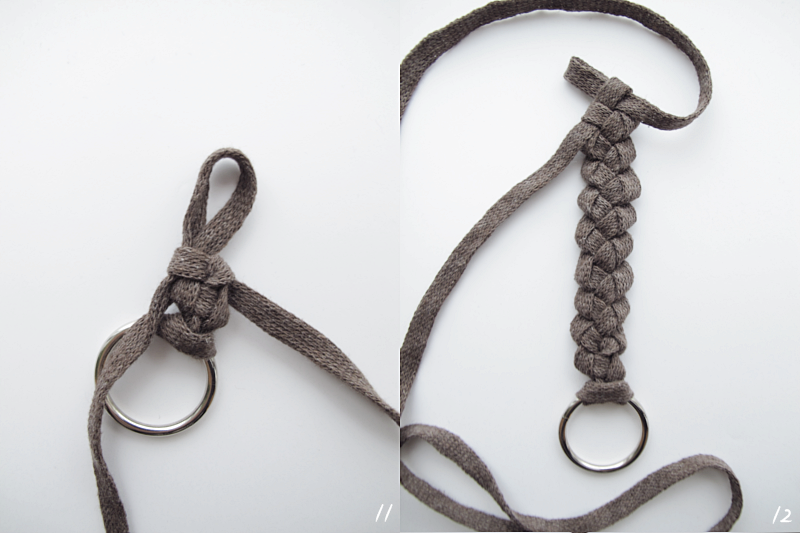
11. An pull the right tread to fasten. /// 11. Dra i den högra tråden för att fästa.
12. Repeat steps 6-11. /// 12. Upprepa steg 6-11.
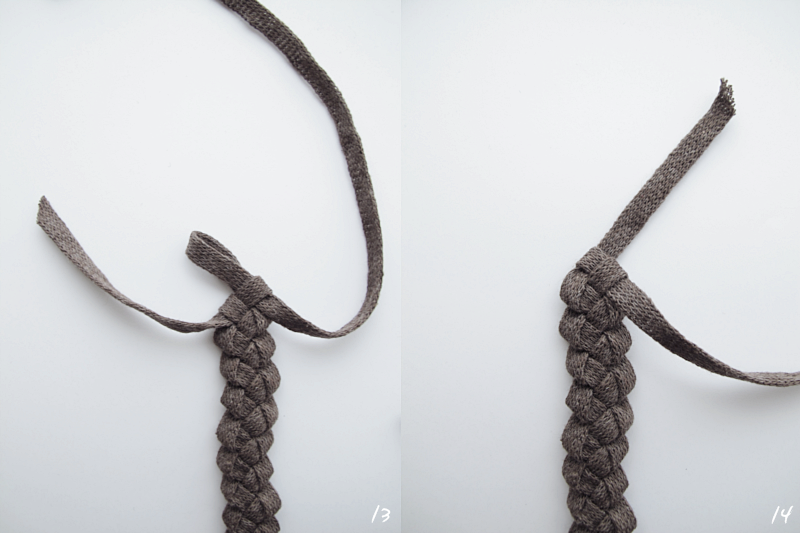
13. When you are happy with the length off your braid, you can cut the thread on the side where you don´t have the loop. /// 13. När du är nöjd med längden på din fläta klipper du av den tråden som inte har en ögla.
14. Put it through the loop. /// 14. Trä den änden genom öglan.
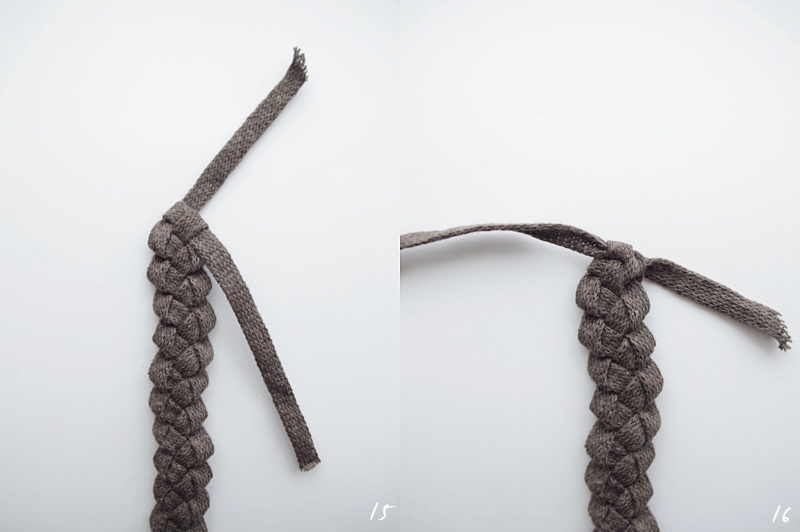
15. Cut the other thread. /// 15. Klipp av den andra tråden.
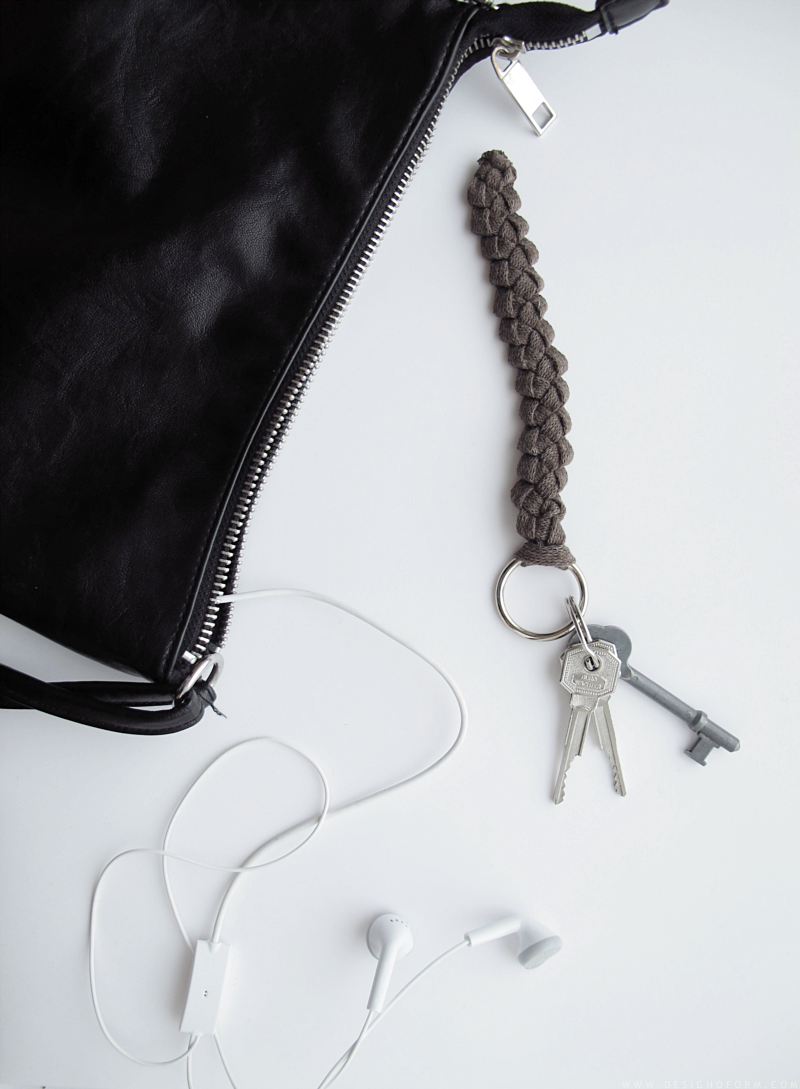
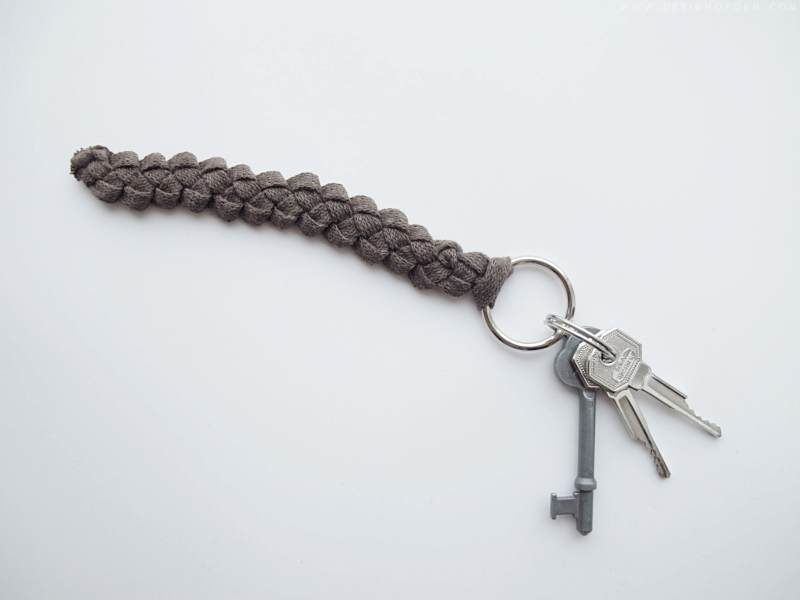
16. And make a double knot and cut the ends off as close to the braid as you can and you are done! /// 16. Gör en dubbelknut och klipp av ändarna så nära flätan du kan. Och du är klar!

Nilla says:
Vad fint det blev!
December 18, 2012 — 19:47
designoform says:
Tack! :)
December 18, 2012 — 22:05
Marie-Josée says:
Thank you for this DIY little project! I will surely try it as soon as possible… simple and beautiful braids!
December 25, 2012 — 20:59
Claudia says:
Me too! I will try it as soon as possible – this is so cute. But first I must find my materials! Thanks you so much for sharing and the good photos. greetings from Germany
March 1, 2013 — 11:22
Kate says:
looks awesome and this would make finding my keys in my purse a lot easier!
March 1, 2013 — 18:46
Marta says:
Thank you!!! Can’t wait to try it!!!
December 2, 2016 — 10:54
designoform says:
You’re welcome :)
December 2, 2016 — 18:26
Dearlives says:
Wow, this is awesome. Glad i found this handmade keyholder. Love this diy tutorial.
May 16, 2018 — 04:51