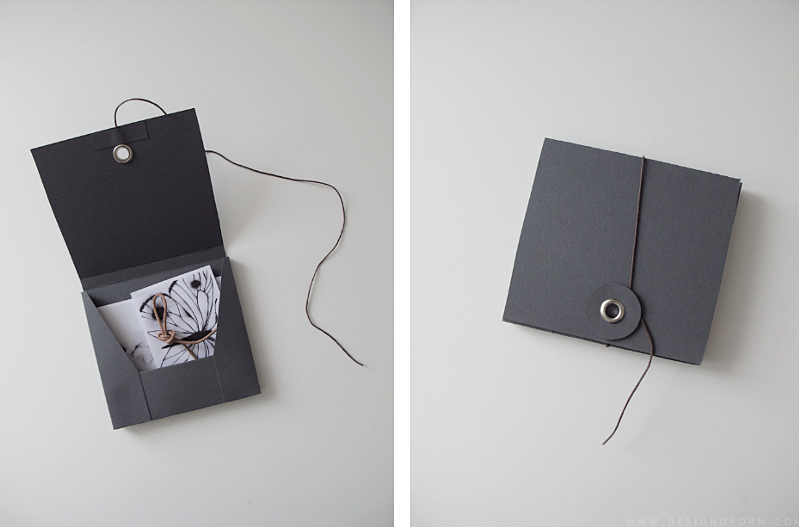
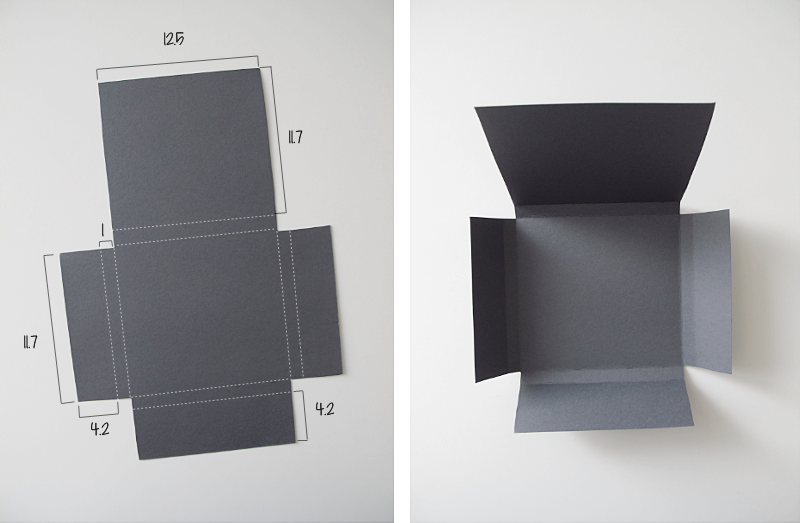
Today I have a storage box diy for you. As always the measurements are in cm. (If you wonder why the numbers are so “awkward”, it´s because I used an a4 paper and wanted the box to be as big as it possibly could.) First draw the figure on the paper. The white dashed lines are where you should fold.
/// Idag har jag ett förvaringslåde diy till er. Och som vanligt är måtten i cm. (Om du undrar varför det är så “konstiga” mått så beror det bara på att jag använde ett a4 och ville göra lådan så stor det bara gick.) Börja med att rita upp lådan på papperet. De vita streckade linjerna är vart du ska vika.
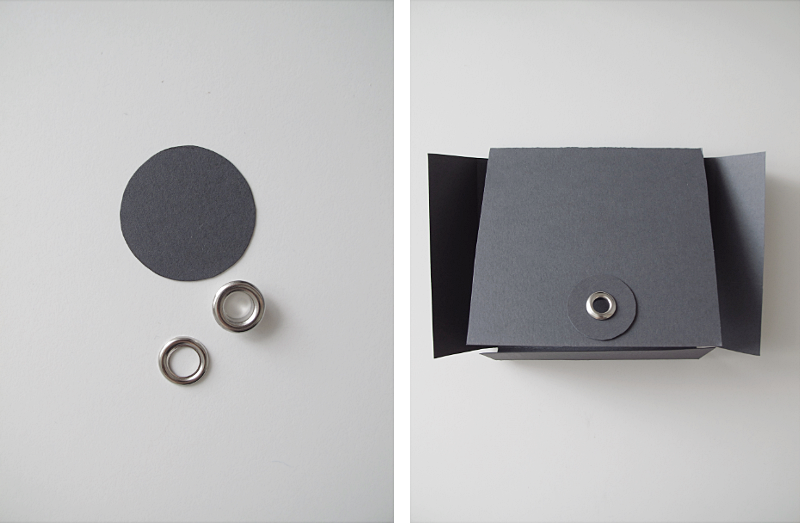
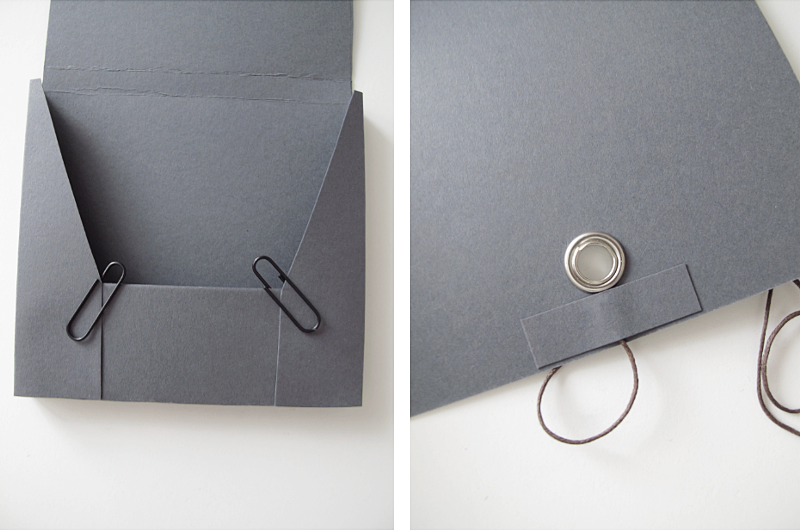
Cut out a circle with a 3.5 diameter and use eyelets to fasten it to the lid. How you do that, is often written on the package.
/// Klipp ut en cirkel med diametern 3.5cm. Och fäst cirkeln med hjälp av en öljett på locket. Hur du gör det, står ofta på baksidan av öljettförpackningen.
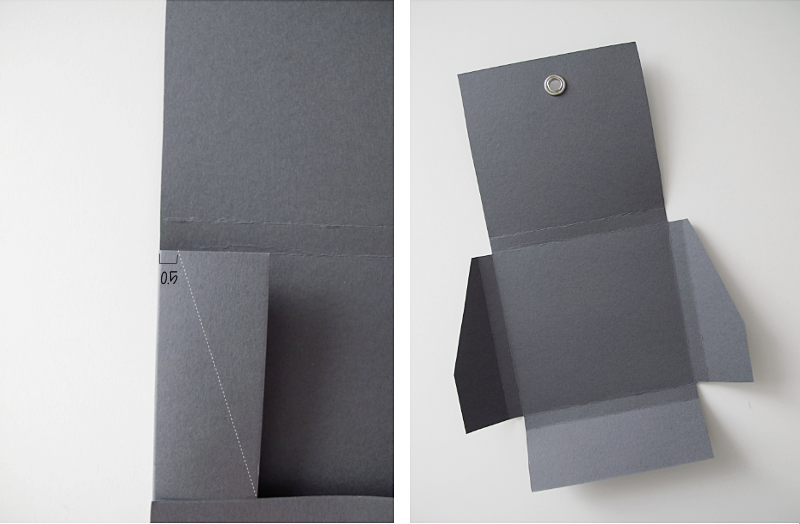
Fold one side and the bottom piece, inwards and draw a line between where they meet and to the other side. But leave 0.5 cm in the upper corner. Do the same to the other side. When you´re finished. Cut along the lines.
/// Vik in ena sidan och botten på lådan och dra ett streck från hörnet där de möts till det andra hörnet. Men lämna 0.5 cm kvar i det övre hörnet. Gör nu likadant på andra sidan. Klipp sedan utmed linjerna.
Now it´s time to glue the box together. I used two paper clips to hold it in place while it dries. Take a thread and glue it on the lid. And you´re done!
/// Nu är det dags att limma ihop lådan. Jag använde två gem för att hålla delarna på plats medan det torkade. Ta sedan en tråd och limma fast den på insidan av locket och du är klar!

Emma Bengtsson says:
Underbart fint!
March 13, 2013 — 20:52
designoform says:
Tack!
March 13, 2013 — 22:11
Beth says:
This is really cool! I took book making courses in college and made boxes similar to this. It’s so much fun. :)
March 14, 2013 — 19:32
Mojca says:
I love it! I recently found your blog and I love it!
March 14, 2013 — 22:46
Anna Balvaz says:
Its simple and smart. love it.
September 16, 2014 — 04:46
hp support assistant says:
Indeed!
September 16, 2019 — 04:58