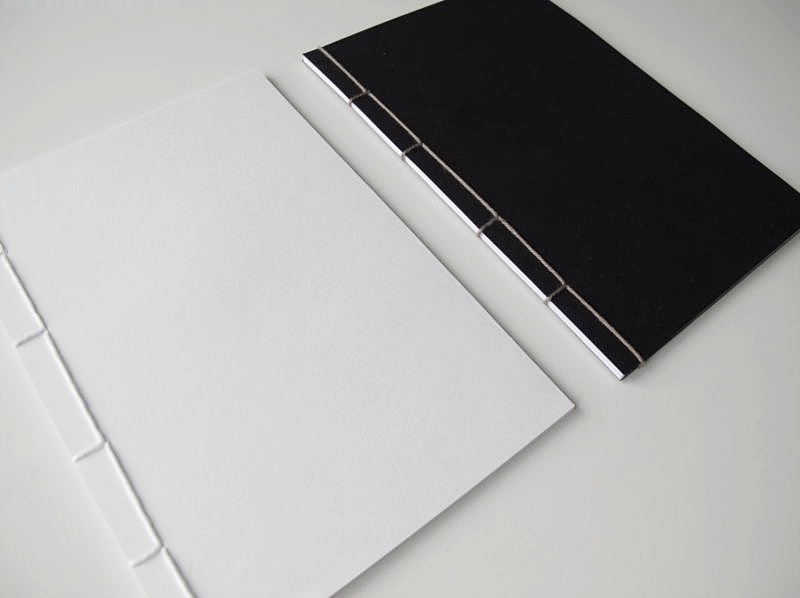
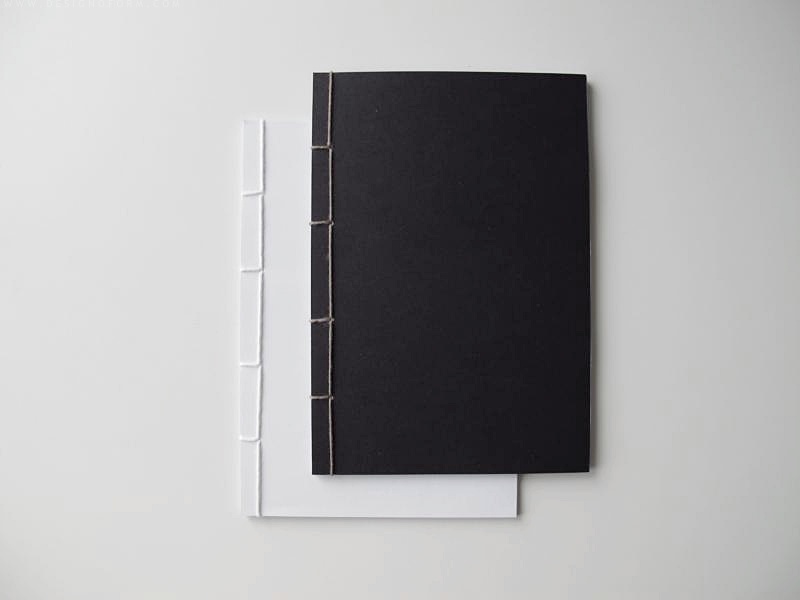
Todays diy is a note book. And don´t get terrified by my instructions. Just take it step by step and follow the pictures. Start by cutting 30 pieces of paper with the dimensions 14.5cmx21cm. For the book’s cover, you can cut two pieces of paper of the same size, but from a prettier paper. Then make holes for the string. I made the holes at 4, 8, 13 and 17 cm. And 1cm in.
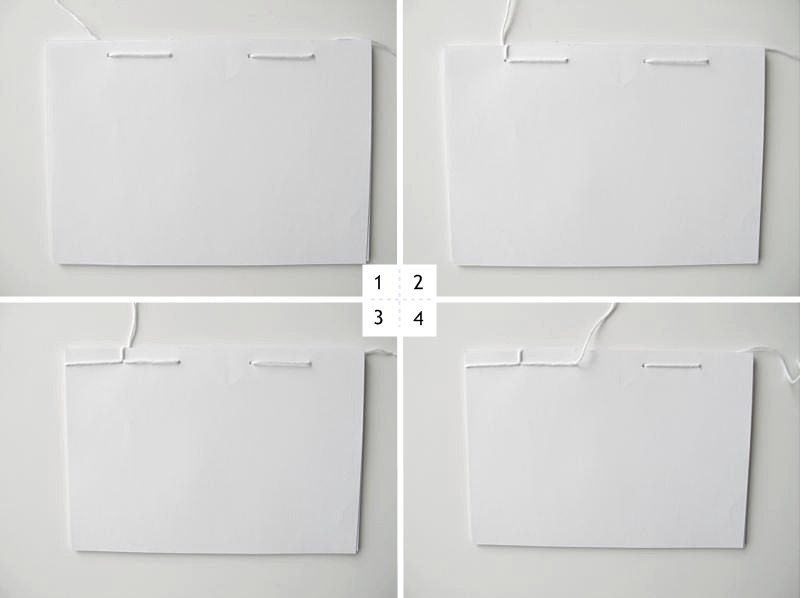
1. Pull the thread (from the back) through the hole on the far right. And then through the others. See the picture.
2. Pull the thread through the hole from the front.
3. Pull the thread on the left side of the papers and through the hole on the far left
4. Pull the thread on the backside and through the second hole from the left
/// Dagens diy är en anteckningsbok. Och bli inte avskräckta av mina instruktioner. Ta det bara steg för steg och följ bilderna. Börja med att klippa 30 st bitar papper i måtten 14.5cmx21cm. Till bokens omslag kan du också klippa ut två bitar med samma mått men i lite finare papper. Sedan är det dags att göra hål för snöret. Jag gjorde hålen på måtten 4, 8, 13 och 17 cm. Och 1cm in från kanten.
1. Trä tråden (från baksidan) genom hålet längst till höger. Och ta vartannat hål. Se bilden.
2. Trä tråden genom hålet från framsidan.
3. Dra tråden på papperens vänstra sida och igenom hålet längst till vänster
4. Trä tråden på baksidan och kom fram i det andra hålet från vänster
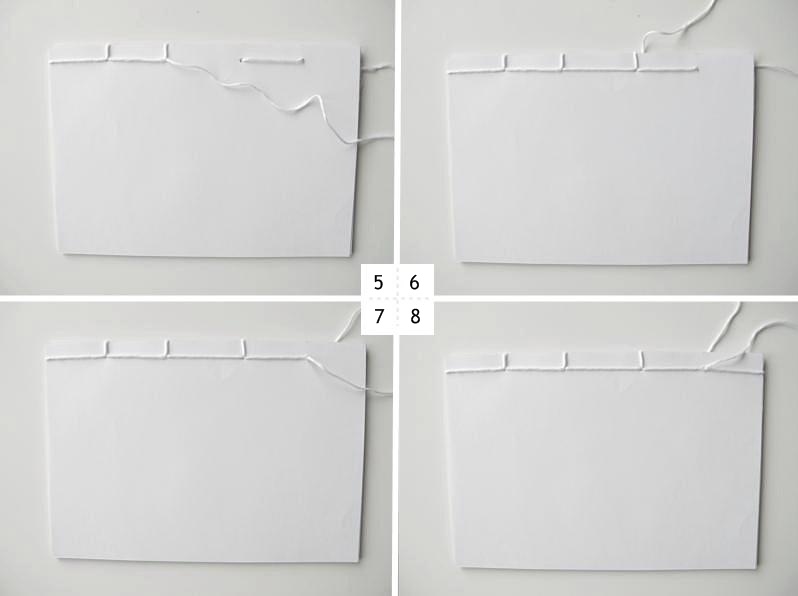
5. Pull the thread through the hole once more
6. Pull the thread through the second hole from the right, and pull it through once more and come out on the backside.
7. Pull the thread on the backside and come out through the hole on the far right
8. Pull the thread on the right side of the stack of papers and come out through the hole on the far right
/// 5. Trä tråden genom hålet och kom ut på framsidan
6. Trä tråden genom andra hålet från höger, trä sedan tråden genom hålet igen och kom ut på baksidan.
7. Dra tråden på baksidan och kom ut genom hålet längst till höger
8. Dra tråden på högra sidan av bunten med papper och kom fram i hålet längst till höger
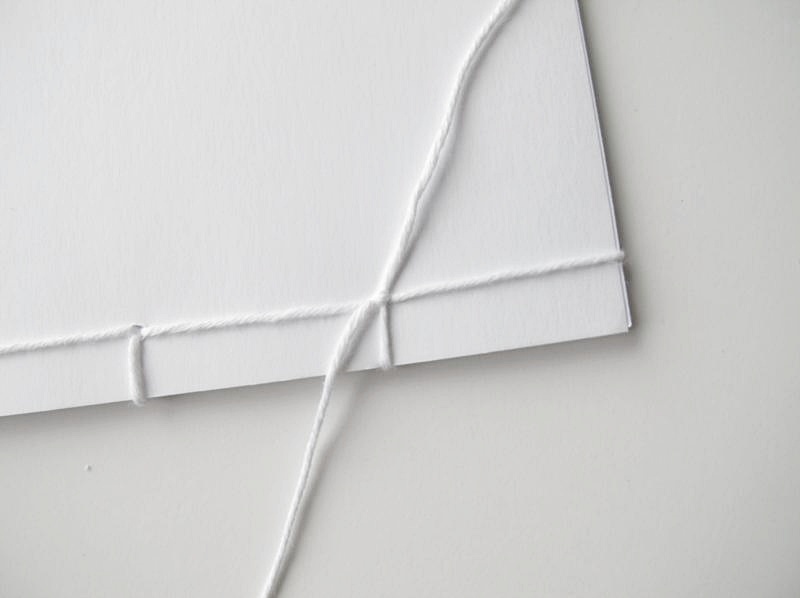
Turn the note book upside down and make a small knot by the hole. Cut the ends off.
/// Vänd så på blocket och gör en liten dubbelknut precis vid hålet, klipp av trådarna.
And you are done!
/// Och du är klar!

Hedvig - DIY says:
åÅ så smart!!
April 12, 2013 — 22:55
Karina says:
I’ve been very much into Japanese book binding techniques lately and I think you’re tutorial is great (pictures are very useful).
Have you read the book “Non-Adhesive Binding: Books Without Paste or Glue” by Keith Smith? It’s a great source of step by step tutorials.
April 15, 2013 — 11:35
designoform says:
I was thinking about adding that it was japanese bookbinding, but since I didn´t have a tutorial to follow (I did it “on my own”) I decided that maybe it would be wrong to call it japanese bookbinding. They probably have a better way of doing it. :)
I haven´t read that book. But I have to check it out!
April 15, 2013 — 16:01
Pysselbolaget says:
Så fint, rent och snyggt. Tack för alla underbara beskrivningar du delar med dig av. Ser alltid fram emot att titta in hos dig!
Karin/Pysselbolaget
April 15, 2013 — 17:53
designoform says:
Var roligt att höra! Tusen tack!
April 16, 2013 — 16:58
Linnéa - clipboard says:
Åh det där måste jag prova! Måste bara säga du har en helt fantastisk blogg! Otroligt snygga och inspirerande pysseltips. Måste bara hitta tiden till att sätta igång. Vill ju göra nästan allt.
April 15, 2013 — 22:11
designoform says:
Men tusen tusen tack snälla du, vad roligt att du gillar!
April 16, 2013 — 16:57
Shu @ Page Thirteen says:
Love hand made notebooks! Haven’t made one in years, and you’ve just inspired me to start again. Thank you for sharing! xx.
April 16, 2013 — 02:15
designoform says:
And thank you for your nice comment!
April 16, 2013 — 16:55