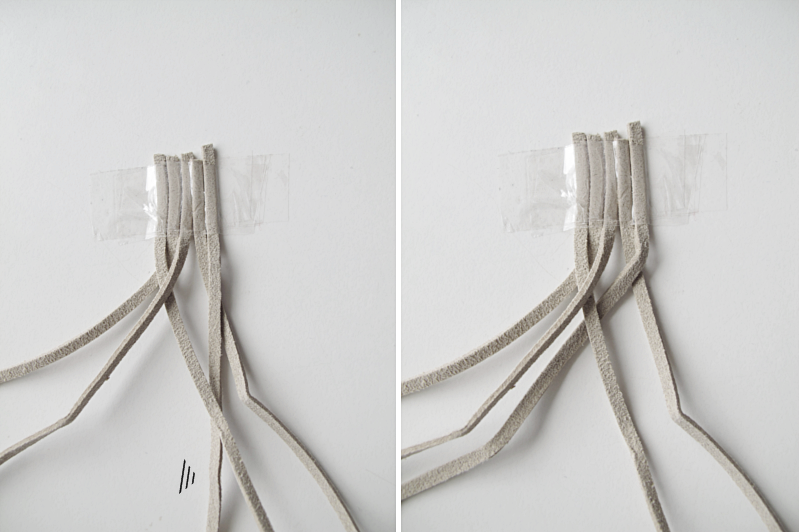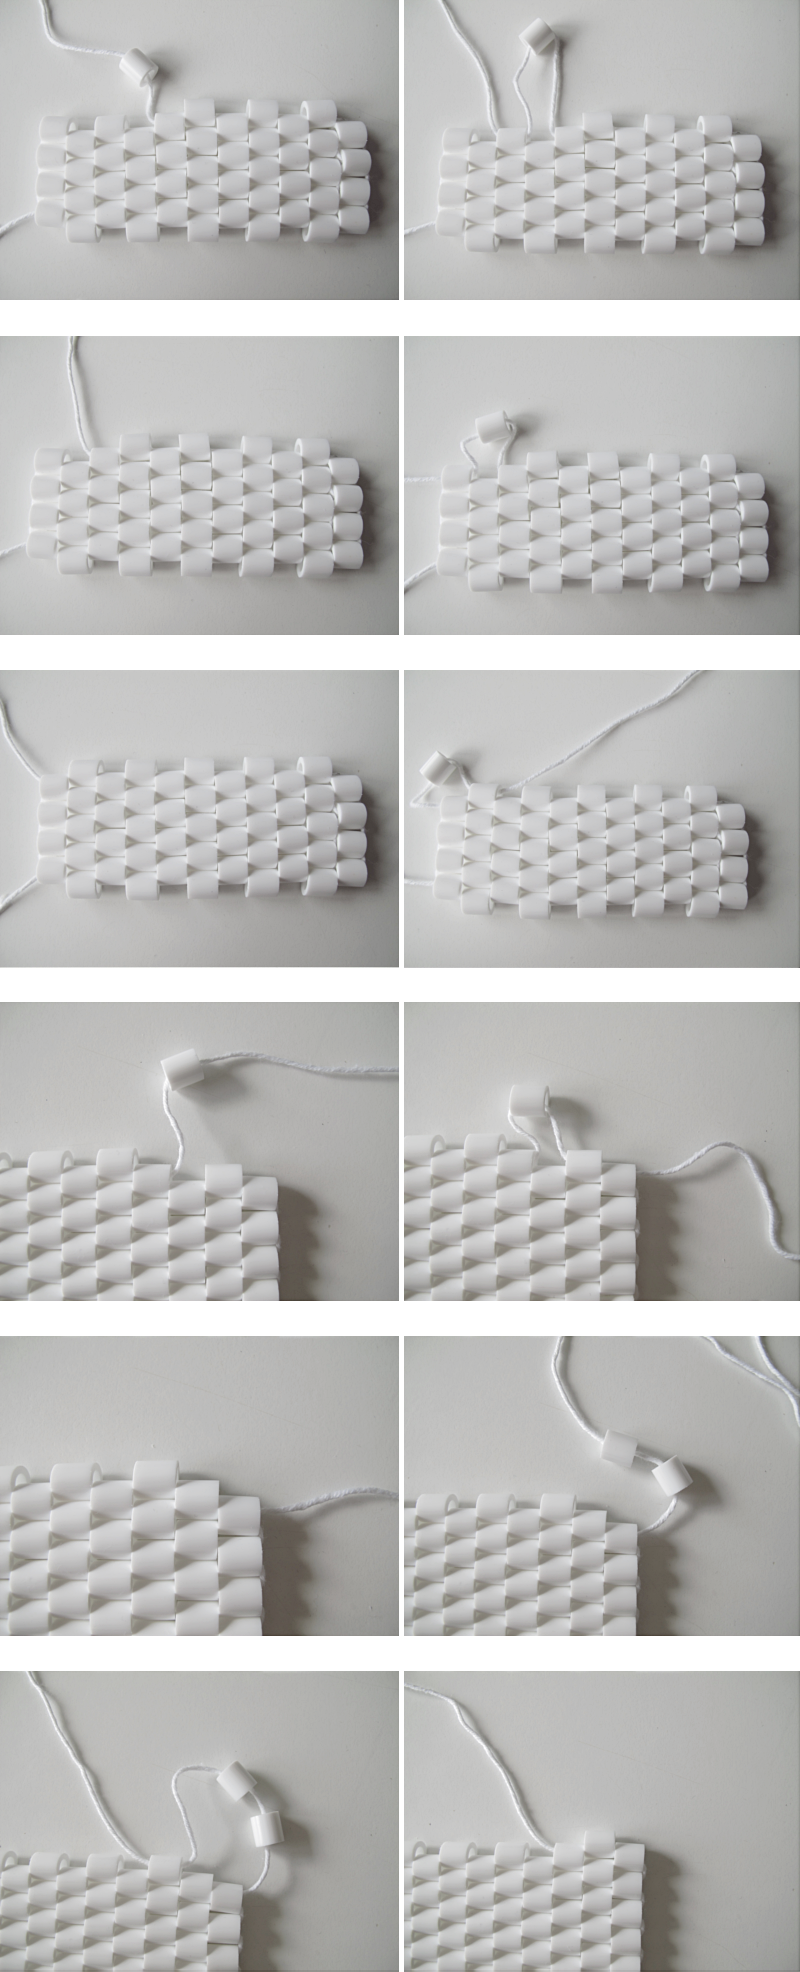
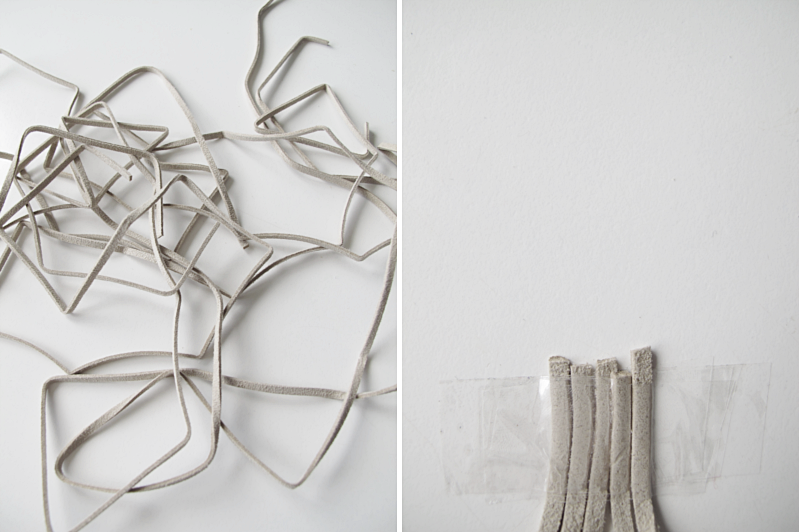
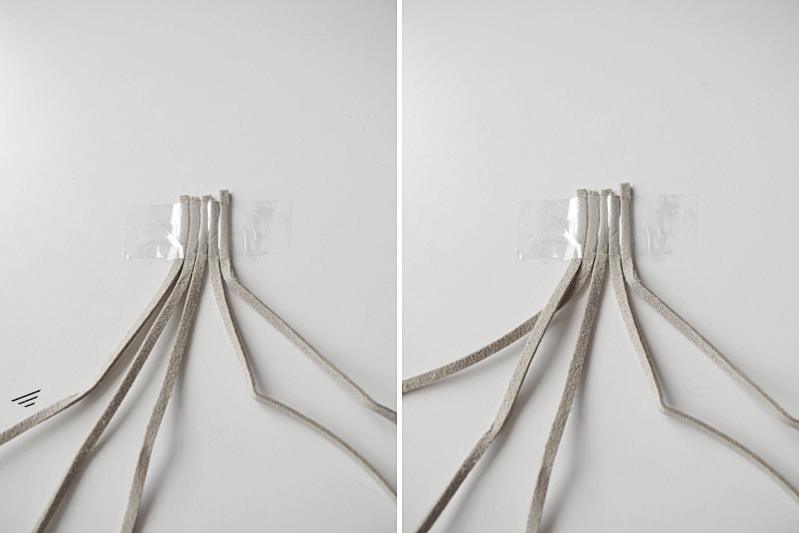
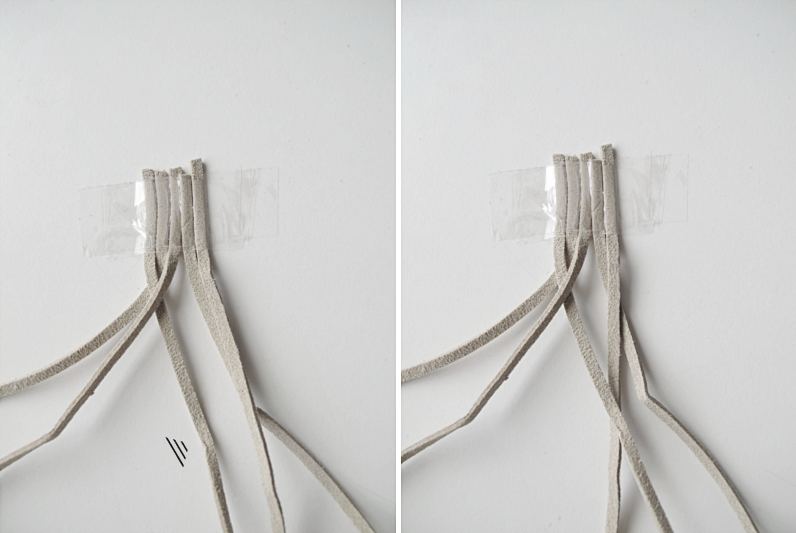
Today I’m going to show you how to make a five-strand-braid. First you want to attach the threads to a plane surface.
/// Idag tänkte jag visa er hur man gör denna fläta med fem snören. Börja med att fästa snörena på en plan yta.
Divide the threads so that you have three on the left side and two on the right. Then start with the left side: Take the thread with the arrow, and place it over the thread next to it.
/// Dela upp snörena så att du har tre på vänstra sidan och två på högra. Så är det dags att börja på vänster sida: Ta snöret med pilen, och lägg den över snöret bredvid.
Take the thread with the arrow and place it over the thread to the left.
/// Ta snöret med pilen och lägg den över snöret till vänster.
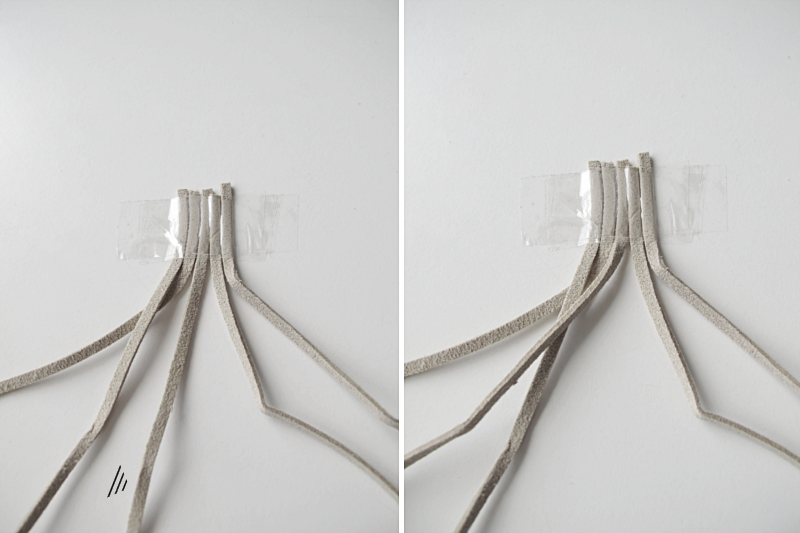
Take the thread with the arrow and move it over to the right side.
/// Ta snöret med pilen och flytta över den till höger sida.
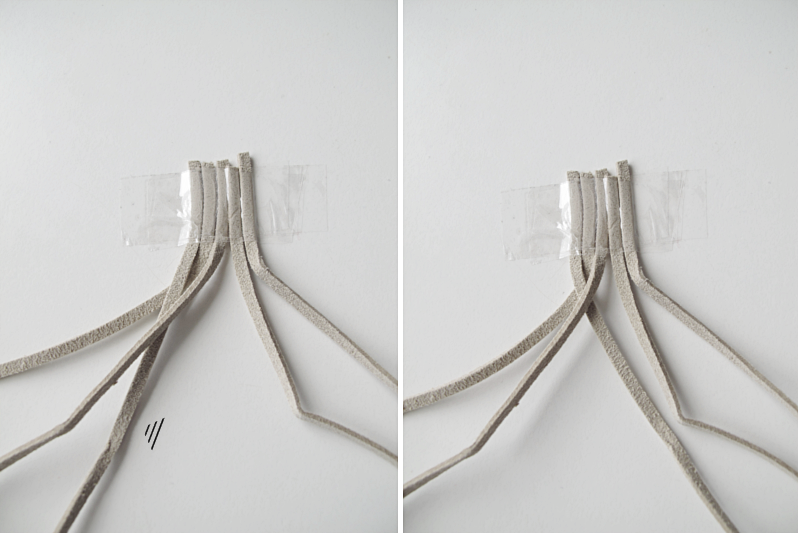
Then continue with the right side. This is actually the same as we did on the left side. Only mirrored. Take the thread with the arrow and place it over the thread next to it.
/// Och nu fortsätter vi på höger sida. Du ska göra precis som vi gjorde på vänster sida. Bara spegelvänt. Ta snöret med pilen och lägg den över snöret bredvid.
Take the thread with the arrow, and place it over the thread to the right.
/// Ta snöret med pilen, och lägg den över snöret till höger.
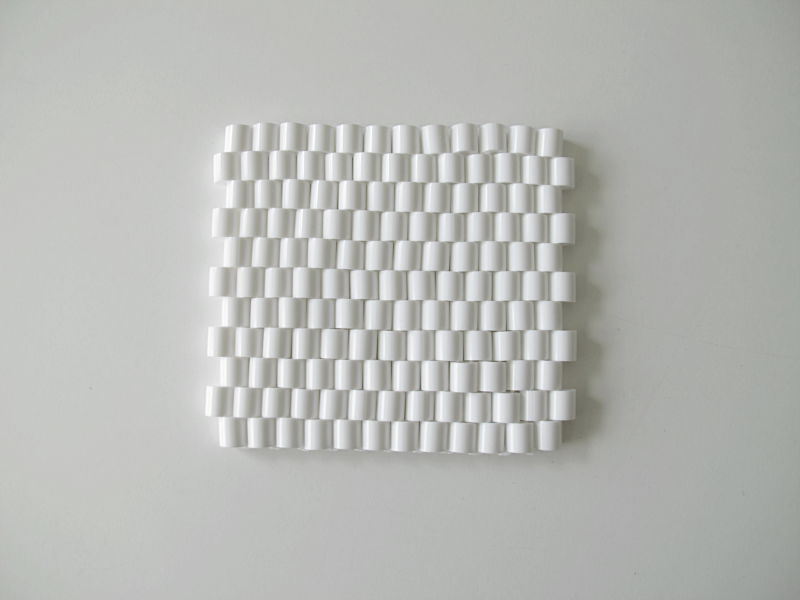
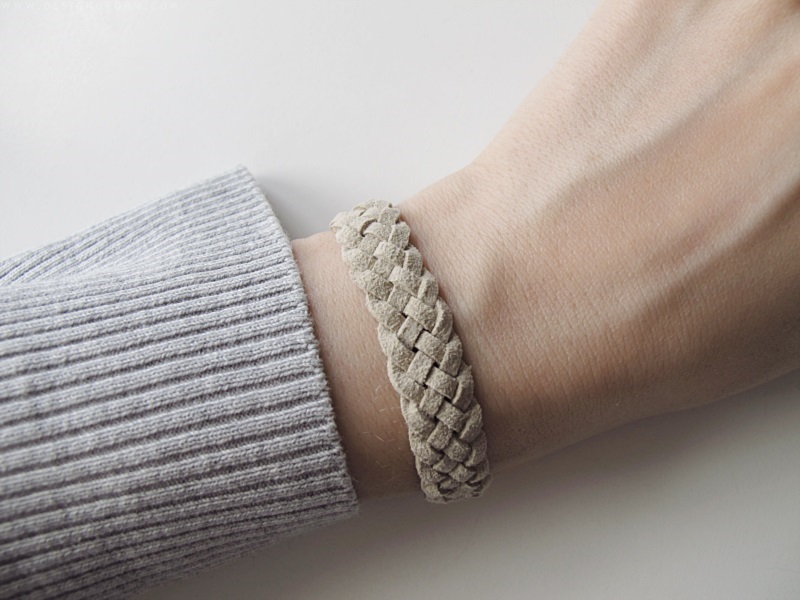
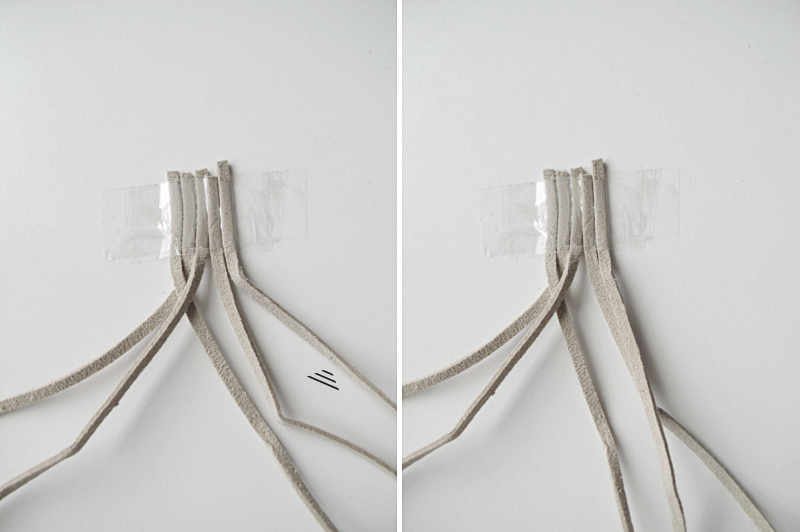
Move the thread with the arrow over to the left side and start from the beginning again. (from: ..start with the left side ). Repeat these steps until you have the length that you want. If you’re making a bracelet you can use one of these as a lock. Good luck!
/// Flytta över snöret med pilen till vänster sida och starta om från början igen. (från: ..börja på vänster sida.) Så alternerar du dessa sidor tills det att du har den längden du vill på flätan. Om du vill använda flätan som armband kan du använda dessa som lås. Lycka till!