STORAGE BOX

storage

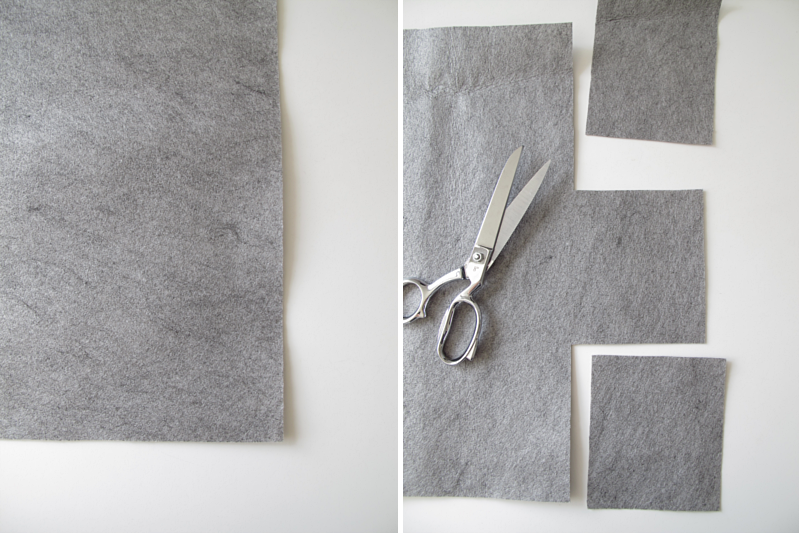
Today I´m going to show you a diy storage box. A diy that requires no sewing or glue. Start with a piece of (“harder”) fabric, that is 48 x 43.5 cm.  Cut the corners off. The pieces you are cutting off, should be 12cm from left to right and 14 cm from the top to the bottom.

/// Idag tänkte jag visa er ett förvaringslåda diy som inte kräver att du ska sy eller limma något. Börja med en bit (lite “styvare”) tyg som är 48 x 43.5cm. Klipp bort hörnen. De bitar som du klipper bort ska vara 12cm från vänster till höger och 14 cm från toppen till botten.

storage

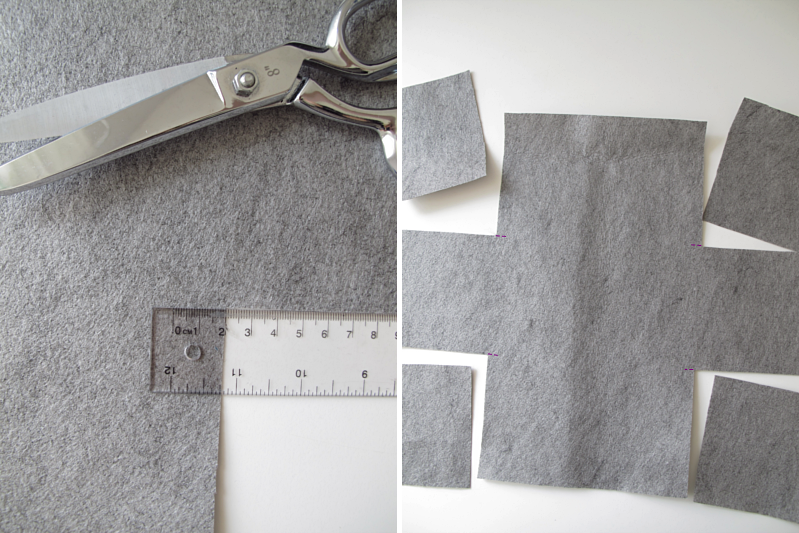
Then cut a 2 cm long cut in all four corners. See the picture where the purple dotted lines shows.

/// Klipp sedan ett 2cm långt jack i de fyra hörnen. Se på bilden var de lila prickade linjerna visar.

storage

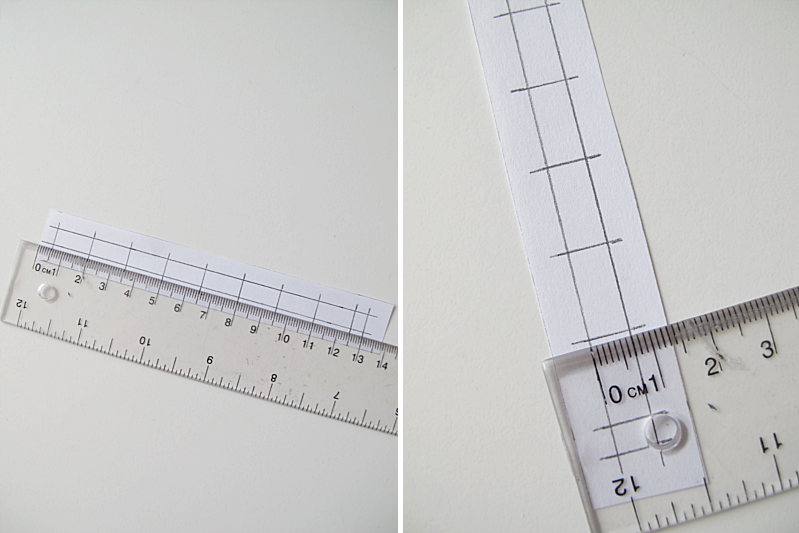
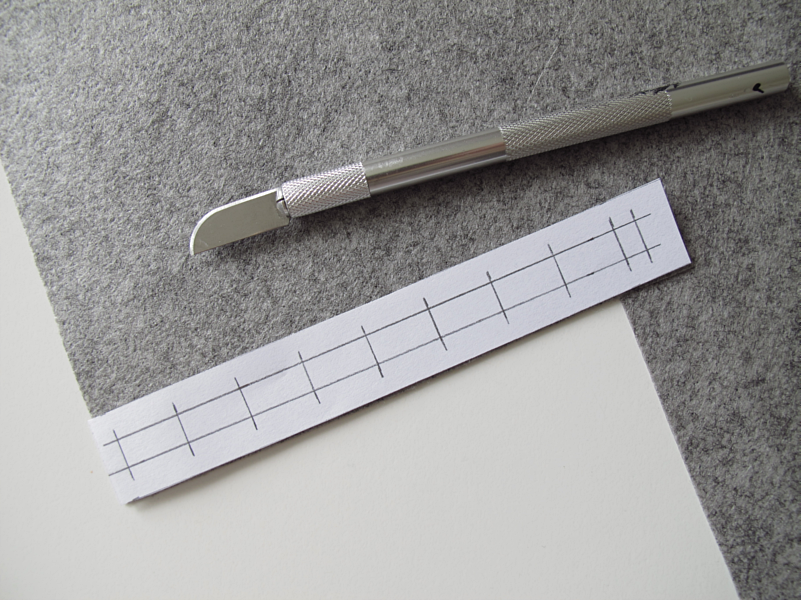
Make a template out of paper. 2 cm x 14 cm. This is to help you with the “stiches” that holds the storage box together.  I did my “stiches” 1,5 cm long, and the space between them, the same. ( Here you can decide if you want your “stiches” to be smaller or longer then the ones I did. Just make sure you have enough fabric to finish.)  If you want your box to look like the one I did, make marks at 0.5 cm, 2 cm, 3.5 cm, 5 cm, 6.5 cm, 8 cm, 9.5 cm, 11 cm , 12.5 cm and 13 cm. I wanted the thread to be 0.7 cm wide, so I made a space in the middle of the template 0.7 cm wide.

/// Gör en mall av vanligt papper. 2 cm x 14 cm. Den här mallen ska du sedan använda när du ska göra hål för tråden som håller ihop lådan. Jag ville att mina “stygn” skulle vara 1,5 cm och mellanrummen lika långa. ( Men här kan du själv bestämma hur långa eller korta “stygn” du vill göra. Kolla bara innan du börjar att du har tillräckligt med tyg på slutet). Om du vill att din låda ska se likadan ut som den jag gjorde, så gör du markeringar på 0.5 cm, 2 cm, 3.5 cm, 5 cm, 6.5 cm, 8 cm, 9.5 cm, 11 cm, 12.5 cm och 13 cm. Jag ville att tråden skulle vara 0.7cm så jag gjorde även en markering i mitten av mallen 0.7 cm bred.

storage

Place the template on top of the fabric and start cutting along the shorter lines. You want the cuts to be a tiny bit wider than the thread, otherwise you cant get the thread through.

/// Lägg mallen på tyget och skär längst med de kortare linjerna. Skär dem en liten bit bredare än 0.7 cm så att du får igenom tråden.

storage

Here you can see, that I cut on both sides of the empty space. Now it´s time to make threads out of the fabric. 4 of them and make them about 16 cm long. When you´re done with that, it´s time to put the box together. Start at the bottom and make sure you have the end of the thread on the inside of the box.

/// Här kan du se att jag skurit på båda sidor om kanten. Gör sedan 4 trådar, 0.7 cm breda och ungefär 16cm långa. När det är klart kan du börja trä ihop din låda. Börja i botten och tänk på att ha trådens ände på insidan av lådan.

storage

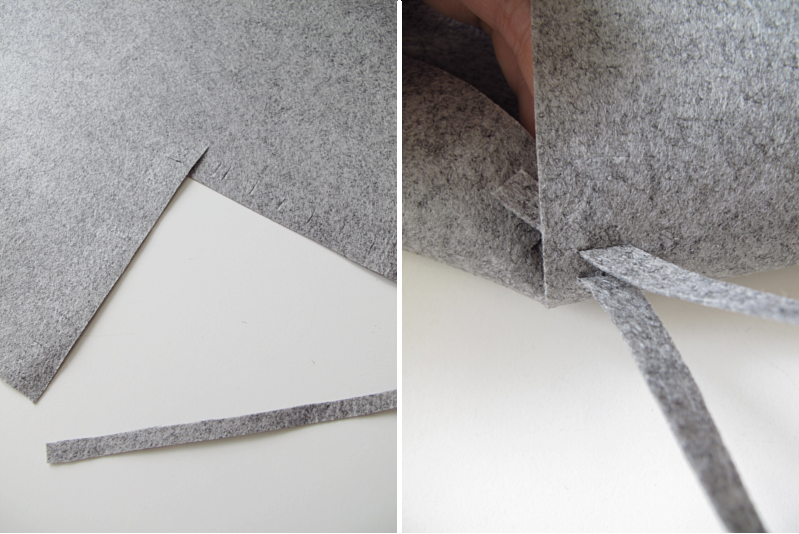
Gently pull it through the cuts. You can use the tip of a pencil to easier get them through. When you have reached the top of the box, cut the excess part off.

/// Dra så försiktigt trådarna igenom hålen. Jag använde en blyertspenna, utan stift, som hjälp med att få tråden igenom. När du har kommit till toppen på lådan, så klipper du bara av den överblivna delen.

storage

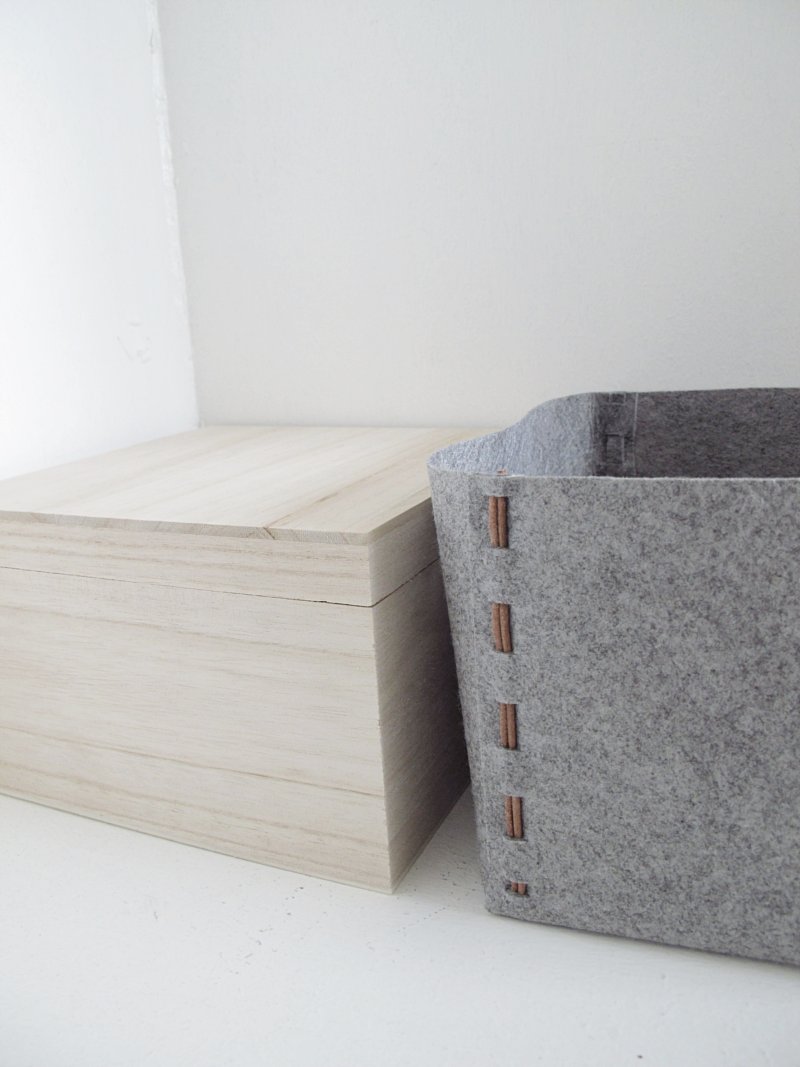
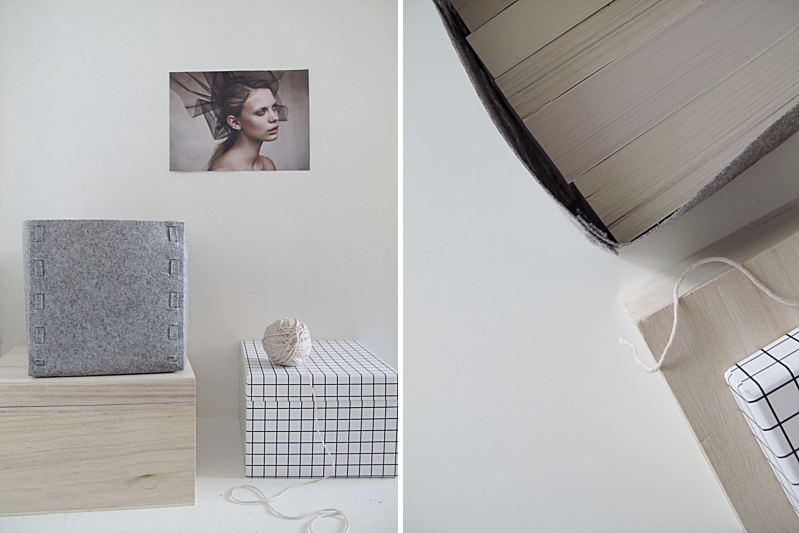
And you are done! As you can see, I had a hard time deciding which thread I like the most. In the first picture I have used two 2mm leather cords and in the tutorial, strips of grey fabric.

/// Och du är klar! Som ni kan se hade jag lite svårt att välja tråd till min låda. Började med tygtråden för att sedan prova med 2 stycken 2mm lädersnören. (första bilden).

storage


Posted

in

,

by

Tags:

Comments

51 responses to “STORAGE BOX”

  1. i love this fabric. it reminds me alot like the mika tolvanen storage baskets!
    i do need to get round to purchasing materials for DIY’s. this one would be perfect for my space-less room.

    1. designoform

      I love it too! You can never get to much DIY material ;)

  2. Really nice done!

    1. designoform

      Thank you!

  3. mar!

    love it! the name of that fabric?

    1. designoform

      I´m happy you like it! It is actually a fabric you use between the “nicer” fabric and the padding on chairs, but you can use a thicker felt fabric instead. Works just fine!

  4. This is so pretty and simple. I have a thing for “soft” boxes and the texture they offer as opposed to slick cardboard. It’s lovely!

    1. designoform

      Thank you Stacey!

  5. oh that’s fabulous! you might have even convinced me to do some diy… thanks for sharing it :)

    1. designoform

      Yes! ;)

  6. Good one! Thanks for the inspiration.

    1. designoform

      Varsågod! :)

  7. […] saw this nice DIY storage box on the Design and Form blog. If I can find the time this weekend, maybe I’ll make myself one as well. You can never […]

    1. designoform

      Vad roligt att du gillar. Och grattis till den lille!

    1. designoform

      Thanks!

    1. designoform

      Tack!

  8. Lovely, have to make it.

    1. designoform

      Sounds like a great idea! ;)

  9. […] these no-sew felt storage boxes at Design and Form. Instructions in the […]

  10. Sandy Lewis

    Thank you – this is brilliant! Shared on Pinterest. http://pinterest.com/pin/174514554284200312/

    1. designoform

      And thank you for your nice comment!

  11. That’s beautiful! I love the simplicity- very elegant! I would also LOVE to link to your tutorial if you didn’t mind!

    1. designoform

      Thank you! Of course you can link to my tutorial! :)

  12. […] hoy no se queda atrás. Se trata de una caja o cesta de almacenaje,  que he visto en el blog Desing and Form. Para hacerla  únicamente se necesita  un retal de fieltro y un par de cortes estratégicos. […]

  13. Hi
    Love this box! Can I ask where you get this sort of material? Would LOVE to make some for craft room storage. Would it be ok when I’ve done so for me to link to this post on my blog? Will email and let you know when I’m going to do it!
    Thanks
    Donna

    1. designoform

      Thank you! I bought it at my local fabric store.

      Of course you can link to my post! :)

    1. designoform

      Yay! Thank you so much!

  14. […] Design and form, amb tutorial de com fer-lo! […]

  15. love this! thank you so much for sharing :)

    1. designoform

      I’m happy you like it! :)

  16. I’ll be sharing this wonderful project in a round-up of gifts kids can make for Father’s Day on The Crafty Crow, thanks so much for the tutorial!

  17. […] No-sew storage box from Design and Form […]

  18. Gorgeous! I love the way this looks made with felt :)

    http://cafecraftea.blogspot.com

  19. Amazing box! Thank you so much for sharing the way I can make this box on my own! I will put there my magazines. Thanks a lot again! Regards!

  20. […] os gusta trabajar con fieltro o tenéis algún retal por casa aprovecharlo para hacer esta preciosa caja para guardar las labores, el mando de la tele o cualquier cosa que estuviera por el salón tirada […]

  21. Henrike

    Very good idea – inspires me a lot! Grabbed it for myPinterest :)Cheers

  22. […] más variadas.  Os dejo con las imágenes del paso a paso, pero para poder hacerlo bien, pinchad aquí y veréis el tutorial completo del blog de Design and […]

  23. […] the blog for a while you might recognise this DIY. Or at least the felt and leather part. I did a no sewing storage box using the same tecnique  a couple of years […]

  24. Sandy

    These are perfect and I’ll be able to make any size. I like to felt my own wool but I am having a difficult time find heavy wool. Any suggestions would be appreciated. Thanks for the great way to “sew”

    1. designoform

      I’m sorry I don’t know where to find your own wool. I only use store bought

Leave a Reply

Your email address will not be published. Required fields are marked *

We use cookies to personalise content and ads, to provide social media features and to analyse our traffic. We also share information about your use of our site with our social media, advertising and analytics partners.
Accept
Decline