Blog

  • PINCH

    I like the idea behind Pinch från Moebe. It consists of two pieces of wood and a rubber band. When the rubber band breaks you just replace it with a new one. And when you ‘re tired of it you toss it in a fire instead of the garbage. For more info click here.

    /// Jag gillar verkligen ideén bakom Pinch från Moebe. Två bitar av trä som hålls ihop av ett litet gummiband. När gummibandet går sönder, byter du bara till ett nytt. Vill du läsa mer klicka här.

    moebe - pinch

    moebe - pinch

    fo: moebe | hello little birdie

  • DIY – CARD WITH WASHI TAPE PATTERN

    DIY card with washitape | designoform.com

    If I don’t remember wrong this is the blogs first DIY using Washi tape. It’s a pretty simple one but you need a bit of patience.

    /// Om jag inte är helt fel ute nu så tror jag minsann att detta är bloggens första DIY med Washi tape. Det är väldigt enkelt med kräver lite tålamod.

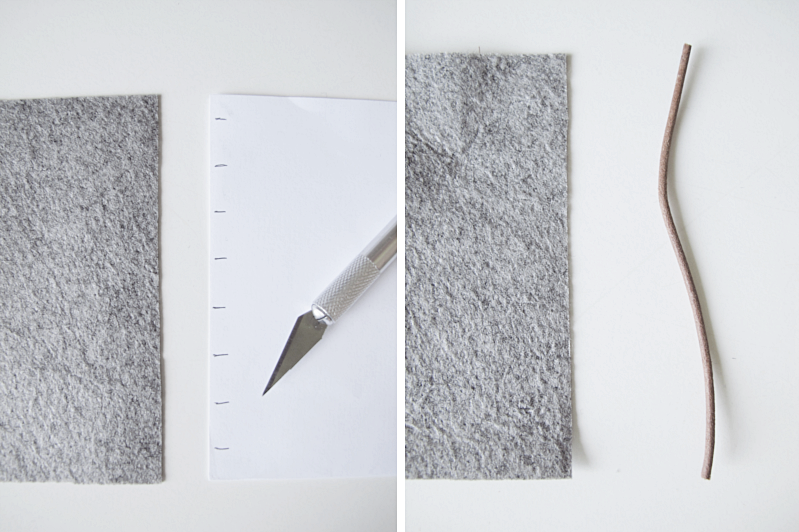
    Other than that you’ll need:

    → Washitape with a striped pattern
    → A pair of scissors
    → A card (If you are using Washi tape that are black and white like I did you get the best result with a white card since the Washitape is a bit transparent)
    → A piece of regular paper

    Till detta behöver du:

    → Washi tape med ränder
    → Sax
    → Ett kort (Om du använder svart och vit Washi tape som jag så får du bäst resultat med ett vitt kort då Washi tapen är lite genomskinlig).
    → Ett vanligt papper

    And this is how you do it:

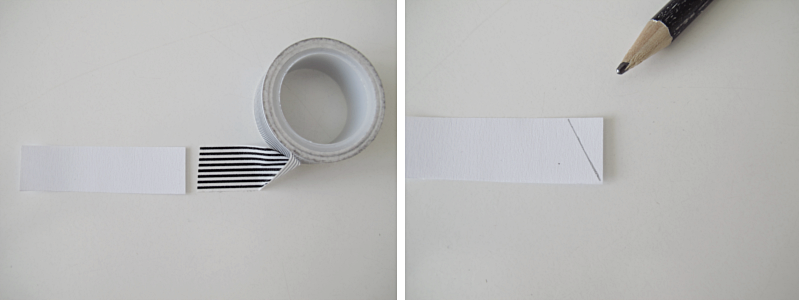
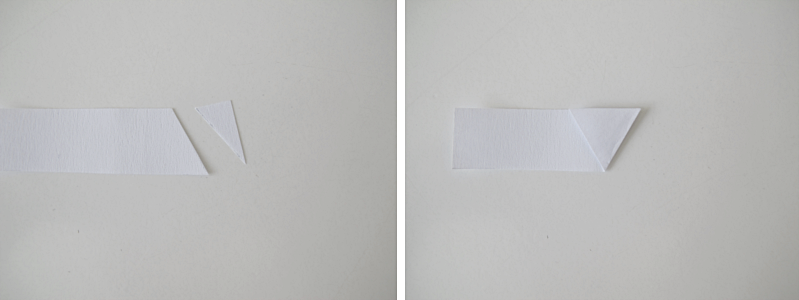
    First you cut a stripe from the regular paper as wide as the Washi tape. Then you draw a line in a 60° angle.

    /// Börja med att klippa ut en bit ur det vanliga papperet som är lika bred som din Washi tape. Sedan ritar du ett streck som är i 60° vinkel.

    DIY card with washitape | designoform.com

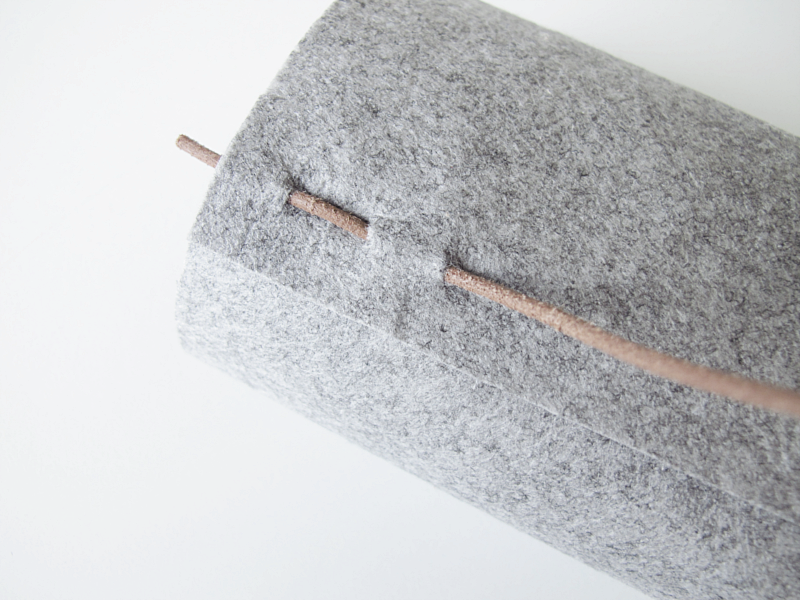
    Cut along the line. Then fold like the picture shows.

    /// Klipp längst med linjen och vik som bilden visar.

    DIY card with washitape | designoform.com

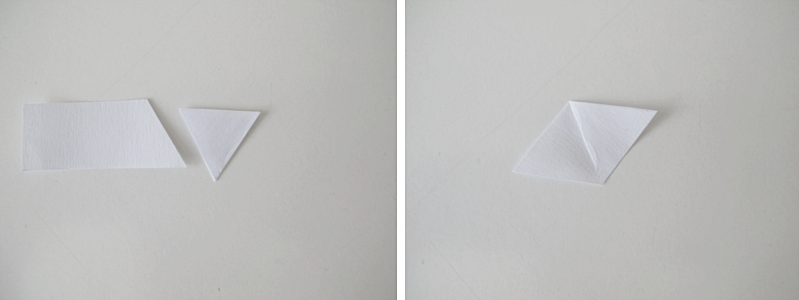
    Then you cut again and unfold. Now you have a template for the Washi tape.

    /// Klipp sedan igen och vik upp. Nu har du ett mall till Washi tapen.

    DIY card with washitape | designoform.com

    DIY card with washitape | designoform.com

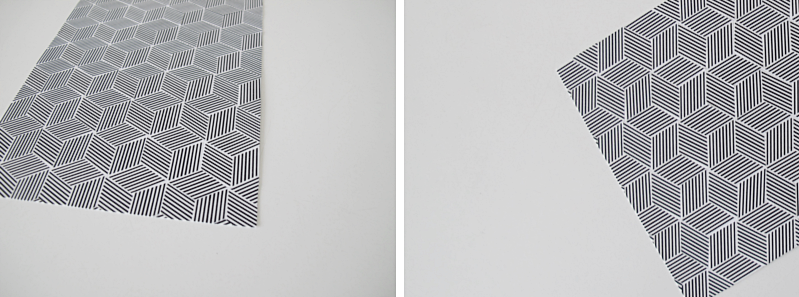
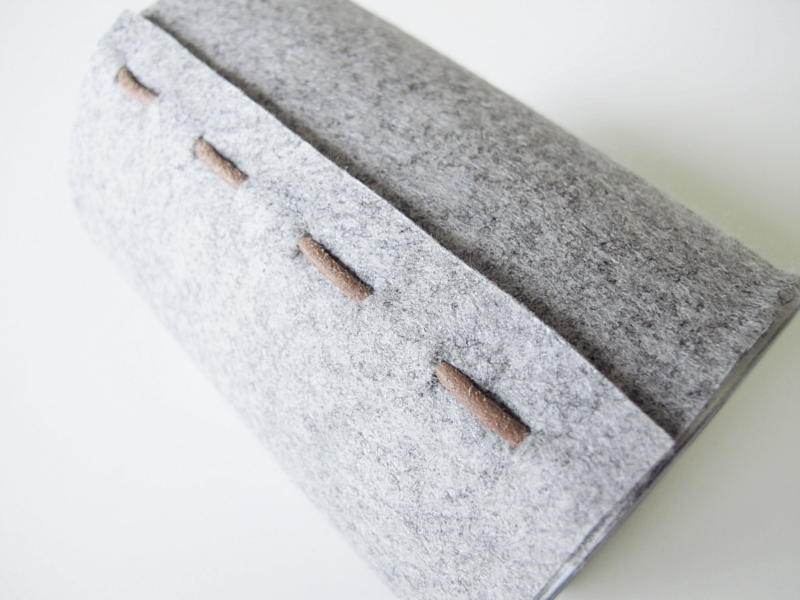
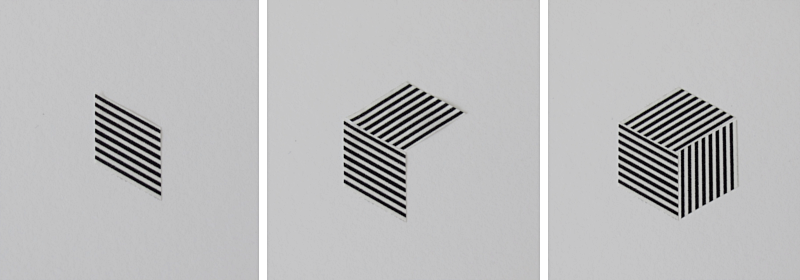
    Now it’s time to start making the pattern. All pieces are the same, you just rotate them.

    /// Nu är det dags att börja med mönstret. Alla bitar är likadana, vi bara roterar dem.

    DIY card with washitape | designoform.com

    I started in the middle and worked my way out to the sides. Some tips along the way: When you fasten your pieces, do it so that they still are a bit loose, because you may have to go back and move them a bit later. At the same time don’t be too meticulous. A small gap won’t show when the card is finished.

    /// Jag började i mitten och arbetade mig utåt. Några tips längst vägen: När du sätter fast dina bitar låt dem vara ganska lösa, för det kan vara så att du behöver gå tillbaka och ändra och flytta om lite. Men var samtidigt inte allt för noga för eventuella småluckor kommer inte att synas i slutändan.

    DIY card with washitape | designoform.com

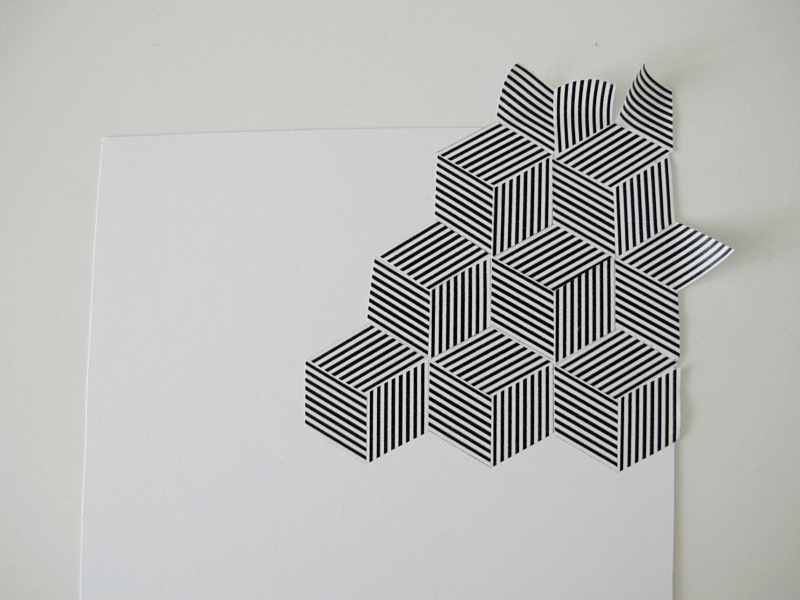
    When the pattern is done, you cut along the edges of the card to remove the leftover Washi tape. And you are done!

    /// När du är färdig med mönstret klipper du längst efter kanten på kortet för att ta bort all överbliven Washi tape och du är klar!

    DIY card with washitape | designoform.com


  • DIY – DAY BED

    Hi guys! I took an early weekend so no Weekly Wonders-list on friday. But now I’m back again and todays DIY inspiration is this wooden day bed. I like the straight lines and that is has a little bit of a minimalist feel to it. If I where to make one small change however I would use one long matress instread of two. But other than that, just perfect. Here you can find the tutorial (It’s in danish but use google translate).

    /// Hallå på er! Jag tog en tidig helg så det blev ingen lista i fredags. Men nu är jag tillbaka och dagen DIY inspiration är den här dagbädden i trä. Jag gillar speciellt de raka linjerna och att den har lite av en minimalistisk känsla. Om jag bara får ändra en liten, liten sak på den så skulle jag använda en hel lång madrass istället för två mindre. Men förutom det, ingenting. Gillar du också den så finns beskrivning på hur du gör din egen här.

    make your own daybed

    fo: Boligmagasinet | Morten Holtum

  • INSTAGRAM FAVORITE #18

    fanny hååg instagram

    fannyhaag. A lovley mix of interior, food and everyday life.  Apparently the talent for beautiful styling runs in the family.

    /// fannyhaag. En härlig mix av inredning, mat och vardagsbilder. Förmågan till fina bilder och styling verkar vara något av ett släktdrag.

  • RANDI VESTERBÆK BRO POSTERS

    Oh, how I like these posters in limited edition by Randi Vesterbæk Bro for Selected By Walnutstreet. (even though I think the bottom poster Together poster is a tiny bit scary too, it somehow reminds me of clowns). The images reflects the study of thoughtful moment, and are called Into The Future poster, By Yourself poster and Together poster

    /// Åh vad jag gillar de här tavlorna av Randi Vesterbæk Bro för Selected By Walnutstreet (även om jag samtidigt tycker att den bilden längst ner Together poster, också är lite, lite obehaglig. Jag tror det är för att de påminner mig om clowner). Bilderna är tänkta att reflektera studier av eftertänksamma ögonblick, och heter Into The Future poster, By Yourself poster och Together poster.

    Selected by Walnutstreet poster

  • TIN CAN MAKEOVER

    tin can makeover | designoform.com

    If you’ve been following the blog for a while you might recognise this DIY. Or at least the felt and leather part. I did a no sewing storage box using the same tecnique  a couple of years ago.

    // Om du har följt bloggen ett tag så kanske du känner igen det här DIY:et. Eller i allafall filten och lädret. Jag gjorde nämligen denna förvaringslåda på exakt samma sätt.

    For this you’ll need:

    → Felt
    → Tin can
    → Leather thread
    → Paper knife
    → A pair of scissors
    → Paper
    → Pen
    → Measuring tape

    /// Till detta behöver du:

    → Filt
    → Konservburk
    → Lädersnöre
    → Papperskniv
    → Sax
    → Papper
    → Penna
    → Måttband

    tin can makeover | designoform.com

    And this is how  you do it:

    Start by measuring your tin can. Add 2cm on the circumference and then cut a piece of felt using thouse measurements (My tin can measured 10.5cm x 24cm. So I cut the felt 10.5cm x 26cm).

    /// Börja med att mäta din konservburk. Addera sedan 2cm till omkretsen på burken och klipp ut en bit filt med de måtten. ( Min konservburk hade måtten 10.5cm x 24cm, Så jag klippte ut en bit som var 10.5cm x 26cm).

    tin can makeover | designoform.com

    Now you are going to make small cuts on both ends of the felt. How far apart you decide. I wanted the ends of my leather thread to be on the inside (between the tin can and the felt), and I wanted the same amount of felt on both sides of  the first and last cut. That made the first cut 1cm from the edge, the next 12mm, the third 12mm and so on. When that is done you cut the leather thread a couple of millimeters longer than the hight of the tin can.

    /// Sedan ska du skära små snitt i filten. Hur långt avstånd mellan snitten väljer du själv. Jag ville att mina ändar på lädersnöret skulle vara på insidan filten (mellan filten och konservburken), och så ville jag ha lika mycket filt på båda sidor av första och sista snittet. Vilket gjorde att första snittet blev ca 1 cm in, sedan nästa ca 12mm från det första, den tredje 12mm ifrån den och så fortsatte jag så hela vägen. Huvudsaken är att du gör snitten på samma plats på båda ändarna av filttyget.  När det är klart klipper du en bit av lädersnöret som är några mm längre än höjden på konservburken. (I mitt fall några millimeter mer än 10.5cm)

    tin can makeover | designoform.com

    Now it’s time to attach the ends of the felt using the leather thread. Do this without the tin can inside.

    /// Sedan är det dags att trä ihop filten. Gör detta utan att ha konservburken inuti.

    tin can makeover | designoform.com

    When that is done you pull the felt over the tin can. This can be a bit tricky but you can do it! Here you can see that the ends of the leather threads are on the inside. And you are done!

    /// När det är klart så trär du filten över konservburken. Det kan vara lite pilligt men det går! Här ser du också att ändarna på lädersnöret är på insidan. Och du är klar!

    tin can makeover | designoform.com


    like

    These felt flippers
    This braided key holder
    This combined card and key holder

We use cookies to personalise content and ads, to provide social media features and to analyse our traffic. We also share information about your use of our site with our social media, advertising and analytics partners.
Accept
Decline