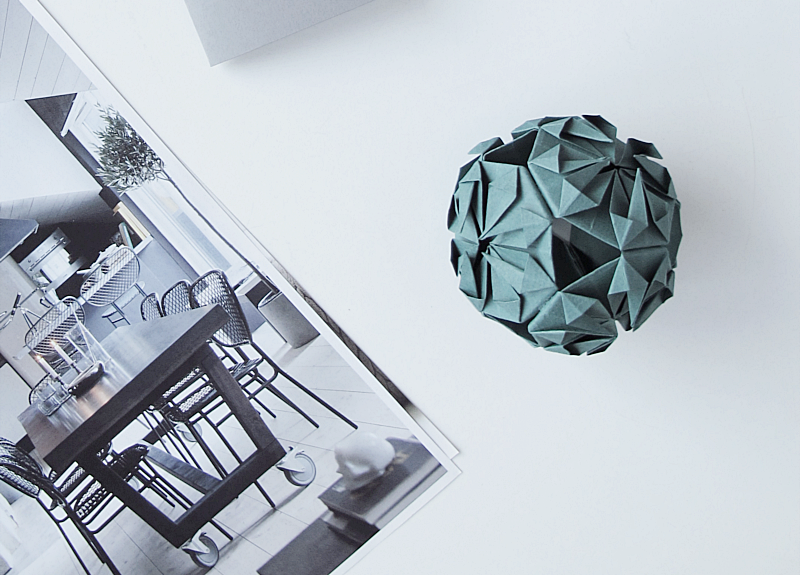
Can you believe it? Already december! Only 21 days until Christmas Eve. ( Here in Sweden we celebrate it on the 24th.) So what better diy than a christmas diy. Here you have a lovely origami ball. Glue a thread to it and you can hang it in your tree or why not make a garland out of it. It’s so nice you can leave it hanging after the holidays too.
/// Kan ni förstå, redan december! Bara 21 dagar kvar till julafton. Så vad passar bättre än ett jul diy. Denna fina origami boll som man kan limma fast en tråd i och hänga i julgranen eller varför inte göra en girlang och hänga på väggen. Passar fint efter julhelgen också.
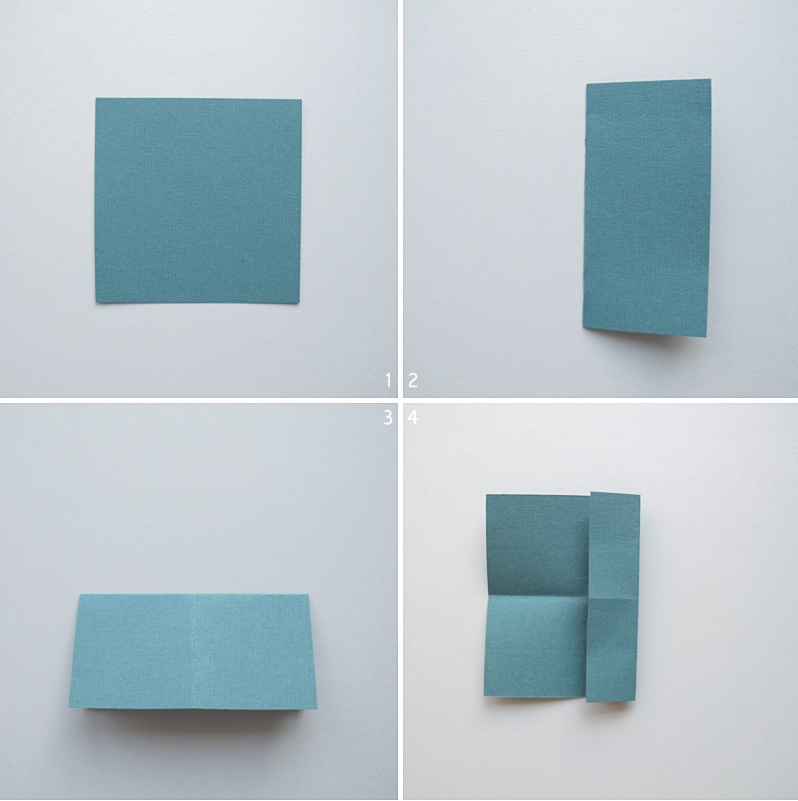
1. Cut out a square from a slighty thicker papper, (but not as thick as carton.) I did my square 10.5 x10.5 cm and ended up with a ball that is approximately 8cm in diameter. 2. Fold it in half. 3. Unfold and fold the other way. 4. Unfold and fold the side to the middle.
/// 1. Klipp ut en fyrkant i ett lite tjockare papper ( men inte så tjockt som hobbykartong.) Jag gjorde min ruta 10.5 x 10.5cm och fick då en boll som är ca 8cm i diameter. 2. Vik den på mitten. 3. Vik upp och vik den nedåt. 4. Vik upp och vik in sidan till mitten.
5. Fold the other side to the middle too. 6. Fold the top to the middle. 7. And the bottom to the middle. 8. Fold the sides inwards so that you get a triangle.
/// 5. Vik in den andra sidan mot mitten. 6. Vik toppen in mot mitten 7. Vik botten in mot mitten 8. Vik in sidorna mot mitten så att det blir en trekant.
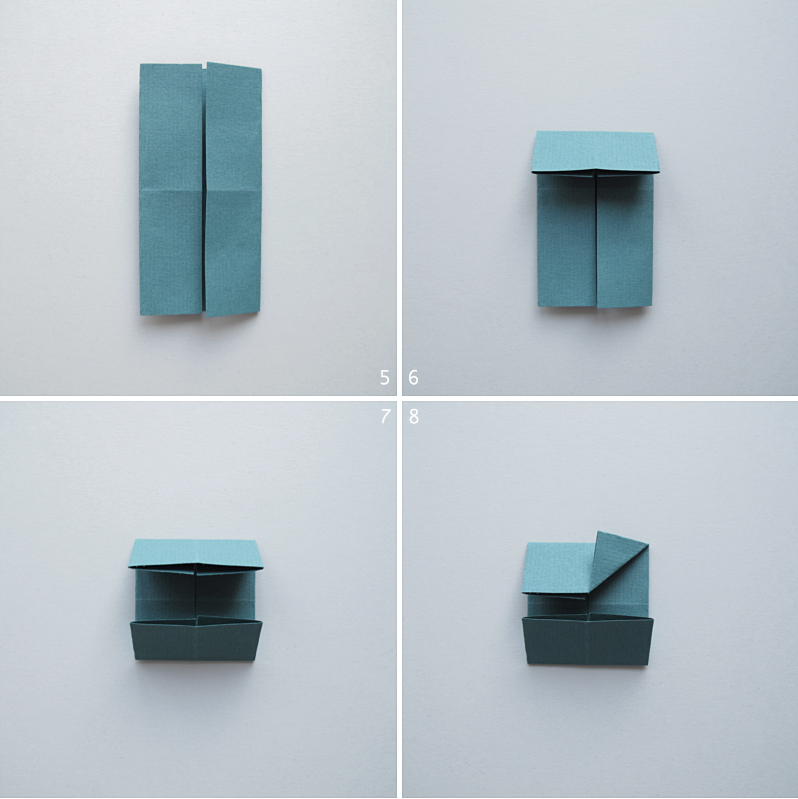
9. Now your paper should look like this. 10. Unfold it so you get a figure that looks like this. 11. Place your finger in the middle of the paper and fold the paper to the left. 12. And then to the right.
/// 9. Så här ska din figur se ut nu. 10. Vik upp trekanterna och de senaste vikningarna så att du får denna figur. 11. Håll fingret på mitten av papperet och vik ut vänster sida. 12. Och så höger.
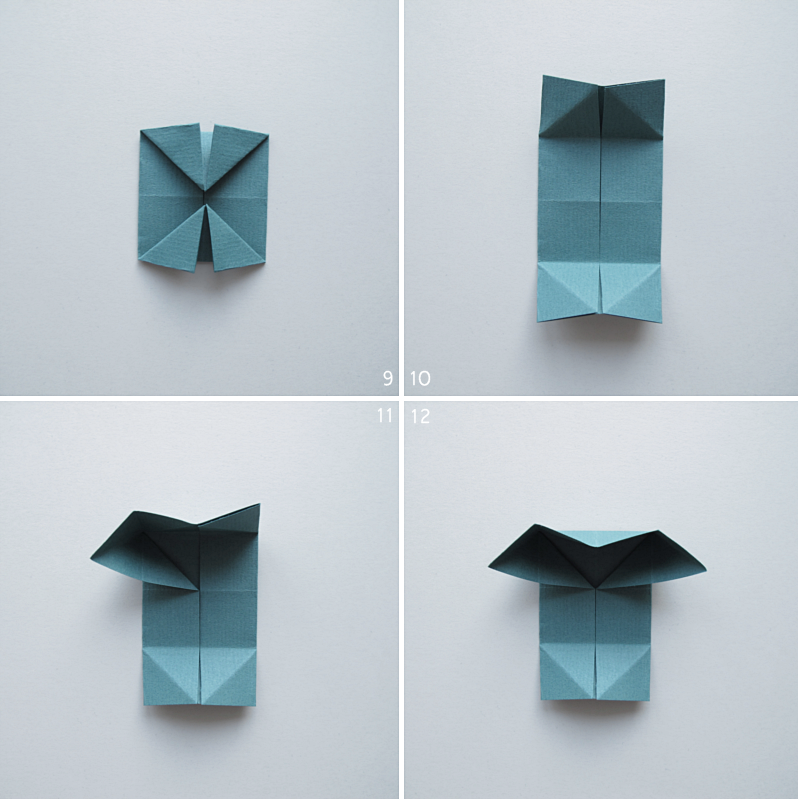
13. Gently push the top down. 14. Now do the same to the bottom of the paper. 15. Turn the figure and open up the pointy part. 16. Then push the paper down so that you get a square.
/// 13. Tryck ner toppen. 14. Gör nu likadant på nedre delen av papperet. 15. Vrid på papperet och öppna upp spetsen som bilden visar. 16. Tryck sedan ner papperet så att du får en fyrkant.
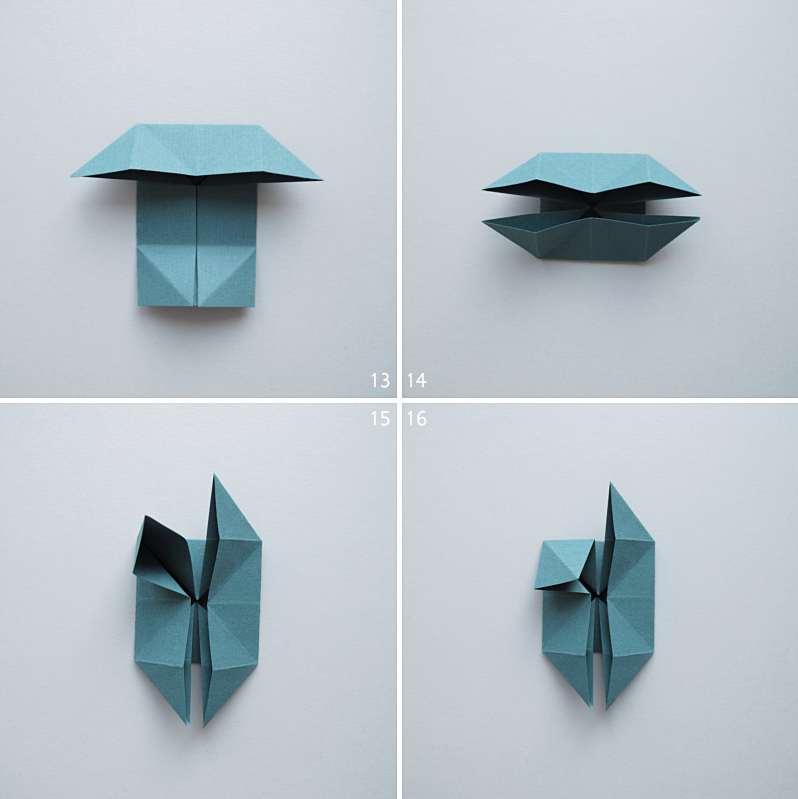
17. Do the same on all sides. 18. Fold one side towards the middle. 19. And then the other. 20. Gently open one of the foldings and push the top down.
/// 17. Gör likadant på alla sidor. 18. Vik in ena sidan mot mitten. 19. Och sedan viker du också in de andra. 20. Pilla försiktigt upp en vikning och tryck ner toppen.
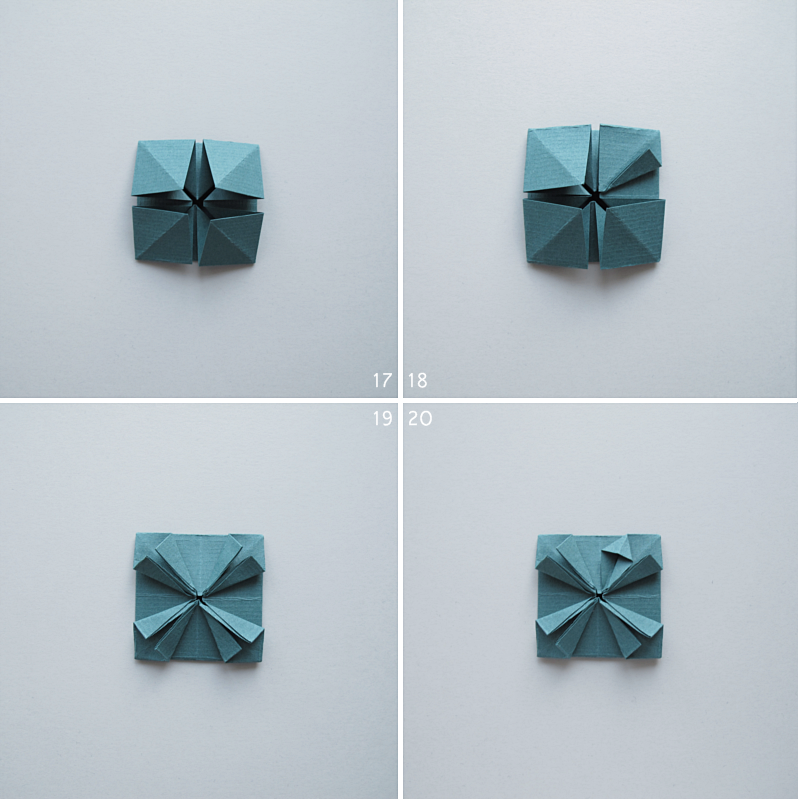
21. Repeat on the other ones. If you find it a bit tricky to open the folding you can use a pencil as help. 22. Fold the corners backwards. 23. Make five more figures and glue them all together using the backward folding you did in step 22. 24. And you are done!
/// 21. Gör likadant på de andra. Om du tycker det är pilligt att få upp vikningen så kan du använda en penna som hjälp. 22. Vik bak hörnen på din figur. 23. Gör nu fem likadana figurer och limma ihop dem i den lilla bakåtvikningen som vi gjorde i steg 22. 24. Och du är klar!
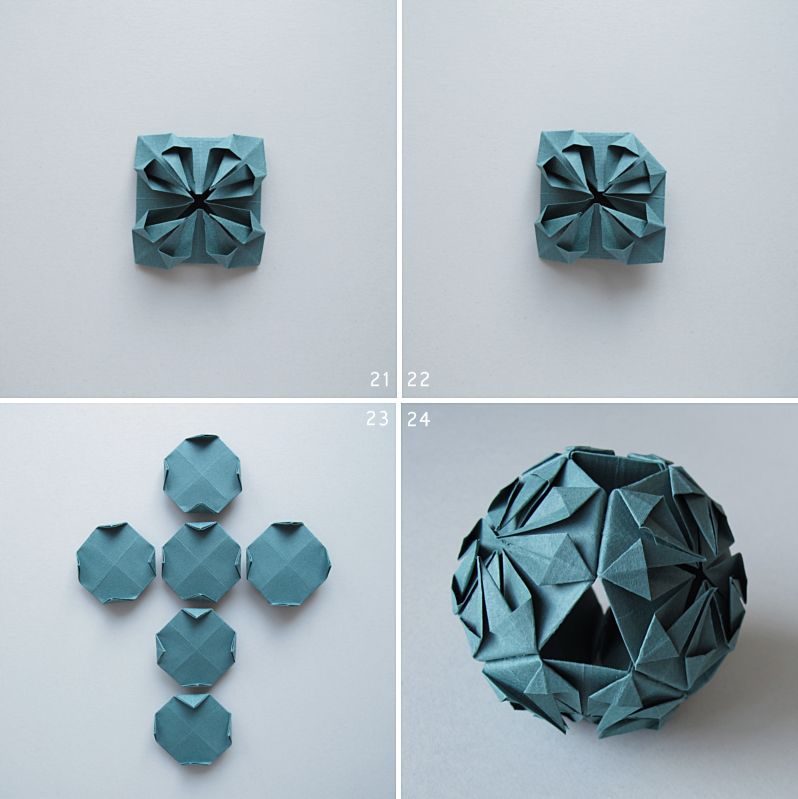
Diy credit: Elle blogg
Leave a Reply