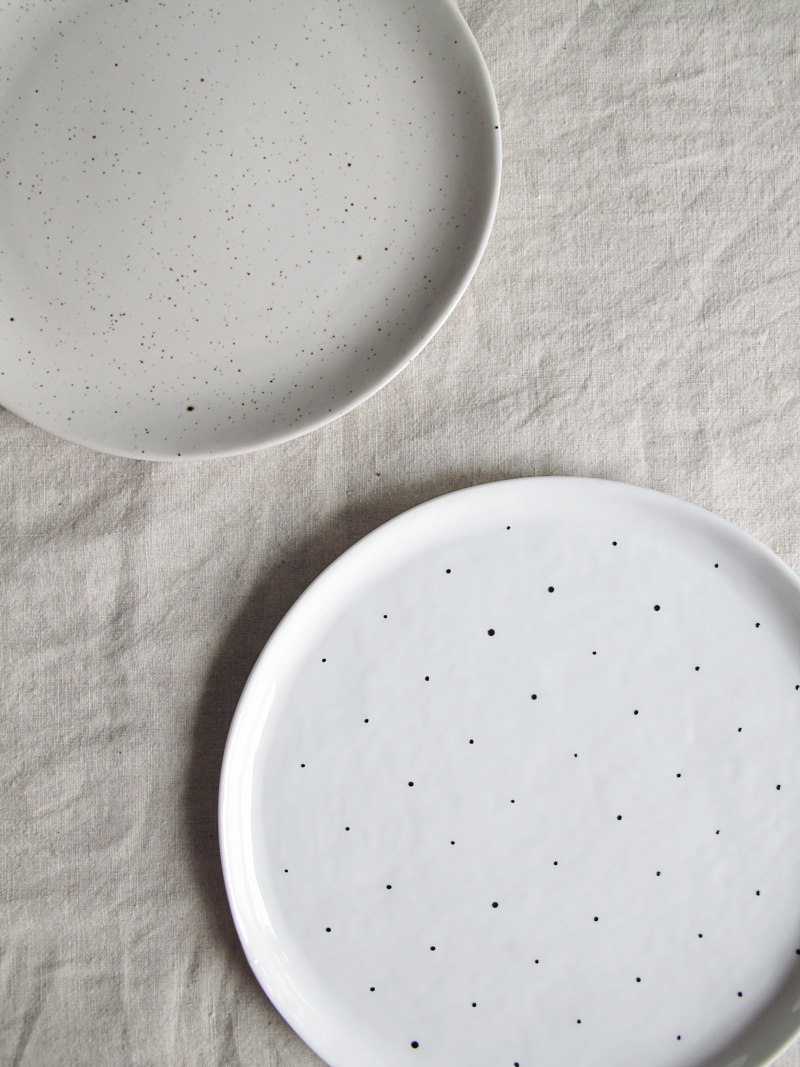
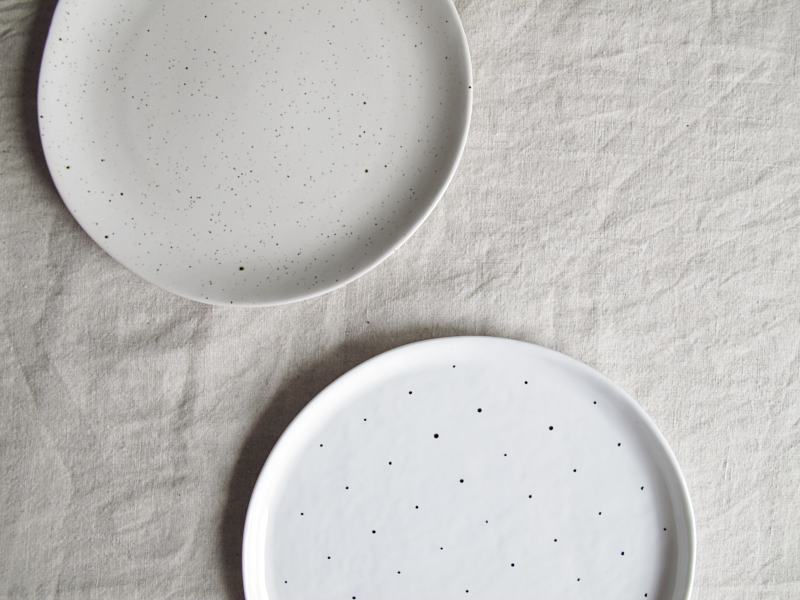
Hi you! New week, new DIY. I was inspired by the small plates I talked about in this post, (and that you can see in the picture below) and wanted to make something similar, except I wanted it to have a smaller number of dots and to be a little more structured..
/// Hallå på er! Ny vecka och ett nytt DIY. Jag blev så inspirerad av assietterna som jag nämnde för er i det här inlägget, (och som ni ser i bilden här nedanför) och ville göra nått liknande själv. Men med mindre antal prickar och lite mer strukturerat.
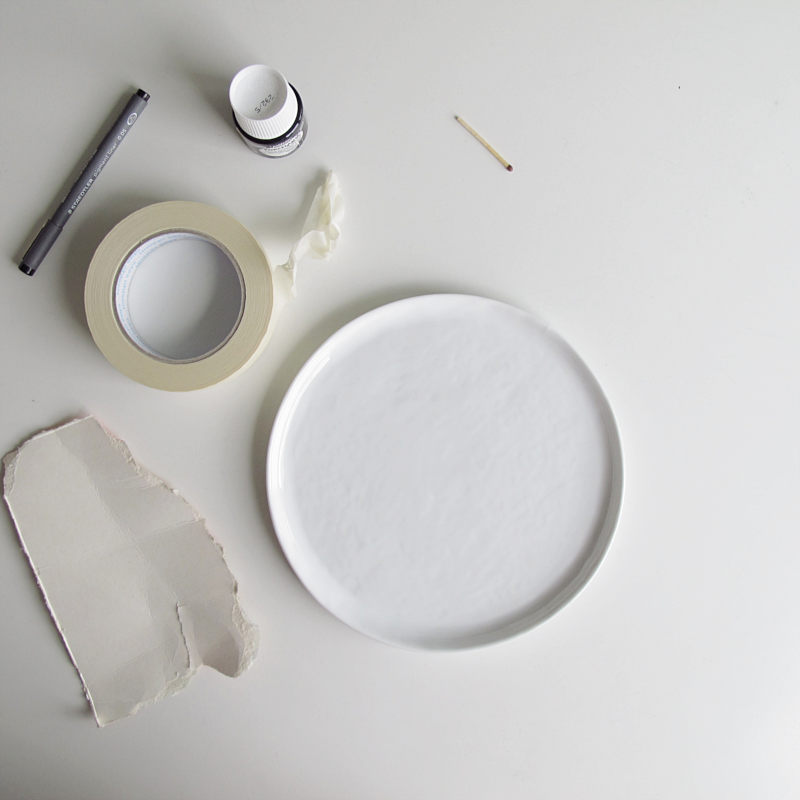
You need:
→ A plate
→ Porcelain paint
→ Masking tape
→ Permanent marker
→ A matchstick
→ A piece of cardboard
/// Till detta behöver du:
→ En tallrik
→ Porslinsfärg
→ Maskeringstejp
→ En (permanent) penna
→ En tändsticka
→ En bit kartong
And this is how you do it:
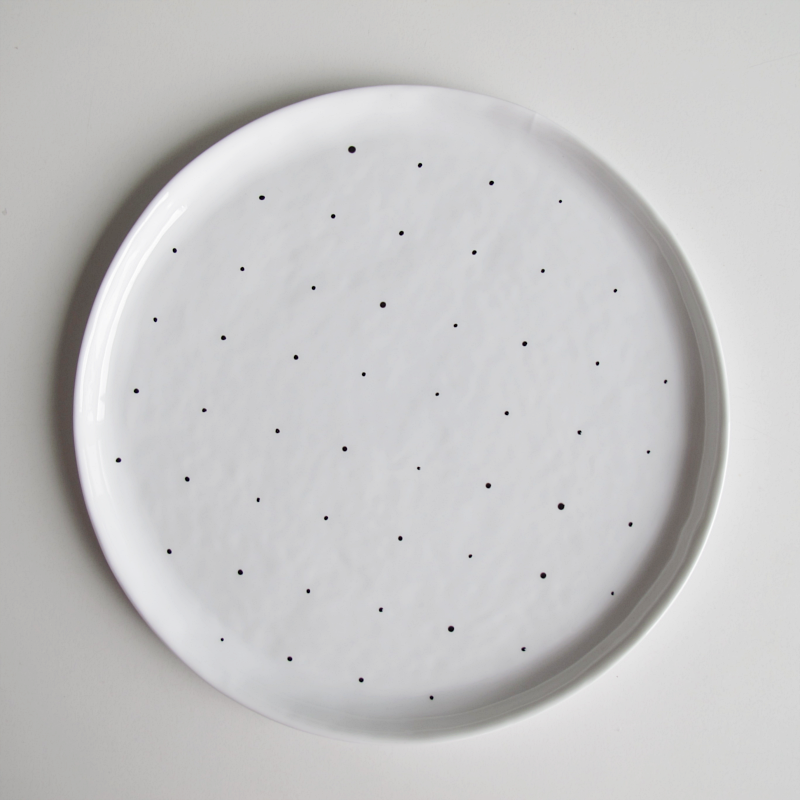
Make a check pattern on the plate using the masking tape. I choosed to make the space between the tape as wide as the tape itself (I used a piece of tape as a template that I removed and reused).
/// Tejpa maskeringstejpen i ett rutmönster på tallriken. Jag valde att göra mellanrummen lika breda som tejpen och använde därför en bit tejp som mall (som jag återanvände).
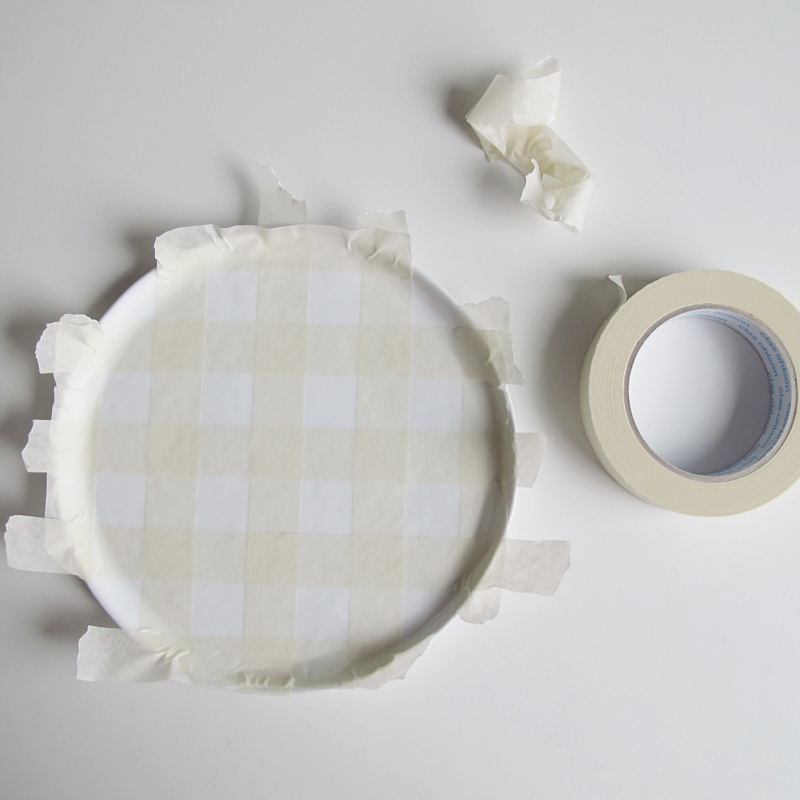
Make small marks with the permanent marker in every corner.
/// Rita små prickar i hörnen på fyrkanterna.

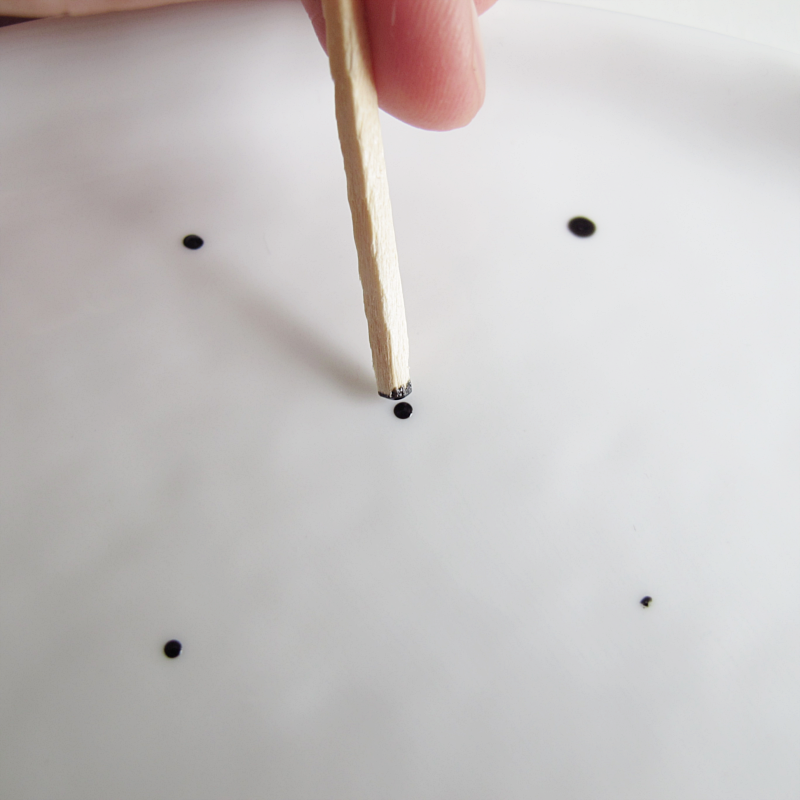
Remove the masking tape. Then pour a small amount of porcelain paint on the piece of cardboard that you then dip the matchstick into (I found it easier to see what I was doing this way).
/// Ta bort tejpen. Sedan häller du ut en liten klick med porslinsfärg på kartongbiten som du sedan doppar tändstickan i (jag tyckte det var enklare att se hur mycket jag doppade tändstickan då).
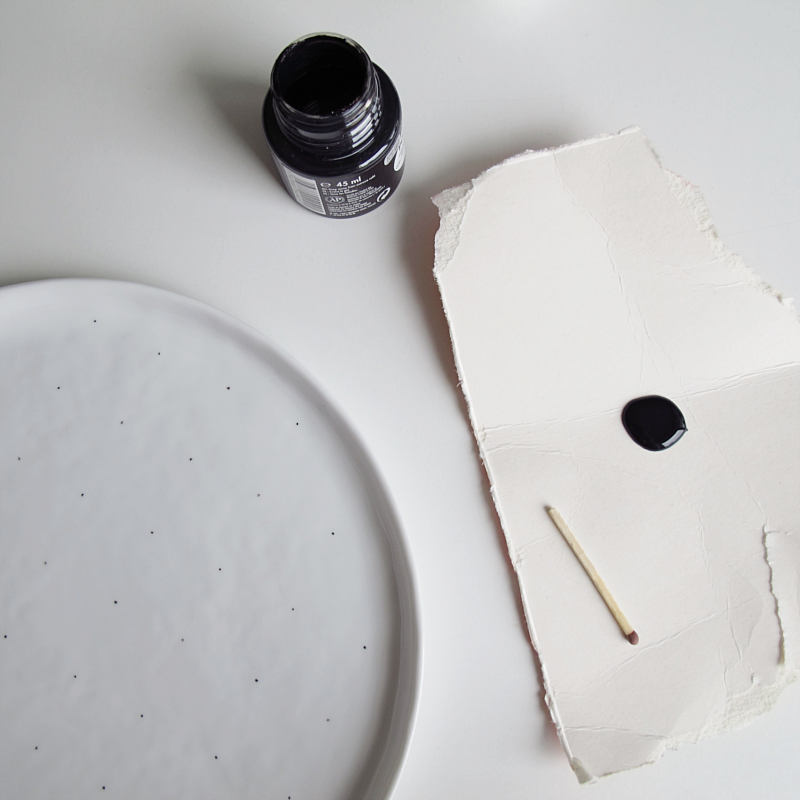
Carefully make a dot on the plate. I didn’t press the actual matchstick to the plate, just the drop of paint. You decide if you want all the dots to have the same size, or if you do like me and let them have different sizes.
/// Tryck försiktigt en liten prick på tallriken. Jag tryckte inte själva tändstickan mot tallriken utan “droppen” mot tallriken. Du väljer själv om du vill göra prickarna exakt lika stora eller om du gör som jag och varierar dem lite.
When you are finished with the dots, follow the instructions on the package of the porcelain paint to harden the color and you are done!
/// När du har gjort alla prickarna så följ instruktionen på porslinsfärgsförpackningen för att härda färgen och du är klar!

This spotted plate
This 2 minutes DIY
Leave a Reply