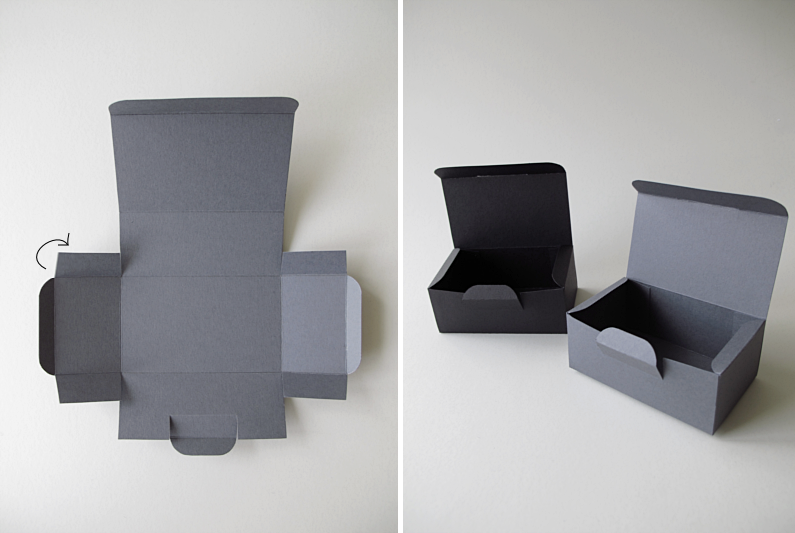
A bit of inspiration for a before and after-post that is coming up later on the blog.
/// Lite inspiration inför ett före och efter-inlägg som kommer upp senare på bloggen.
fo: 1,2,4 my blogarchive 3 lovely life
A bit of inspiration for a before and after-post that is coming up later on the blog.
/// Lite inspiration inför ett före och efter-inlägg som kommer upp senare på bloggen.
fo: 1,2,4 my blogarchive 3 lovely life

Some jewellery diy inspiration. (if you want to make the braid in the upper right corner, I´ve made a tutorial here:)
/// Lite armbands- och halsbandsinspiration för den diy sugne. (om du vill göra en flätad en, som i övre högra hörnet, finns en tutorial här:)
fo: & Other Stories


Todays craving is this lovely little Alarm clock from Anything design.
/// Dagens vill-ha är finaste lilla väckarklockan Alarm clock från Anything design.
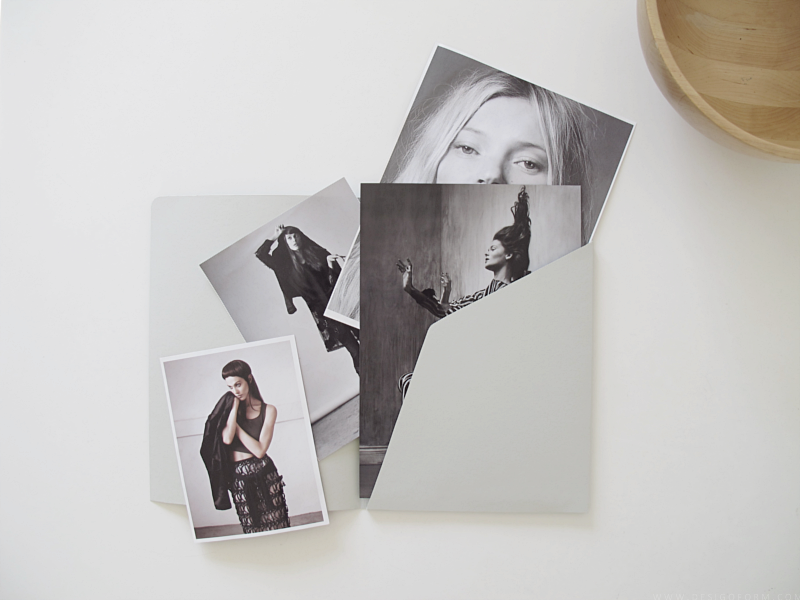
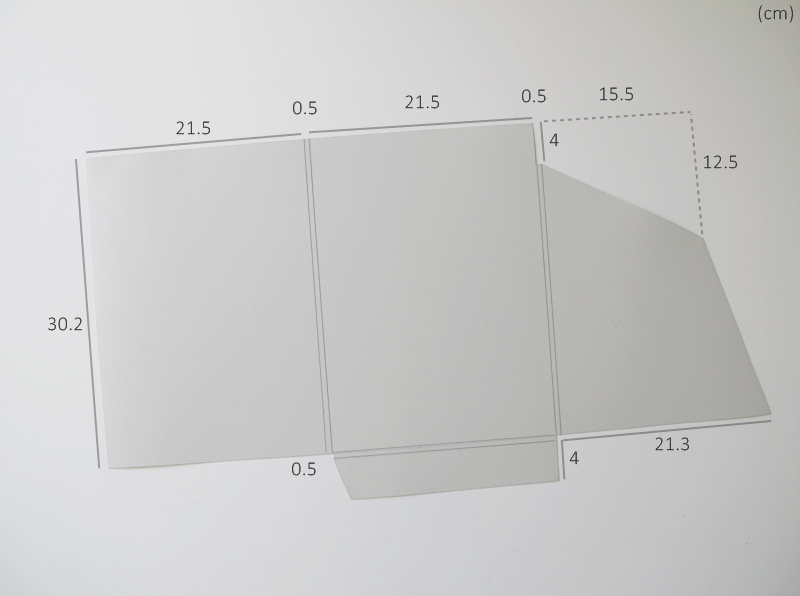
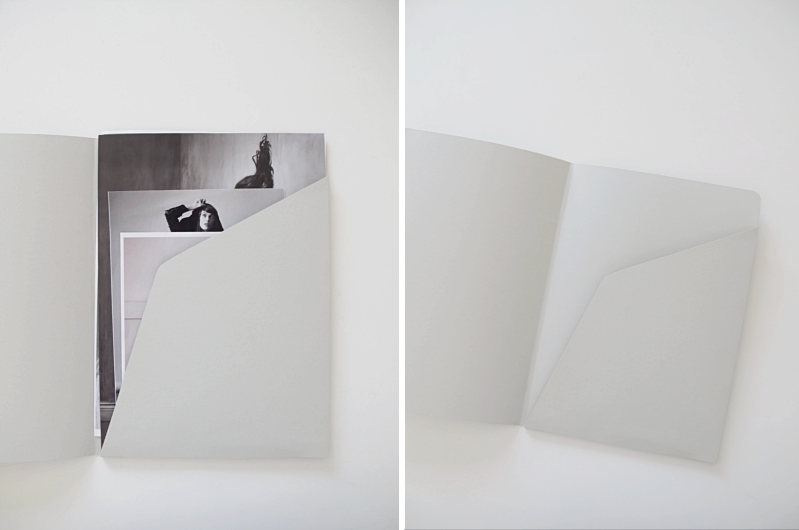
I often save pages from magazines I buy, and up till now I haven´t really had a good place to store them. But yesterday I made this organizer and I think it turned out really good, so I thought I share it with you. Oh and I made this one using a regular a4 paper as a template. So if your pages are like that or smaller, it fits this folder. First make a figure with these measurments:
/// Jag river ofta ur sidor ur tidningar jag köper och fram till nu har jag inte riktigt haft något bra sätt att förvara dem på. Men igår gjorde jag denna mapp, och tänkte att jag skulle visa er hur jag gjort, ifall ni också är en sidsamlare. Och just det.. Jag använde ett vanligt a4 papper som mall, så om dina sidor är så stora eller mindre passar denna mapp perfekt. Börja med att göra en figur med dessa mått:
Then you fold at all lines
/// Vik vid alla linjer
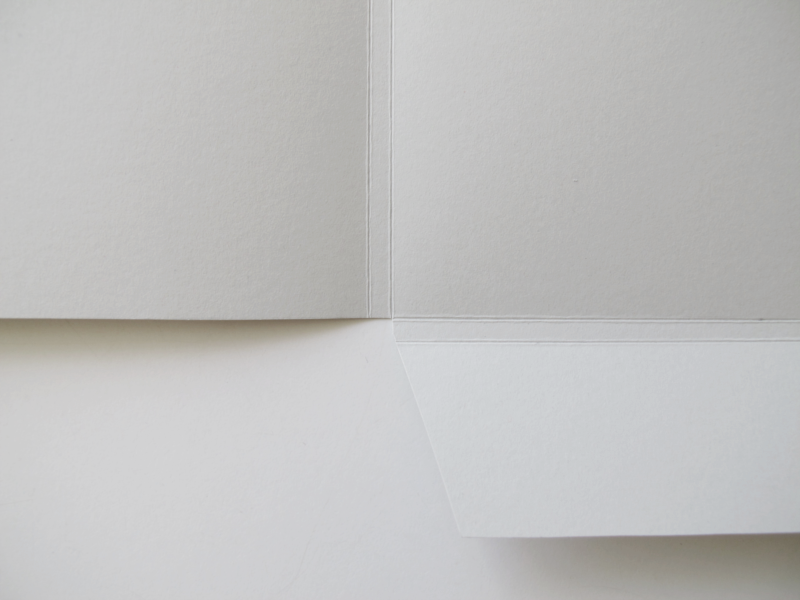
Erase all the pencil marks, and rounden all the upper corners. As I describe here.
/// Sudda bort blyertstrecken och runda alla övre hörn. Beskrivning hur jag gjorde runda hörn, hittar du här:
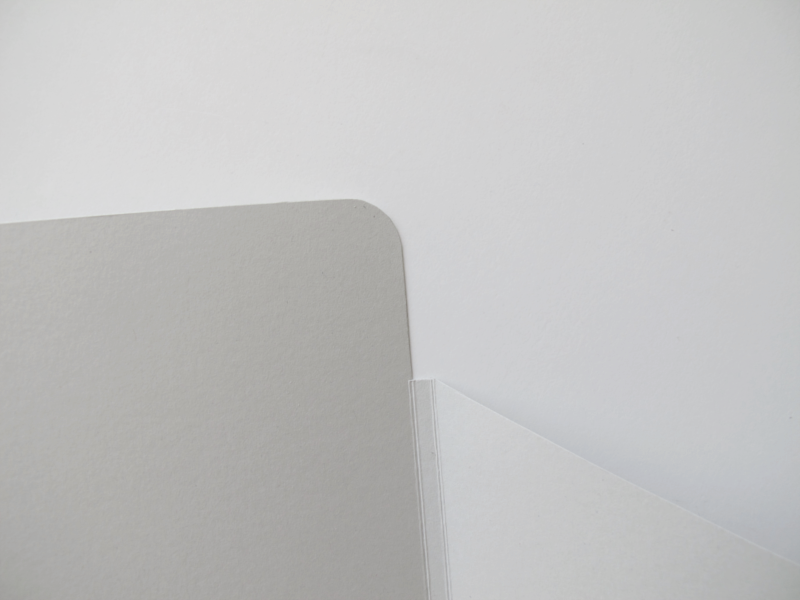
Glue it together and you are done!
/// Limma ihop mappen och du är klar!

Oh we been having the most amazing summer weather here in Sweden for the last couple of days. So I´ve been outside most of the time. Not wanting to spend time at the computer. But today I went inside for a while and made this little diy for you. Here´s a sneak peek, but tomorrow you get the full tutorial. See you then!
/// Åh vilket sommarväder det varit de senaste dagarna. Tiden har spenderats så mycket som möjligt utomhus, utan dator. Men idag smet jag in en stund och gjorde detta diy till er. En liten tjuvkik nu, men imorgon får ni se hela. Ses då!
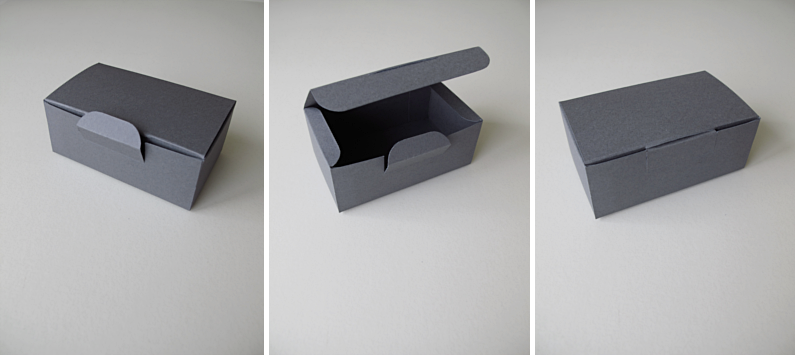
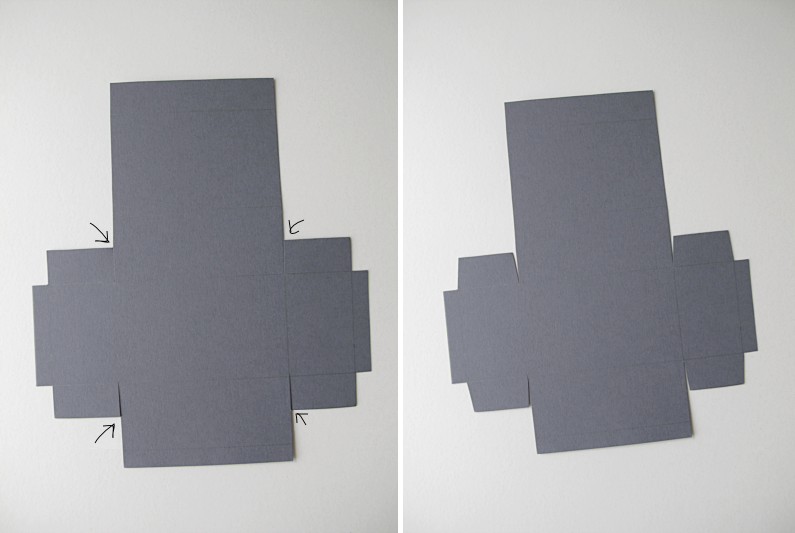
Today I have a new box diy for you. These are the measurements I used:
/// Idag har jag ett nytt ask diy till er. Dessa är måtten som jag använde:
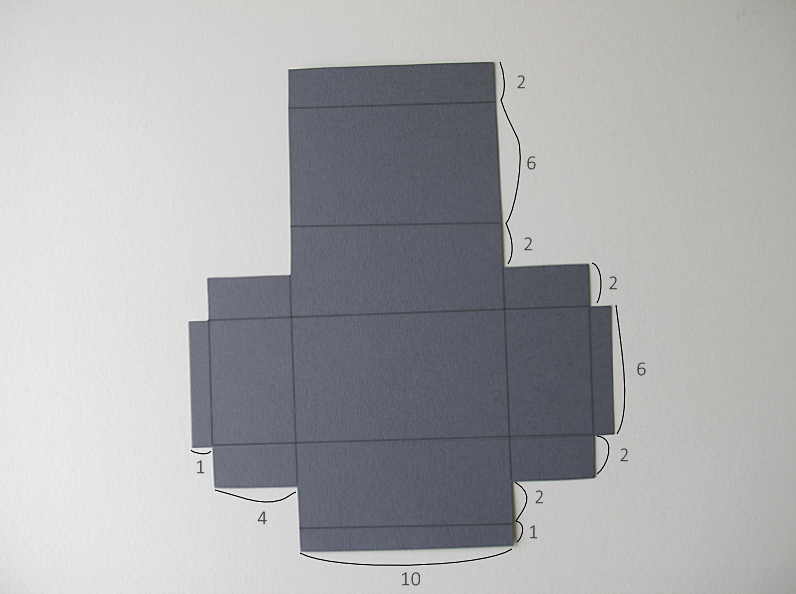
Cut along the lines, where the arrows shows. And cut out a tiny tiny triangle too. On both sides of the four side parts.
/// Klipp längs med linjerna där pilarna visar. Klipp sedan små, små trianglar i hörnen. På båda sidorna av sidobitarna.
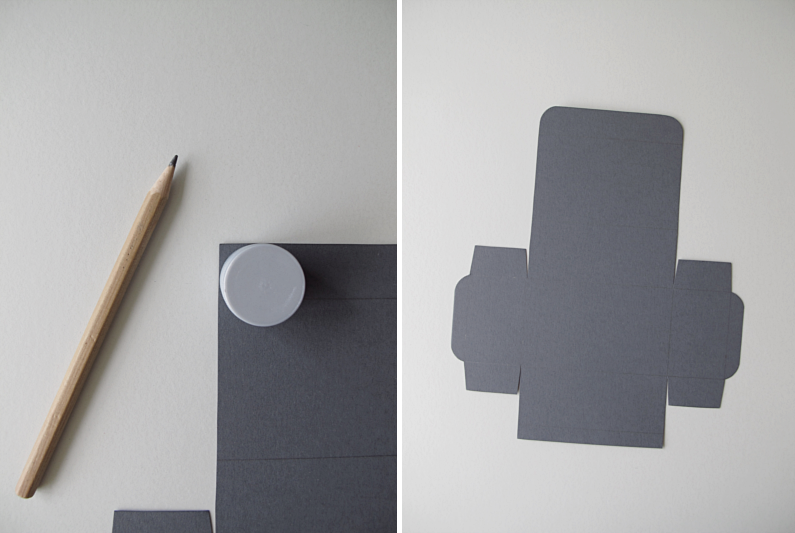
Take a round object, and draw a line in six of the corners. Cut the edges off.
/// Ta något runt, och dra linjer i sex av hörnen. Klipp sedan bort det överflödiga papperet.
Make two marks (on 3cm and 7cm from the left) on the bottom off the figure. Then draw a line where you made the mark, from the edge and 2,5 cm in.
/// Gör två markeringar, (3cm och 7cm från vänster) på figurens nederdel. Sedan drar du en 2,5cm lång linje från kanten, där du gjorde din markering.
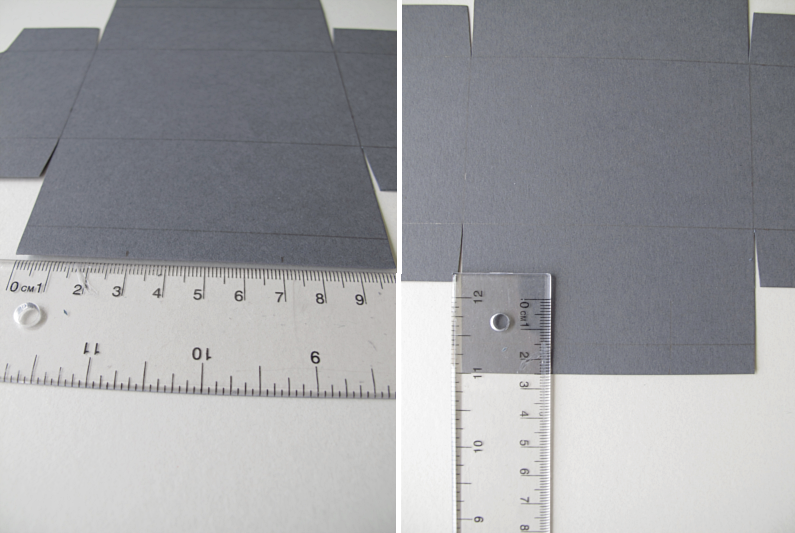
Cut along the line, and cut away the excess part (the 1cm wide part). Take the round object and rounden the corners. The next step is to fold at all lines. You should fold towards you on all of them except on the little part you just did. The one on the bottom of the figure. Fold that one from you, and the tip towards you.
/// Klipp sedan längs med linjen. Klipp även bort de 1cm breda bitarna som finns på var sida om de linjerna du just klippt. Gör sedan hörnen runda med hjälp av den runda saken du använde tidigare. Nu är det dags att vika. Vik vid alla linjer och mot dig, förutom längst ner på den lilla flärpen. Där viker du först från dig och sedan viker du toppen mot dig.
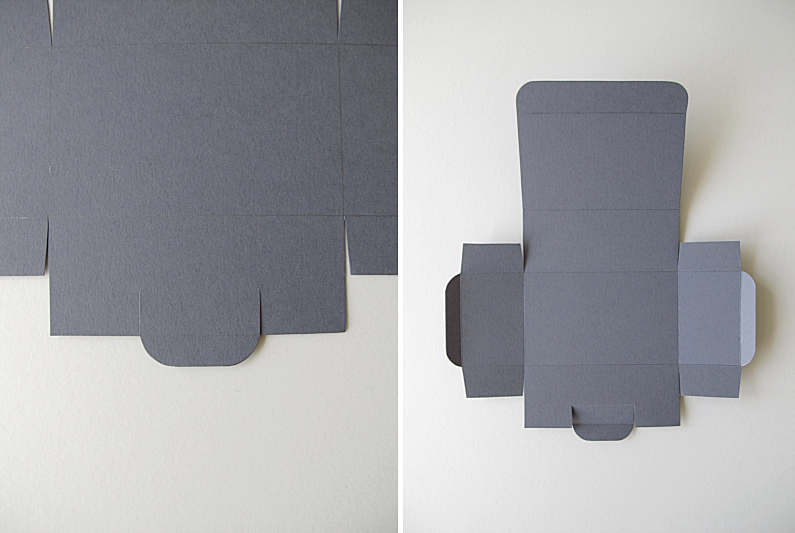
Now you make two new marks, on the top of the figure. Where you have folded. The same as before. 3cm and 7 cm from the left side. Then you use a paper knife and cut a hole between the lines 4cm x 1mm.
/// Gör två nya markeringar på övre delen av din figur. Likadant som förut. 3 och 7 cm från vänster sida. Skär ut ett hål mellan markeringarna 4cm x 1mm.
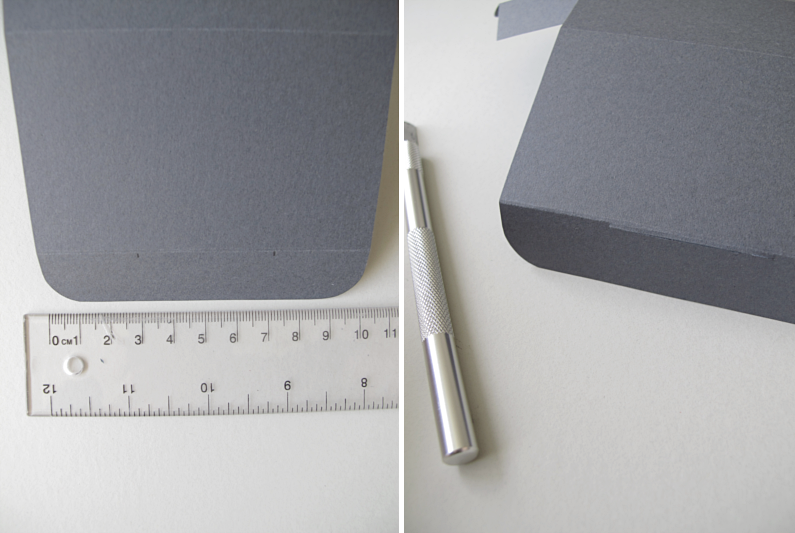
Put some glue on the back of the upper and lower parts of the side parts and glue the box together, and you are done!
/// Sätt lite lim på baksidan av den översta och nedersta delen så sidbitarna och limma ihop din ask. Och du är klar!