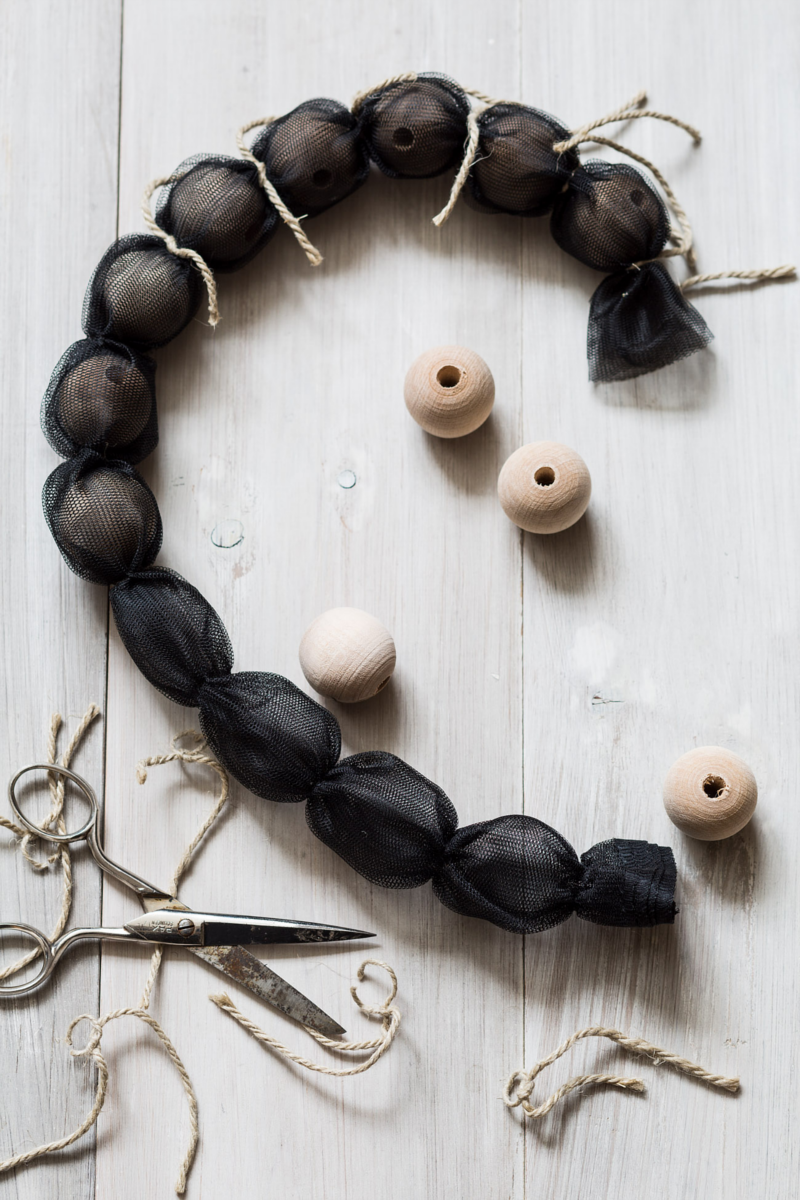
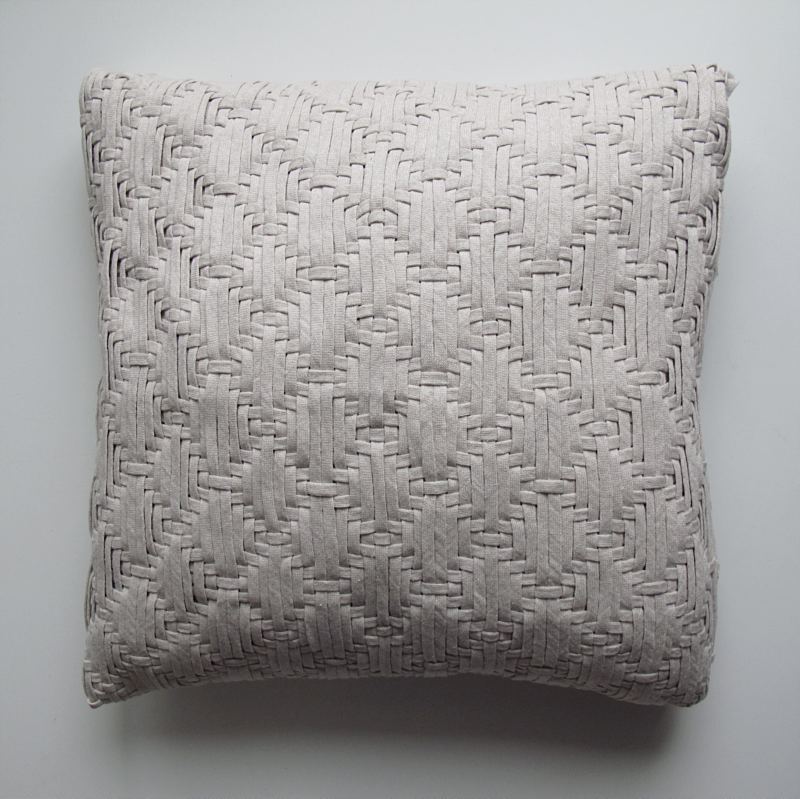
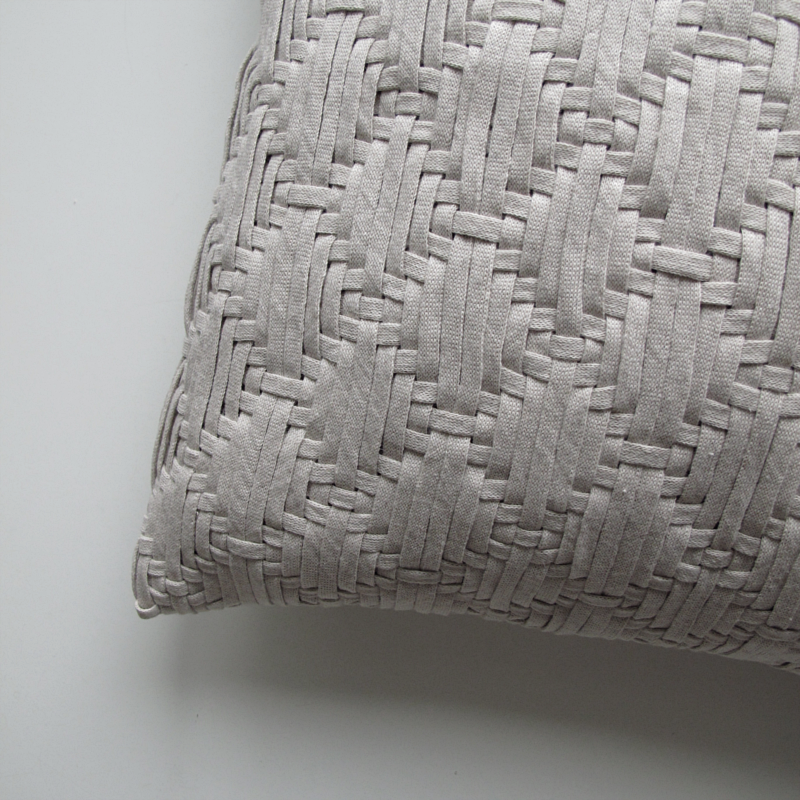
Time for my first challenge in the Blog Challenge 2017, and the theme I choosed was yarn. I knew I wanted to make a pillowcase with braided pattern, but I didn’t want to use regular yarn so I used Ribbon XL yarn instead. You can really make whatever pattern you want but if you want to make one like mine, you can see how I did in the last photo in this post. I also want to tell you that this is yet another one of those project that if patience is not a friend of yours, you might want to try another DIY. I think this pattern took four days to make!
/// Dags för första inlägget i min Blog Challenge 2017. Och temat denna gång blir garn. Jag visste att jag ville göra ett kuddöverdrag med flätat mönster, men jag ville inte använda mig av “vanligt” garn utan istället blev det trikågarn. Här kan du ju välja själv vilket mönster du vill göra, men om du vill ha samma som mig så finns det en bild längst ner i inlägget på hur jag gjorde. Men jag vill också nämna att om du inte har sådär jättebra tålamod, så prova istället ett annat DIY på bloggen för det är lite pilligt, och tog mig fyra dagar att få färdigt.
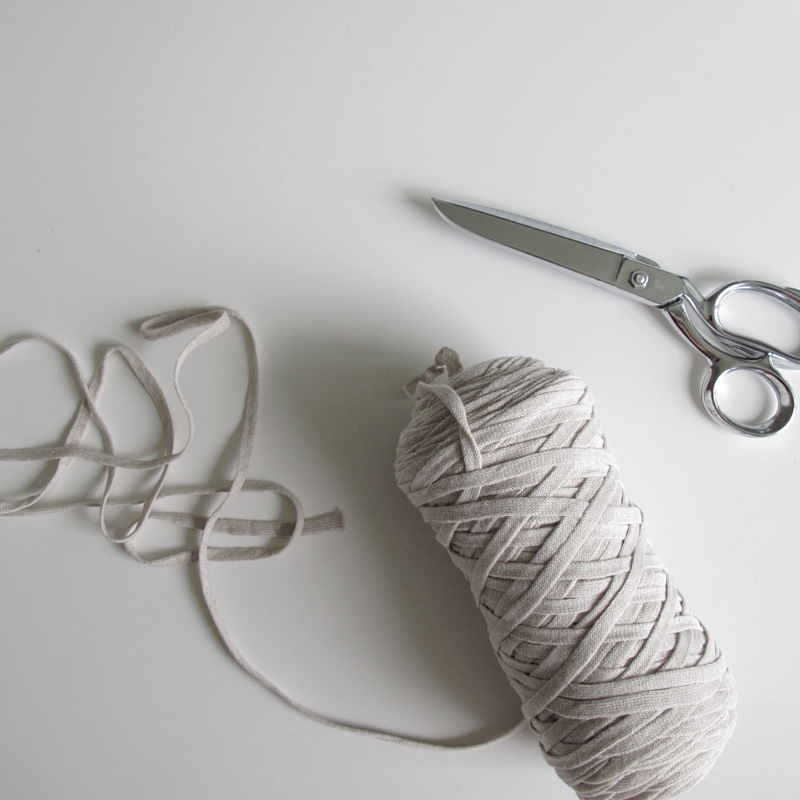
I started by measuring the pillow I wanted to use. Mine was 50×50 cm. So I cut as many threads from the yarn that they, laying on the table side by side, measured 55x55cm. I made one for the horisontal threads and one for the vertical threads.
/// Jag började med att mäta den innerkudden som jag ville använda (den var 50x50cm), och så klippte jag så många trådar att de, när de låg sida vid sida, mätte 55x55cm. Jag gjorde en för de horisontella och en för de lodräta trådarna.
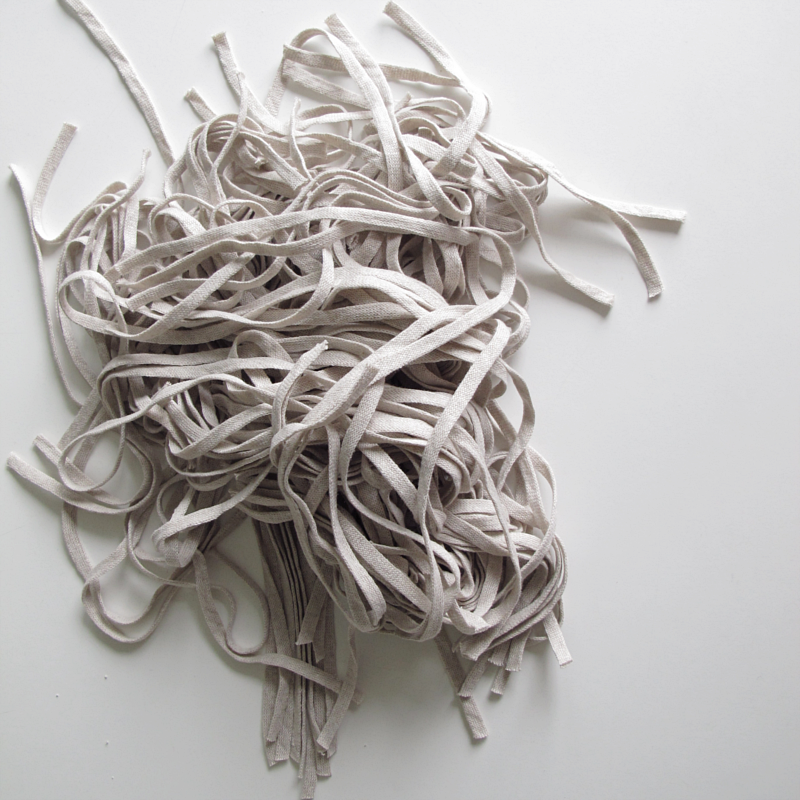
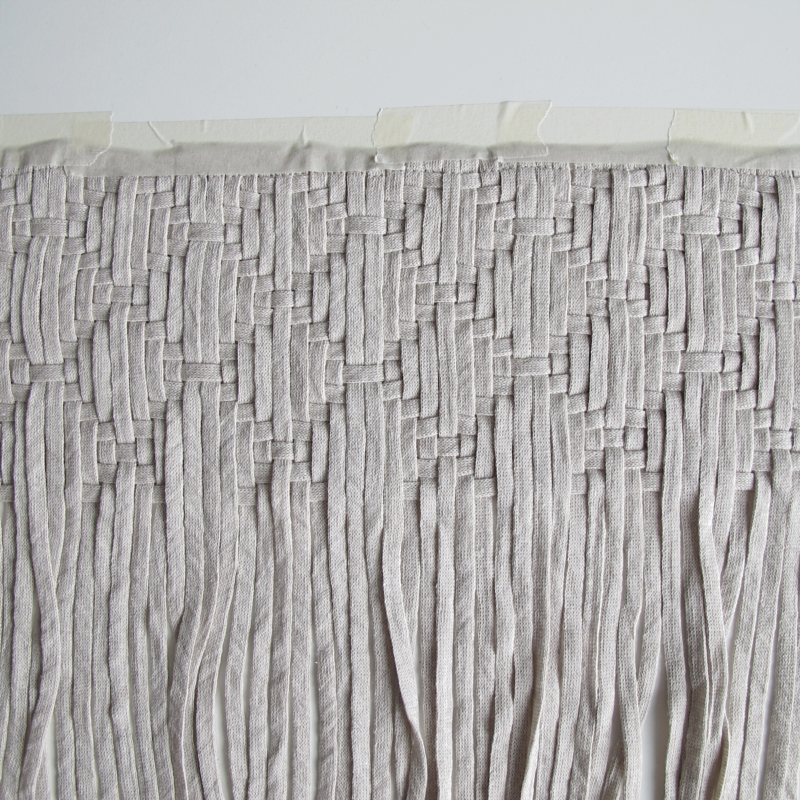
To get a little help holding the threads together I sewed one single seam along the top of the threads (close to the ends).
/// För att hålla trådarna på plats, sydde jag en liten söm så nära kanten det bara gick.
I also used masking tape to hold the threads in place while I was making the pattern.
/// Jag använde även maskeringstejp för att hålla trådarna på plats medans jag gjorde mönstret.
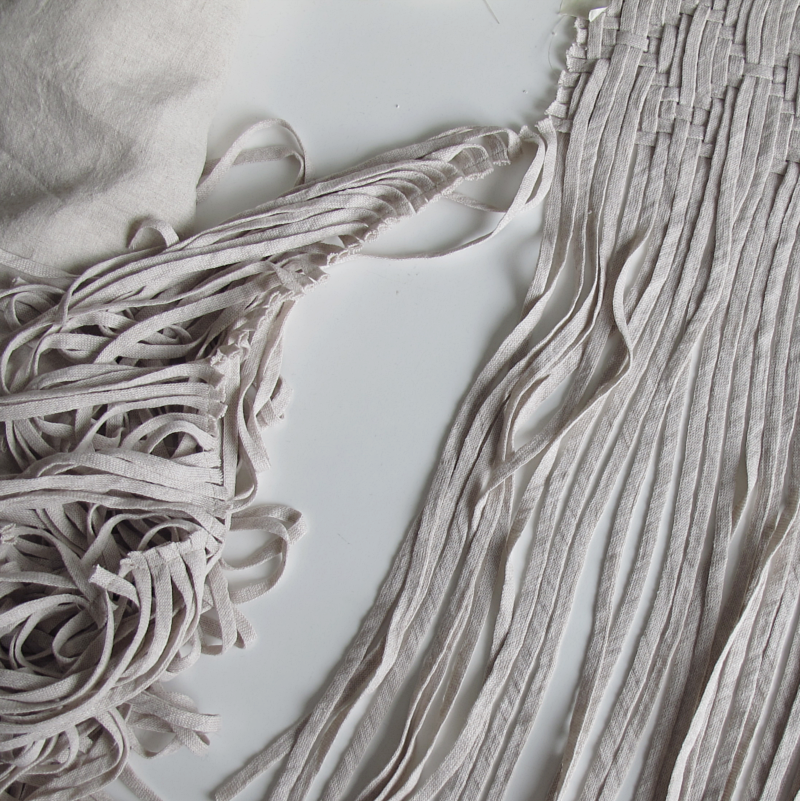
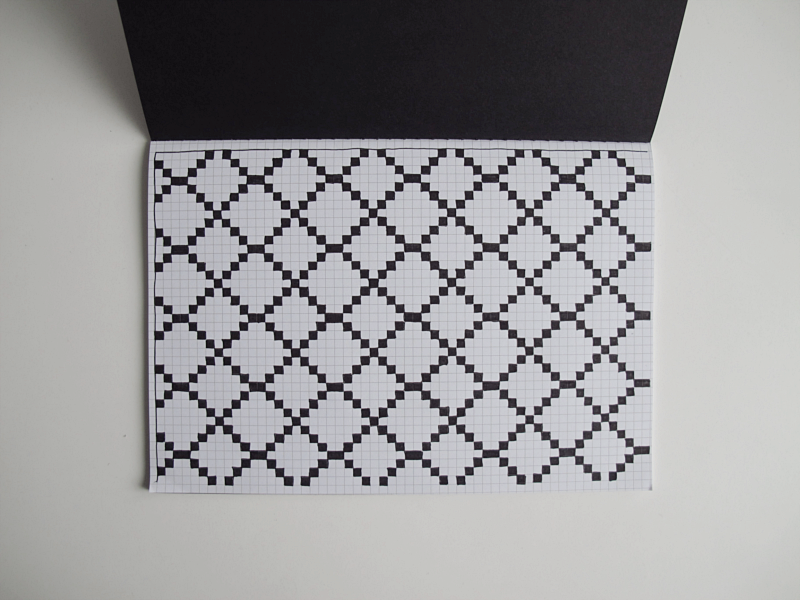
Here you have the template off the pattern. Starting from the top left corner.. But the variations on this braiding is really endless. When I was done with the pattern I sewed a seam on all sides of the square and then I made a regular pillowcase, using a piece of fabric on the backside.
/// Här kommer så mönstret som jag utgick från, med början i det övre vänstra hörnet. När jag var klar med flätandet sydde jag en sömn runt hela fyrkanten och sedan sydde jag min kudde utan konstigheter, där baksidan blev i tyg.
Good luck!
/// Lycka till!
Spara
Spara