Menu Close

Tag: DIY (page 7 of 40)

DIY- WALLHANGING

I found this DIY string art over at Cc Hobby and I immediately wanted to make my own.

/// Jag hittade denna DIY mobil via Cc Hobby och var bara tvungen att göra en själv.
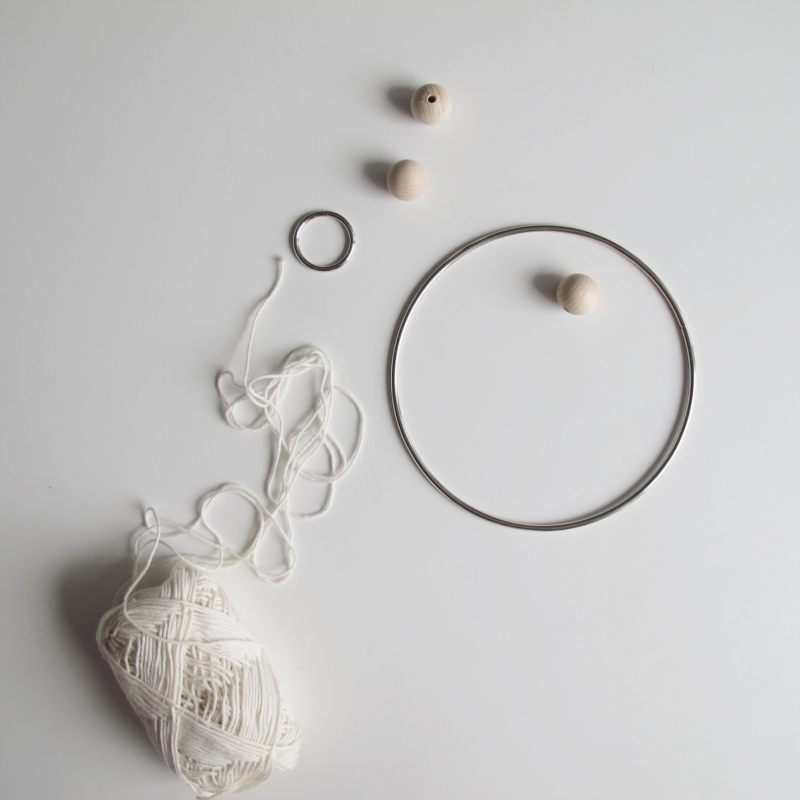
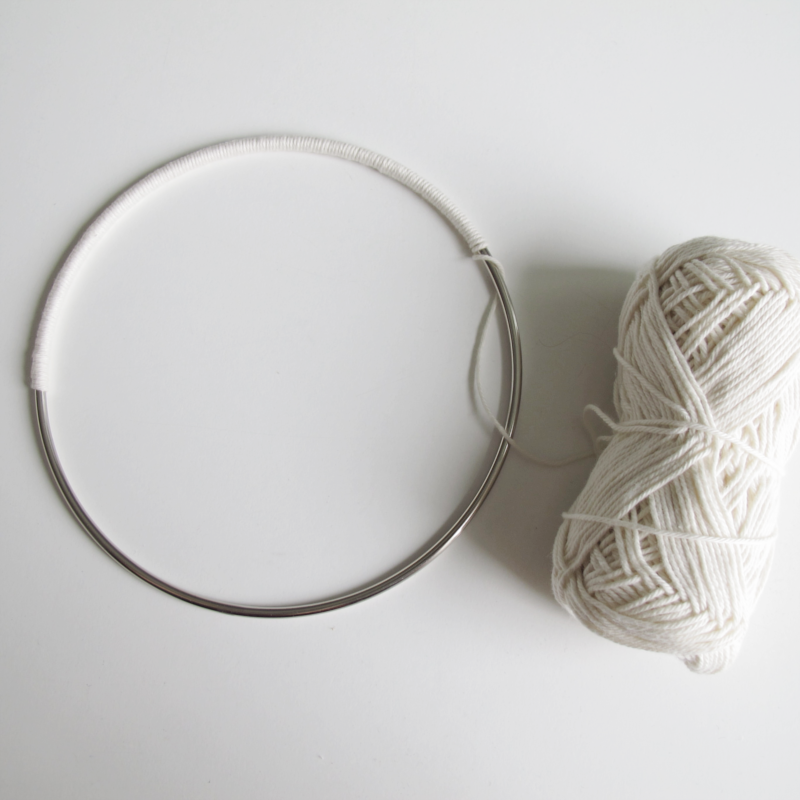
diy wallhanging | designoform.com

You need:

→ Two metal rings in different sizes
→ Yarn
→ A pair of scissors
→ A wooden ball

/// Till detta behöver du:

→ Två metallringar i olika storlekar
→ Tråd
→ Sax
→ Träkula

diy wallhanging | designoform.com

How to:

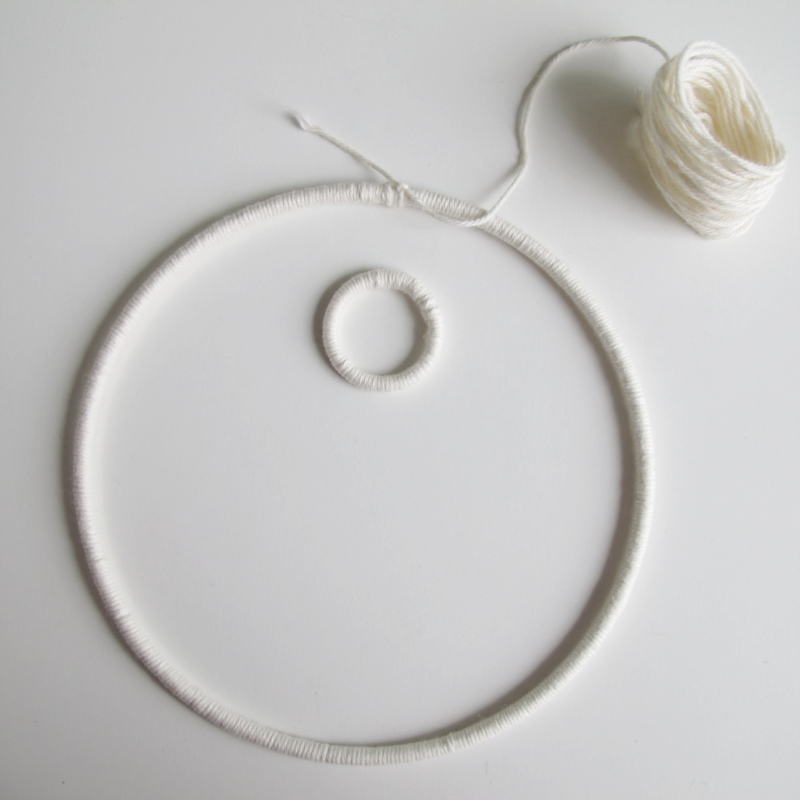
Start by winding the yarn around the two rings.

/// Börja med att trä tråden runt båda metallringarna.

diy wallhanging | designoform.com

Then you choose where you want the smaller ring to be placed.

/// Sedan är det dags att bestämma vart du vill placera den inre ringen.

diy wallhanging | designoform.com

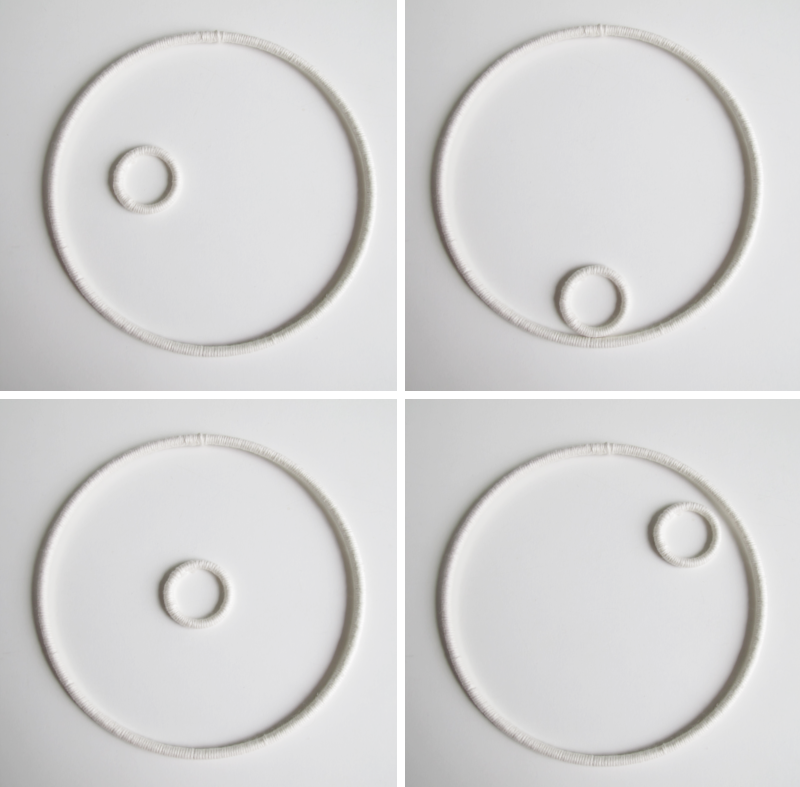
I choose to have mine like this. (Since my smaller ring was so small the ball of yarn didn’t fit through it so I had to cut it into a smaller ball). Tie a small knot on the top of the bigger ring.

/// Jag valde att ha min såhär. (På grund av att min var så liten så fick jag inte igenom nystanet utan fick klippa av en bit istället). Knyt fast tråden högst upp på den stora ringen.

diy wallhanging | designoform.com

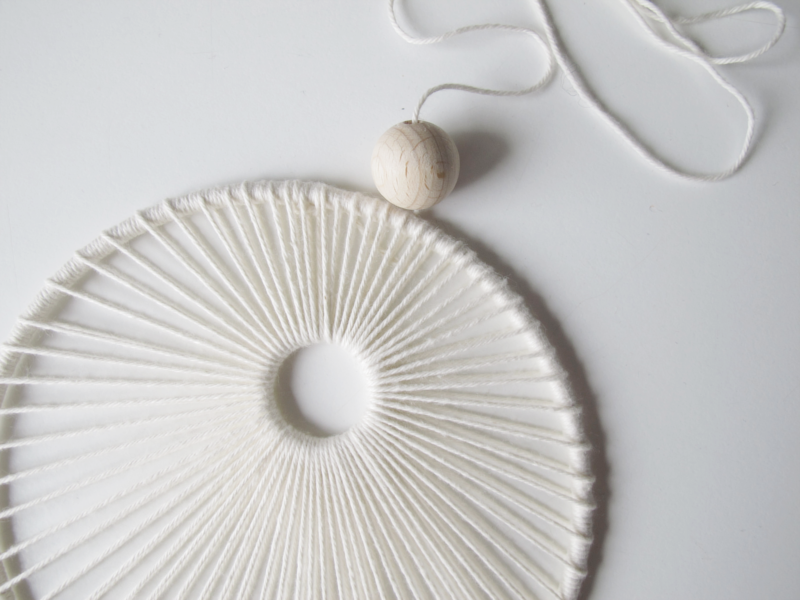
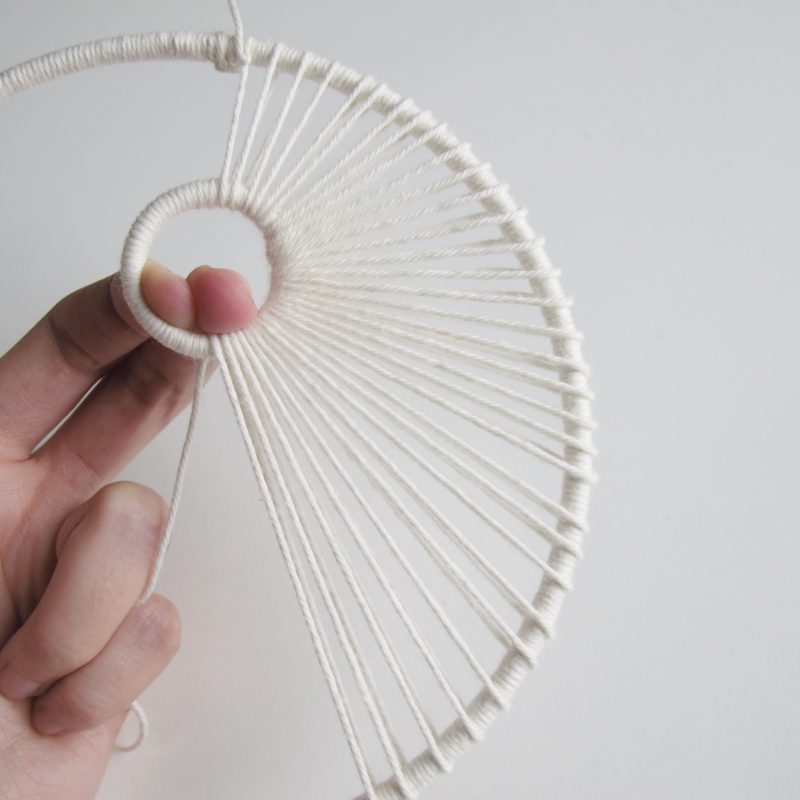
Then it’s time to start winding the yarn through the smaller ring, then around the bigger one, through the smaller, around the bigger, and so on.. Make sure you keep the smaller ring in place while doing this.

/// Och sedan är det bara att trä tråden igenom den lilla ringen, runt den stora, igenom den lilla, runt den stora osv. Se till att hålla den lilla ringen på plats när du gör detta.

diy wallhanging | designoform.com

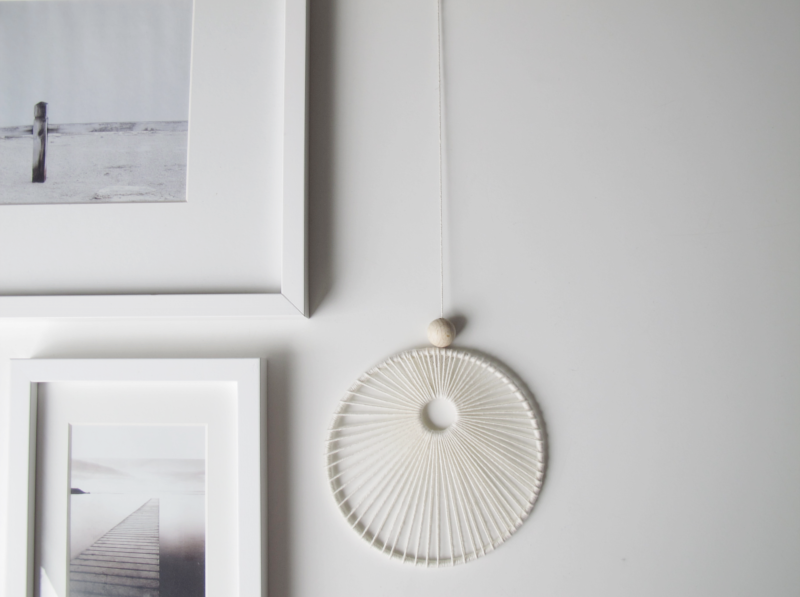
When you are finished, make a knot at the top and save a long piece of thread before cutting it off (you want to use that thread to hang it to the wall).

/// När du kommit hela vägen runt så knyter du fast tråden och sparar en lång bit tråd innan du klipper av den (det är den du använder för att hänga upp mobilen på väggen.)

diy wallhanging | designoform.com

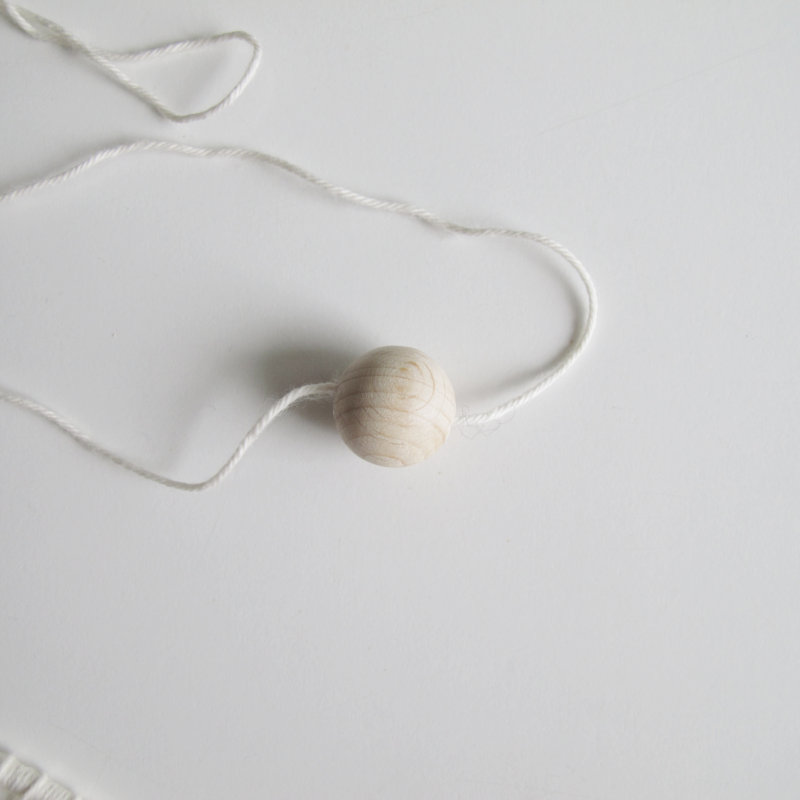
I placed a wooden ball on the thread as a decoration.

/// Jag valde också att trä en träkula på tråden.

diy wallhanging | designoform.com

And you are done!

/// Och du är klar!

diy wallhanging | designoform.com

DIY – BOOK HOLDER

A simple and beautiful DIY from Hannas inspo. Take a piece of thread or leather band and tie a knot in the ends. Hang the band on a rack with hooks, attach a book or magazine to it and done!

/// Ett snabbfixat och fint DIY från Hannas inspo. Ta ett snöre, ett i läder förslagsvis, och knyt ihop det i ändarna. Häng snöret på en knoppbräda, trä en tidning genom snöret och klart!

via hannas inspo

fo: Hannas inspo

DIY – TILED BENCH

I’m in the middle of updating my archives so hopefully it will be a lot easier for you to find what you’re looking for. One of the new categories is called DIY – Inspiration and (you guessed it right..) will be filled with DIY inspiration. The only difference from the other (DIY-) categories is that here the DIY’s are done by other people than me. This amazing tiled bench by Matilda gillar goes right into that new one. Nice isn’t it?

/// Jag håller så sakta på att uppdatera bland kategorierna här på bloggen, med förhoppningen om att det ska bli lättare för er att hitta vad ni letar efter. En av de nya kategorierna har fått namnet DIY- Inspiration och kommer att innehålla (ni gissade rätt..) inspiration till DIY’s. Den enda skillnaden mot de andra kategorierna är att här samlar jag de DIY’s som andra än jag gjort. Den här otroligt fina kaklade bänken av Matilda gillar åker rakt in i den nya kategorin. Fin va?

via matildagillar

fo: Matilda Gillar

DIY – DOTS

Hi you! New week, new DIY. I was inspired by the small plates I talked about in this post, (and that you can see in the picture below) and wanted to make something similar, except I wanted it to have a smaller number of dots and to be a little more structured..

/// Hallå på er! Ny vecka och ett nytt DIY. Jag blev så inspirerad av assietterna som jag nämnde för er i det här inlägget, (och som ni ser i bilden här nedanför) och ville göra nått liknande själv. Men med mindre antal prickar och lite mer strukturerat.

diy dotty plate | via design and form

You need:

→ A plate
→ Porcelain paint
→ Masking tape
→ Permanent marker
→ A matchstick
→ A piece of cardboard

/// Till detta behöver du:

→ En tallrik
→ Porslinsfärg
→ Maskeringstejp
→ En (permanent) penna
→ En tändsticka
→ En bit kartong

diy dotty plate

And this is how you do it:

Make a check pattern on the plate using the masking tape. I choosed to make the space between the tape as wide as the tape itself (I used a piece of tape as a template that I removed and reused).

/// Tejpa maskeringstejpen i ett rutmönster på tallriken. Jag valde att göra mellanrummen lika breda som tejpen och använde därför en bit tejp som mall (som jag återanvände).

diy dotty plate

Make small marks with the permanent marker in every corner.

/// Rita små prickar i hörnen på fyrkanterna.

diy dotty plate

Remove the masking tape. Then pour a small amount of porcelain paint on the piece of cardboard that you then dip the matchstick into (I found it easier to see what I was doing this way).

/// Ta bort tejpen. Sedan häller du ut en liten klick med porslinsfärg på kartongbiten som du sedan doppar tändstickan i (jag tyckte det var enklare att se hur mycket jag doppade tändstickan då).

diy dotty plate

Carefully make a dot on the plate. I didn’t press the actual matchstick to the plate, just the drop of paint. You decide if you want all the dots to have the same size, or if you do like me and let them have different sizes.

/// Tryck försiktigt en liten prick på tallriken. Jag tryckte inte själva tändstickan mot tallriken utan “droppen” mot tallriken. Du väljer själv om du vill göra prickarna exakt lika stora eller om du gör som jag och varierar dem lite.

diy dotty plate

When you are finished with the dots, follow the instructions on the package of the porcelain paint to harden the color and you are done!

/// När du har gjort alla prickarna så följ instruktionen på porslinsfärgsförpackningen för att härda färgen och du är klar!

diy dotty plate | designoform.com

diy dotty plate | designoform.com


like

This spotted plate
This 2 minutes DIY

NOTE BOOK MAKEOVER

Note book makeover | designoform.com

I really, really like to do note book makeovers. So when I find  them on sale I always buy a bunch of them. The good thing about that is it doesn’t matter how they look because I always change them and I get more for the same price ( if that is actually true with the material for the makeover we’re not going to think about now..)  Anyway.. Here you have my latest makeover. If you want to make one too, here’s how I did it.

/// Jag vet inte hur många anteckningsböcker jag gjort om, men jag verkar aldrig ledsna på det. När jag ser dem på rea så köper jag alltid en hel hög, dels för att det inte spelar någon roll hur de ser ut och sen så får jag fler för en billigare peng (om det verkligen blir billigare i slutändan med allt material som jag använder för att göra om dem, bryr vi inte oss om just nu..) Iallafall så är detta min senaste, som jag tänkte visa er om ni vill göra en likadan.

For this you’ll need:

→ A note book
→ A piece of paper
→ Textile tape
→ Glue
→ A pair of scissors

/// Du behöver:

→ En anteckningsbok
→ Ett fint papper
→ Textil tejp
→ Lim
→ Sax

First you remove the band that holds the note book together (if you have one of those). Then you cut out two pieces of the paper, a few millimeters smaller than the width of the note book. And glue them onto the note book.

/// Först tar du bort snöret som håller ihop anteckningsboken (om du har ett sådant). Sedan klipper du två bitar ur papperet, några millimeter smalare än boken, som du sedan limmar fast.

Note book makeover | designoform.com

Now its time for the textile tape. Mine was pretty wide so I decided to cut it in half. You also want to cut it a few millimeters longer than the books back.

/// Nu är det dags för textil tejpen. Min var lite bred så jag valde att klippa itu den på mitten. Tänk också på att klippa den några millimeter längre än längden på bokens rygg.

Note book makeover | designoform.com

Place the textile tape on the back of the note book and then attach it to the sides. It’s not that visible on the pictures but place the textile tape so that it’s sticking out a couple of mm so that you instead of trying to stretch the tape, cut the excess off.

/// Lägg textil tejpen på bokens rygg och vik sedan ner den mot sidorna. Det syns inte så bra på bilden men sätt tejpen några millimeter utanför kanten så att du får klippa bort det som sticker ut, istället för att försöka sträcka så att det räcker till.

Note book makeover | designoform.com

Cut away the excess paper (if you have rounded corners like I do). And you are done!

/// Klipp bort papperet som sticker ut i hörnen (Om du har rundade hörn som jag har). Och du är klar!

Note book makeover | designoform.com

Note book makeover | designoform.com


like

This marble book makeover
This table makeover
This leather notebook makeover