Menu Close

Tag: DIY (page 22 of 40)

BEADS

beads

beads

Today I´m going to show you another diy with beads. This is not really a tutorial for something specific, it’s more of a I’m-going-to-show-you-the-technique post. For this you need beads and some thread. I used Hama Maxi beads.

/// Idag tänkte jag visa er ett till diy med pärlor. Det är inte riktigt en tutorial för något specifikt, utan mer för att visa tekniken. Till detta behöver du pärlor och tråd. Jag använde Hama Maxi pärlor.

beads

And here is how you do it:

/// Och så här gör du:

beads

BRAID

braid

Today I’m going to show you how to make a five-strand-braid. First you want to attach the threads to a plane surface.

/// Idag tänkte jag visa er hur man gör denna fläta med fem snören. Börja med att fästa snörena på en plan yta.

braid

Divide the threads so that you have three on the left side and two on the right. Then start with the left side: Take the thread with the arrow, and place it over the thread next to it.

/// Dela upp snörena så att du har tre på vänstra sidan och två på högra. Så är det dags att börja på vänster sida: Ta snöret med pilen, och lägg den över snöret bredvid.

braid

Take the thread with the arrow and place it over the thread to the left.

/// Ta snöret med pilen och lägg den över snöret till vänster.

braid

Take the thread with the arrow and move it over to the right side.

/// Ta snöret med pilen och flytta över den till höger sida.

braid

Then continue with the right side. This is actually the same as we did on the left side. Only mirrored. Take the thread with the arrow and place it over the thread next to it.

/// Och nu fortsätter vi på höger sida. Du ska göra precis som vi gjorde på vänster sida. Bara spegelvänt. Ta snöret med pilen och lägg den över snöret bredvid.

braid

Take the thread with the arrow, and place it over the thread to the right.

/// Ta snöret med pilen, och lägg den över snöret till höger.

braid

Move the thread with the arrow over to the left side and start from the beginning again. (from: ..start with the left side ). Repeat these steps until you have the length that you want. If you’re making a bracelet you can use one of these as a lock.  Good luck!

/// Flytta över snöret med pilen till vänster sida och starta om från början igen. (från: ..börja på vänster sida.) Så alternerar du dessa sidor tills det att du har den längden du vill på flätan. Om du vill använda flätan som armband kan du använda dessa som lås. Lycka till!

braid

braid

DIY CUSHION

kudde

Start by cutting out two pieces of fabric. How big depends on where you want to use your cushion. Just remember that the cushion will “shrink” on two of the sides, when you start filling it. Place the fabric so that you have the frontside of the fabric facing eachother. Then sew three of the sides together, and turn it inside out.

/// Börja med att klippa ut två bitar tyg. Hur stor du vill att de ska vara beror på var du ska ha din dyna. Men kom ihåg att dynan “krymper” på två av sidorna när du fyller den. Lägg rätsidorna mot varandra och sy ihop tre av sidorna. Vänd den sedan ut och in.

kudde

Sew another seam along the edge off the cushion. On the same three sides. Then you want to decide how many “pockets” you want on your cushion. I wanted 5, so I measured the length between the seams and devided it by 5. The number you get is the length between the seams. (Like this: My cushion measured 35,5 cm. I divided that with 5, and that was 7.1cm. Therefore I made my pockets 7.1cm wide). I used needles to show my 7.1 cm mark.

/// Sy en till sömn längst med kanten. På alla de tre sidorna som du sydde på tidigare. Nu ska du bestämma hur många kanaler du vill ha på din dyna. Jag ville ha 5, så jag började med att mäta hur bred min dyna var mellan sömmarna. För att sedan dela den summan med 5. Då får du fram hur breda kanalerna ska vara. (Såhär: Min dyna var 35.5 cm bred. Delade det med 5, vilket ger summan 7.1cm. Alltså gjorde jag mina kanaler 7.1 cm breda). Mäta upp och märk med nålar där du ska sy.

kudde

Sew along the needles. Remember to leave a bit on the end of the cushion. So that you have room to fold the excess fabric inwards and make a nice finish. When that is done, you can fill your cushion. Be sure to fill the “pockets” with a lot of stuffing, almost to much. When you´re satisfied with the result, just sew the cushion together.

/// Sy så längs med nålarna. Kom ihåg att inte sy hela vägen ner, då du vill lämna lite rum för att kunna vika in tyget där nere och göra ett fint avslut. När du har sytt färdigt är det dags att fylla din dyna. Tänk på att fylla den lite för mycket så att den blir skön att sitta på. När det är klart så syr du ihop din dyna.

kudde

And you are done!

/// Och du är klar!

kudde

DIP DYE

boxen

If you follow me on insta you have already seen it, but I´ve made another version of this box. A dip dye looking one.

/// Om du följer mig på insta så har du redan sett denna, men jag har gjort en ny variant på den här asken. En dip dye.

DIY BOX

ask

ask

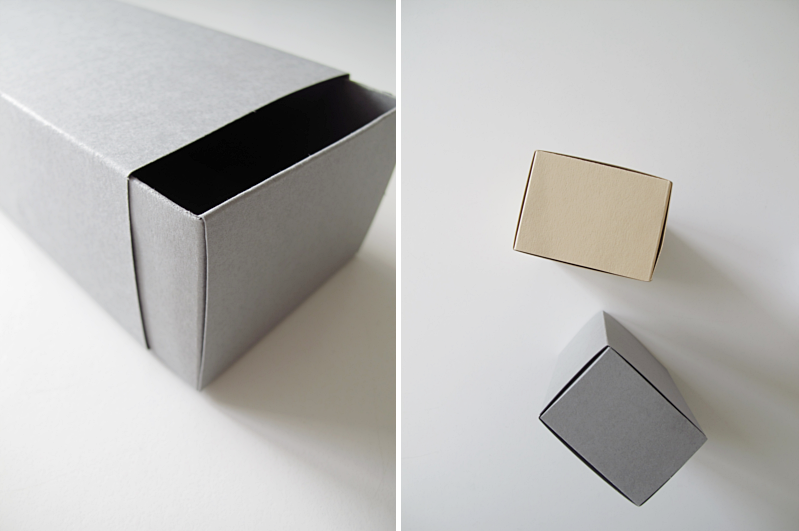
1. For this diy you need a ruler, a pair of scissors, a pencil, glue and 2 sheets of carton. A3 size. 2. Start with one of the sheets. Lay the paper so you have the shorter sides of the paper on your left and right. Draw a line 4.9 cm from the upper edge. And yes, you have to be that accurate :). Then a second line, 5 cm from the first. The third line should be 7 cm from the one you did before. The fourth line should be 5 cm from the one before, and the last line should be 4.9 cm.

/// 1. Till detta diy behöver du en linjal, sax, blyertspenna, lim och två A3 ark i kartong. 2. Börja med ett av arken. Placera papperet så att du har långsidan mot dig, och dra en linje 4.9 cm från den övre kanten. Och ja du behöver vara så noggrann :). Dra sedan en andra linje, 5 cm från den första. Tredje linjen ska vara 7 cm från den du gjorde innan. Fjärde linjen ska vara 5 cm ifrån, och den sista linjen ska vara 4.9 cm ifrån.

ask

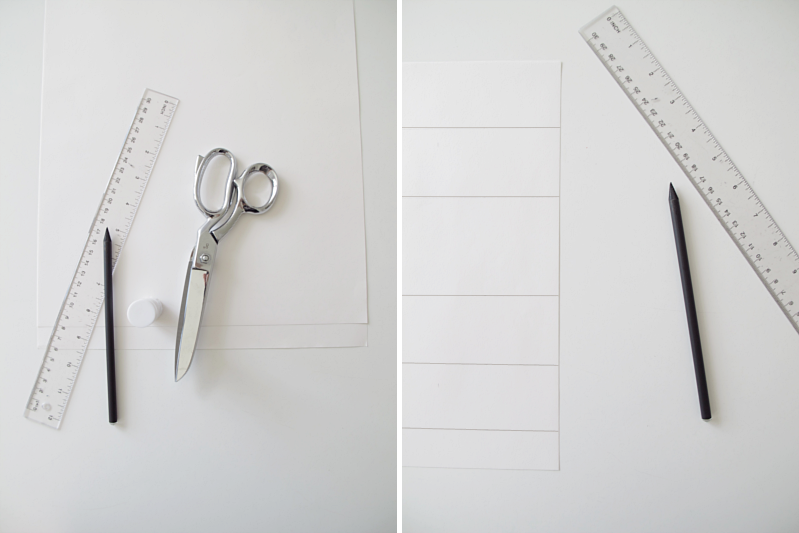
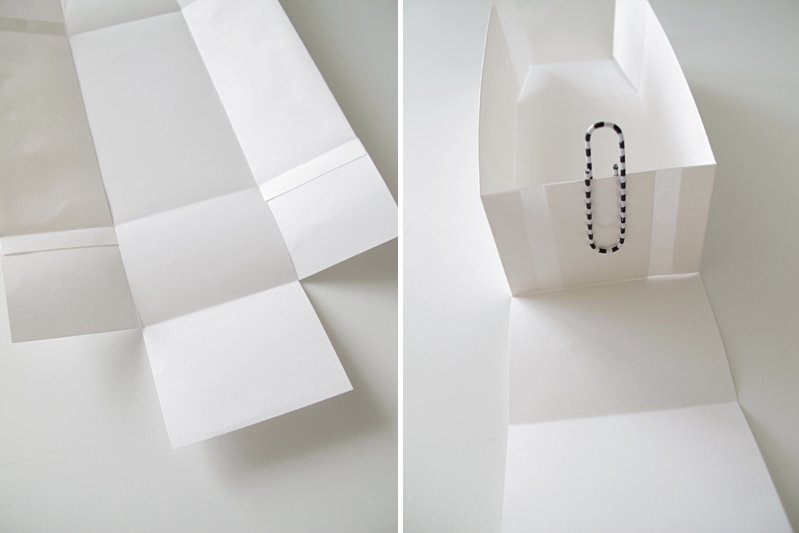
3. Now you are going to draw lines in the other direction. Start with one 5.1 cm from the right side. Then make another 5 cm from the first line. Then make one line 13 cm from the one before. And then one line 5 cm, and end with one 5.1 cm from the one before. 4. Cut along the lines, so it looks like this.

/// 3. Nu ska du dra linjer åt andra hållet. Börja med en linje 5.1 cm från kanten. Nästa ska vara 5 cm ifrån den första. Den tredje ska vara 13 cm ifrån. Den fjärde 5 cm ifrån och den sista ska vara 5.1 cm ifrån. 4. Klipp längst med linjerna så att ditt papper ser ut såhär.

ask

5. Draw another line 1cm wide. If you are using a really thick carton you can skip this step and jump right to step 7. 6. And cut off the excess.

/// 5. Rita ännu en linje. 1cm från kanten. Om du använder ett riktigt tjock papper så kan du hoppa över denna del och gå direkt till steg 7. 6. Klipp bort den överblivna biten.

ask

7. Time to cut again. Where the beige lines shows. 8. Fold along all lines, notice that I folded the pieces I did in step 5 in the opposite direction. And erase all pencil marks.

/// 7. Dags att klippa igen. Klipp där de beiga linjerna visar. 8. Vik längs med linjerna, notera att jag vikt bitarna, som jag gjorde i steg 5, åt andra hållet. Sudda sedan bort alla blyertsstreck.

ask

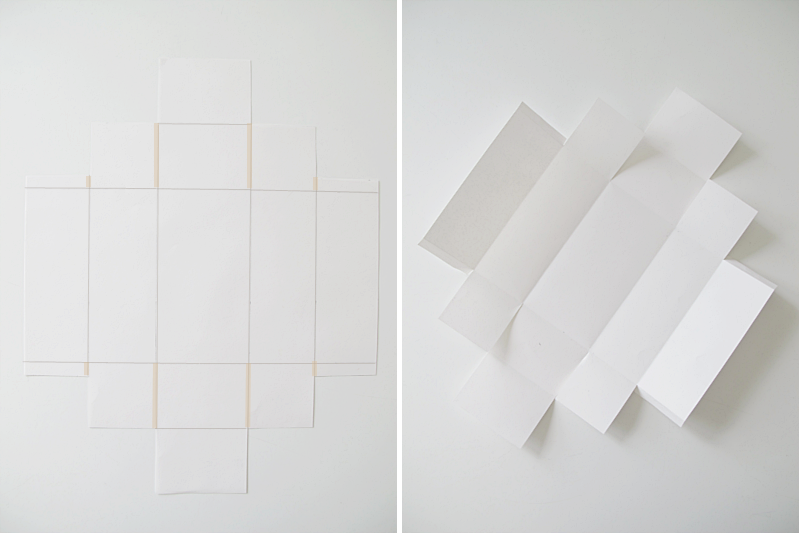
9. Put some glue on the piece of paper that is on the far right. 10. And fold it to the left.

/// 9. Stryk lim på biten som är längst till höger. 10. Och vik den sedan åt vänster.

ask

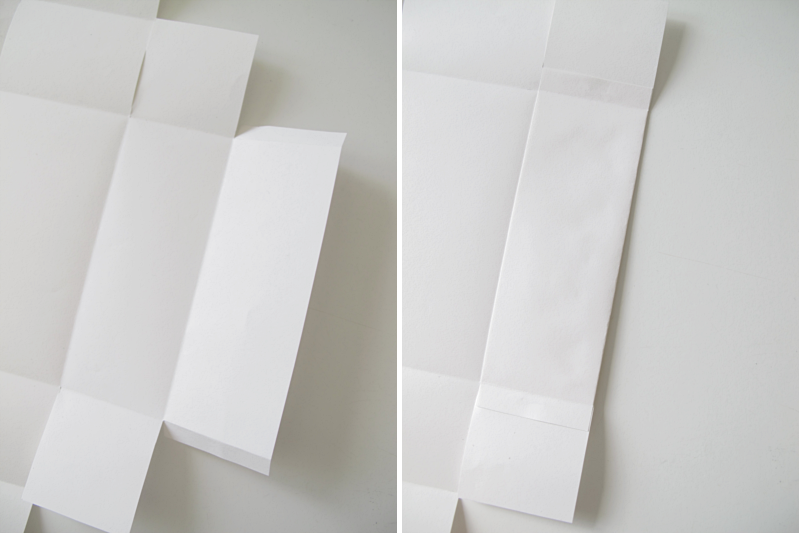
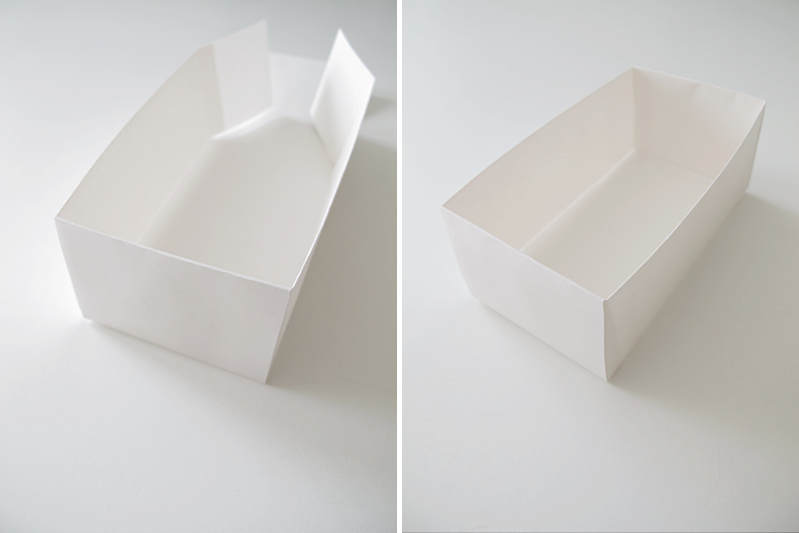
11. Repeat on the other side. Put some glue on one of the side pieces. 12. And put the sides together. Then put another click of glue on the middle piece and..

/// 11. Gör likadant på andra sidan. Stryk lim på en av sidbitarna. 12. Och sätt ihop de båda sidbitarna med varandra. Sedan stryker du lim på mittenbiten..

ask

13. ..fold it over. 14. Repeat on the other side.

/// 13. ..och viker den över. 14. Gör nu likadant på andra sidan.

ask

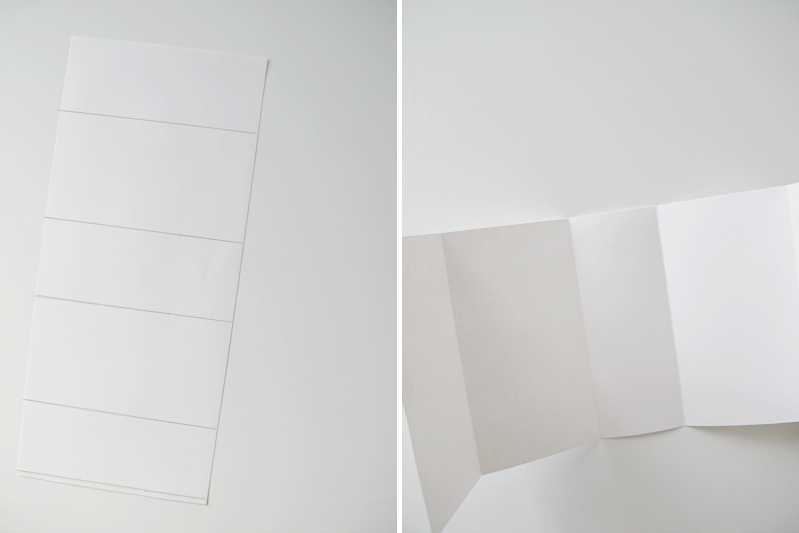
15. And now to the “lid” of the box. Start by cutting a piece of paper 13cm wide. And then it´s time for the lines again. The first one should be 5 cm from the edge. Make another, 7.1 cm from the first, then one 5.1 cm from the one you did before. Make another one at 7.1 cm and end with a line 5.1 cm from the one before. You can also cut off the tiny piece of excess paper, you see in the bottom of the picture. 16. Fold along the lines and erase the pencil lines.

/// 15. Nu är det så dags för “locket” på lådan. Ta ark nr 2 och klipp ut en remsa som är 13 cm bred. Rita sedan en linje 5 cm från toppen. Och en till 7.1 cm från den första. En tredje linje 5.1 cm ifrån. Den fjärde linjen ska vara 7.1 cm ifrån och den sista 5.1 cm ifrån. När du har ritat ut linjerna så har du fått en liten liten remsa papper kvar på slutet, den kan du klippa bort. 16. Vik längst med linjerna och sudda bort blyertsstrecken.

ask

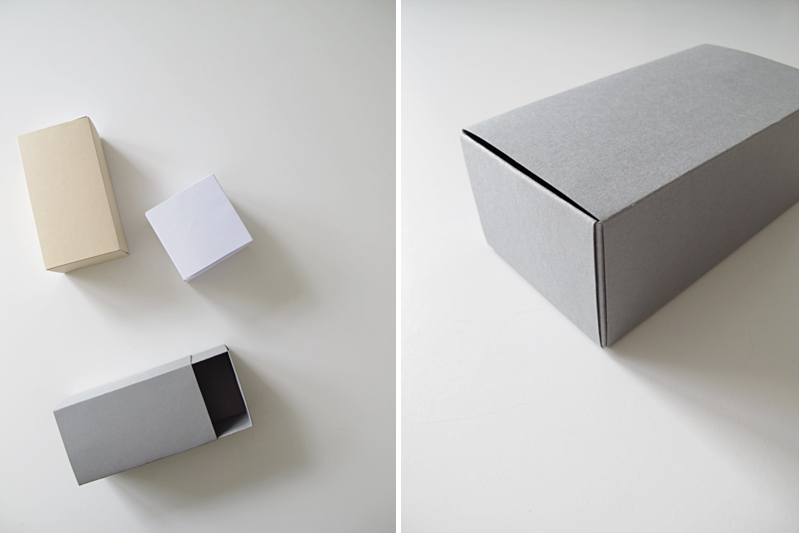
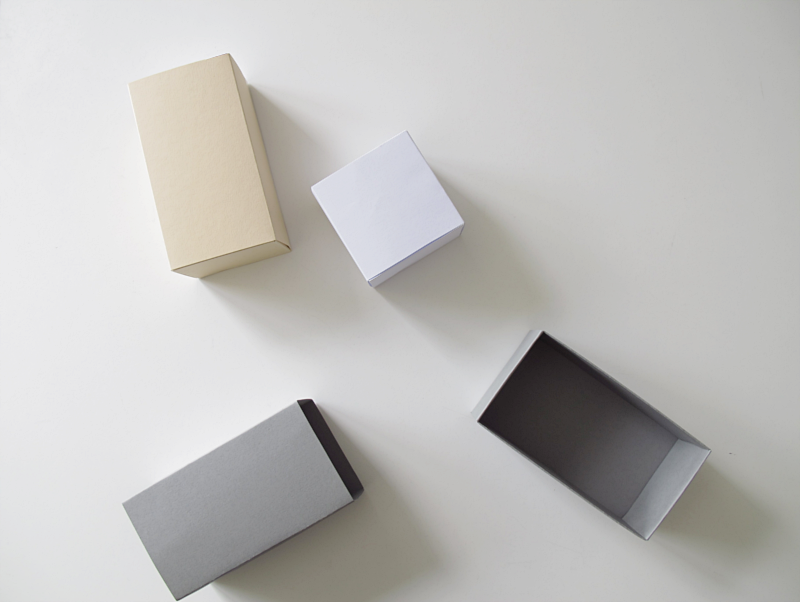
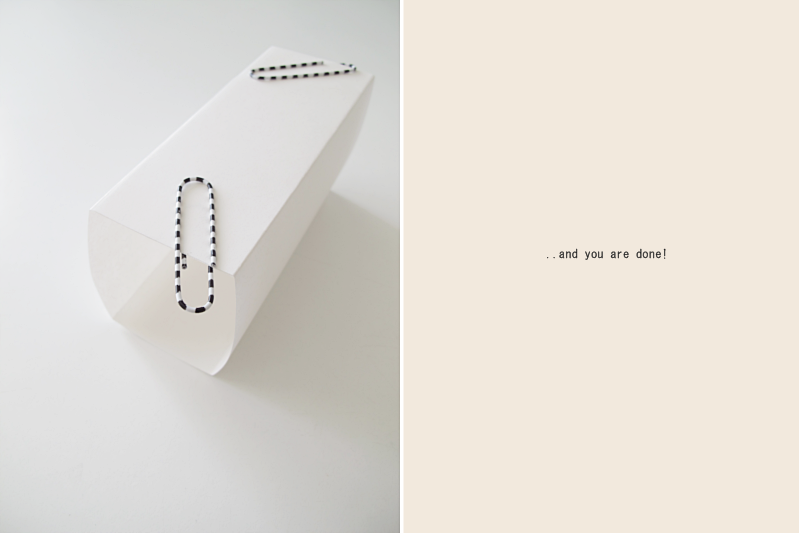
17. Put some glue of the end piece and glue the “lid” together. 18. Let it dry, and you are done!

/// 17. Stryk lim på ena ändbiten och limma ihop “locket”. 18. Låt det torka, och du är klar!

ask

A tip is to pre fold the box before you glue it together, just to make sure that it will be good looking when you are done. You may have to cut off a mm or two. It all depends on what kind of paper you are using. Good luck!

/// Ett litet tips är att förvika din låda innan du limmar ihop något. Bara för att se om du kanske behöver klippa bort nån mm här eller där. Det beror egentligen helt på vilken typ av papper du använder och tjockleken på detta. Lycka till!

ask