Menu Close

Tag: DIY (page 2 of 40)

DIY – ENVELOPE WITH A LOCK

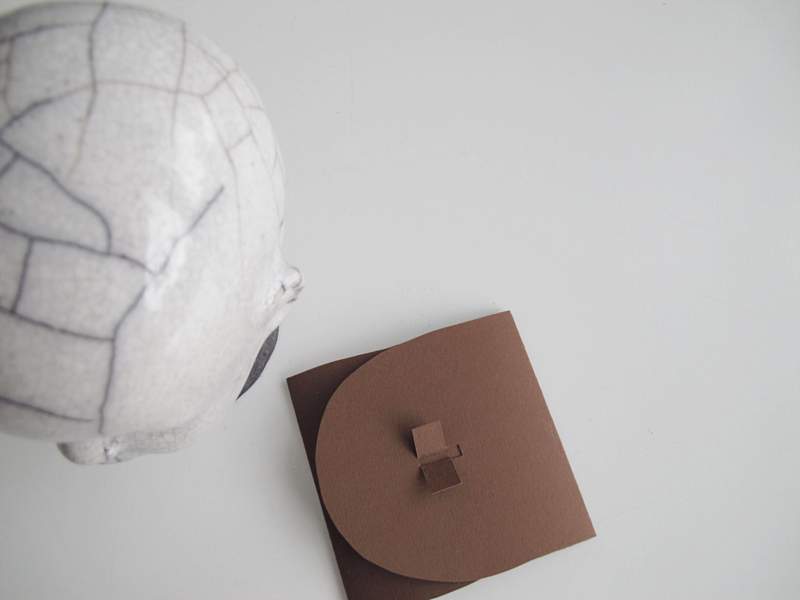
Hi guys! I found this DIY envelope on pinterest and I just had to try it myself. The “lock” on the envelope actually works surprisingly well, even if you might not think so.

/// Hallå på er! Jag hittade det här DIY:et via pinterest och var bara tvungen att prova. “Låset” fungerar faktiskt förvånansvärt bra, även om man kanske inte kan tro det.

diy envelope | designoform

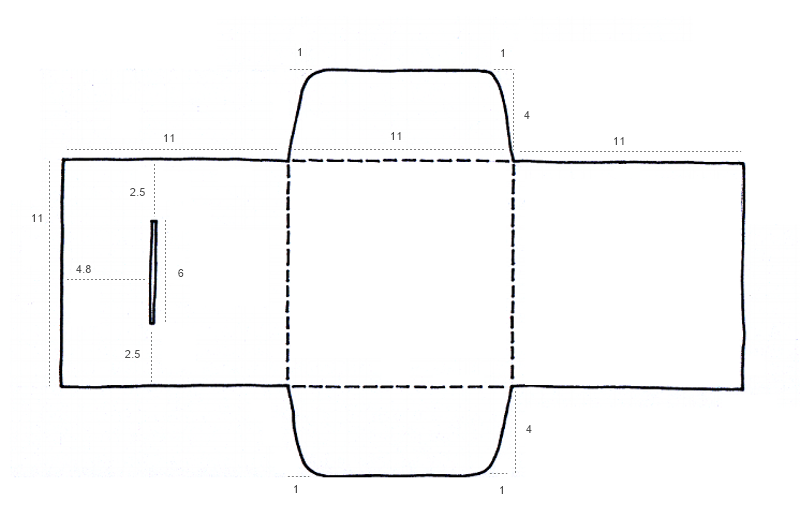
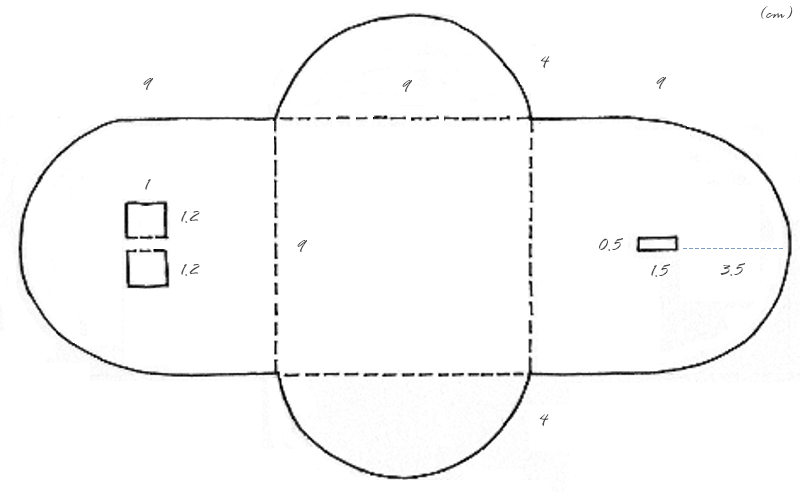
Easy to make and all you need is carton, a pair of scissors, a paper knife, a ruler, eraser and a pencil. Start by making this figure.

/// Enkelt att göra är det också. Allt du behöver är kartong, sax, papperskniv, linjal, sudd och blyertspenna. Börja med att göra den här figuren.

diy envelope | designoform

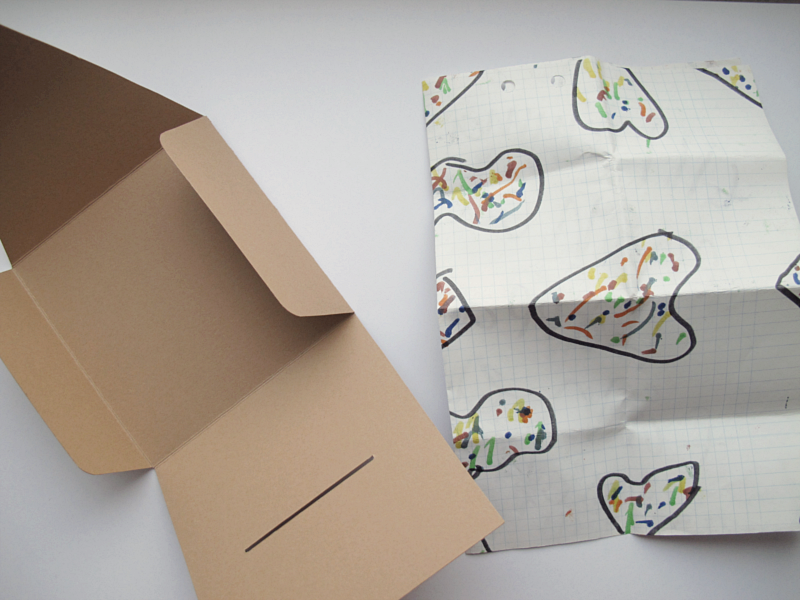
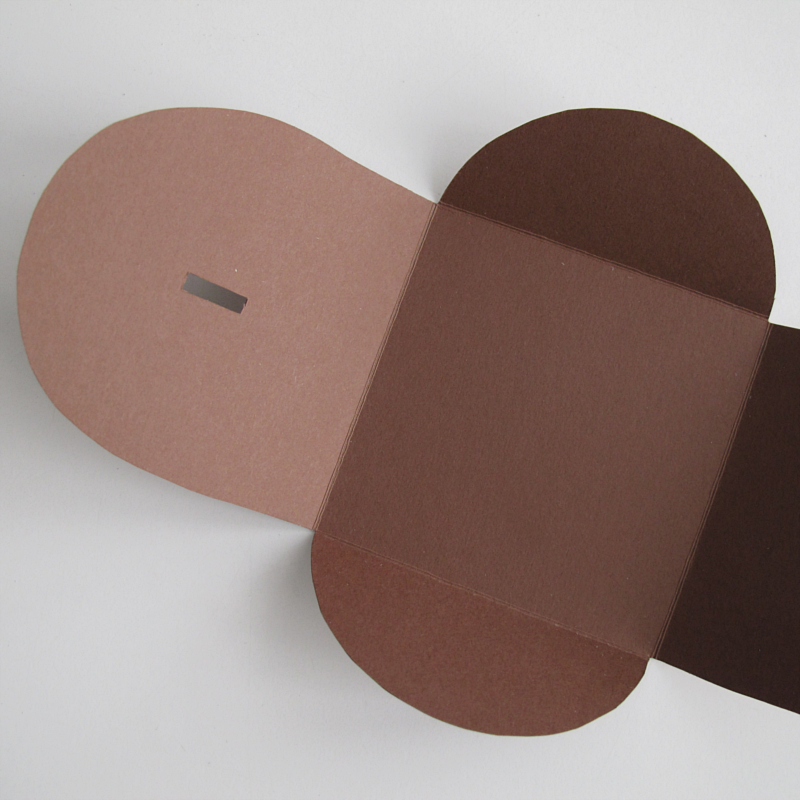
Cut along all the lines, and fold along all the dotted ones. To make the “lock” I folded the envelope and made a mark inside the hole, to know where the lock should be.

/// Klipp längst med alla linjer, och vik längs med de prickade linjerna. För att göra “låset” skar jag först ut hålet för låset, sedan vek jag ihop kuvertet och markerade vart hålet hamnade. På så vis visste jag vart flikarna skulle göras.

diy envelope | designoform

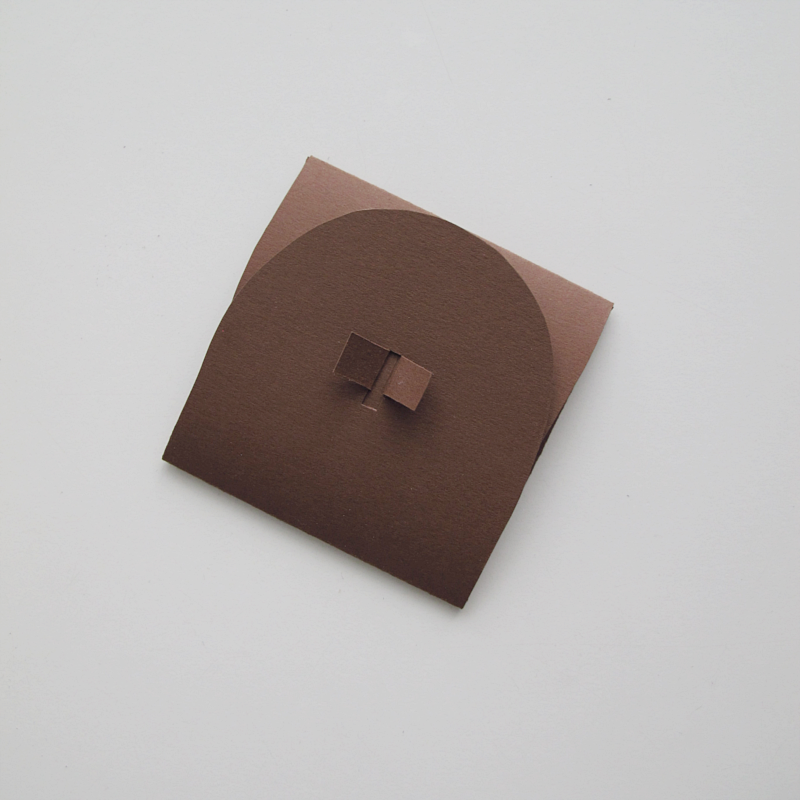
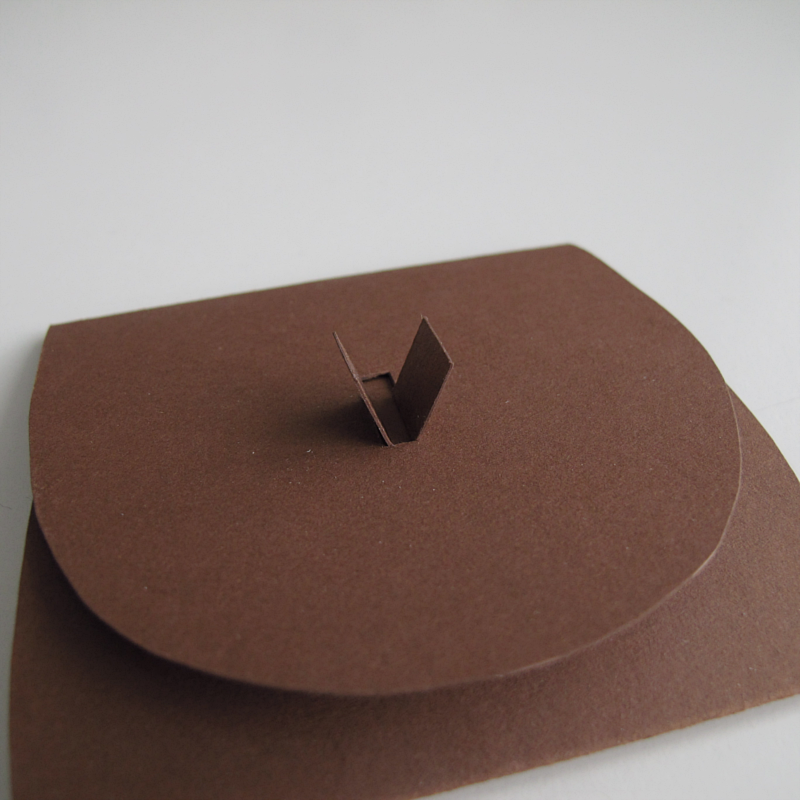
To “lock” the envelope just slide the flaps in the hole and fold them to the sides.

/// För att “låsa” kuvertet trär man de två flikarna i hålet och sedan viker man dom utåt.
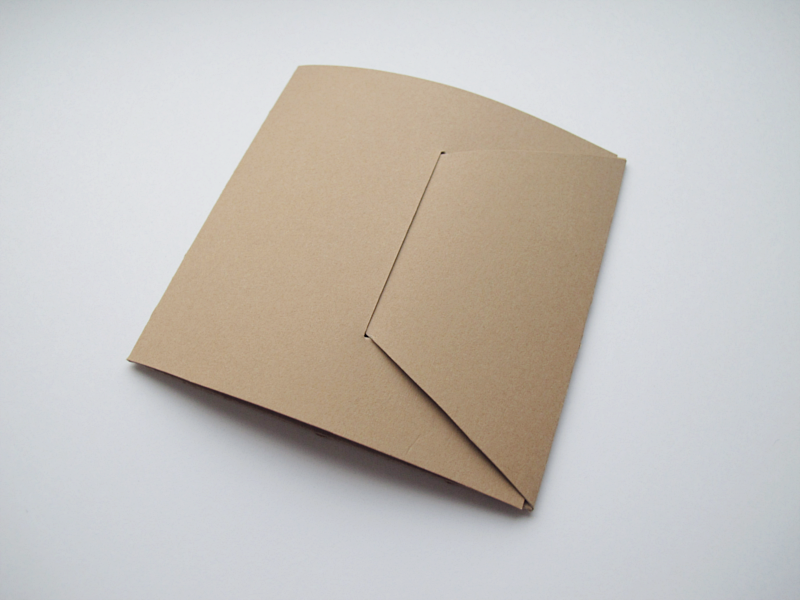
diy envelope | designoform

Done!

/// Klart!

diy envelope | designoform

DIY – INSPIRATION

slöjddetaljer

A great DIY from DIY-detaljer, an A5 leather folder. For instructions click here (in swedish, but you can use google translate)

/// Tokfint DIY från DIY-detaljer. Ett läderfrodral till ett A5 block. Klicka här för instruktioner.

fo: DIY-detaljer

DIY – MAGAZINE SHELF

Today I have another bookshelf DIY for you. Or maybe more of a DIY magazine shelf. Anyway.. looks great and it’s supereasy to make. You just need a countertop and four picture ledges, and some tools. For instructions click here.

/// I dag har jag ännu ett bokhylle DIY till er. Eller kanske mer av ett magasinhylle DIY. Iallfall.. jättefint och är enkelt att göra själv. Du behöver bara en bänkskiva och fyra tavellister. För instruktioner klicka här.

fo: IKEA Livet Hemma / Karl Andersson

DIY – INSPIRATION

diy clamp tray

Today’s inspiration from Atilio, a DIY Clamp Tray. A homemade version of Navets dito. Lovely!

/// Dagens DIY inspiration from Atilio, ett brickbord med klämma. En hemmagjord variant på Navets dito. Fint!

fo: Atilio

DIY – ENVELOPE

diy envelope | designoform

I don’t really know what to call this DIY but it works a bit like an envelope. Pretty easy to make and you can change the look how you want. Change the size or move the notch further to the right if you want.

/// Jag vet inte riktigt vad jag ska kalla detta DIY men det fungerar ju lite som ett kuvert. Ganska enkelt att göra och går att förändra utseendet på hur du vill, du kan exempelvis ändra på storleken eller flytta skåran längre åt höger.

diy envelope | designoform
You need:

→ carton
→ pencil
→ eraser
→ ruler
→ a round object ( I used a gluestick)
→ paperknife
→ a pair of scissors

/// Du behöver:
→ kartong
→ penna
→ sudd
→ linjal
→ något runt (jag använde ett limstift)
→ papperskniv
→ sax

Start by drawing this figure on your paper. Then you cut it out, fold along the dotted lines and cut out the notch with the paperknife. I did my 2 millimeters wide.

/// Börja med att rita ut den här figuren på ditt papper. Klipp ut den, vik längst med de streckade linjerna och skär ut skåran med papperskniven. Jag gjorde min 2 millimeter bred.

template

When it’s time to make the flap on the right side of the picture, I first folded that flap inwards, then the flap with the notch. After that I measured out where the notch was by drawing on the inside of it. Then I unfolded the envelope again and drew  a V-shape right next to the mark, and to every corner. Cut out the V and round off the top using the round object. Erase all the pencil marks and you are done!

/// När det var dags för att göra fliken på höger sida i bilden, så vek jag först in den sidan, sedan den sidan med med skåran. Därefter mätade jag ut var skåran var genom att rita på insidan av den. Därefter vek jag upp kuvertet igen och så ritade jag ut en V-form alldeles bredvid den utritade skåran, och till varje hörn. Därefter klippte jag ut V-et och rundade av toppen. Sudda bort blyertsstrecken och klart!

diy envelope | designoform