Menu Close

Tag: DIY (page 19 of 40)

WITH A LOCK OF LEATHER

mapp

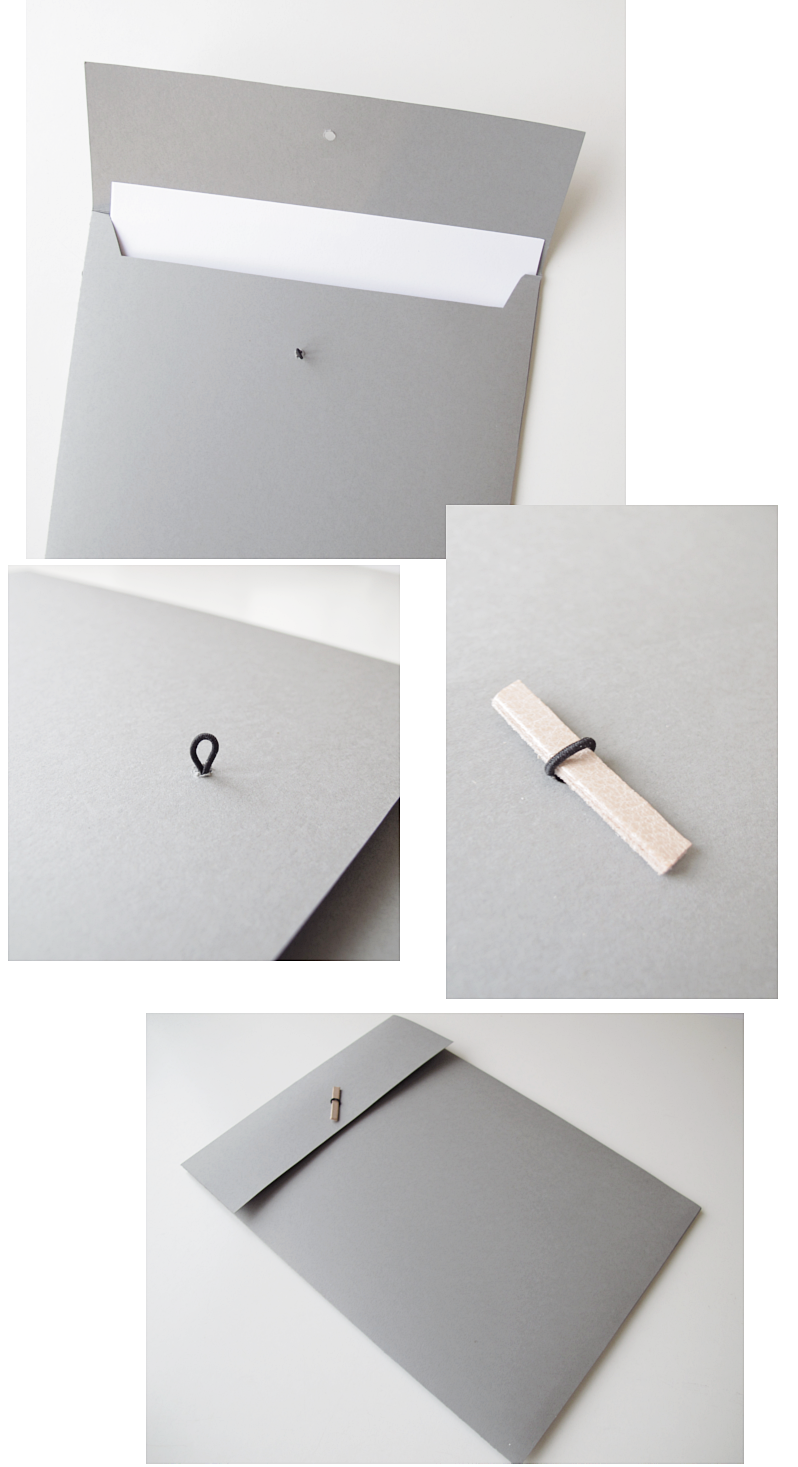
Here’s a folder I did the other day. Very simple, just like I like it, with a piece of leather as a lock. For the the little loop you see in the second picture, I used a piece of elastic thread. And to keep in it place, I just made a knot on the inside of the folder.

/// Här är en mapp som jag gjorde häromdan. Väldigt enkel, med en liten bit läder som lås. Jag använde vanligt tunt resårband när jag gjorde den lilla öglan som syns på andra bilden. Och jag fäste den genom att helt enkelt göra en knut på baksidan.

mapp

DIY – CHRISTMAS BALL

boll

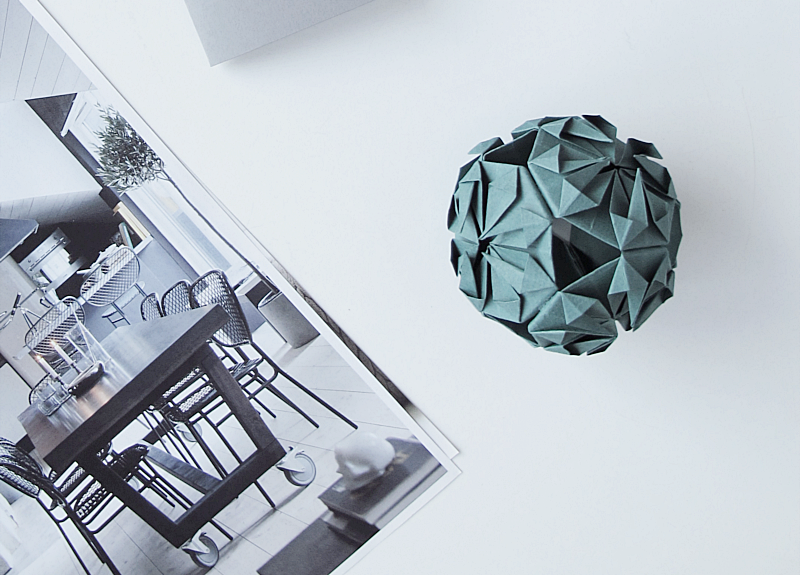
Can you believe it? Already december! Only 21 days until Christmas Eve. ( Here in Sweden we celebrate it on the 24th.) So what better diy than a christmas diy. Here you have a lovely origami ball. Glue a thread to it and you can hang it in your tree or why not make a garland out of it. It’s so nice you can leave it hanging after the holidays too.

/// Kan ni förstå, redan december! Bara 21 dagar kvar till julafton. Så vad passar bättre än ett jul diy. Denna fina origami boll som man kan limma fast en tråd i och hänga i julgranen eller varför inte göra en girlang och hänga på väggen. Passar fint efter julhelgen också. 

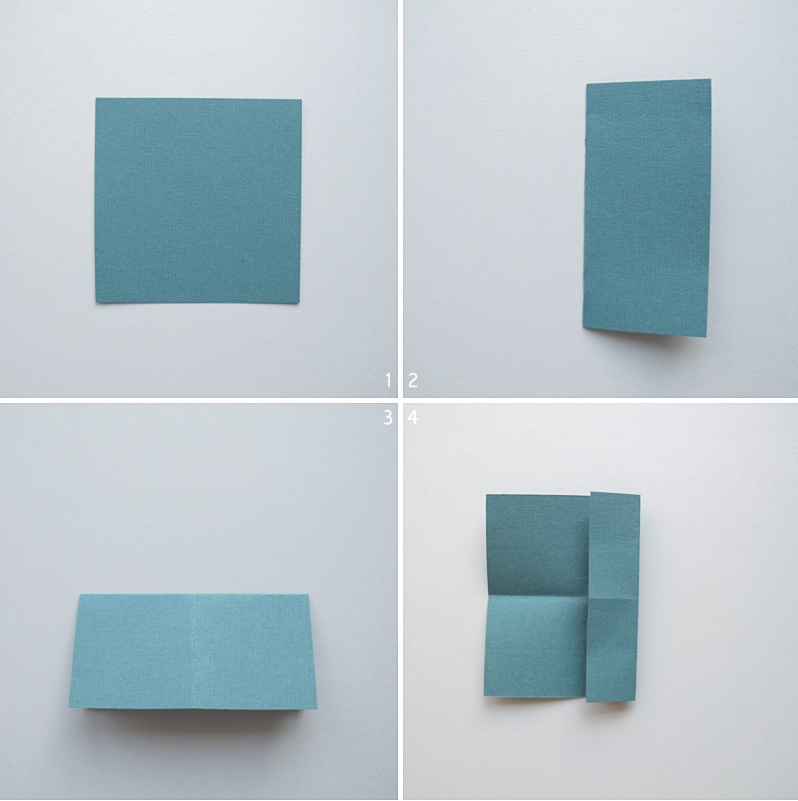
1. Cut out a square from a slighty thicker papper, (but not as thick as carton.) I did my square 10.5 x10.5 cm and ended up with a ball that is approximately 8cm in diameter. 2. Fold it in half. 3. Unfold and fold the other way. 4. Unfold and fold the side to the middle.

/// 1. Klipp ut en fyrkant i ett lite tjockare papper ( men inte så tjockt som hobbykartong.)  Jag gjorde min ruta 10.5 x 10.5cm och fick då en boll som är ca 8cm i diameter. 2. Vik den på mitten. 3. Vik upp och vik den nedåt. 4. Vik upp och vik in sidan till mitten.
boll

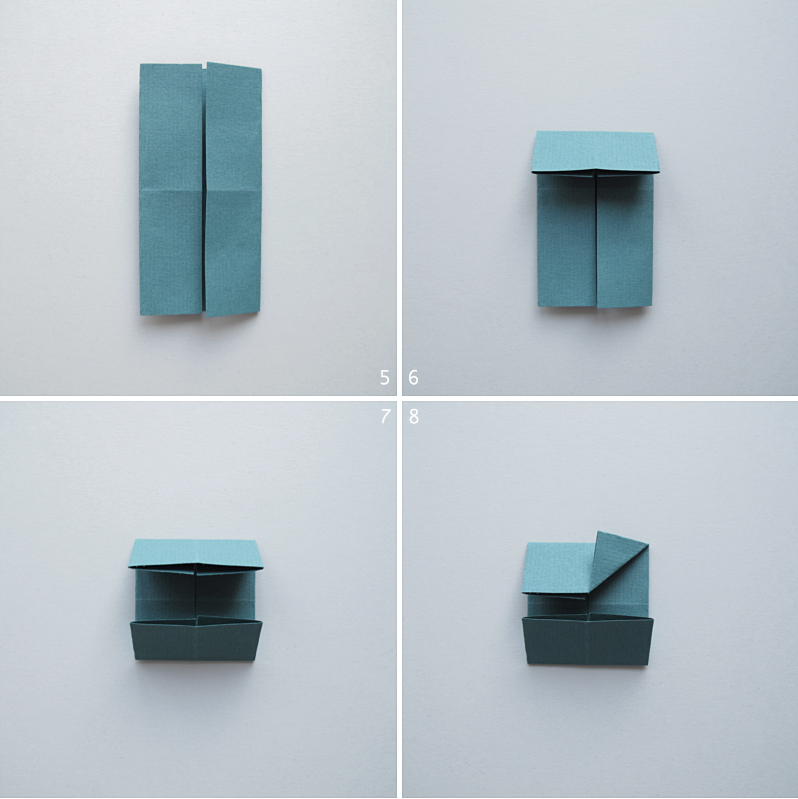
5. Fold the other side to the middle too. 6. Fold the top to the middle. 7. And the bottom to the middle. 8. Fold the sides inwards so that you get a triangle.

/// 5. Vik in den andra sidan mot mitten. 6. Vik toppen in mot mitten 7. Vik botten in mot mitten 8. Vik in sidorna mot mitten så att det blir en trekant.
boll

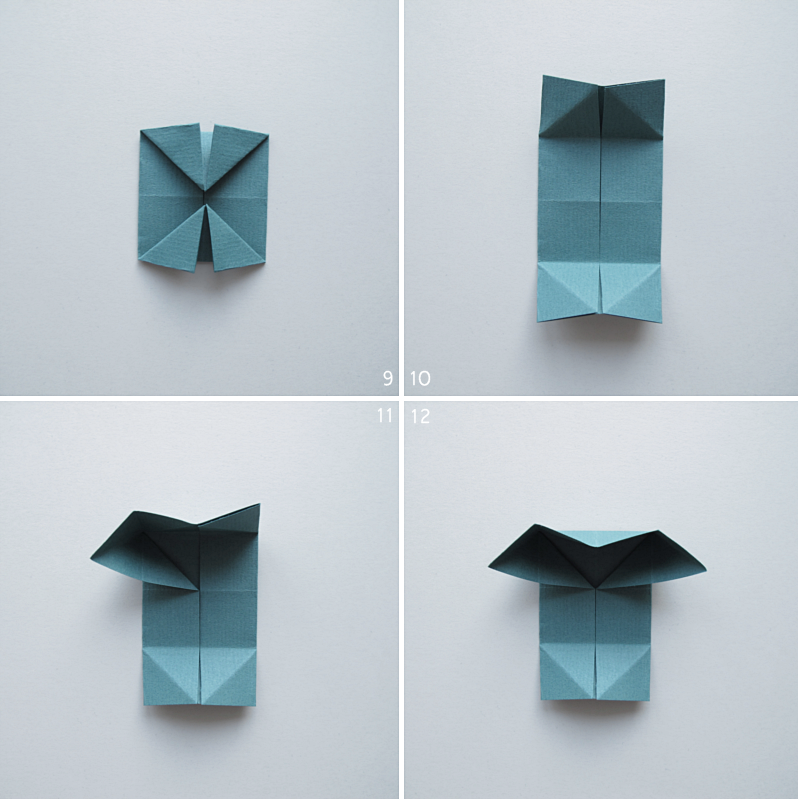
9. Now your paper should look like this. 10. Unfold it so you get a figure that looks like this. 11. Place your finger in the middle of the paper and fold the paper to the left. 12. And then to the right.

/// 9. Så här ska din figur se ut nu. 10. Vik upp trekanterna och de senaste vikningarna så att du får denna figur. 11. Håll fingret på mitten av papperet och vik ut vänster sida. 12. Och så höger.
boll

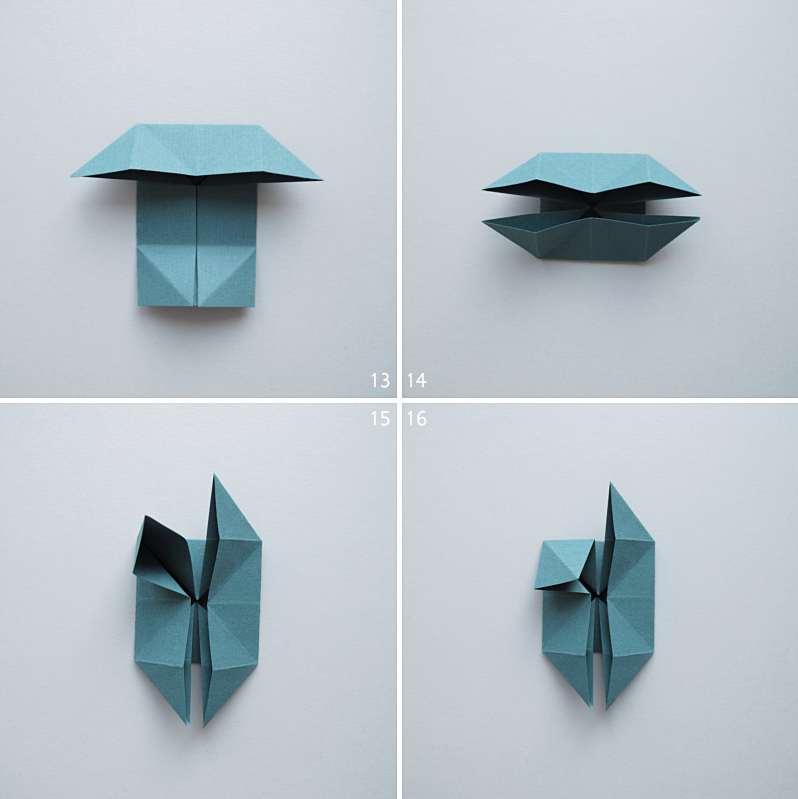
13. Gently push the top down. 14. Now do the same to the bottom of the paper. 15. Turn the figure and open up the pointy part. 16. Then push the paper down so that you get a square.

/// 13. Tryck ner toppen. 14. Gör nu likadant på nedre delen av papperet. 15. Vrid på papperet och öppna upp spetsen som bilden visar. 16. Tryck sedan ner papperet så att du får en fyrkant.
boll

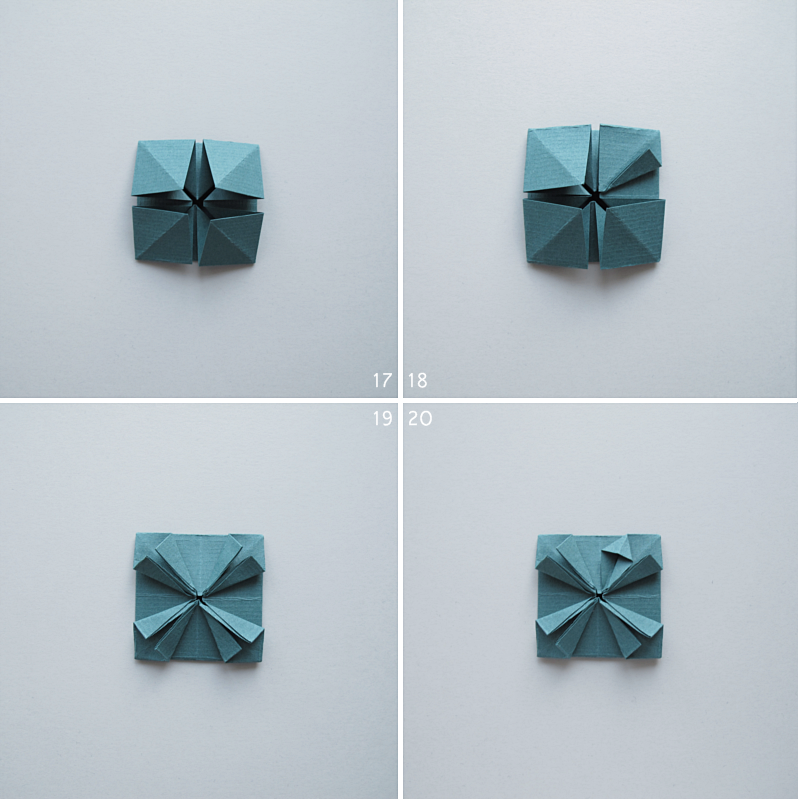
17. Do the same on all sides. 18. Fold one side towards the middle. 19. And then the other. 20. Gently open one of the foldings and push the top down.

/// 17. Gör likadant på alla sidor. 18. Vik in ena sidan mot mitten. 19. Och sedan viker du också in de andra. 20. Pilla försiktigt upp en vikning och tryck ner toppen.
boll

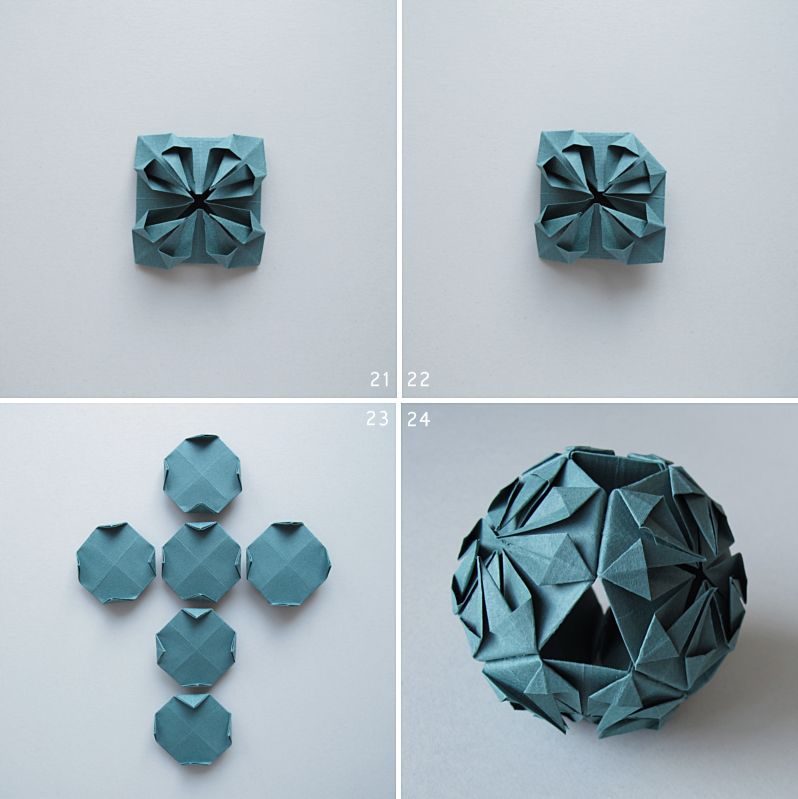
21. Repeat on the other ones. If you find it a bit tricky to open the folding you can use a pencil as help. 22. Fold the corners backwards. 23. Make five more figures and glue them all together using the backward folding you did in step 22. 24. And you are done!

/// 21. Gör likadant på de andra. Om du tycker det är pilligt att få upp vikningen så kan du använda en penna som hjälp. 22. Vik bak hörnen på din figur. 23. Gör nu fem likadana figurer och limma ihop dem i den lilla bakåtvikningen som vi gjorde i steg 22. 24. Och du är klar!
boll

Diy credit: Elle blogg
5 MORE STARS

stars

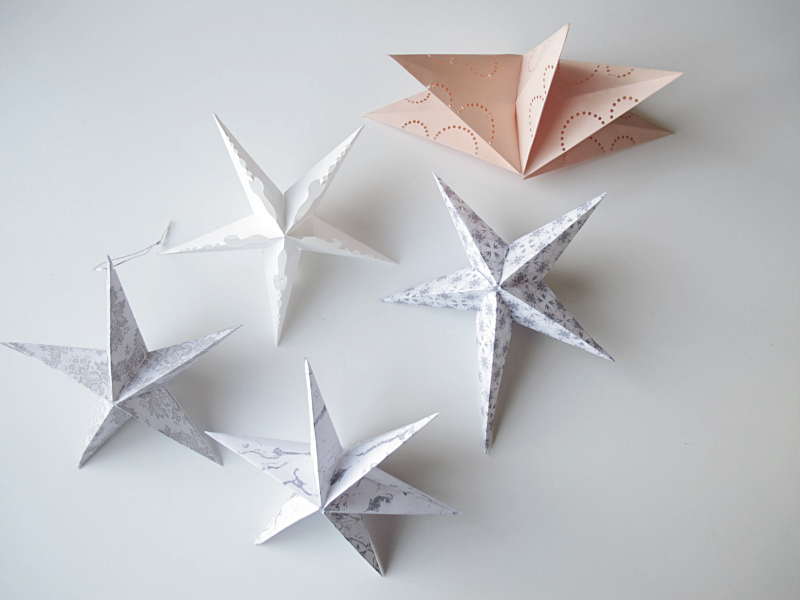
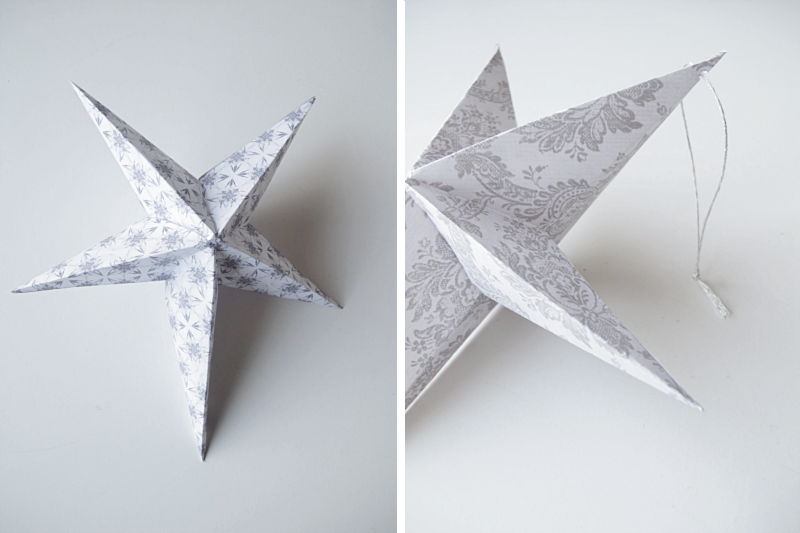
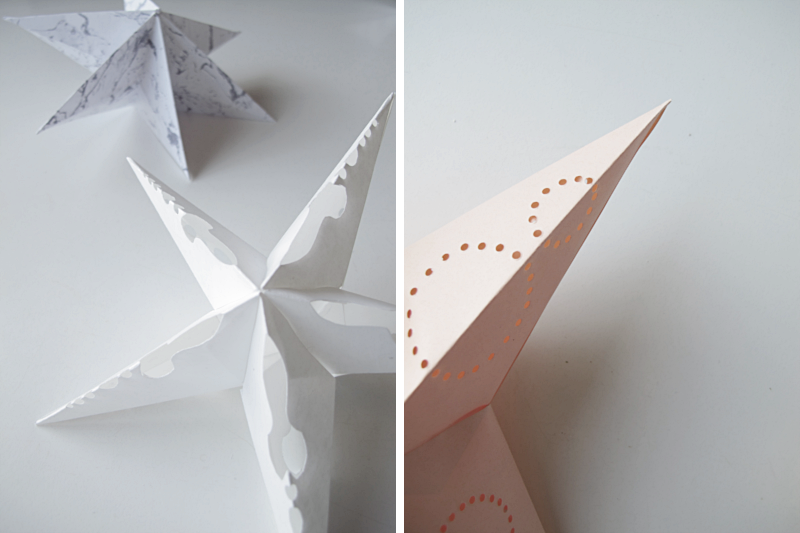
I’m so happy you like the star diy I did a couple of days ago. Thumbs up for you! Today I’ll show you some more variants on that star. On the first one I made the bottom point longer than the others. On the second star I made a hole on the top off the star so that I can hang it. The pattern on the paper I printed out from sxc.

/// Vad roligt att ni gillade mitt stjärn diy som jag visade för några dagar sedan. Tummen upp för er och era glada tillrop! Idag tänkte jag visa er fler varianter på den stjärnan. På första stjärnan har jag gjort nedersta spetsen längre än de andra. På andra stjärnan har jag gjort ett litet hål på toppen av en spets, för att kunna hänga upp stjärnan. Mönstret till den har jag skrivit ut på sxc.

stars

In the picture with two stars the star in the back has six points instead of five. And on the one in the front I cut a pattern on every point using a pair of scissors. On the last star I made a pattern with tiny holes. Put a led light inside the star and it becomes a beautiful christmas star.

/// På bilden med två stjärnor har den bakre sex stycken spetsar istället för fem. På den främre stjärnan har jag klippt ett mönster på varje spets. Och på sista stjärnan har jag gjort ett hålmönster. Blir jättefint att sätta fast en liten ledlampa inuti.

stars

Do have any more variants on the star so please share them!

/// Kommer ni på fler varianter på stjärnan så får ni gärna dela med er!

DIY THREE DIMENSIONAL STAR

stars

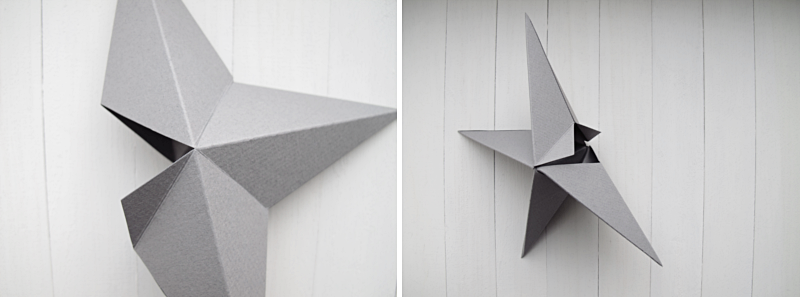
Almost to this day one year ago, I showed a star diy, that has become one of the most popular diy’s on my blog. Today it’s time again. But this time it’s a three-dimensional star. You need: A pair of scissors, glue and some carton. I tried to make stars out of copying paper too, but I found it to be much harder.
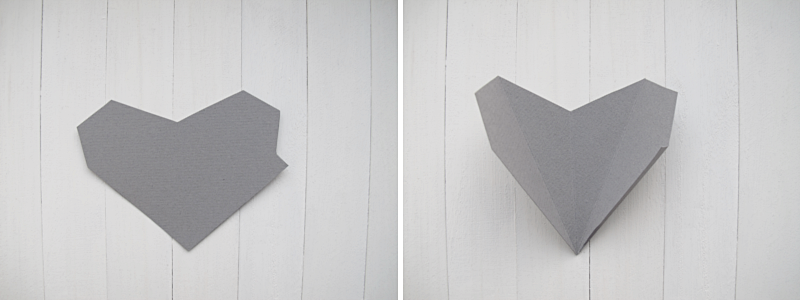
First you want to cut out the template. You’ll found the pdf in the bottom of the post. Place it on the paper you want to use and make five figures. (An a4 sized will be enough). Then cut them out. And fold along the lines.

/// För ganska precis ett år sedan visade jag ett stjärn-diy som faktiskt har blivit ett av de mest gillade diy:en på bloggen. Nu ett år senare tänkte jag att det var dags igen. Denna gång blir den en tredimensionell stjärna. Du behöver lim, sax, och papper. Jag provade att göra stjärnor av både kopieringspapper och hobbykartong, och hobbykartongen var mycket enklare.
Börja med att klippa ut mallen (pdf finns längst ner i inlägget). Rita sedan av den 5 gånger på papperet du vill använda. Ett a4 ark räcker, och klipp sedan ut delarna. Vik längst med linjerna.

star

Fold along the slashed lines too, but in the opposite direction. Put glue on the small part and make the figure into a cone.

/// Vik längs med de streckade linjerna men åt andra hållet. Stryk ut lim på den lilla delen och sätt ihop till en spets.

star

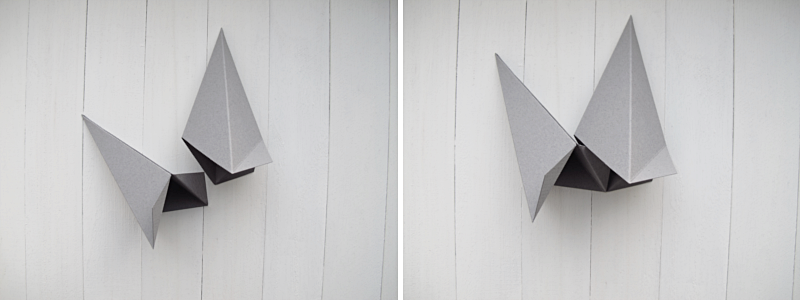
Now its time to assemble the star. Place two cones so that you have the little “wings” in the same direction. Put glue on both “wings”, and attach them on the inside off the other cone. See pictures below.

/// Nu är det dags att sätta ihop stjärnan. Lägg två spetsar så att de har de två “vingarna” åt samma håll, jag la dem till höger. Stryk lim på “vingarna” och fäst båda två på insidan av spetsen till höger. Se bilderna nedan.

star

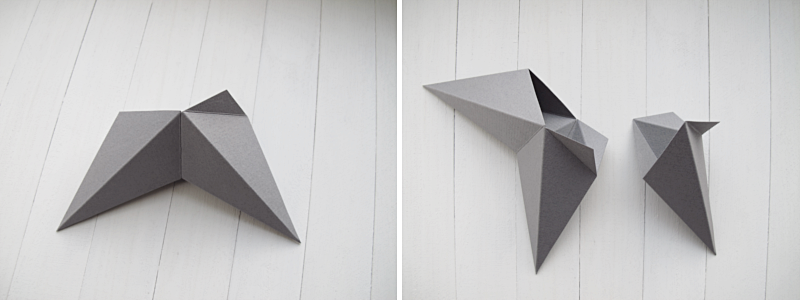
This is how it should look when the glue has dried. Then continue with the next cone. The same way. Glue on the “wings”, then attach them on the inside of the other cone.

/// Så här ser den ut när limmet torkat. Fortsätt med nästa spets. På samma sätt igen. Sätt lim på de små “vingarna” och sätt fast dem på insidan på den andra spetsen.

star

Be sure to check that your cones don’t “wander off”. When you want to attach the fifth and last cone it can be a bit tricky to get it in place. You can push the four other cones together to get a little more space. And the good thing about using carton, you don’t even have to glue the last “wings” in place. The star will hold together anyway. When that is done, you’re done!

/// Var noga med att kolla så att ingen av delarna förskjuts, för då kommer du inte att få ihop stjärnan på slutet. När du kommer till den sista och femte spetsen på stjärnan kan det vara lite mäckigt att få dit den. Då kan du trycka ihop de andra spetsarna mot varandra för att få lite hjälp. Om du gör med hobbykartong så behöver du inte heller fästa de sista “vingarna” med den första spetsen, utan stjärnan håller ihop ändå. När det är färdigt, är du klar!

star

Pdf: star template

TIP OF THE DAY

bord

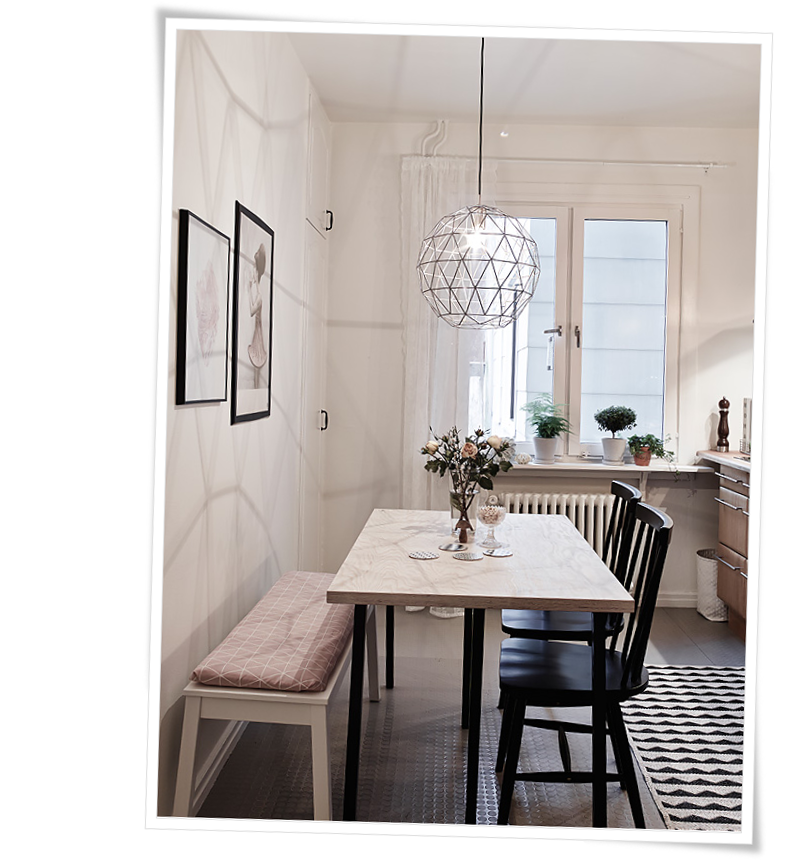
If you like this table, as much as I do, you can easily make one yourself. With Loop Stand Frame from Hay and a piece of plywood from your local hardware store, you’re pretty much done.  Todays tip!

/// Om du gillar detta bord, lika mycket som jag gör, så kan du enkelt få ett likadant hemma hos dig. Med Loop Stand Frame från Hay och med en plywoodskiva från ditt lokala trävaruhus är du i hamn. Dagens tips! 

fo: stadshem