Menu Close

Page 30 of 313

DIY – CARTON BOWLS

diy paper bowl

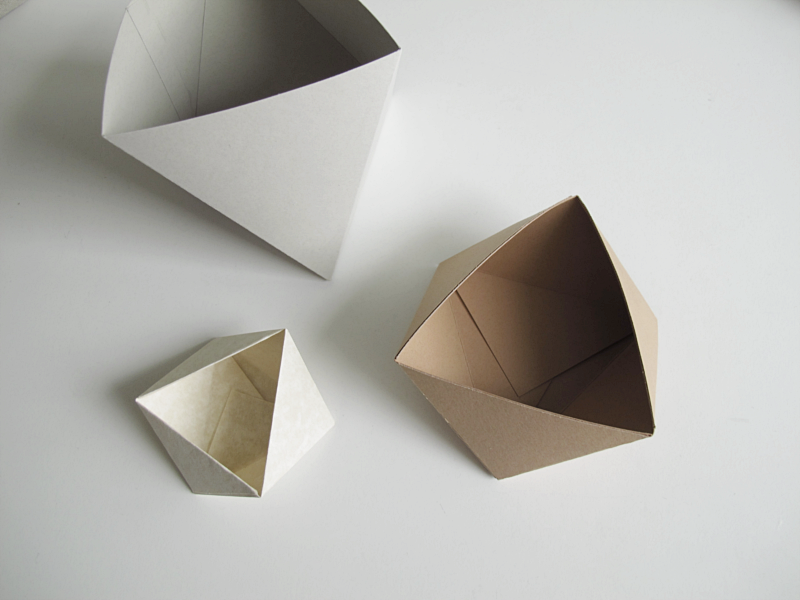
As I promised last week here you have the tutorial for the paper bowl made with carton instead. It’ s not that much different from the paper bowl tutorial, the biggest difference is that here you don’t fold the paper in half. If you want to make this bowl I suggest that you first take a peak at the first tutorial I did.

For this you need:

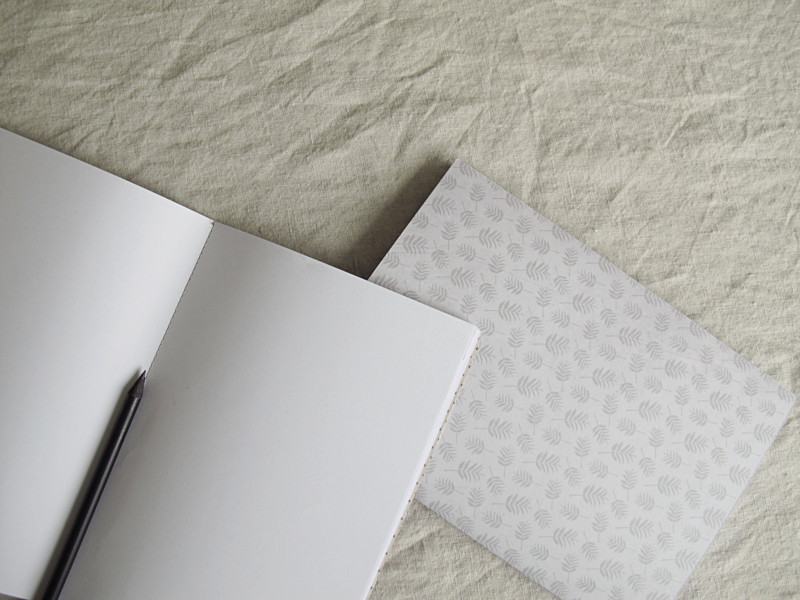
→ 2 squared shaped pieces of carton. Mine where 13 x 13cm.
→ A piece of regular copying paper
→ A crochet hook and a ruler (Or foldingbones. Use whatever you use to make a nice folding)
→ A pair of scissors
→ Glue

/// Som lovat förra veckan kommer här en beskrivning på hur du gör skålen i hobbykartong istället. Det är inte så stor skillnad mot den andra beskrivningen, den största är att man inte viker fyrkanten på mitten. Om du vill göra denna skål så är mitt förslag att du först tittar på hur skålen görs i vanligt papper.

Till detta behöver du:

→ 2 fyrkantiga bitar med kartong. Jag använde bitar som är 13x 13cm
→ En bit vanligt kopieringspapper
→ En virknål och linjal (Eller vikben. Använd vad du brukar använda för att göra fina viklinjer)
→ Sax
→ Lim

And this is how you do it:

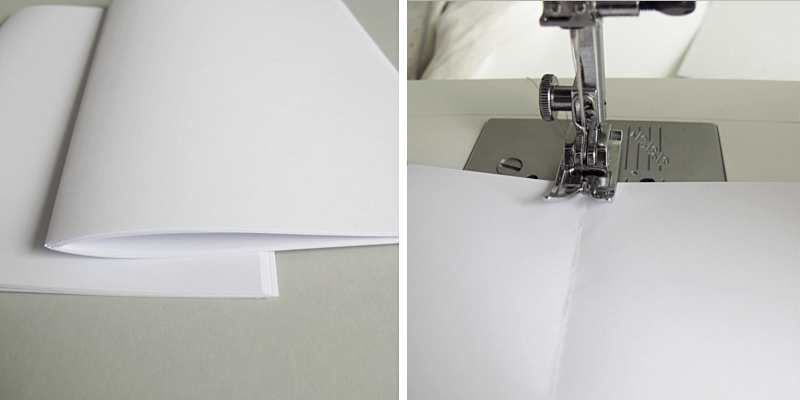
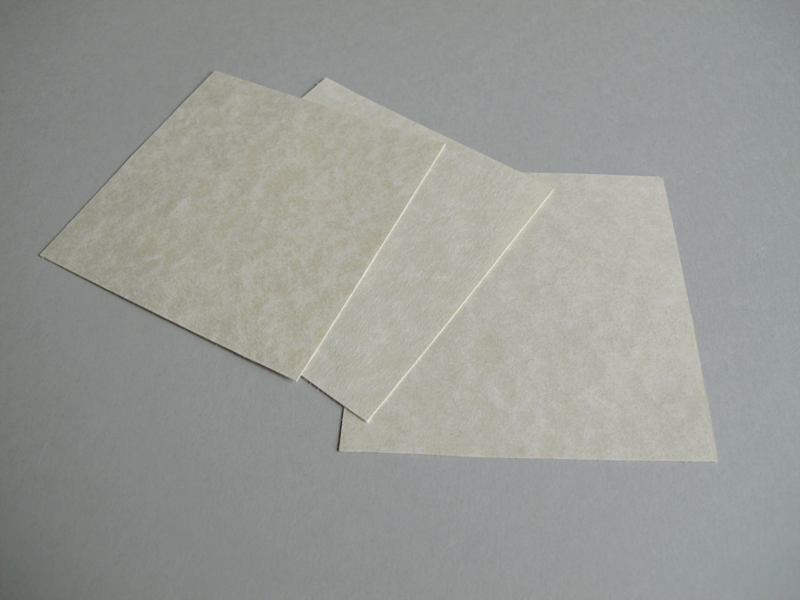
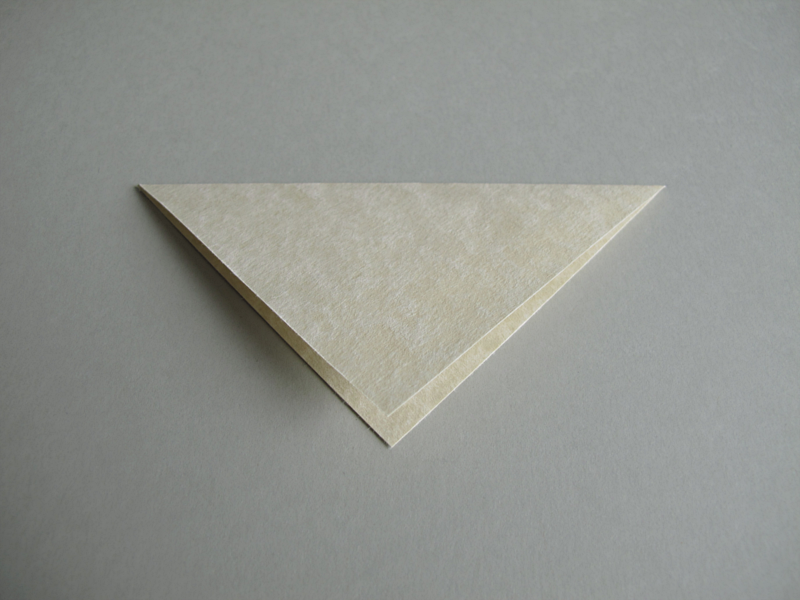
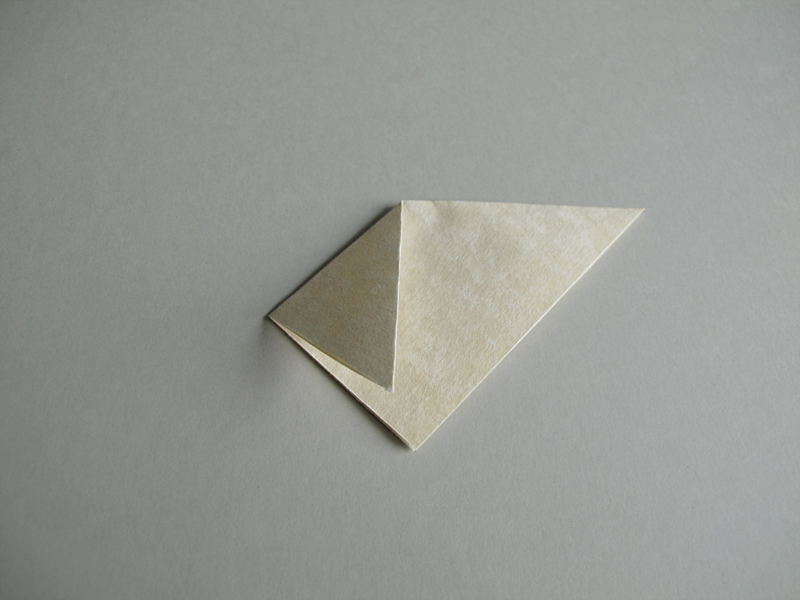
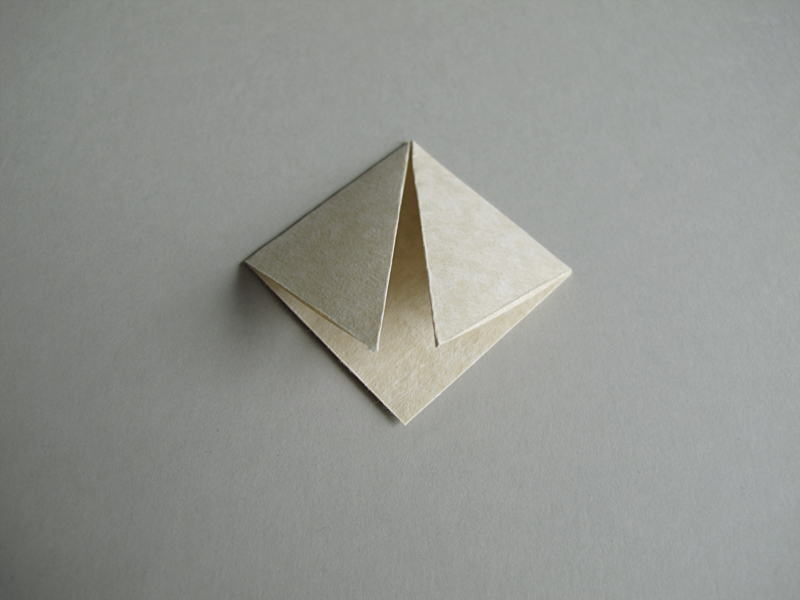
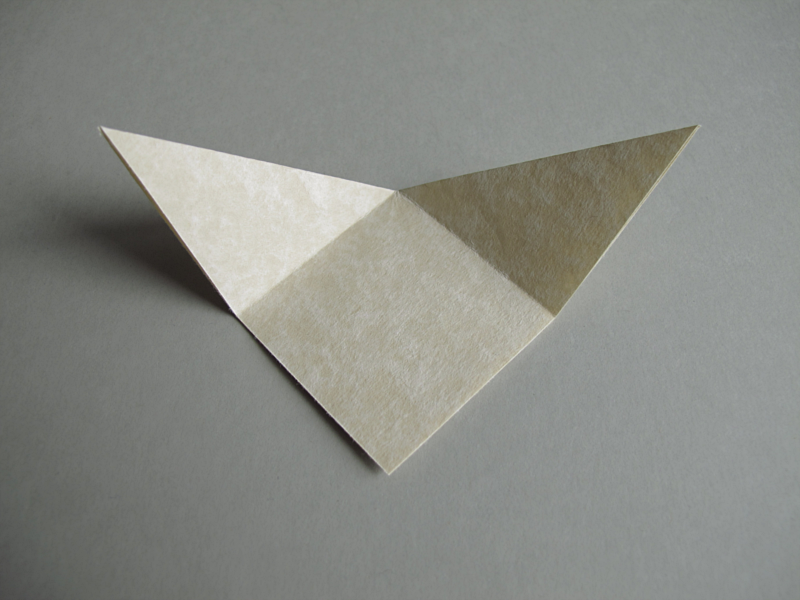
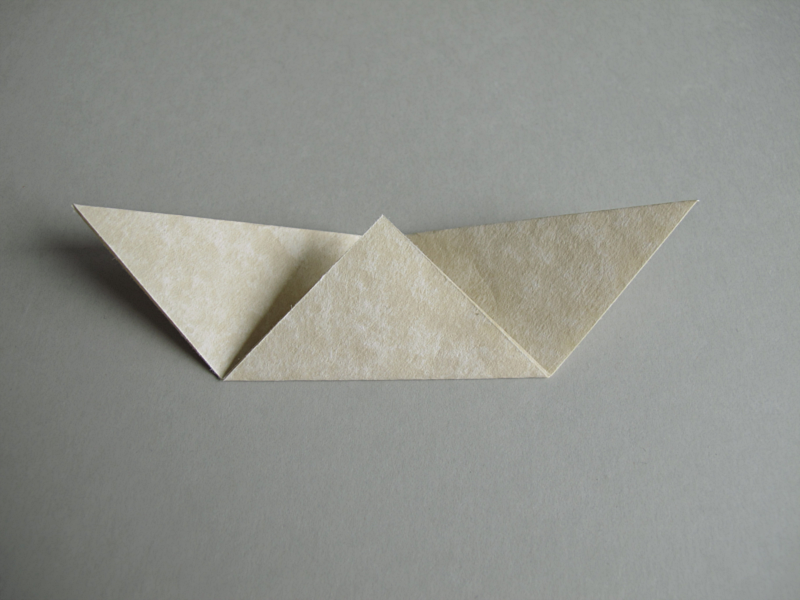
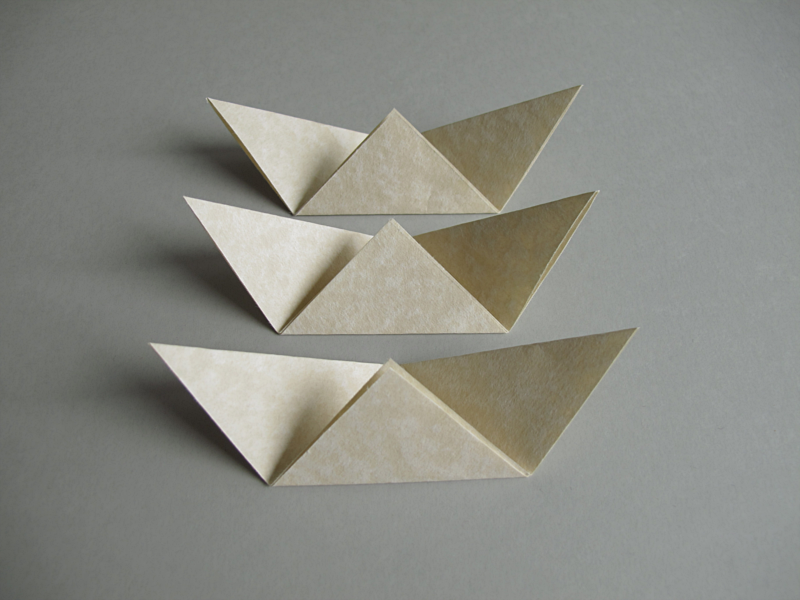
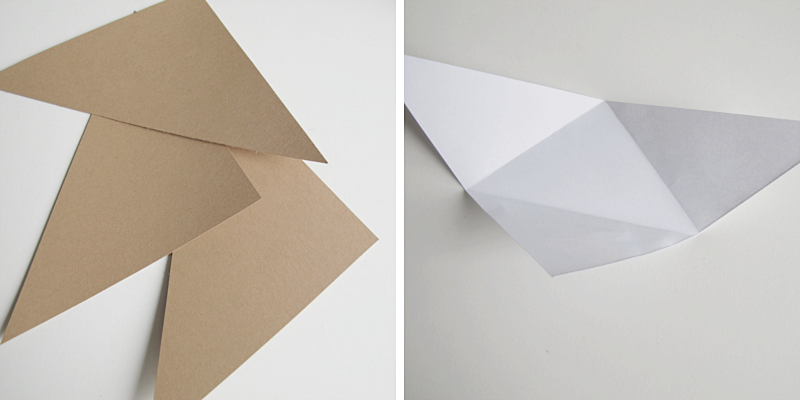
Start by cutting the pieces of carton in half so that you get 4 triangles. But we are only using three of them for this. Then cut the copying paper in the same size as the triangles, and fold it like I did here (Step 2-5).

/// Börja med att klippa kartongbitarna på mitten så att du får fyra trekanter. Men vi ska bara använda tre till detta DIY. Klipp sedan kopieringspapperet i samma storlek som trianglarna, och vik det som jag gjorde här (Steg 2-5).

Diy paper bowl

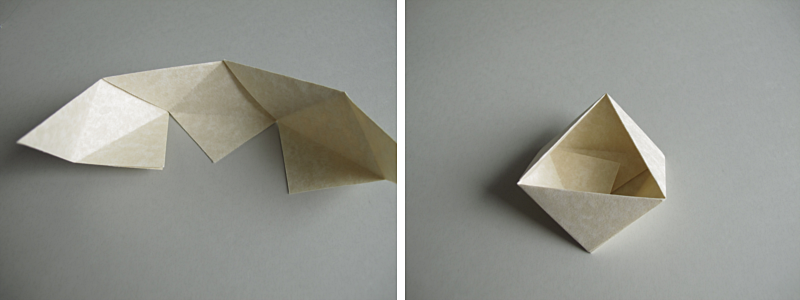
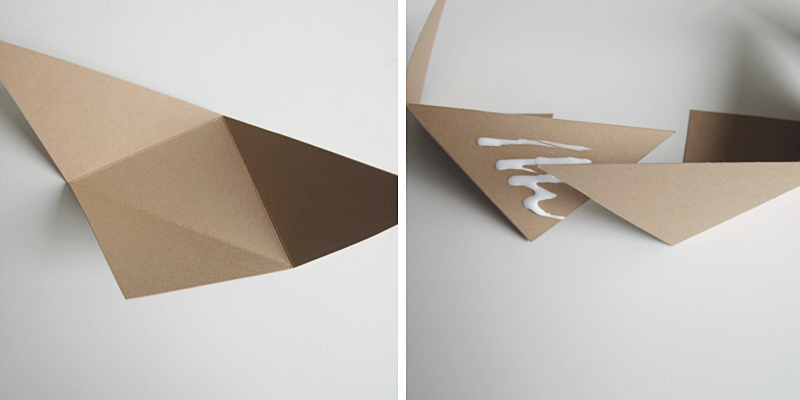
Place the copying paper on top of the carton and draw with the crochet hook along the folded lines (use the ruler as a help). This leaves marks so that you know where to fold later on. Repeat on all pieces of carton.

/// Placera biten med kopieringspapper på en av kartongbitarna och dra med virknålen längst efter de vikta linjerna (använd linjalen som hjälp). Detta lämnar märken på kartongen så att du vet var du ska vika den senare. Gör likadant på alla tre kartongbitarna.

DIY paper dowl

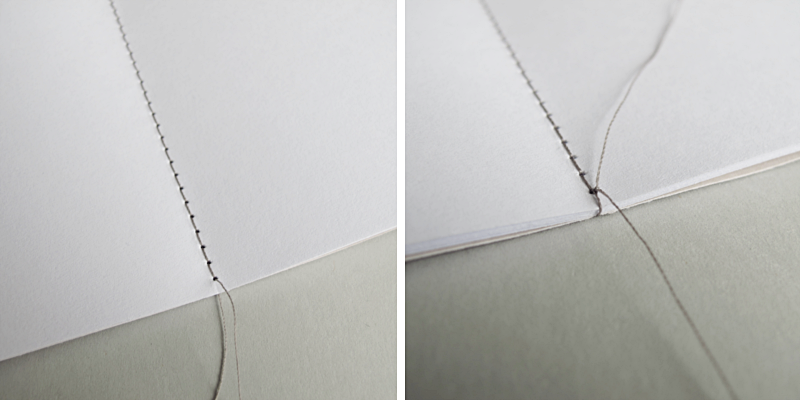
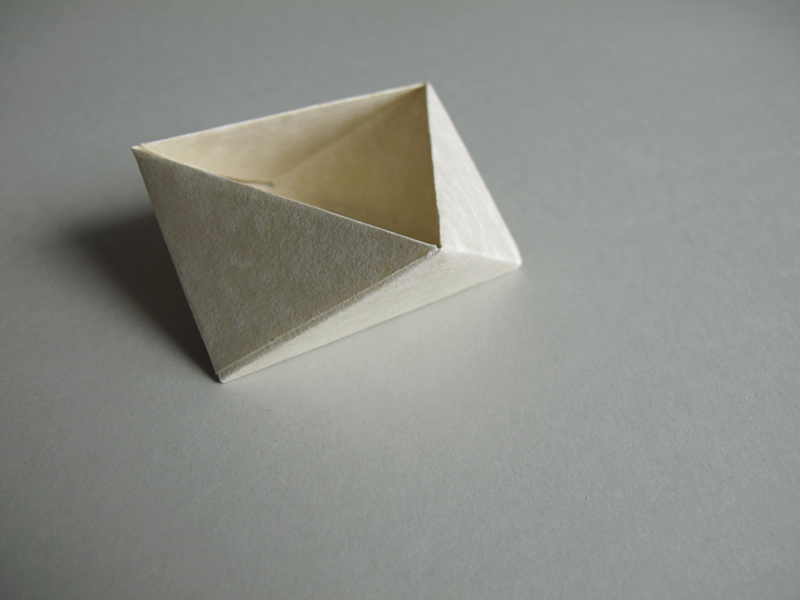
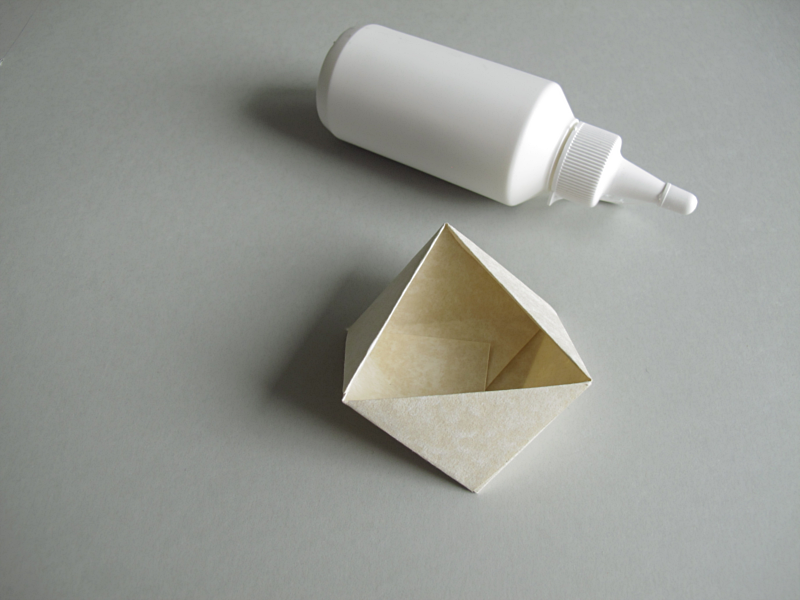
Fold the carton along the lines. Then (instead of attaching the pieces together by sliding one corner into the other, as I did with the thinner paper) you glue the pieces together.

/// Vik kartongen längs med linjerna. Sedan (istället för att trä en spets in i en annan, som jag gjorde med den av tunnare papper) limmar du ihop delarna.

Diy Paper bowl

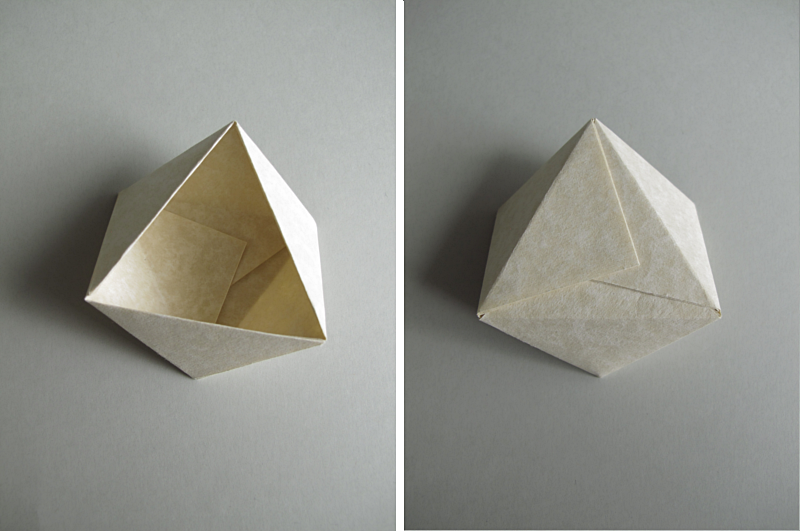
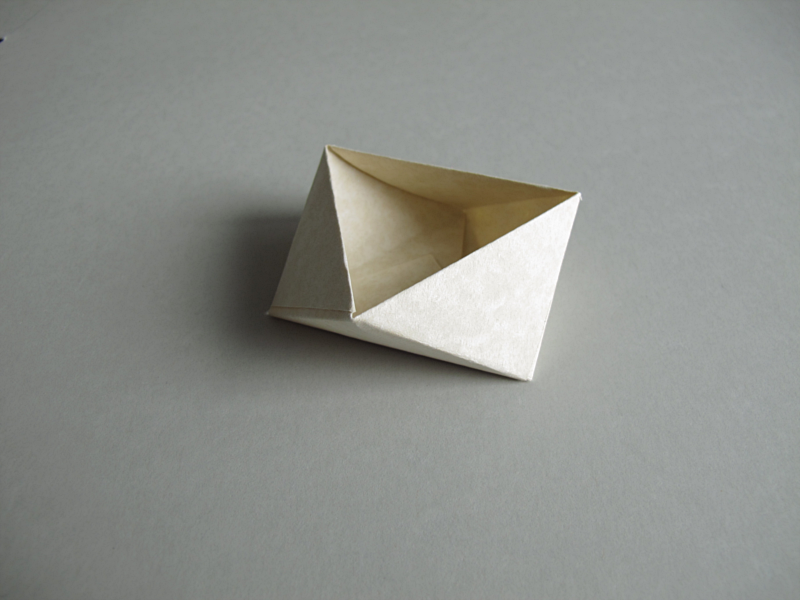
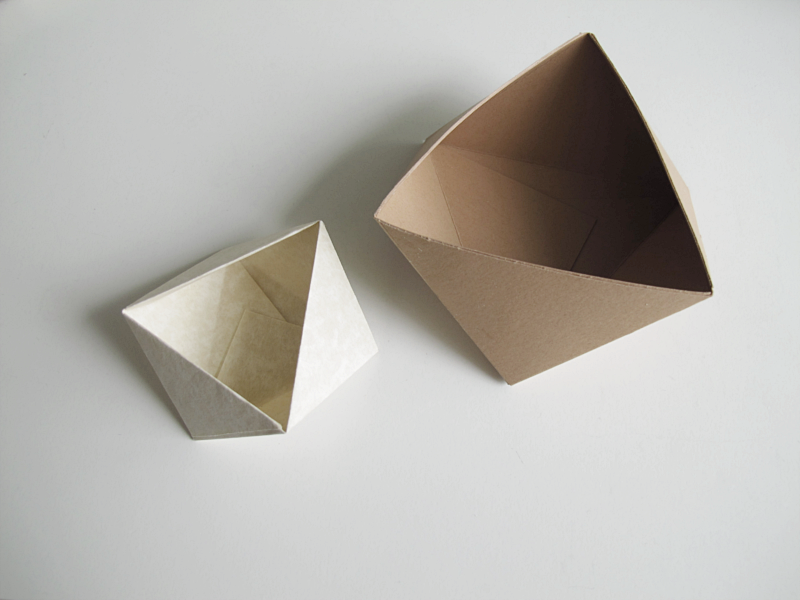
Then glue the bottom pieces together and you are done!

/// Limma sedan ihop bottenflikarna och du är klar!

Diy paper bowl


like

This storage box
This gift box
These mini plastic bags

DIY INSPIRATION : BASKETS

hanging flower pots

When it comes to DIY’s and hanging flower pots it feels like macrame has been the go to for a long time now. Don’t get me wrong, I think they look nice but maybe I’m just a bit tired of them. And that’s why I like these made out of thread and small baskets. Baskets that one can easily (at least here in Sweden) find in second hand stores or at flea markets. Today’s DIY inspiration!

/// När det kommer till DIY’s och amplar så känns det som att de av makramé har varit det som vi sett mest av rätt länge nu. Inget ont om dem, de är fina, men kanske att jag börjar vara lite mätt på dem. Och det är därför jag gillar dessa amplar gjorda av snöre och små korgar. Korgar som man lätt kan hitta på  loppmarknader och second hand butiker. Dagens DIY inspiration!

fo: boligliv / Pernille Enoch

Spara

DIY – SEWN NOTEBOOK

notebook
notebook

I guess it’s no surprise to you that I like note books. I’ve done one in marble, leather, a braided one and one with thread (and a couple more). Todays diy is one with a sewn back.

For this you need:

→ 15 A4 copying papers
→ Thread. You can choose to use a matching thread or a contrast color
→ A sewing machine
→ One paper 30 x 30cm to use as a cover. I used a scrapbook paper
→ Paper knife

/// Jag antar att det inte kommer som någon överraskning för er att jag gillar anteckningsböcker. Jag har gjort en i marmor, en i läder, en flätad och en med tråd (plus några fler varianter). Dagens anteckningsbok är en med sydd rygg.

Till detta behöver du:

→ 15 st kopieringspapper, A4
→ Sytråd. Du kan välja om du vill ha en som är samma färg som omslaget eller ett i annan färg som en kontrast.
→ Symaskin
→ Ett papper som är 30×30 som ska fungera som omslag. Jag använde ett för scrapbooking.
→ Papperskniv

Start by folding all the papers in half including the cover paper. When that is done place all the papers on top of the cover paper and sew a seam along the folded line. Make sure you have long pieces of the thread sticking out on both ends of the note book. This makes it easier to tie them together. I choose to tie them on the inside of the note book, as close to the hole as I could.

/// Börja med att vika alla papper på mitten, inklusive omslagspapperet. När det är klart så lägger du alla papper uppe på omslagspapperet och syr en sömn längst efter den vikta linjen. Tänk på att ha en ganska lång bit tråd kvar på båda sidorna av anteckningsboken, då det blir lättare att knyta ihop dem sedan. Jag valde att knyta på insidan av anteckningsboken så nära hålet jag kunde.

notebook

notebook

After that, you fold the note book and carefully cut the excess paper off (when you place the papers on top of each other and then fold the note book, a bit of shifting occurs.)

And then you are done!

/// Vik sedan anteckningsboken och skär försiktigt bort det överflödiga papperet som sticker ut. (När man lägger alla papper i varandra och sedan viker boken så förskjuts bladen lite).

Och så var det klart!

notebook

JULY 1ST AND MY WEEKLY WONDERS

On my feed on instagram this picture popped up from Grandpa store, and the new Black cork pinboard by Low Key. I think it looks great with the black cork and that it is a nice update from the usual cork pinboard.

/// I mitt flöde på instagram fick jag se den här bilden från Grandpa store. Och på Black cork pinboard av Low Key som nu finns att köpa. Jag tycker det är så fint med svart kork samtidigt som det också känns som en fin uppdatering från den vanliga korkanslagstavlan som vi sett tidigare.

granpa

Grandpa store

Something else I’ve had my eyes on is the pot Bubblor available at Le Kiosk. Just love the crackle pattern and the round shape.

/// Något annat som jag haft ögonen på är krukan Bubblor som finns att köpa från bland annat Le Kiosk. Älskar det krackelerade mönstret, och den runda formen.

johannapilfalk

Johanna Pilfalk

And a collaboration that for me feels a bit surprising. Stilleben has designed a new series of pictures frames and mirrors for Georg Jensen. The serie is called Tableau and are available in stores now.

/// Så till ett samarbete som för mig känns väldigt oväntat. Stilleben har designat nya tavelramar och speglar för Georg Jensen. Serien har fått namnet Tableau och finns att köpa redan nu.

stillebendk

Stilleben

Let´s end this list and week with this picture. You now another one that stuck. Mixed chairs around a big wooden table, pretty flowers from the garden in simple glass vases, old books, double doors and wooden floors.. I could go on forever. Anyway.. Wish you a happy friday and a great weekend!

/// Låt oss avluta denna lista och vecka med den här bilden. Ni vet ännu en sån bild som fastnat. Blandande stolar runt ett stort träbord, sommarblomster i enkla glasvaser, gamla böcker, pardörrar, trägolv.. ja listan kan göras lång… Hur som haver,  hoppas jag ni får en trevlig fredag och en trevlig helg!

bord

Ahre

DIY – PAPER BOWL

bowl

bowl

So many of you followers on Bloglovin liked the Paper pen holder I did so I thought that you might like this one too, and it’s actually a bit easier to make. No cutting or measuring at all.

For this you need:

→ 3 pieces of thin paper in the shapes of squares. How big, you decide. I did one 9x9cm and the finished bowl is about 6.5 cm wide and 2.5 cm high. I also did one 13x13cm and that turn out to be about 9 cm wide and 4 cm high.
→ Glue

/// Så många av er följare på Bloglovin gillade Pennhållaren jag gjorde, så jag tänkte att ni nog skulle gilla den här också. Den är faktiskt lite lättare att göra. Inget klippande eller mätande överhuvudtaget.

Till denna behöver du

→ 3 bitar fyrkantigt tunt papper. Hur stora bestämmer du själv. Jag gjorde en skål med papper som var 9x9cm och då blev måtten på den färdiga skålen ungefär 6.5cm bred och 2.5cm hög, och en med papper som var 13x13cm och då blev skålen ungefär 9cm bred och 4cm hög.
→ Lim

bowl

Fold one of the squares, so that the top meets the bottom.

/// Vik ett av papperna på mitten.

bowl

Fold the top left corner so that it meets the bottom corner.

/// Vik in vänstra spetsen så att den möter spetsen i botten.

bowl

Repeat on the other side.

/// Vik likadant på andra sidan.

bowl

Unfold.

/// Vik upp spetsarna igen.

bowl

Fold the bottom corner to the top.

/// Vik spetsen i botten uppåt så att den möter övre delen av papperet.

bowl

Now fold the two remaining pieces of paper, just like the first one you did.

/// Vik de två andra papperna precis likadant som den första.

bowl

Attach two of the pieces. See picture below.

/// Trä in en spets i spetsen på ett annat papper.

bowl

And then attach the last one. Once that is done, attach the two farthest out on each side with each other.

/// Gör likadant med det tredje papperet. När det är klart sätter du ihop de två spetsarna längst ut på vardera sidan med varandra.

bowl

Put some glue on the ends at the bottom of the bowl. And press them together until the glue is dry.

/// Limma ihop bitarna i botten och tryck lätt tills limmet torkat.

bowl

And you are done!

/// Klart!

bowl

Next week I’ll show you how to do this with carton instead.

/// Nästa vecka tänkte jag visa er hur man gör denna i kartong istället.