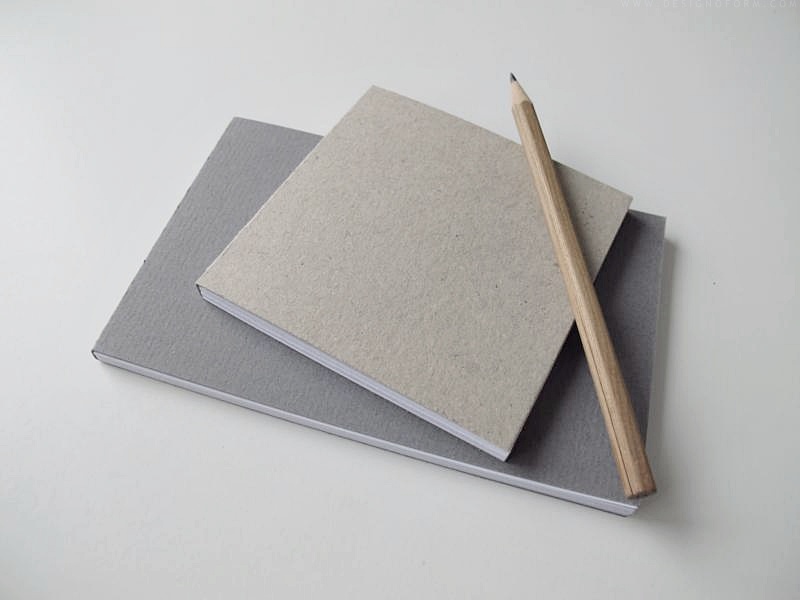
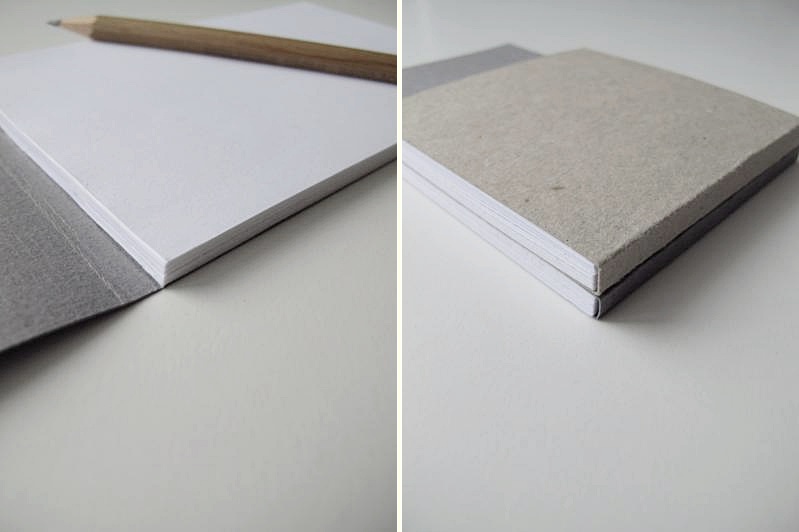
And here you have the diy I showed a sneak peek of yesterday. Memo blocks. First you cut 50 squares and 50 rectangles out of ordinary paper. 9×9 cm and 9x14cm. After that you cut two pieces of carton with the measurments 9x30cm and 9x22cm. Take all the papers and put them together. Try to make the edges as nice as you can. Use two clamps and use them to hold the pieces in place. Take some glue, I used transparent water based glue, and put a string on one of the four sides. Use your finger to smoth it out. Take two more paper clamps and leave it to dry.
/// Och här kommer så diy:et jag visade en sneak peek av igår. Ett memoblock diy. Börja med att klippa 50st rektanglar och 50st kvadrater av vanligt vitt papper. Använd måtten 9x14cm och 9x9cm. Klipp sedan ut två kartongbitar med måtten 9x30cm och 9x22cm. Ta alla vita papper och sätt ihop dem. Försök att vara så noggrann du bara kan, så att du får fina kanter. Använd två pappersklämmor för att hålla ihop bunten medans du tar lite lim, jag använde vanligt transparent skollim, och limmar en liten sträng på en av de fyra sidorna. Använd fingret för att stryka ut. Ta sedan två klämmor till och lämna det att torka.
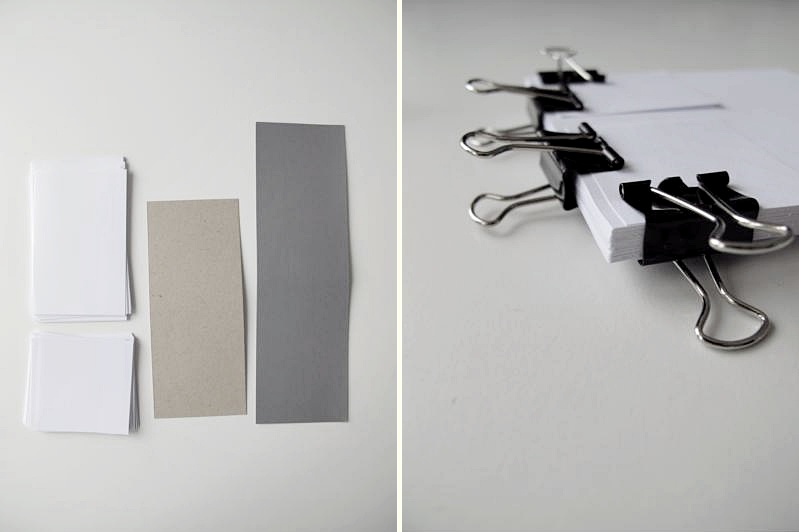
Then do the same to the other bunch of paper.
/// Gör nu likadant med den andra bunten.
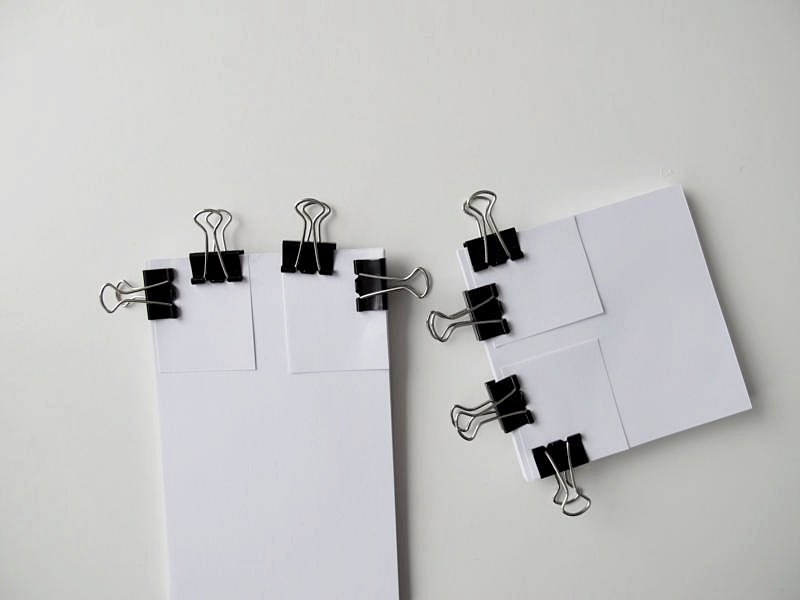
When it´s dry take the clamps off, and place the blocks on top of the carton. Then fold them where the arrows shows.
/// När det har torkat färdigt kan du ta bort alla klämmor och lägga buntarna av papper på kartongbitarna. Vik sedan där pilarna visar.
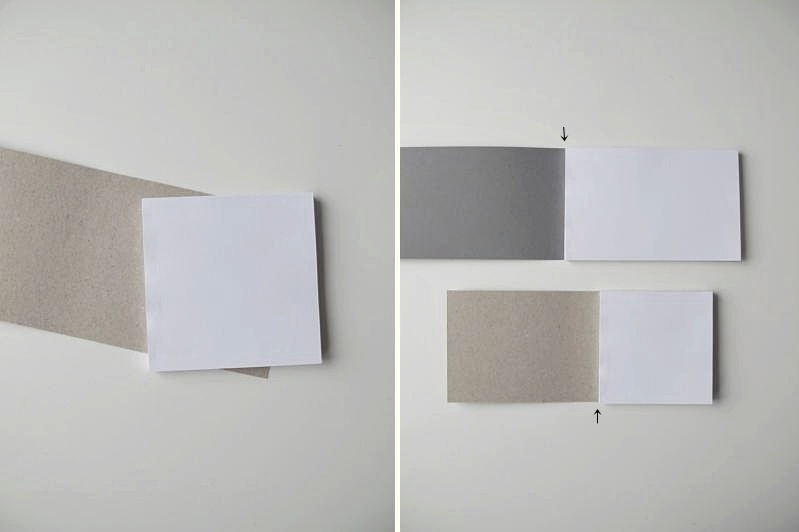
Like this. Then you fold, once again where the arrow shows.
/// Så här. Vik sedan en gång till där pilen visar.
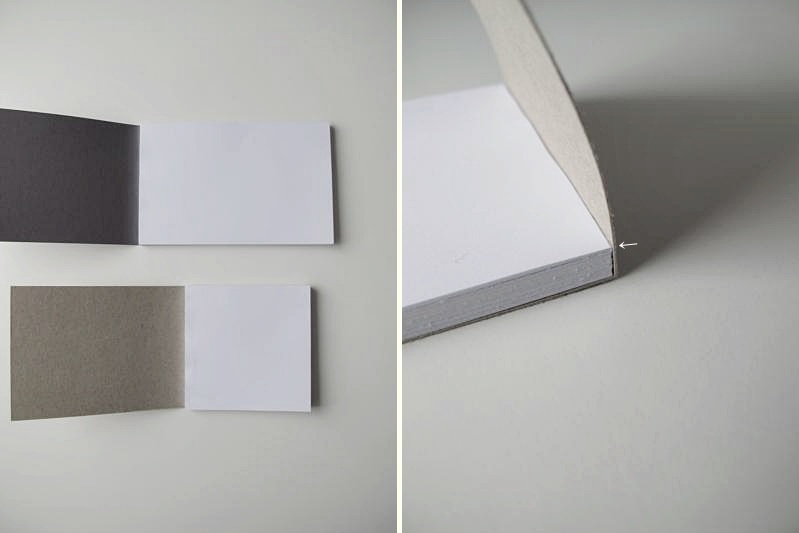
Now you have a piece of carton sticking out, so cut it off. ( I did it this way, instead of deciding the measurments from the beginning, so you all get the carton exactly where it should be, no matter which kind of paper you are using.) Do the same thing on the other block.
/// Nu har du förmodligen en bit av kartong som sticker, så klipp bort den. (Jag gjorde på det här sättet, istället för att bestämma måttet från början, så att ni alla får kartongen precis där den ska vara, oavsett vilket sorts papper ni än använder. ) Gör nu likadant med det andra blocket.

Now it´s time to glue the block to the carton. For this I used a glue that wasn´t so “watery”. Put the glue on the last page of the block and turn it so you have the side we glued before, facing the folded carton. Let it dry and you are finished!
/// Nu är det dags att limma fast blocket till kartongen. Till denna del använde jag ett lim som inte var så rinnigt. Sätt lim på sista bladet i blocket och vänd blocket så att du har den delen som vi limmade tidigare mot där kartongen är vikt. Låt det torka och du är klar!

McKenna Ryan says:
Oh my goodness I love these! I would love to make them in bright colors with letter pressed phrases on the front. xx. McKenna Lou
http://www.lynnandlou.com
April 8, 2013 — 16:34
Sibtul Hasnain says:
Hello,
I am an artist and curate for TurnPress. I loved this project for its understated yet sharp minimalism. It is now featured at TurnPress.com in the Design category.
Thanks for writing a fine blog.
April 8, 2013 — 22:00
designoform says:
Thank you for your nice words. And for sharing my diy on TurnPress!
April 9, 2013 — 09:38
Annie says:
Älskar dina Diy tips, så snyggt och enkelt! Ha en fin dag!
Kram Annie
April 9, 2013 — 08:22
designoform says:
Tusen tack Annie!
En bra dag till dig med!
Kram
April 9, 2013 — 09:39
3D Architectural Rendering says:
I’m frequently to blogging and I really appreciate your content. I’m going to bookmark your website and keep checking for new data.
April 9, 2013 — 14:27
Samantha says:
Beautiful. So minimal.
April 16, 2013 — 15:41
designoform says:
Thank you!
April 16, 2013 — 16:52