Menu Close

Category: DIY – PARTY & DECORATION (page 3 of 6)

DIY THREE DIMENSIONAL STAR

stars

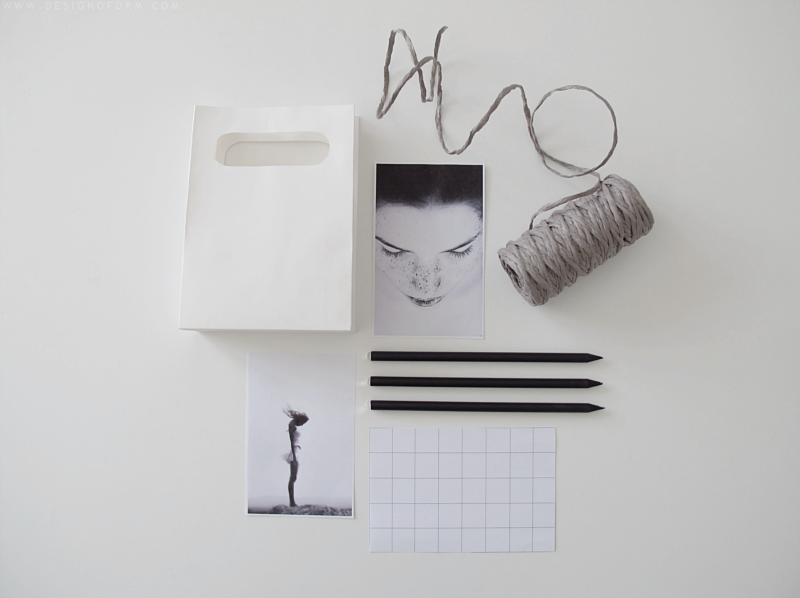
Almost to this day one year ago, I showed a star diy, that has become one of the most popular diy’s on my blog. Today it’s time again. But this time it’s a three-dimensional star. You need: A pair of scissors, glue and some carton. I tried to make stars out of copying paper too, but I found it to be much harder.
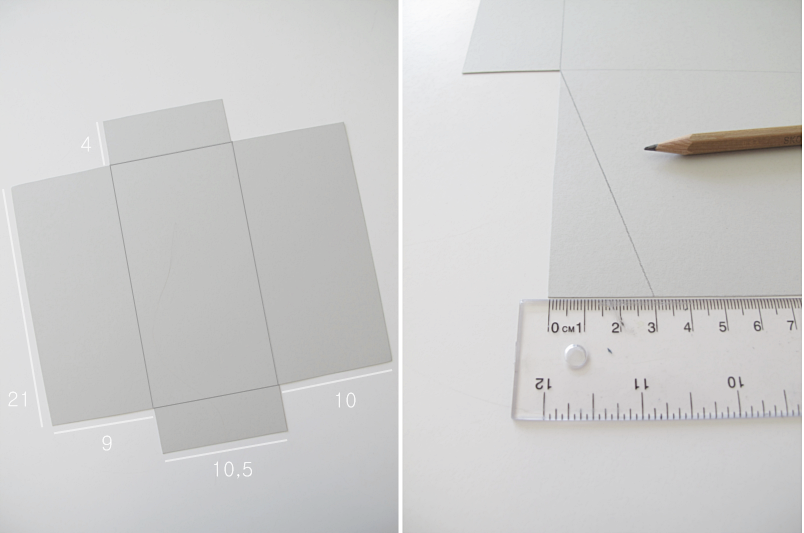
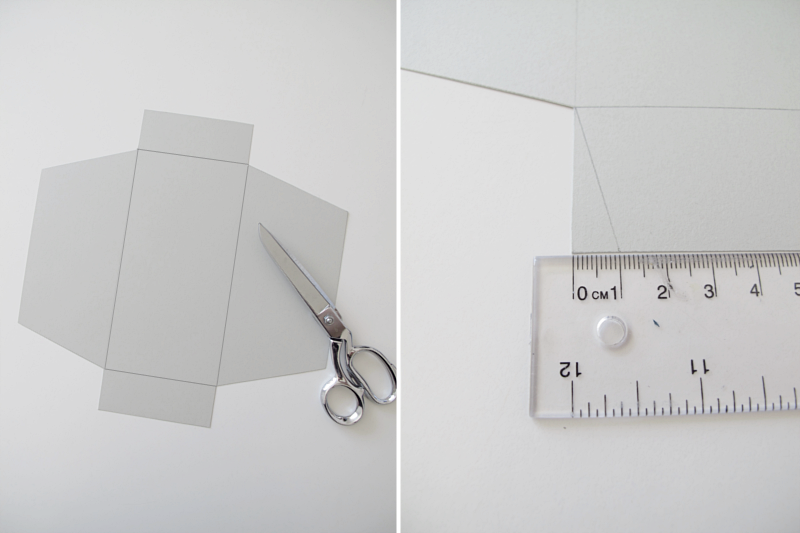
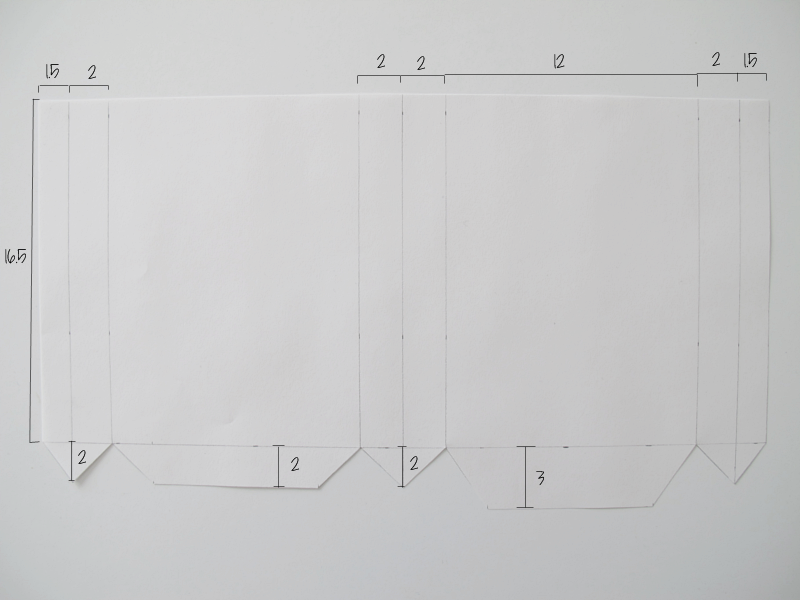
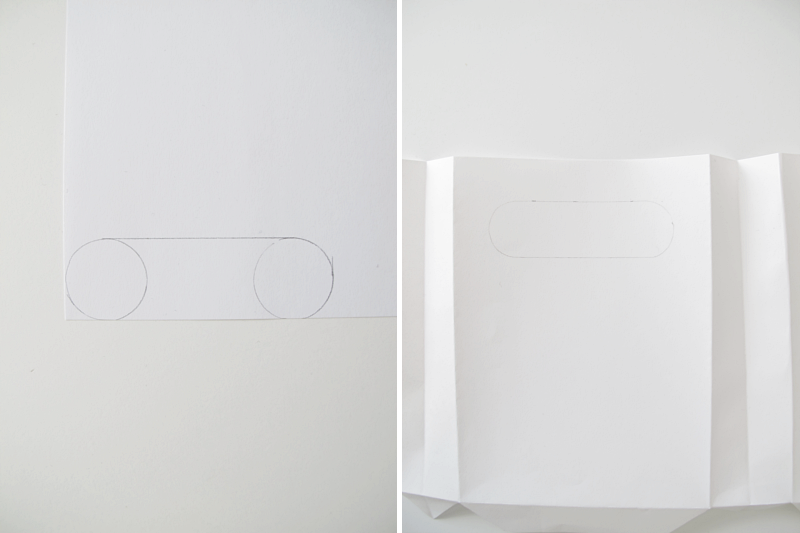
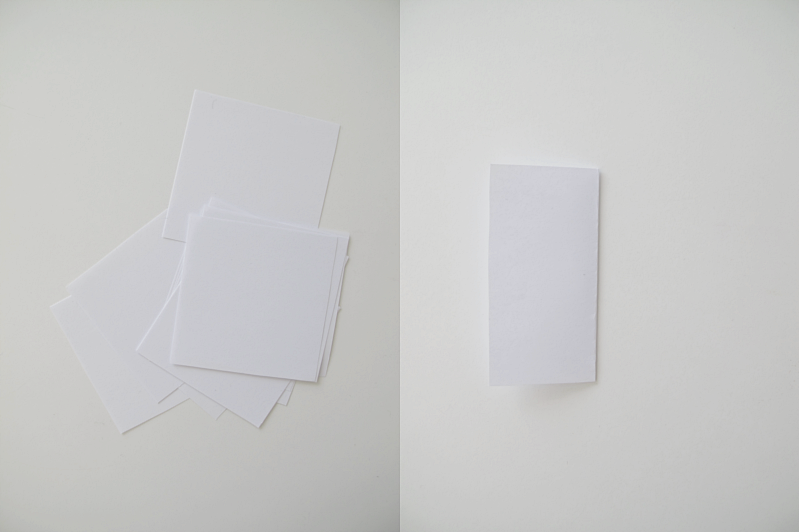
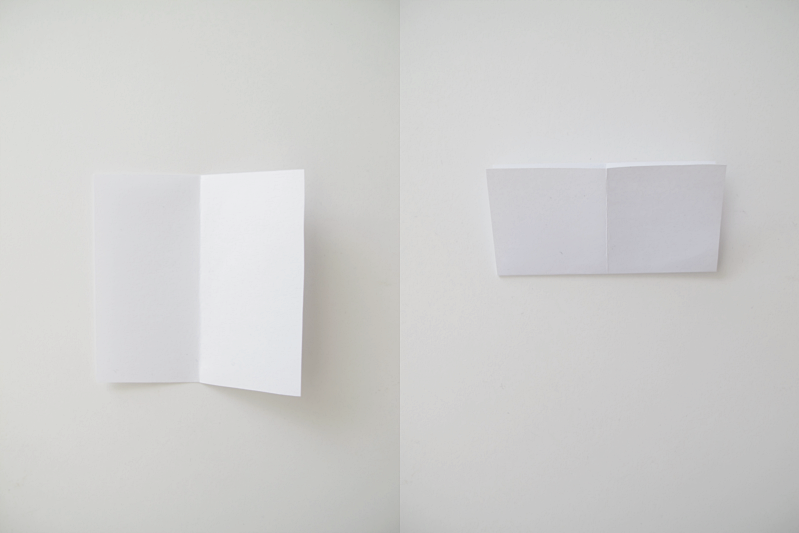
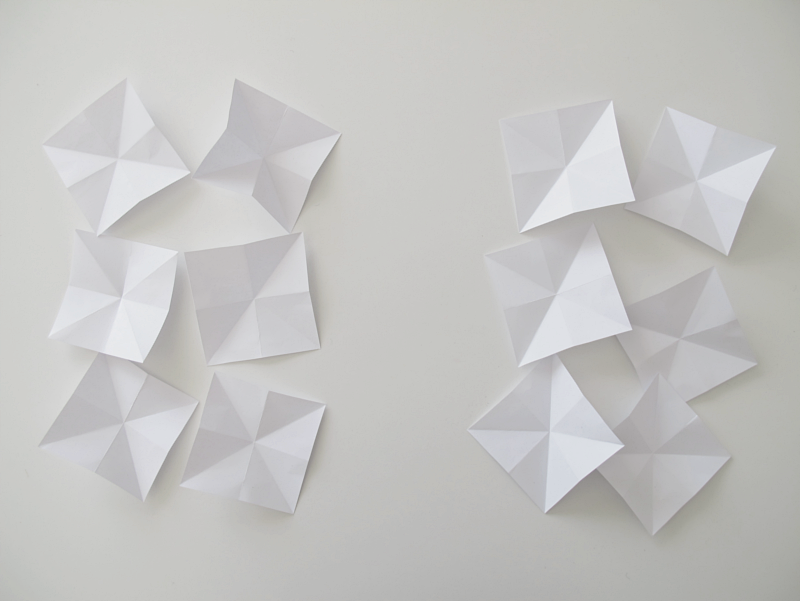
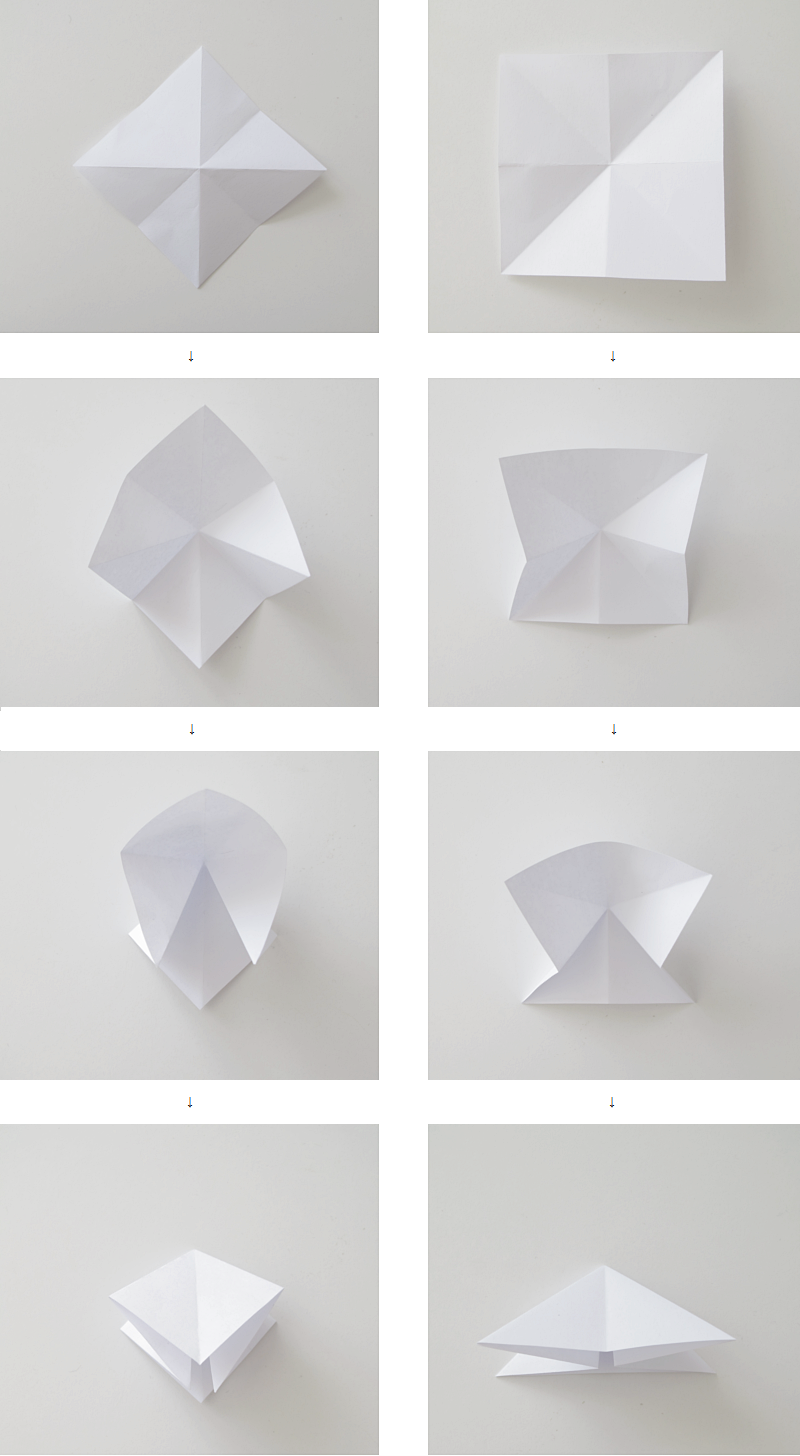
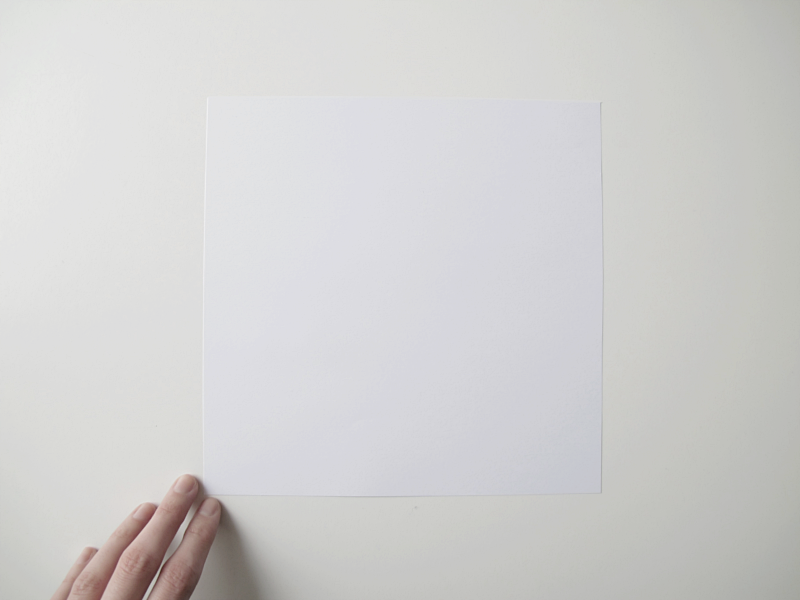
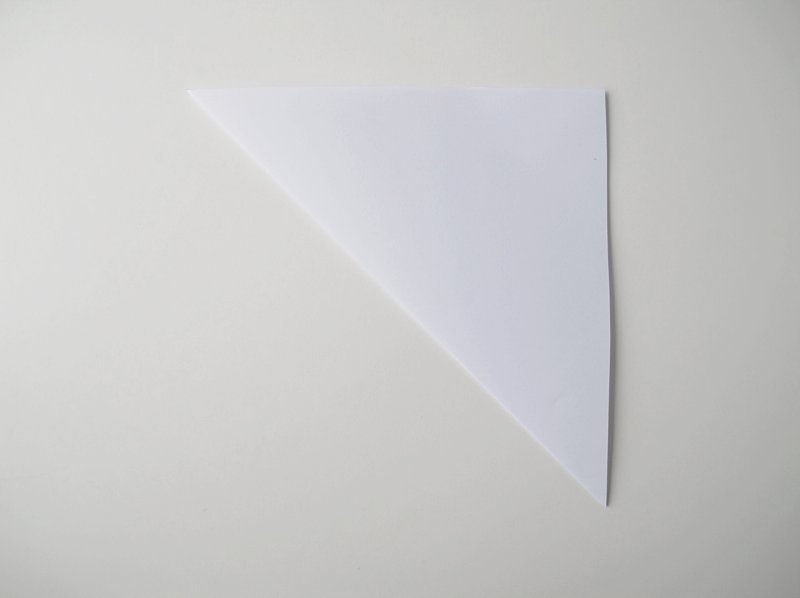
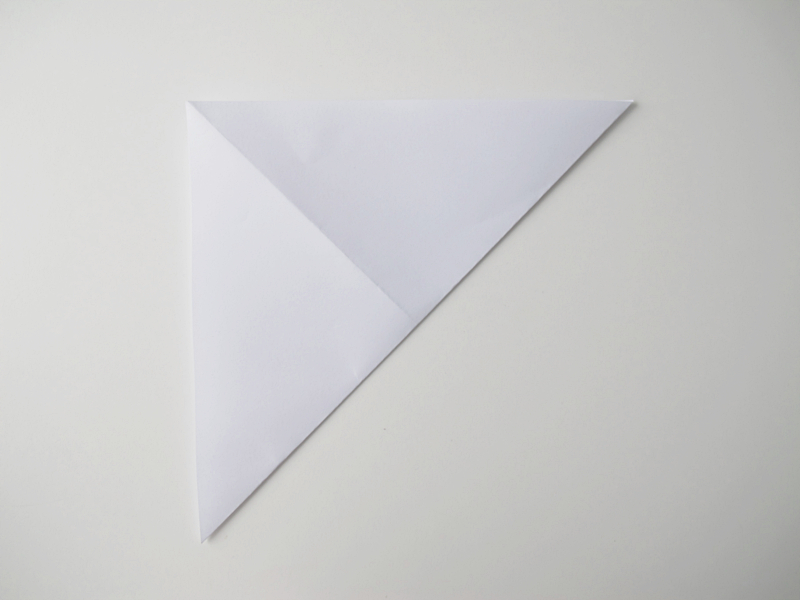
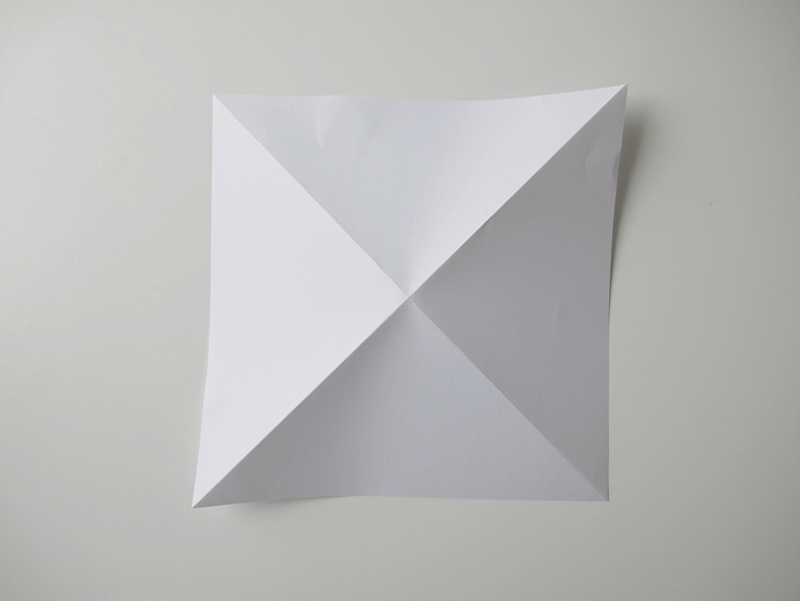
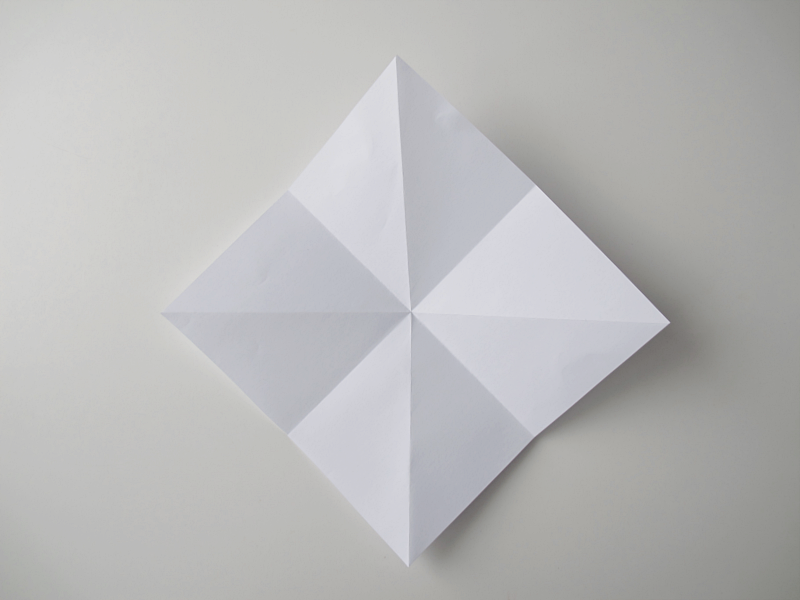
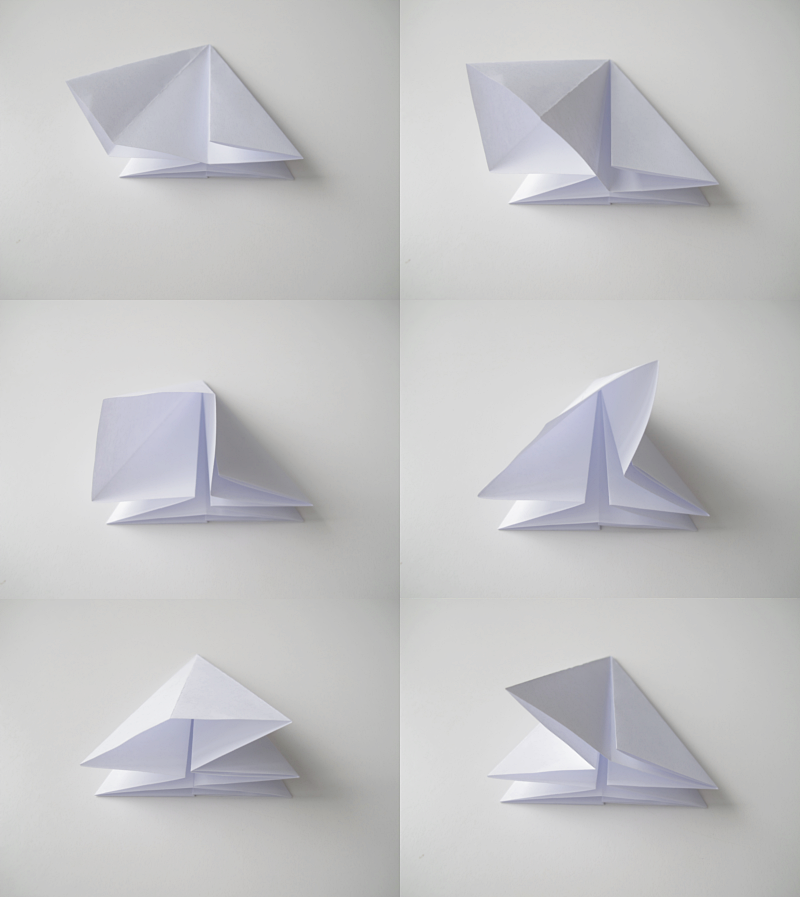
First you want to cut out the template. You’ll found the pdf in the bottom of the post. Place it on the paper you want to use and make five figures. (An a4 sized will be enough). Then cut them out. And fold along the lines.

/// För ganska precis ett år sedan visade jag ett stjärn-diy som faktiskt har blivit ett av de mest gillade diy:en på bloggen. Nu ett år senare tänkte jag att det var dags igen. Denna gång blir den en tredimensionell stjärna. Du behöver lim, sax, och papper. Jag provade att göra stjärnor av både kopieringspapper och hobbykartong, och hobbykartongen var mycket enklare.
Börja med att klippa ut mallen (pdf finns längst ner i inlägget). Rita sedan av den 5 gånger på papperet du vill använda. Ett a4 ark räcker, och klipp sedan ut delarna. Vik längst med linjerna.

star

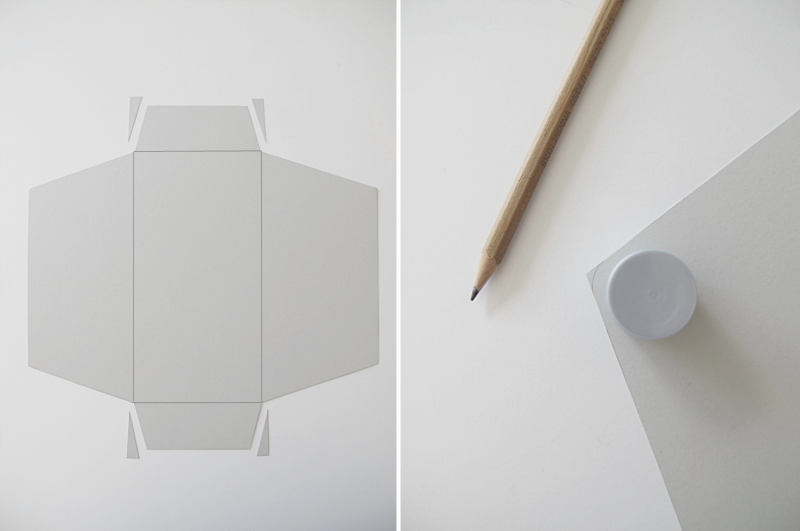
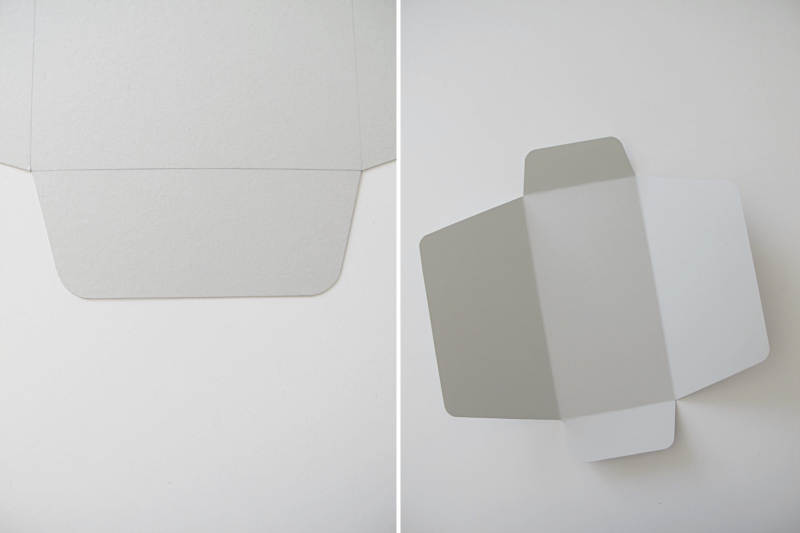
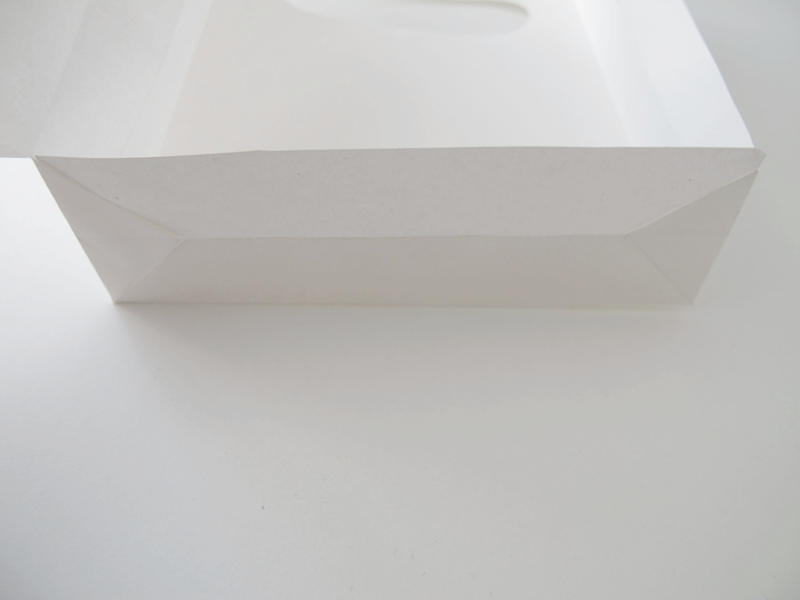
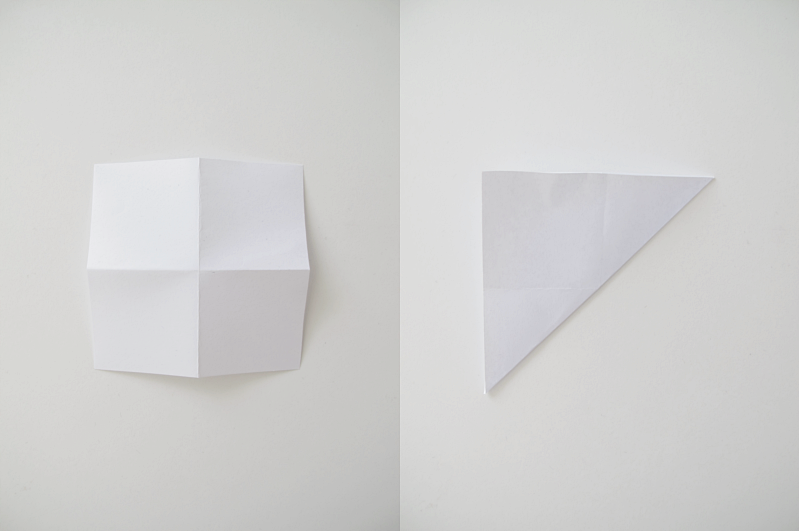
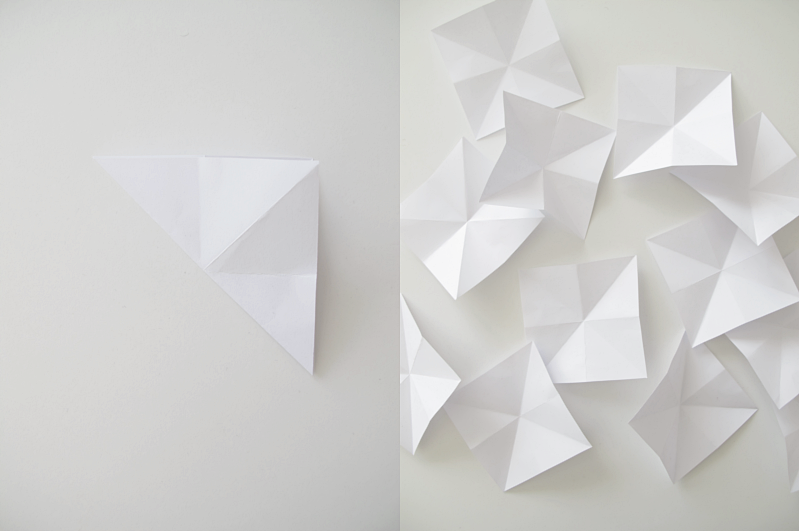
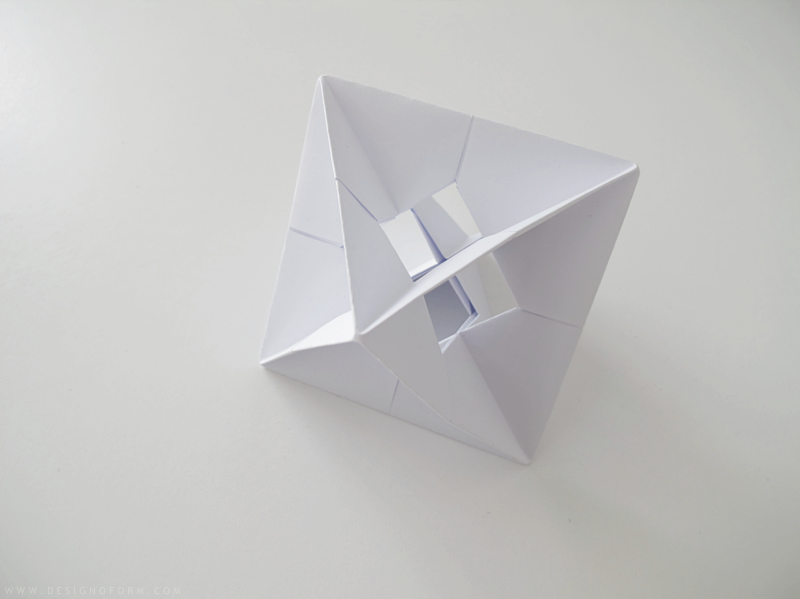
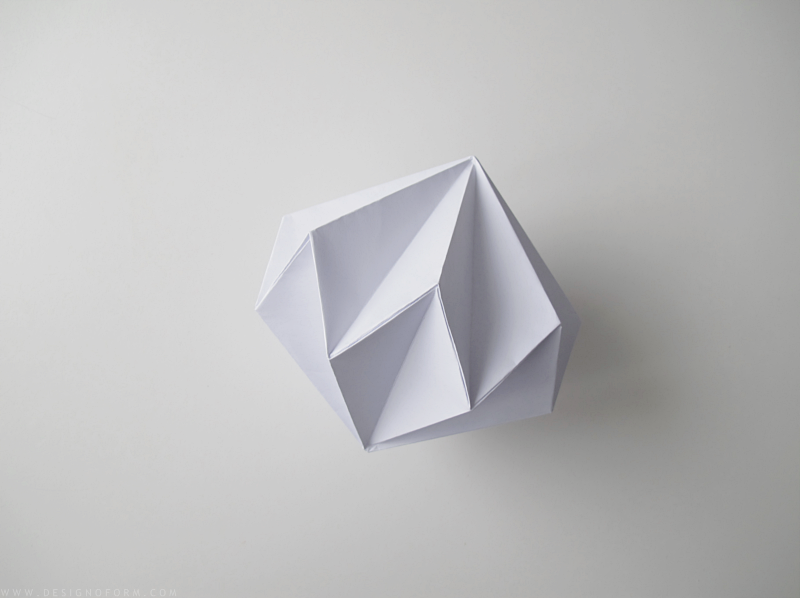
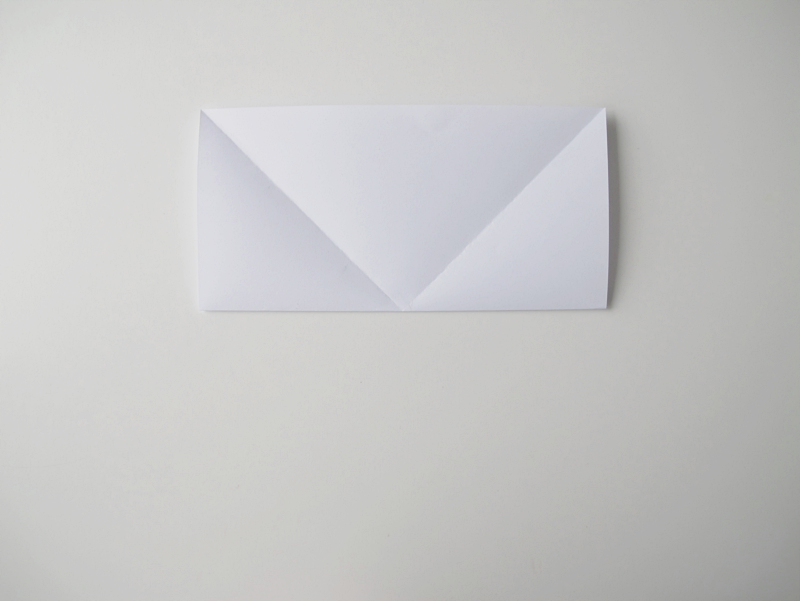
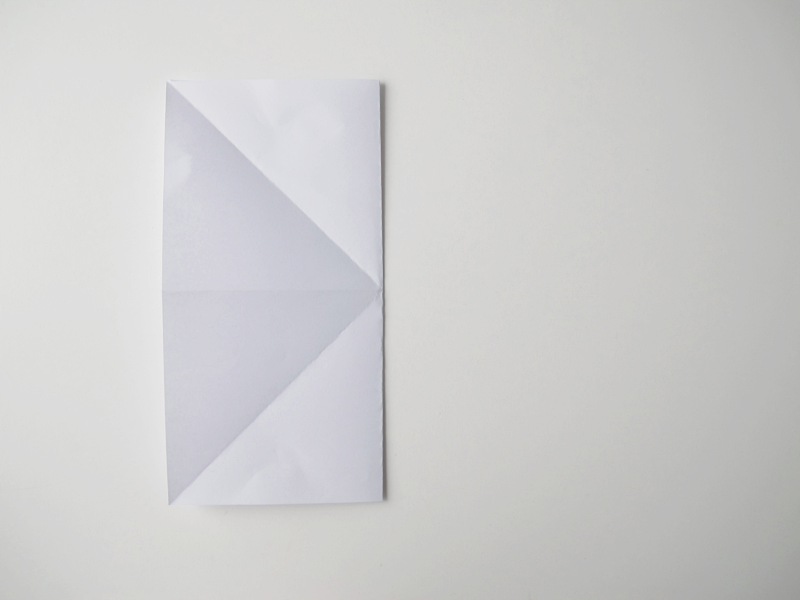
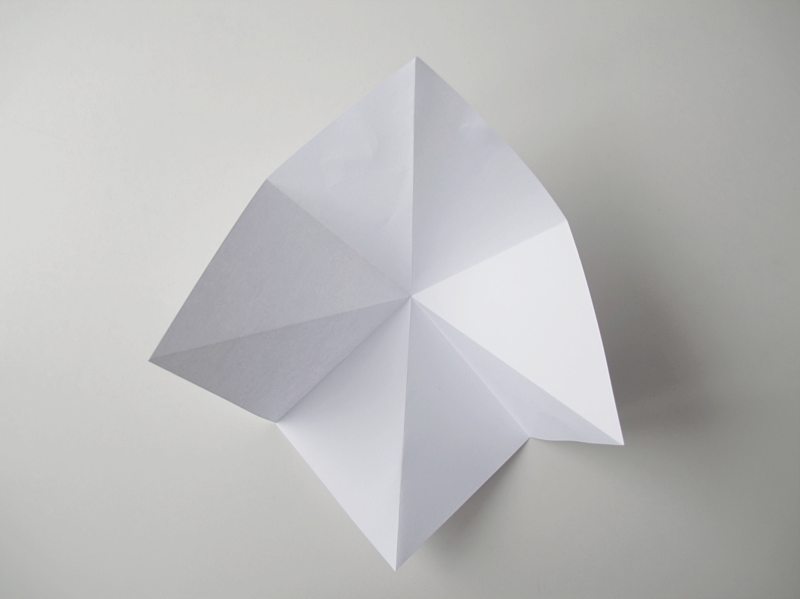
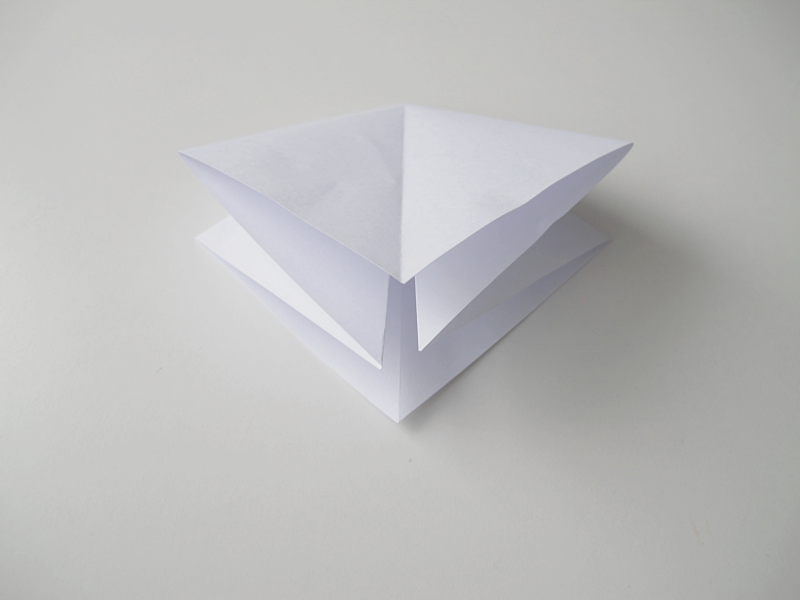
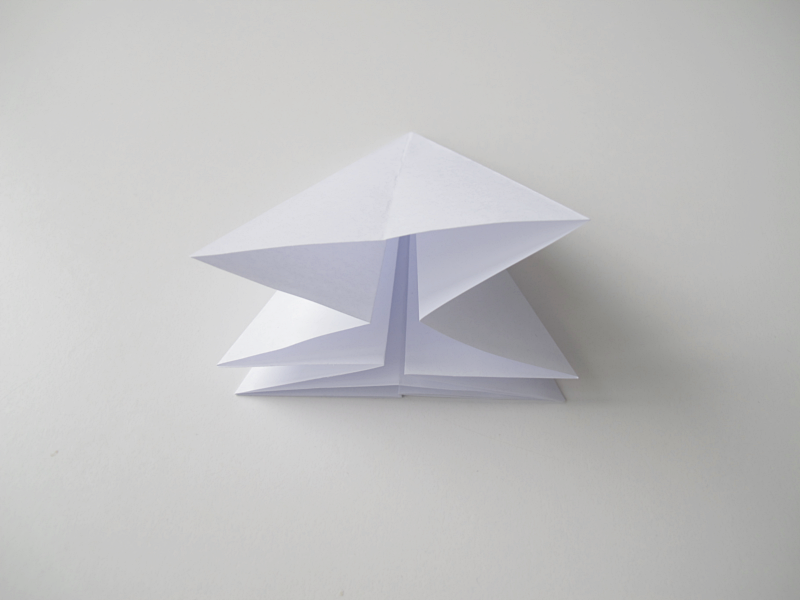
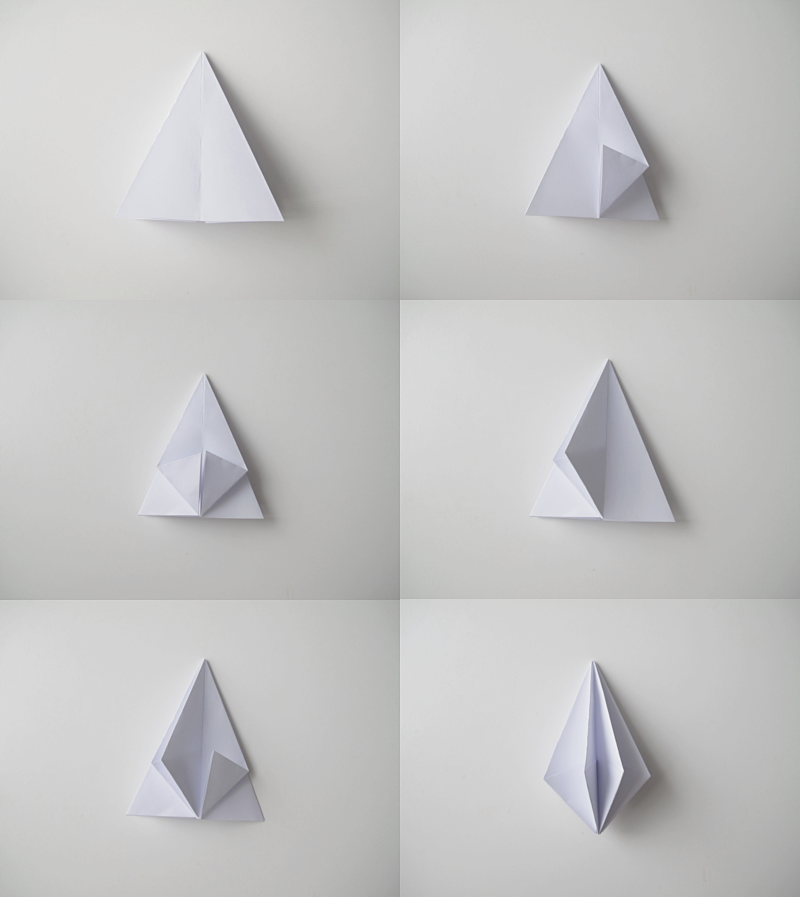
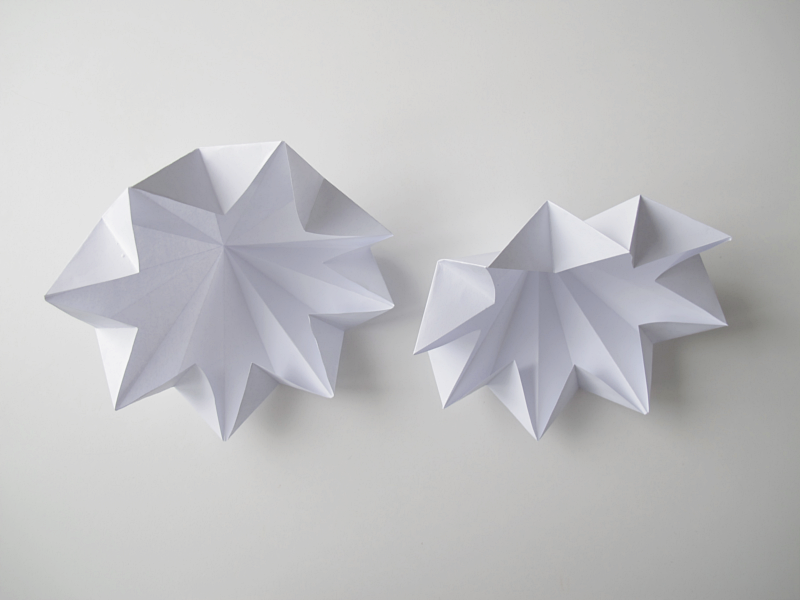
Fold along the slashed lines too, but in the opposite direction. Put glue on the small part and make the figure into a cone.

/// Vik längs med de streckade linjerna men åt andra hållet. Stryk ut lim på den lilla delen och sätt ihop till en spets.

star

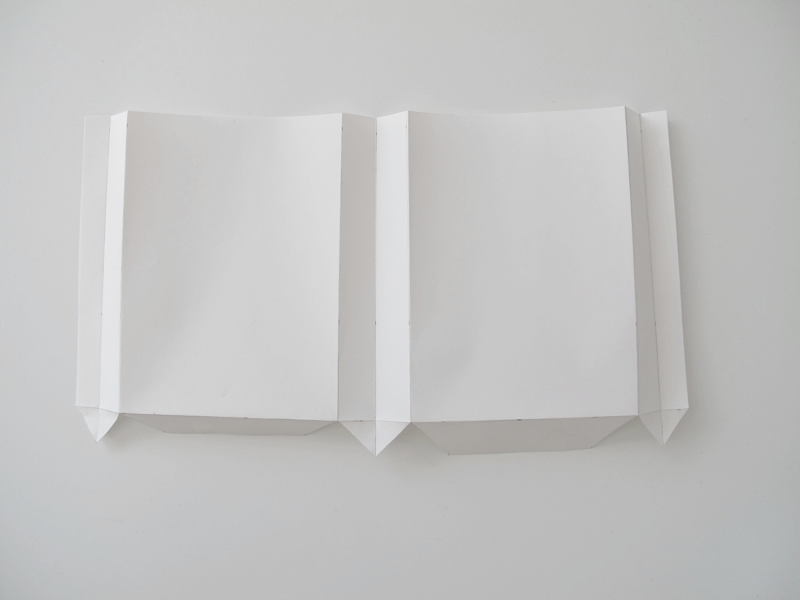
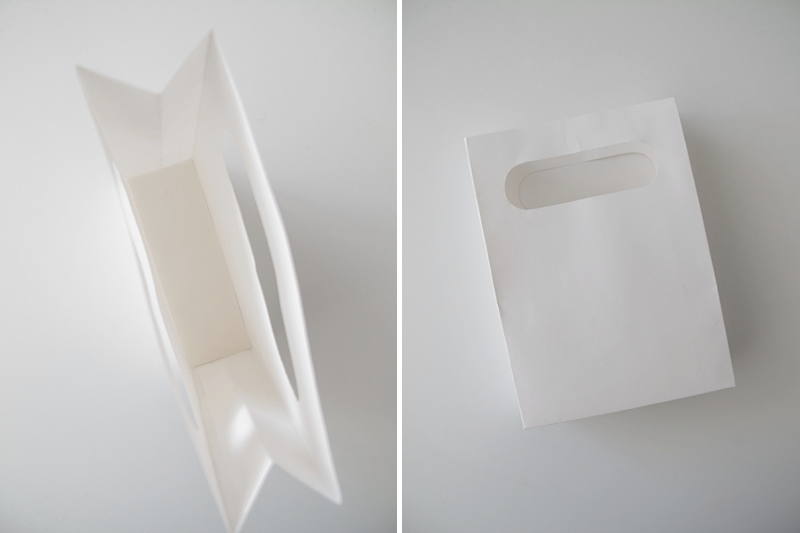
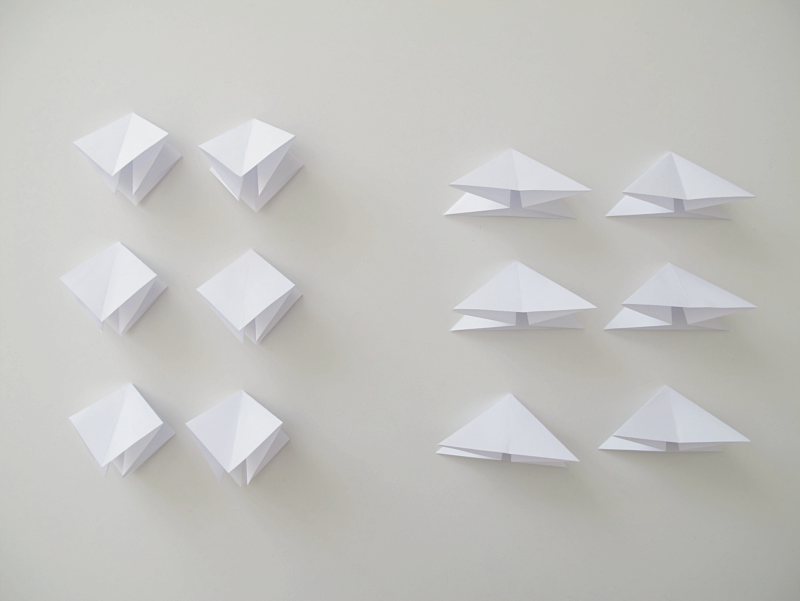
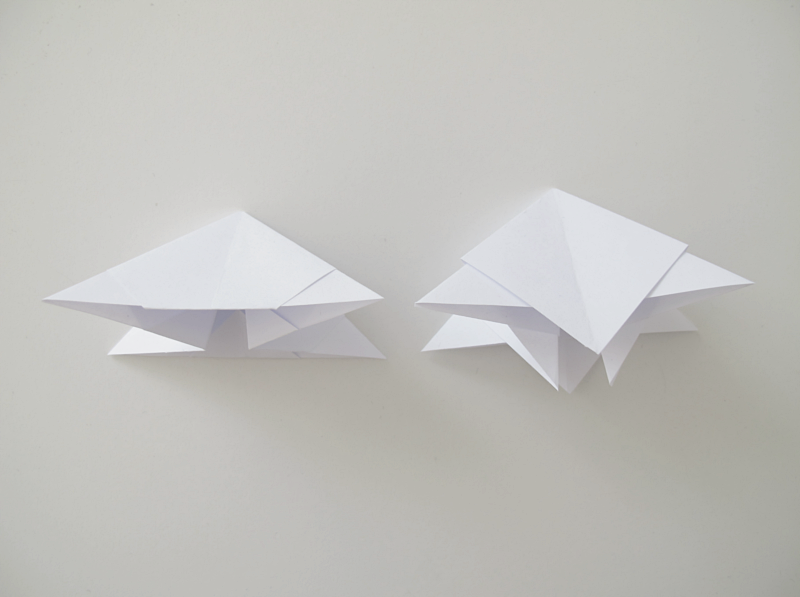
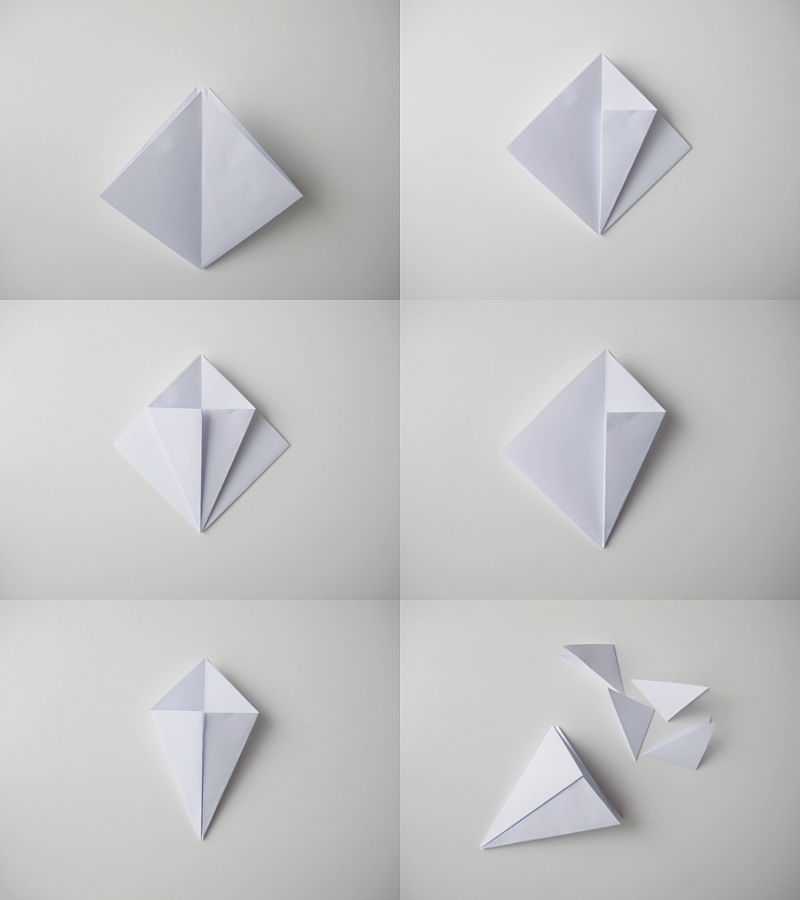
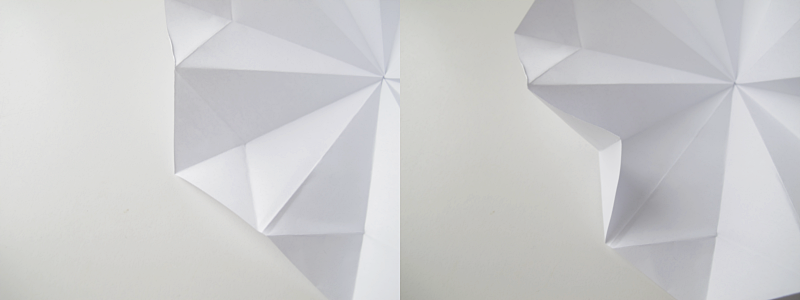
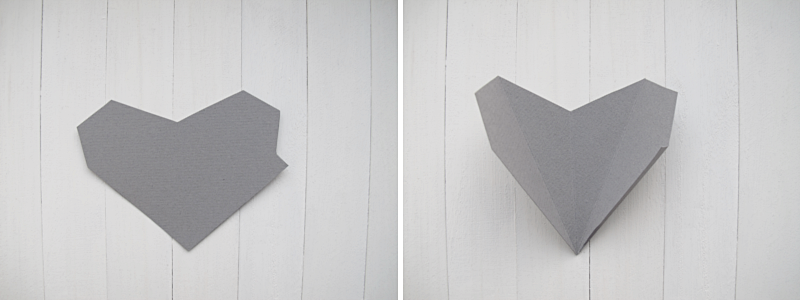
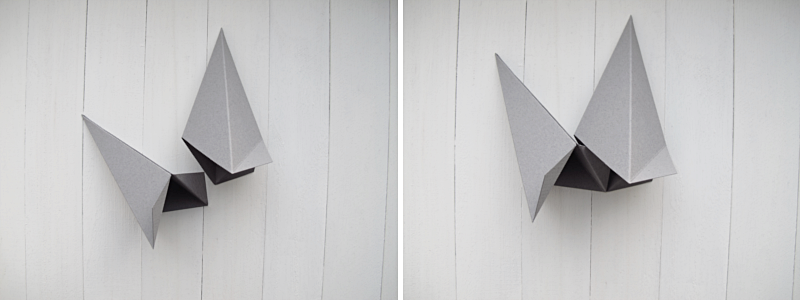
Now its time to assemble the star. Place two cones so that you have the little “wings” in the same direction. Put glue on both “wings”, and attach them on the inside off the other cone. See pictures below.

/// Nu är det dags att sätta ihop stjärnan. Lägg två spetsar så att de har de två “vingarna” åt samma håll, jag la dem till höger. Stryk lim på “vingarna” och fäst båda två på insidan av spetsen till höger. Se bilderna nedan.

star

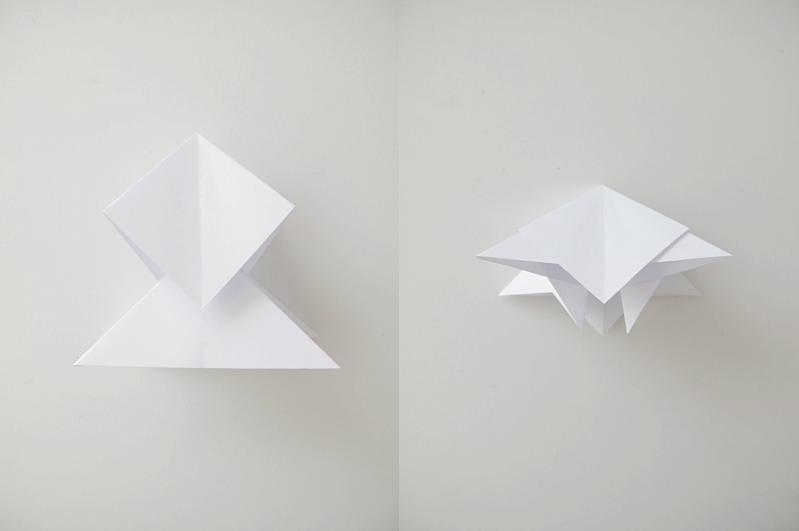
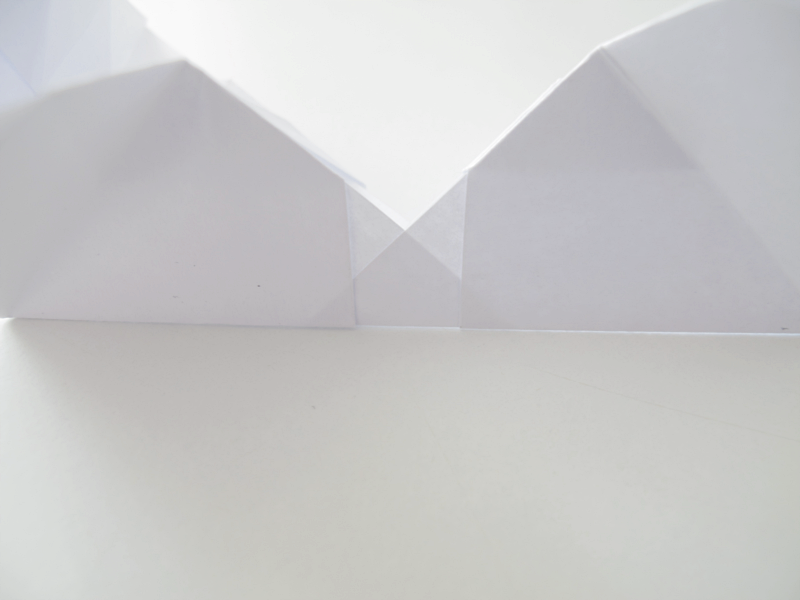
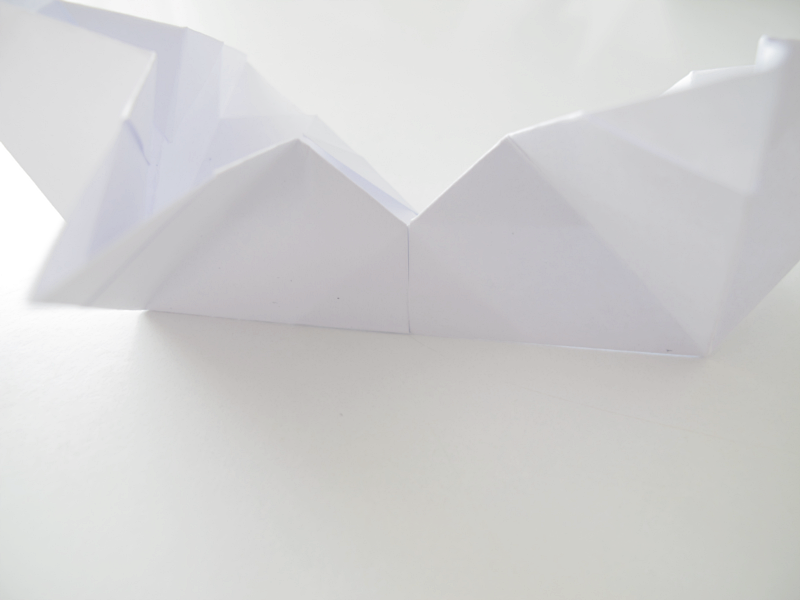
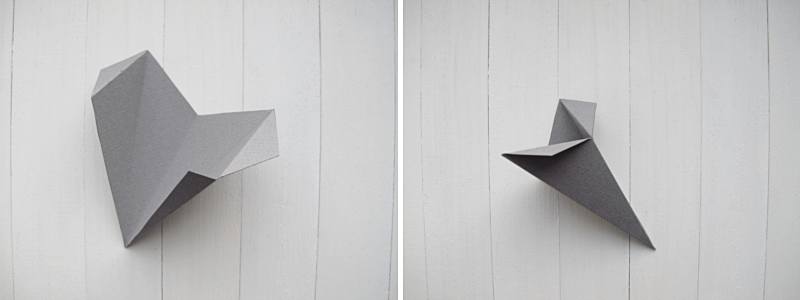
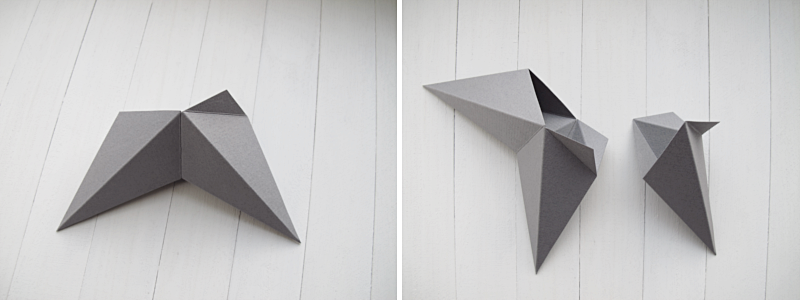
This is how it should look when the glue has dried. Then continue with the next cone. The same way. Glue on the “wings”, then attach them on the inside of the other cone.

/// Så här ser den ut när limmet torkat. Fortsätt med nästa spets. På samma sätt igen. Sätt lim på de små “vingarna” och sätt fast dem på insidan på den andra spetsen.

star

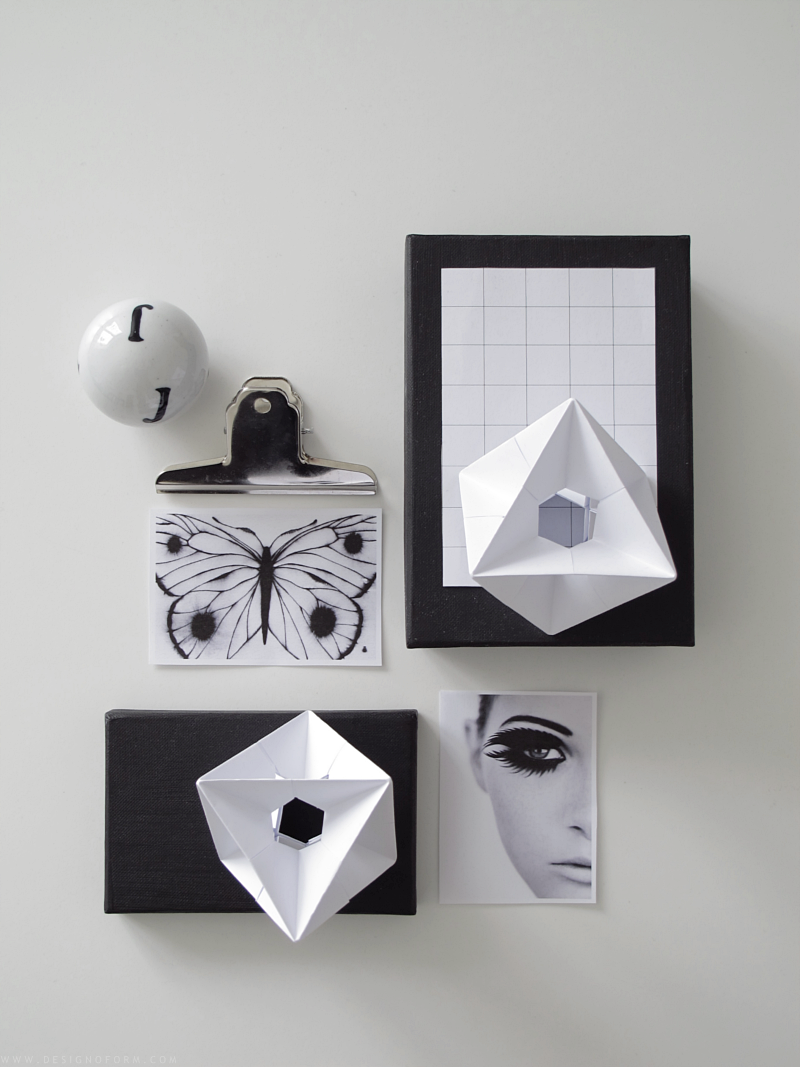
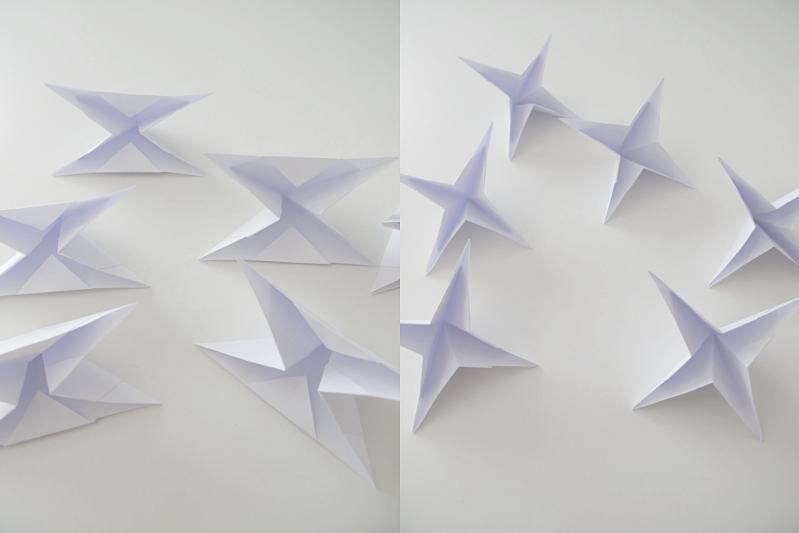
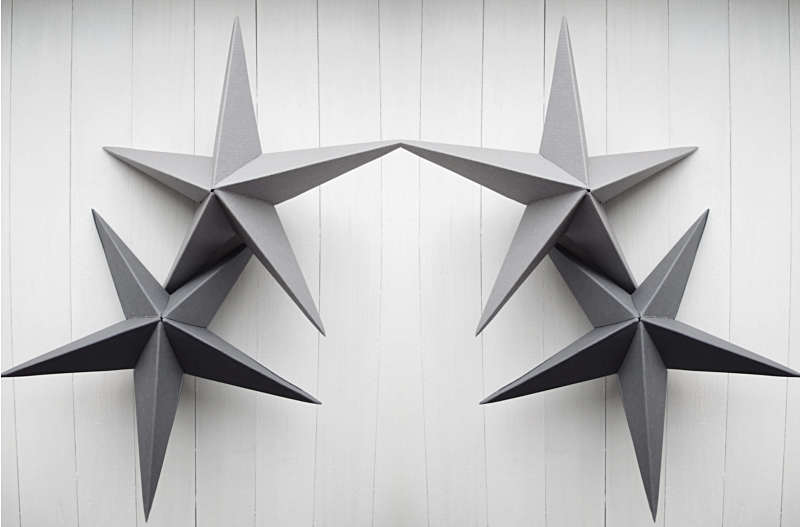
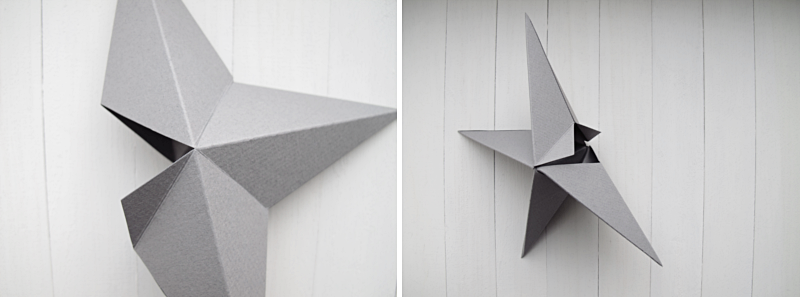
Be sure to check that your cones don’t “wander off”. When you want to attach the fifth and last cone it can be a bit tricky to get it in place. You can push the four other cones together to get a little more space. And the good thing about using carton, you don’t even have to glue the last “wings” in place. The star will hold together anyway. When that is done, you’re done!

/// Var noga med att kolla så att ingen av delarna förskjuts, för då kommer du inte att få ihop stjärnan på slutet. När du kommer till den sista och femte spetsen på stjärnan kan det vara lite mäckigt att få dit den. Då kan du trycka ihop de andra spetsarna mot varandra för att få lite hjälp. Om du gör med hobbykartong så behöver du inte heller fästa de sista “vingarna” med den första spetsen, utan stjärnan håller ihop ändå. När det är färdigt, är du klar!

star

Pdf: star template

TIME FOR A PARTY?

inbjudan

Today I have another envelope diy for you. Maybe for a party invitation. For this you need: a pair of scissors, a piece of carton, eraser, thread, pencil, ruler and a round object. I used the lid of my glue stick. Start by making a figure like the one in the picture below. After that you make a mark 3 cm from the edge, on the top and bottom of both side pieces, and then draw a line between the mark and the corner.

/// Idag har jag ännu ett kuvert diy till er. Kanske till en festinbjudan. Till detta behöver du: sax, en bit kartong, sudd, snöre, blyertspenna, linjal och något runt. Jag använde locket till mitt limstift. Börja med att göra en figur som på bilden nedan. När du är klar gör du en liten markering 3cm in från kanten, på övre delen och nedre delen av båda siddelarna. Dra en linje mellan markeringen och hörnet.

inbjudan

Cut along the lines. When you are finished cutting, make a new mark 1cm from the edge on the top and bottom pieces.

/// Klipp nu längs med linjerna. Sedan är det dags att göra nya markeringar. 1cm in från kanten på båda sidor av översta och nedersta biten.

inbjudan

Once again, cut along the lines. Now it´s time to make the corners round. Take your round object and draw along the side, on all corners.

/// Åter igen, klipp längs med linjerna. Nu ska du runda hörnen. Använd den runda saken (alt. limstiftslocket) till hjälp.

inbjudan

And for the third time, cut along the lines. Then fold the paper.

/// Klipp bort hörnen, och vik papperet.

inbjudan

Erase all pencil marks, place the card inside the envelope and tie the thread around it and you are done!

/// Sudda bort alla blyertsstreck, placera inbjudan i kuvertet, knyt snöret runt och du är klar!

inbjudan

GIFT BAG

påse

And here you have the diy I showed a sneak peek from the other day. A small giftbag. The measurements are in cm.

/// Och här har ni så diy:et som ni fick se en liten glimt av häromdagen. En liten presentpåse. Måtten är i cm.

påse

Fold at all lines. Then erase the pencil lines. /// Vik vid linjerna. När du har vikt färdigt, sudda bort alla blyertsstreck.

påse

Now for the handle on the bag. Take another paper and draw two circles on it. I used my glue stick as template. Then draw two lines between them. I did mine about 8.5 cm from one corner to the other. Cut it out and use it as a template on the bag. I did it 2cm from the top. When you are finished drawing, cut them out.

/// Och nu till handtagen på påsen. Ta ett annat papper och rita två cirklar på det. Jag använde mitt limstift som mall. Dra sedan två streck mellan de båda cirklarna. Jag gjorde mina handtag så att det var 8.5 cm från kant till kant. Klipp sedan ut mallen och rita upp den på påsen. Jag gjorde den 2cm från toppen, och skär eller klipp sedan ut handtaget.

påse

Cut a rectangle of paper, 4×12 cm, and glue it to the bottom of the bag. This makes it more durable. Then glue the sides together. And you´re done!

/// Klipp ut en rektangel i storleken 4x12cm och limma fast den i botten på påsen. Detta kommer att göra den starkare. Och sedan är det bara att limma ihop sidorna och du är klar!

påse

How the bag looks inside with the extra paper.  /// Så här fin blir påsen med det extra papperet i botten.

påse

AND IT`S SPINNING

spinner

But first I have another diy for you. I posted a picture of my spinner on instagram and so many of you like it so here you have a tutorial. Start with 12 squares. I did mine 8x8cm. You can do all the squares at once, as we go, but I´m only gonna show you one. Fold it sideways.

/// Men först tänkte jag visa er ett annat diy. Det var så många som gillade bilden på spinnern som jag visade på instagram så jag tänkte visa hur jag gjort. Börja med 12 fyrkanter. Jag gjorde mina 8x8cm. Du kan vika alla fyrkanterna på en gång, steg för steg, men jag kommer bara visa en av dem. Börja med att vika den åt sidan.

spinner

Unfold and fold it upwards. /// Vik upp och vik den uppåt

spinner

Turn the square upside down and fold it from one corner to another. /// Vänd fyrkanten upp och ner och vik den från ett hörn till det andra.

spinner

Unfold and fold it the other way. This is how they should be looking /// Vik upp den igen och vik åt andra sidan. Så här ska de se ut.

spinner

Now you are going to make two piles. Six squares in every pile. The ones to the left you´re going to fold as the left pictures shows, and the squares to the right you´re going to fold as the right pictures shows.

/// Nu ska du dela in dina rutor i två högar. 6 stycken i varje. De rutor som ligger i den vänstra högen ska vikas som bilderna till vänster visar, och de rutorna som finns i den högra högen ska vikas som de bilderna till höger visar.

spinner

 ↓

spinner

spinner

Now you are going to take one from each pile and attach them together. /// Ta en från varje hög och sätt ihop dem med varandra.

spinner

Fold the corners inwards. (Folded and unfolded.)  /// Vik in kanterna. (vikt och ovikt)

spinner

They now look like this if you´re looking from down under. Fold them so they look like the ones on the right. Almost like stars. /// Om du tittar på de ihopsatta rutorna från undersidan så ser de ut så här. Vik nu dem så att de ser ut som bilden till höger. Nästan som stjärnor.

spinner

Take two of the “stars” and attach them to each other, by sliding one corner into the other.

/// Ta två “stjärnor” och  sätt ihop dem, genom att skjuta ett hörn av en “stjärna” in i hörnet på den andra “stjärnan”

spinner

spinner

spinner

Take the rest of the “stars” and attach them aswell. When you only have two corners left, the last couple, it can be a bit tricky to attach them. But with patience you can make it. And you are done!

/// Ta resten av “stjärnorna” och sätt fast dem också. När du bara har två hörn kvar, de sista paret, kan det vara lite trixit att få ihop dem, men med lite tålamod så går det. Och du är klar!

spinner

PAPER DIAMONDS

diamond

Start with a square of paper /// Börja med en fyrkant

diamond

Fold it from one corner to the other /// Vik från ett hörn till det andra

diamond

Unfold and fold it the other way. From corner to corner /// Vik upp den och vik från det andra hållet. Hörn till hörn.

diamond

Unfold and turn it over so it looks like this: /// Vik upp och vänd på den så att den ser ut så här:

diamond4

Fold the bottom part to the top /// Vik nedre delen mot den övre

diamond

Unfold and fold it the other way /// Vik upp och vik den åt andra hållet.

diamond6

Unfold and turn it over. So it look like the one in the picture. /// Vik upp och vänd på den så att den ser ut som på bilden

diamond

Gently press the sides towards the middle… /// Tryck försiktigt sidorna in mot mitten…

diamond

…and fold the top part towards you /// …och vik ner toppen mot dig

diamond

Turn it 180° and fold the sides. When you´re finished folding, cut the top part off.

/// Vänd på den 180° och vik in sidorna. När det är klart så klipp bort toppen.

diamond

Here comes the tricky part. Place the paper so you have the opening towards you. Take the left side and unfold it. Open it a bit, and fold it over to the right side. (see pictures). Press down the folding on the top, and fold it to the left. (last picture)

/// Nu kommer den lite kluriga biten. Lägg papperet så att du har öppningen mot dig. Vik upp på vänster sida. Öppna upp den lite, och vik den mot den högra sidan. (se bilder). Tryck ner vikningen som är högst upp med fingret och vik sedan till vänster (sista bilden)

diamond

Do the same to the right side  /// Och nu gör vi likadant med den högra sidan

diamond

Fold the corners. All off them /// Vik upp alla hörn

diamond

Unfold /// Vik upp

diamond

Fold the corners inwards /// Vik hörnen inåt

diamond

Now you want to make the other half of the diamond, repeat all the previous steps so that you have two pieces that looks like this.

/// Gör nu en precis likadan igen, så att du får den andra halvan av diamanten.

diamond

Put some glue on the corner parts you just folded and gently press half the diamond to the other half. (You want to turn the two parts so you have one “top” facing one “valley”. And not “top” to “top”.)

/// Stryk lite lim på de delar du just vikt in och  tryck försiktigt den ena halvan av diamanten mot den andra. (Tänk på att ha en “topp” mot en “dal” och inte “topp” mot “topp”)

diamond

Done! /// Klart!

diamond

Spara