Menu Close

Month: November 2013 (page 2 of 4)

A LITTLE HELP NEEDED

calender

I’m wondering if any of you know of a swedish webshop selling these Marjolein Delhaas weekly planners? If there is, I would be super happy if you could leave a comment here or email me at emma@designoform.com.  Thanks!

/// Nu behöver jag lite hjälp här. Är det någon av er som vet om en svensk webbshop som säljer dessa Marjolein Delhaas almanackorna? Om ni gör det skulle jag bli superglad om ni skriver en liten kommentar här eller mailar mig på emma@designoform.com. Tack!

fo: april and may

DIY THREE DIMENSIONAL STAR

stars

Almost to this day one year ago, I showed a star diy, that has become one of the most popular diy’s on my blog. Today it’s time again. But this time it’s a three-dimensional star. You need: A pair of scissors, glue and some carton. I tried to make stars out of copying paper too, but I found it to be much harder.
First you want to cut out the template. You’ll found the pdf in the bottom of the post. Place it on the paper you want to use and make five figures. (An a4 sized will be enough). Then cut them out. And fold along the lines.

/// För ganska precis ett år sedan visade jag ett stjärn-diy som faktiskt har blivit ett av de mest gillade diy:en på bloggen. Nu ett år senare tänkte jag att det var dags igen. Denna gång blir den en tredimensionell stjärna. Du behöver lim, sax, och papper. Jag provade att göra stjärnor av både kopieringspapper och hobbykartong, och hobbykartongen var mycket enklare.
Börja med att klippa ut mallen (pdf finns längst ner i inlägget). Rita sedan av den 5 gånger på papperet du vill använda. Ett a4 ark räcker, och klipp sedan ut delarna. Vik längst med linjerna.

star

Fold along the slashed lines too, but in the opposite direction. Put glue on the small part and make the figure into a cone.

/// Vik längs med de streckade linjerna men åt andra hållet. Stryk ut lim på den lilla delen och sätt ihop till en spets.

star

Now its time to assemble the star. Place two cones so that you have the little “wings” in the same direction. Put glue on both “wings”, and attach them on the inside off the other cone. See pictures below.

/// Nu är det dags att sätta ihop stjärnan. Lägg två spetsar så att de har de två “vingarna” åt samma håll, jag la dem till höger. Stryk lim på “vingarna” och fäst båda två på insidan av spetsen till höger. Se bilderna nedan.

star

This is how it should look when the glue has dried. Then continue with the next cone. The same way. Glue on the “wings”, then attach them on the inside of the other cone.

/// Så här ser den ut när limmet torkat. Fortsätt med nästa spets. På samma sätt igen. Sätt lim på de små “vingarna” och sätt fast dem på insidan på den andra spetsen.

star

Be sure to check that your cones don’t “wander off”. When you want to attach the fifth and last cone it can be a bit tricky to get it in place. You can push the four other cones together to get a little more space. And the good thing about using carton, you don’t even have to glue the last “wings” in place. The star will hold together anyway. When that is done, you’re done!

/// Var noga med att kolla så att ingen av delarna förskjuts, för då kommer du inte att få ihop stjärnan på slutet. När du kommer till den sista och femte spetsen på stjärnan kan det vara lite mäckigt att få dit den. Då kan du trycka ihop de andra spetsarna mot varandra för att få lite hjälp. Om du gör med hobbykartong så behöver du inte heller fästa de sista “vingarna” med den första spetsen, utan stjärnan håller ihop ändå. När det är färdigt, är du klar!

star

Pdf: star template

MINI

barnrum

Here’s a little something for the smaller ones in the family.

Poster – L´Affiche Moderne, Bunnies- OYOY, Pillow- Färg Form Sweden, Box- Ikea, Beadspread – H&M, Softie – Lucky Boy sunday, Chest of drawers – Ikea, Apple shaped pillow – Studio meez, Blanket – H&M, Wood toys – Hay,  Pillow – Mini empire,  Owl – Maileg

/// Finsaker till dom små.

PosterL´Affiche Moderne, TräkaninerOYOY, KuddeFärg Form Sweden, LådaIkea, PåslakanH&M, MjukisLucky Boy sunday, ByråIkea, ÄppelkuddeStudio meez, FiltH&M, TräfigurerHayKuddeMini empireUgglaMaileg

TIP OF THE DAY

bord

If you like this table, as much as I do, you can easily make one yourself. With Loop Stand Frame from Hay and a piece of plywood from your local hardware store, you’re pretty much done.  Todays tip!

/// Om du gillar detta bord, lika mycket som jag gör, så kan du enkelt få ett likadant hemma hos dig. Med Loop Stand Frame från Hay och med en plywoodskiva från ditt lokala trävaruhus är du i hamn. Dagens tips! 

fo: stadshem

DIY BRAIDED TRIVET

trivet

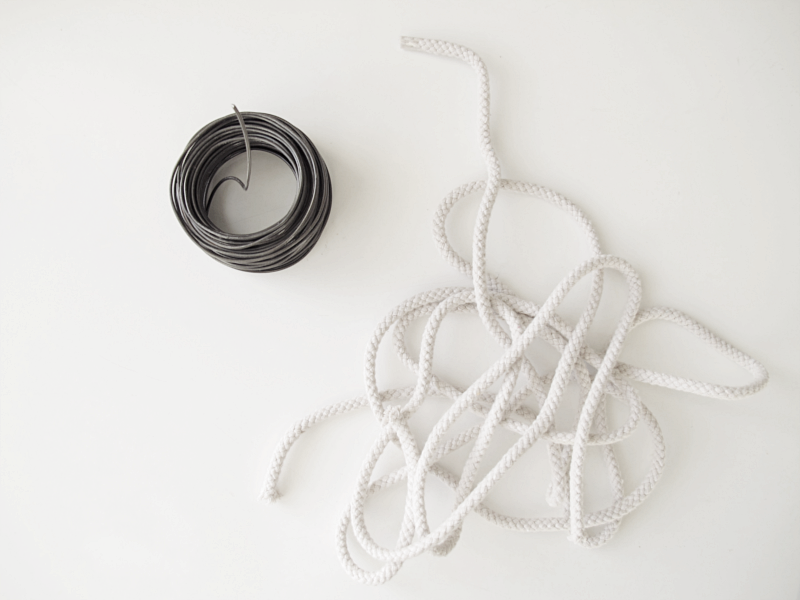
Today I’ll show you how to make a braided trivet. For this you need: A glue gun, a thick string and a thick steel wire. My steel wire was a bit thin so I choosed to wrap it two times. I also used a thinner wire to hold the two together. You decide the size on you trivet, but make sure you have a lot of string, because you will need it.

/// Idag tänkte jag visa hur du gör ett flätat grytunderlägg. Du behöver: En limpistol, tjockt snöre och en tjock ståltråd. Då jag inte hade en jättetjock ståltråd själv så valde jag att linda den två varv. Jag använde även en tunn ståltråd för att hålla ihop de två trådarna. Du bestämmer själv storleken på ditt underlägg. Se bara till att du har ett väldigt långt snöre för det kommer att behövas. 

trivet

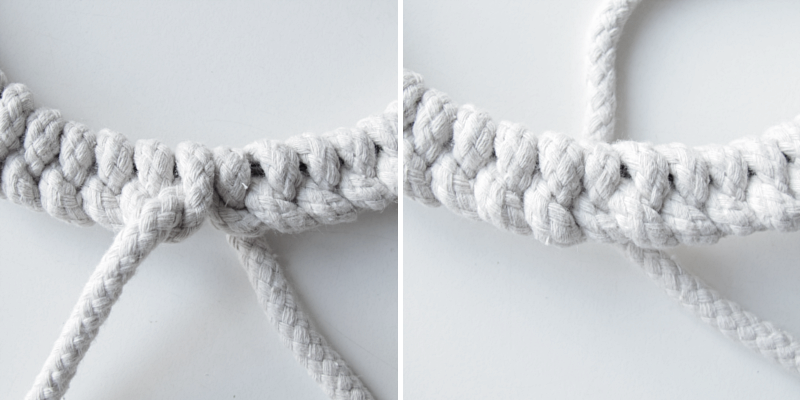
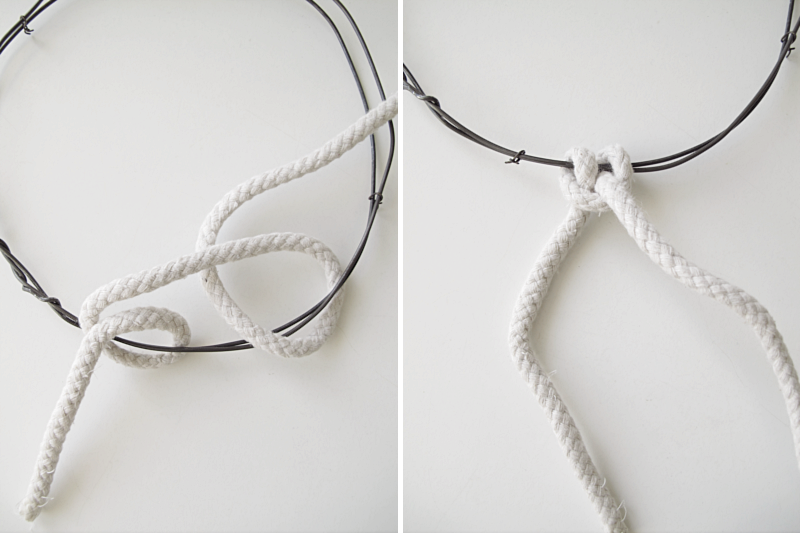
First you make a ring out of the steel wire. Then you thread the string as the picture shows. Hold the end of the string on the left side and use the right end of the string to thread. Through the big ring (steel wire ring), around the wire, and through the small loop.

/// Börja med att göra en ring av ståltråden. Sedan ska du trä tråden som bilden visar. Håll fast änden på vänster sida och med den andra delen av tråden ska du trä. Igenom stora ringen (stråltrådsringen), runt ståltråden, och genom den lilla öglan som blir.

trivet

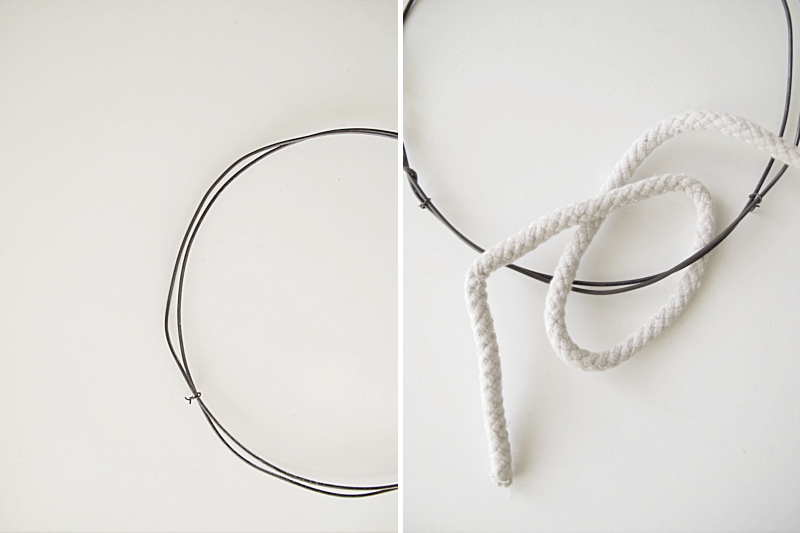
And again. Then tighten.

/// Gör så en till. Och dra ihop. 

trivet

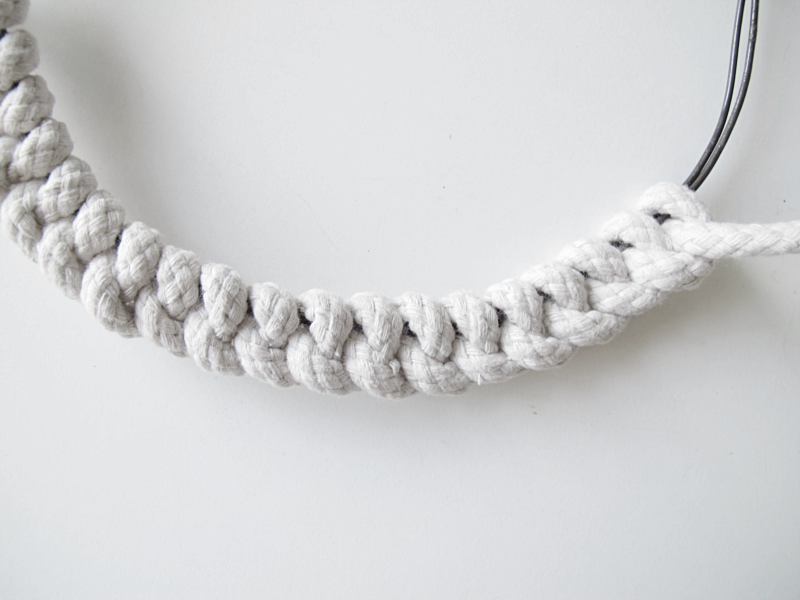
Continue this step all the way around your ring. Through the big ring, around the wire, through the loop. Remember to tighten the same amount each time, so that your trivet becomes nice and round. I choosed to do my trivet pretty tight, because I didn’t want the wire to show.

/// Fortsätt så hela vägen runt ringen. Genom stora ringen, runt, och igenom lilla öglan. Tänk på att dra åt lika mycket varje gång, så att underlägget blir runt och fint. Jag valde också att göra mitt underlägg väldigt tätt, för att inte ståltråden skulle synas så mycket.

trivet

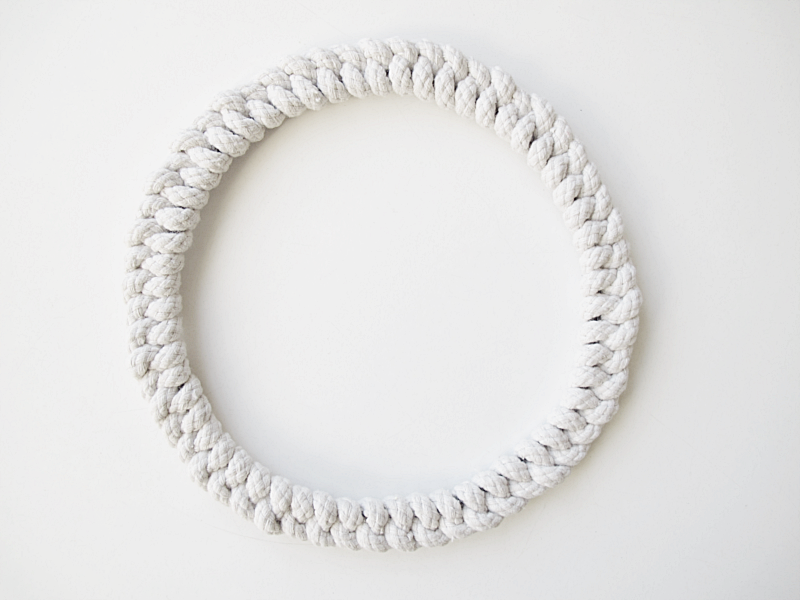
When you want to finish, fold the left end of the string to the right, as the pictures shows. Cut the ends and glue them to the back of the trivet. And you are done!

/// När du så har kommit runt hela ringen, så viker du in tråden till vänster. Se bilderna. Klipper av båda trådarna, och limmar fast dem med limpistol på baksidan. Och du är klar!

trivet